It's always a fun decision process for me when it comes to my mini kitchens. I generally begin with deciding what type and period of appliances I want to utilize in order to emphasize the style of the project. Naturally, different builds call for different looks, different methods, different kits and many "made by me" challenges. I have spent a lot of time reflecting throughout the Beachside Bungalow project about what style of kitchen I wanted, and that has lead me to revisiting decisions I made about many of my past kitchens...
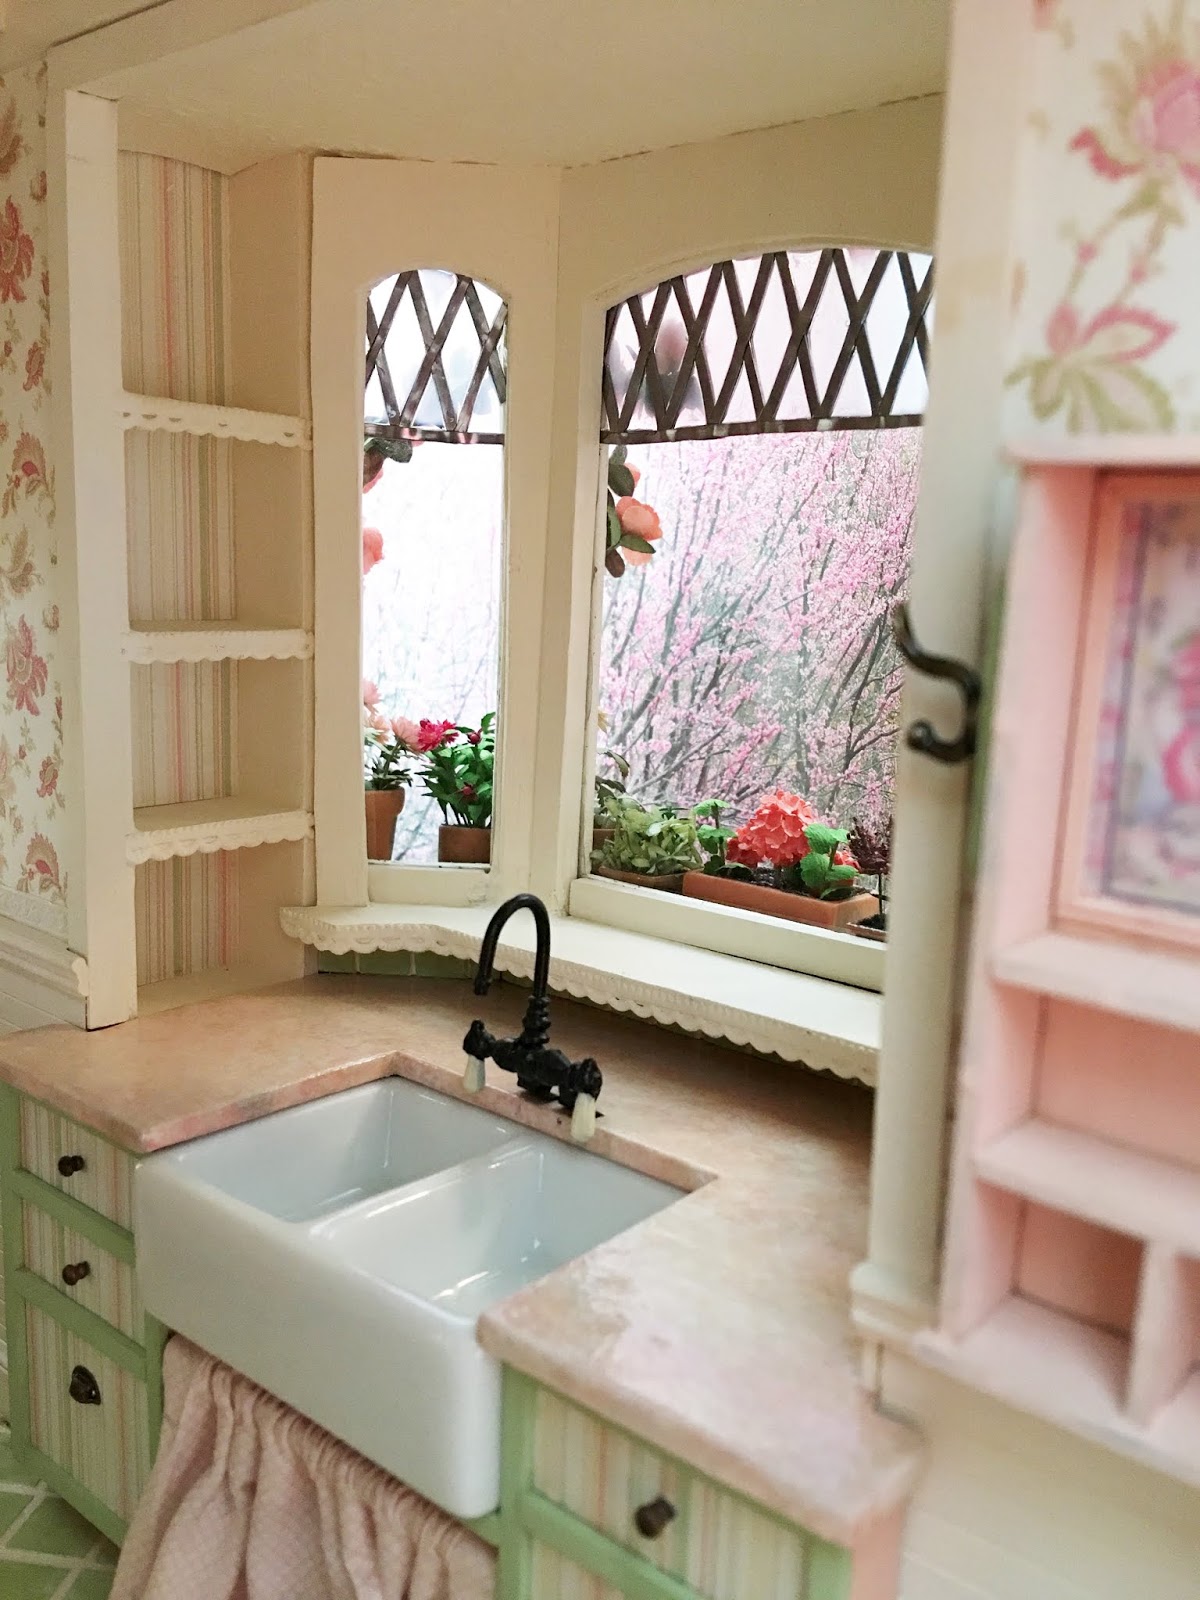
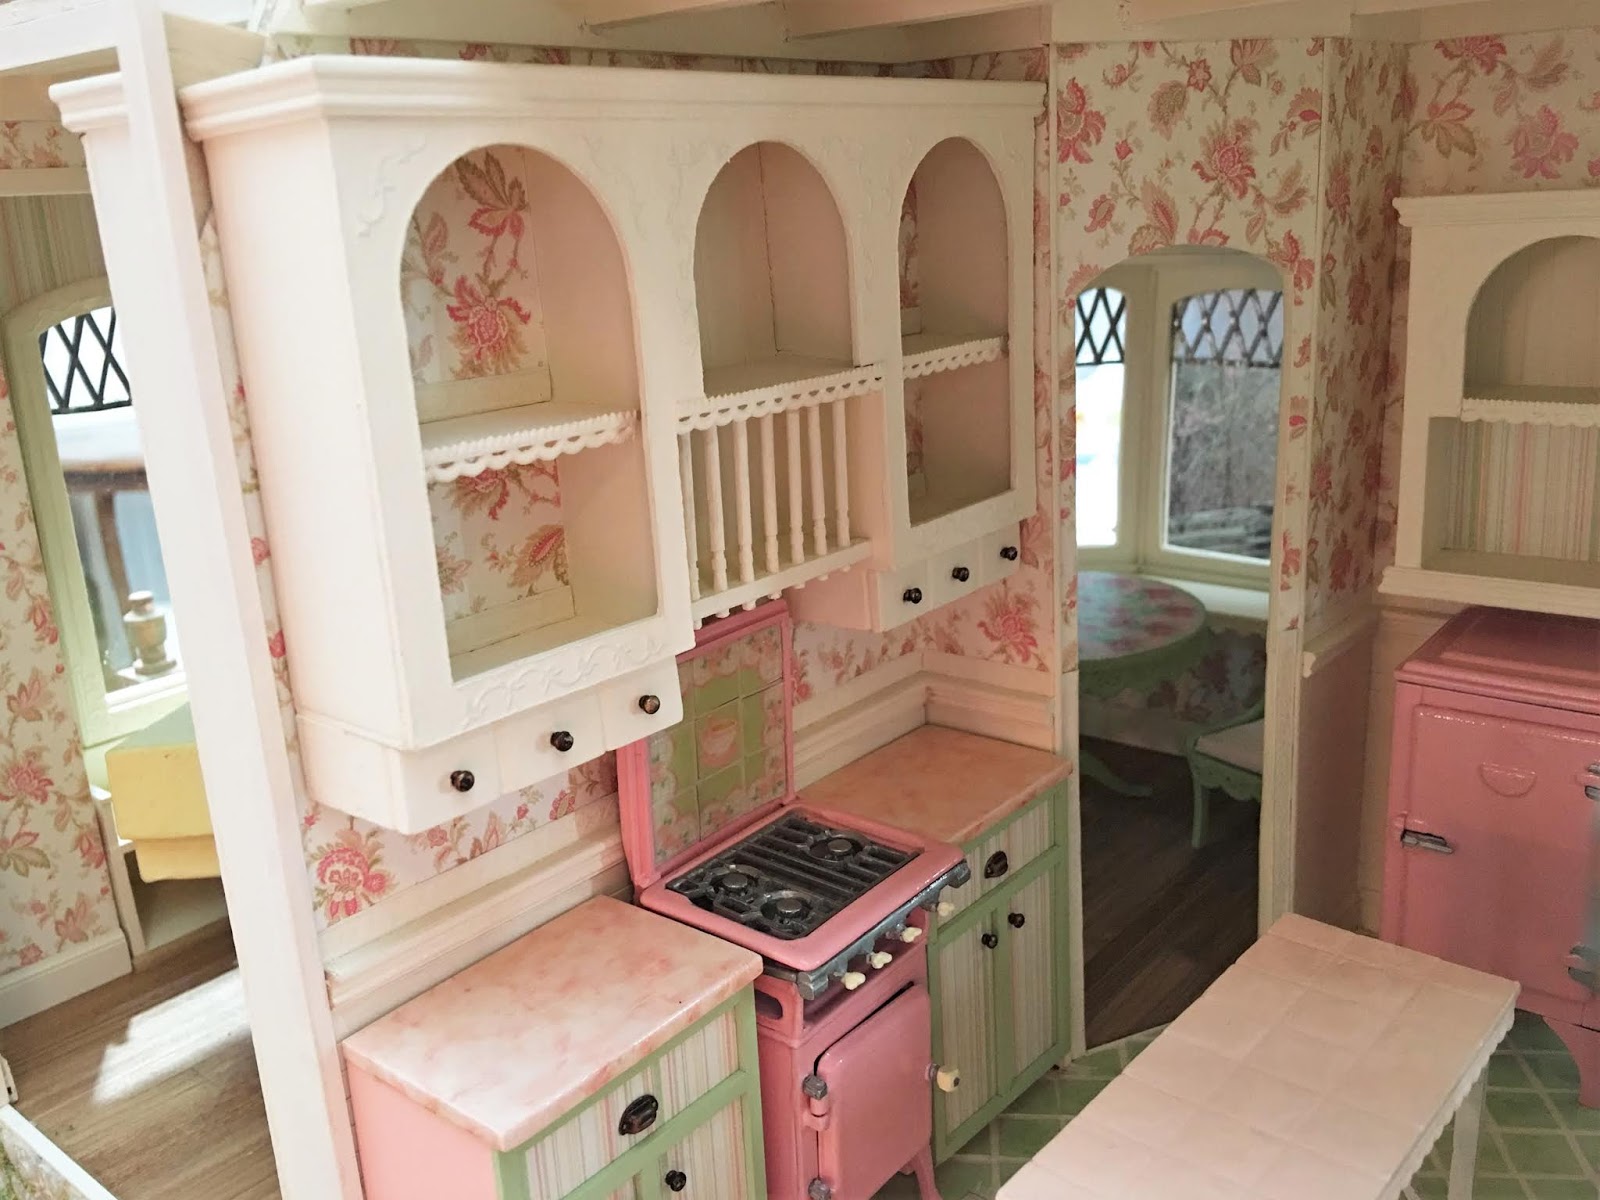
A cutsie cottage style kitchen seemed to fit the bill for the Storybook Cottage. Here, I made the cabinets from chipboard and assembled/finished kits for the stove and fridge from Phoenix Models. That was an odyssey to get them assembled and painted. I did it twice! But I truly LOVE the end result. Who wouldn't want pink appliances in their cottage kitchen?!? The sink was a Reuter Porcelain free standing that I took apart and built into the cabinets.
Cutsie was also the style for the Lisa's Country Cottage kits in which the mice, Vera and Virgil, reside. Their ovens and cabinets were created in Design Space and cut with the Cricut Maker. The sinks were created in Tinkercad and printed on my 3D printer. The stovetops were Houseworks kits I had in my stash for years. Here, simplicity was called for, and I wanted kitchens that you'd expect to see if you were reading a bedtime storybook about Vera and Virgil to your grandkids. Seeing these photos makes me excited again to decorate them!
 |
| Vera's Kitchen |
 |
| Virgil's Kitchen |
Sometimes it's fun to take a kit and make it your own. I reconfigured a Realife Miniatures Kitchen kit to create a country retro look in the Real Good Toys Barn Bash. I love these types of projects because perfectionism can be put aside for fun and frivolity! The crooked little stools were made from take out chop sticks.
In The Three Pigs build I delved into the Tudor style. Here, an open fire oven and hearth made perfect sense. Indoor plumbing by way of a Chrysnbon sink kit was an added luxury for the time. But who could deny these happy little fellows anything? With The Big Bad Wolf stuffed and hanging above the mantle, they are able to fully enjoy the first peace they've had for a long, long, time! The hearth was my first venture into foam core and egg carton bricks. Making it was so much fun, it added fuel to my mini fire!
There were also a few modern kitchens along the way, like the one in the New Orleans Kit. The cabinets were Elf Miniatures kits I purchased in 2016 for the Beachside Bungalow. When that project kept being put farther back in the queue, I was inspired to use the cabinets here. While I'd love to have a kitchen like this in real life, building this dollhouse kitchen was also a dream come true!


Alki Point was my first venture into 3D designing and printing back in 2015. Back then, I had to design something in Tinkercad, upload it to Shapeways, order and pay for it, wait for shipping and then hope the piece came out great. If not, I had to tweak the design, re-upload, reorder, pay for shipping again and hope the second time was the charm. It was expensive to keep trying until I got it right.... All the white pieces in this kitchen were my first designs, including the sink. I have come a long way since those early days, and am so grateful to have a 3D printer at home now! The design to printed prototype process can be counted in days now instead of weeks!

My latest attempt at a modern style is Natasha's Kitchen. I had kits for the ovens and dishwasher from Elf, but the sink, gas cooktop and wine cooler were my own design and build. I printed the sink and cooktop pieces on the 3D printer, created the cabinets and housing with the Maker, and cut my own aluminum. It was very exciting to know that, if very careful, I can make my own! Natasha and I are still eagerly waiting for our opportunity to set it up with all it's décor. A summer virus has her sidelined, but we're grateful that the Covid test came back negative!

The
Sweet Christmas Cottage was meant to be a 40's era confectioners paradise! I combined opened
barewood Dollshouse Emporium shelves with a
Jane Harrop Sink Kit so that every Christmas themed food and treat could be seen and appreciated. There was even a gingerbread house decoration station with all of the candy decorations in glass jars. This was as whimsical a house as I could come up with, down to the paperclay cookie roofing shingles. The thrill of looking at every tiny thing in this house never wanes. This one still takes me the longest, for all the time I sit and daydream, while dusting.

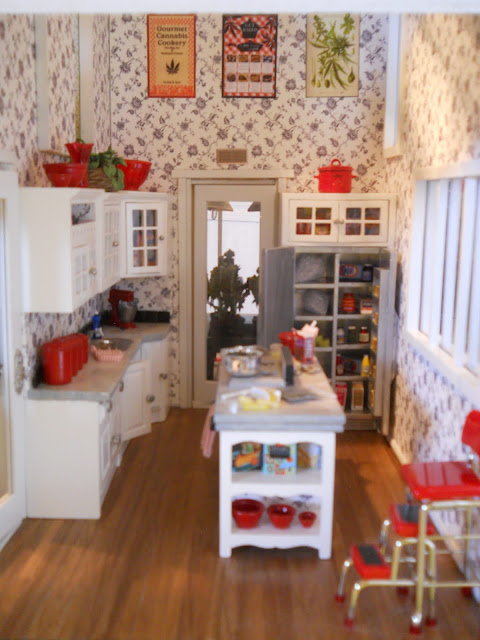
CannaBliss, done back in 2012-2013, was one of the first mini projects I embarked on after my long hiatus from the hobby. I think I ordered every item from the HBS/miniatures.com catalog for this kitchen! Never one to leave well enough alone, I added wallpaper to the drawers and cabinets, "glass" to the cupboard doors, and painted the appliances with the best silver paint they had at the time. I also covered the countertops in "marble" paper, applying it with Mod Podge. Boy I've come a long way since those early days! Knowing what is possible and not being afraid to try (and fail) is the key! I guess I'd call this style contemporary. This project was dismantled and sold a few years ago to make room for new dreams.
So what am I trying to achieve with the Beachside Bungalow's kitchen? Referring to the broad story for the era and occupant, I see the house in current times. Being built in the 1940's, the house has received small renovations and improvements through the years, but kept it's simple character. I see a kitchen that you'd commonly see in any American neighborhood today. It should be clean and contemporary, simple, not dated but definitely not top of the line. Great meals can be prepared here, but it's not going to make the cover of any design magazine. It's efficient and open to the great room because time with friends is Kairi's top priority in life. She is an artist, after all, and though she inherited the house from her great aunt, she just doesn't have the budget for swanky.
Doing something fresh, new and a little challenging is always an exciting goal for me, too. When I got out the graph paper to begin putting ideas down, here's what I came up with...
 |
Right wall with side by side fridge (old MBS kit in my stash), drawer units, gas stove
with microwave overhead, a combination of closed and open cupboards above. |
 |
Island with sink and dishwasher, drawers and under sink cabinet.
Countertop overhang on the opposite side to provide eating surface for meals. |
With all of this in mind, I'll be designing the appliances to print 3D, and the cabinets to cut with the Maker. The appliances will be standard white with a few fun details, and the cabinets will be painted. I imagine if you stripped them, there would be several layers of color from over the years. Even though the style is simple, designing the parts and pieces that make up the appliances is going to be a big challenge. It's also a great opportunity for me to dive a bit deeper into my Qidi XOne2's capabilities (and my own).
 |
| Sneak peek stove/oven design. |
 |
| Sneak peek prototype. |
This will be a big endeavor with lots to print! With luck, I'll be back next week with progress to report! And hopefully, with some tips to share for those of you considering taking the plunge into the world of 3D printing.
Have an inspired and creative week, my friends!
xo xo,
Jodi
P.S. This week I wanted to share a link to a new blog started by a longtime Blogger mini community member, Marilyn O. (burygardeners). It's called Mini-Epilogue, as this is Marilyn's last mini endeavor. Her most recent big project, Dalton House, was dismantled and sold to become someone else's dream come true. Marilyn kept the furnishings and fixtures from six of her favorite rooms, and will reassemble each of them into room boxes. It's going to be a great adventure, and so apropos for all of us facing the inevitable downsizing of our collections. Just think: If you had to give up 90% of your collection, what would you keep and how would you display it? Marilyn has come up with a great solution!
She's had several blogs over the years, and even had a YouTube channel for a time where she shared her amazing knowledge with the mini community! If you click on her profile, this is the amazing body of work you'll see:
I hope you'll treat yourself to to Marilyn's work, and that you'll Follow Mini-Epilogue!