Search My Blog!

Use the Search box below to find keywords that you're looking for quickly and easily!

Search Feature

Showing posts with label Auntie Jackie's Potting Shed. Show all posts

Sunday, April 12, 2015

Bittersweet Ending...

Auntie Jackie's Potting Shed is almost completed. Just a little touch up here and there and it will be finished.

I'm always really happy to see the vision in my head come to life, but it's a little sad, too, because I've so enjoyed actually working on the project. Sometimes I feel like the creativity is being channeled through me from some unknown source, and when the project comes to an end, I never know when that source will flow through me again.


For now I'll get to enjoy looking at it while I begin a new project, then soon I'll ship it off to Jackie. I hope she'll be thrilled to marvel at all the little items, and know just how much she is loved and thought of.

Saturday, April 11, 2015

Time Flies...

And I am definitely having fun! Here I am painting some white plastic babies breath flowers from Joanne's in more vibrant colors.


While paint was drying my wonderful husband showed me the "math" behind cutting angles on his miter saw. The roof that came with the kit was flat, and I just thought it needed a little character. Plus, I had wires to hide! 


A couple layers of drywall compound, and a LONG drying time later, it was time for sanding. I did this in the garage rather than my dining room! It was also nice to use my husbands compressor to blow the dust off my jammies and the potting shed!


I noticed that a lot of the potting sheds I looked at on Pinterest to get ideas had metal channel roofing. I liked the look, so adding 1/8x1/8 strip wood to the roof gave me just what I was after.


A couple coats of Linen paint and some sealer later, I had time while they dried.


Why not start the rain chain?

I used Chrysnbon cups for the actual water cups on the chain (after I drilled holes in them to run the chain through). Next I'll apply some copper paint and bronze glage to the whole assembly. That glaze takes a good long time to dry, so I'll post completed pictures later.


Intermittently I am working on the plants, planters and flowers. Very soon now I am going to be able to start loading in and gluing down treasures. Since Jackie's birthday isn't until June, I'll get a little time to enjoy this little beauty before it leaves for California!


Thursday, April 9, 2015

This Little Light Of Mine...

Let it shine, let it shine, let it shine!


Love, Family and Gratitude

Last night I sat at the computer with the hubbs - we do that a lot just to plan new adventures or drool over new tools we find and stuff. We feel better doing that than sitting in front of the TV!

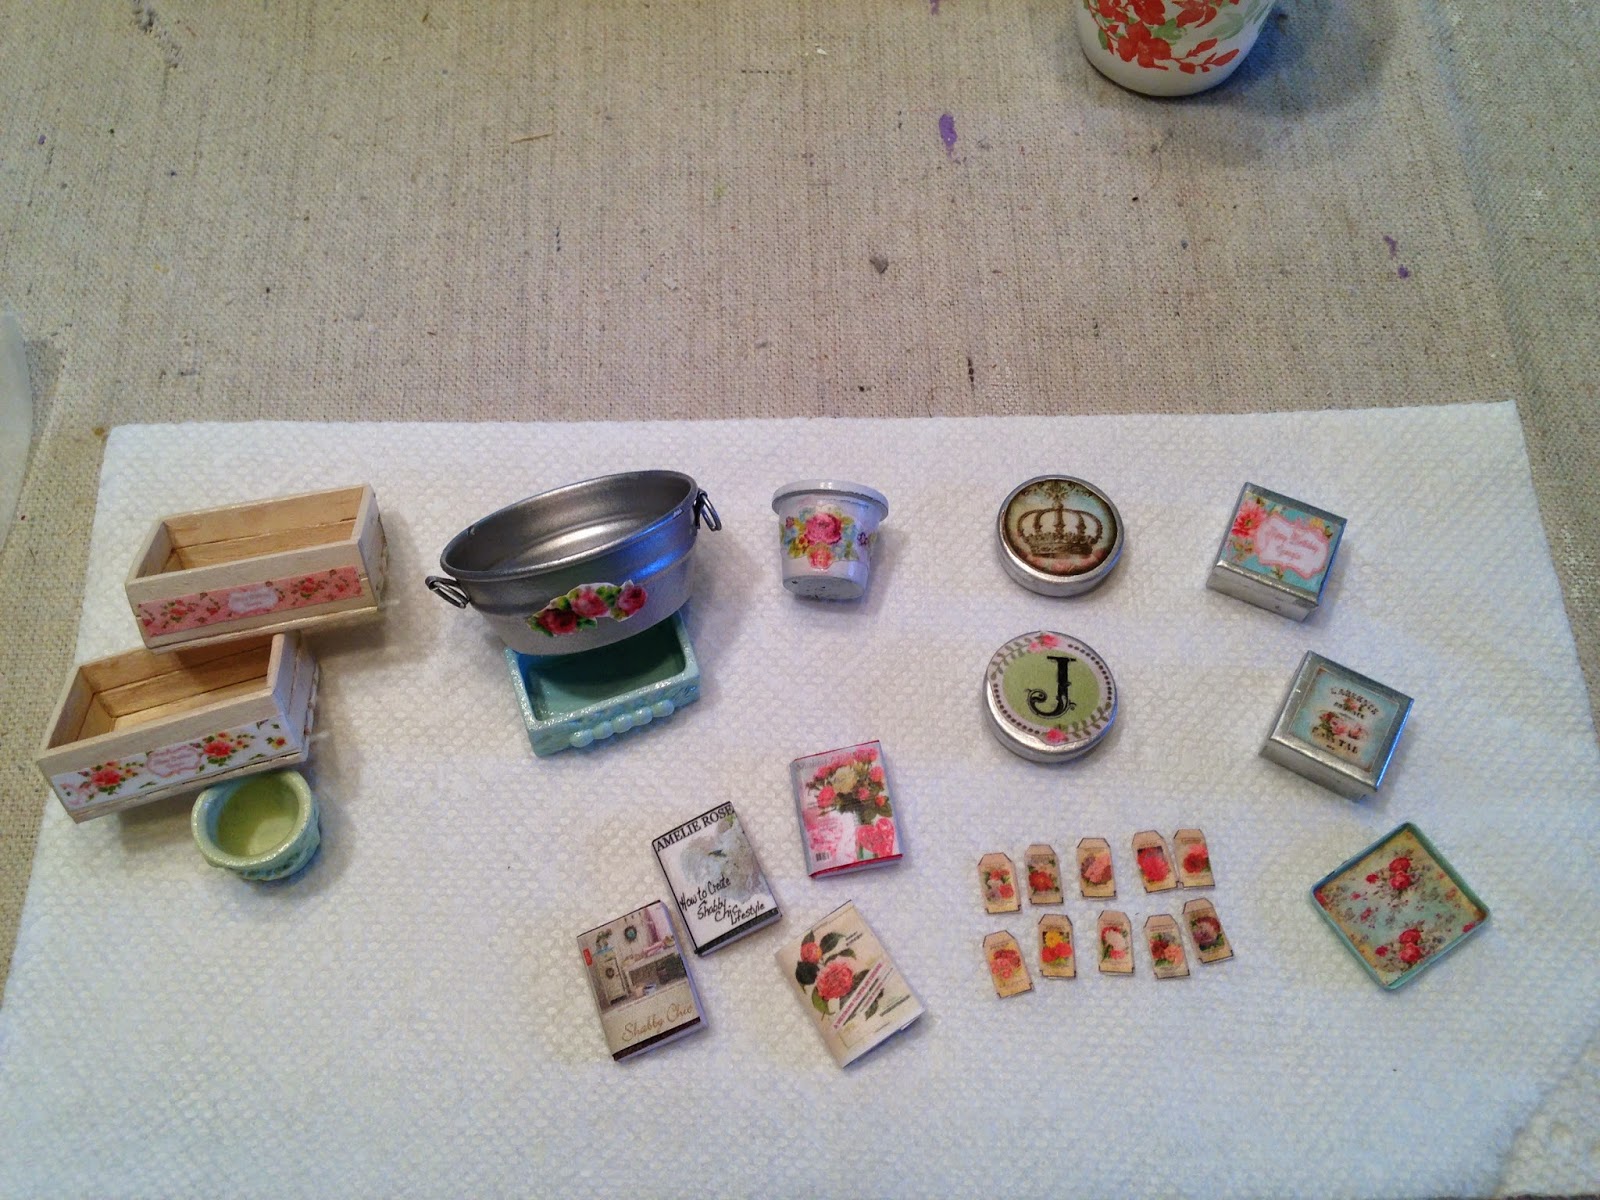
Anyway, I searched for awesome shabby chic labels and patterns that I could decoupage onto some of the mini items I'm making, and also searched for cute flower seed packets etc. I found some really fun stuff!

The first order of business this morning was to cut everything out and get them affixed to said objects. That was fun! I love that the colors from the printed patterns become more vibrant with Mod Podge!


The next little project is very dear to my heart. My grandma was one of the kindest, funniest, most caring people I've ever known. In spite of having seven kids and many grandkids, she always found a way to single me out and make me feel very important to her. She passed in 1998, and there is never a day that goes by when I don't think of her. As a matter of fact, I have her dining room set and a pair of peacock metal art sculptures she had in her dining room while I was growing up. I even painted my dining room blue just like hers was. This helps me feel that she, in some way, is still here with me.

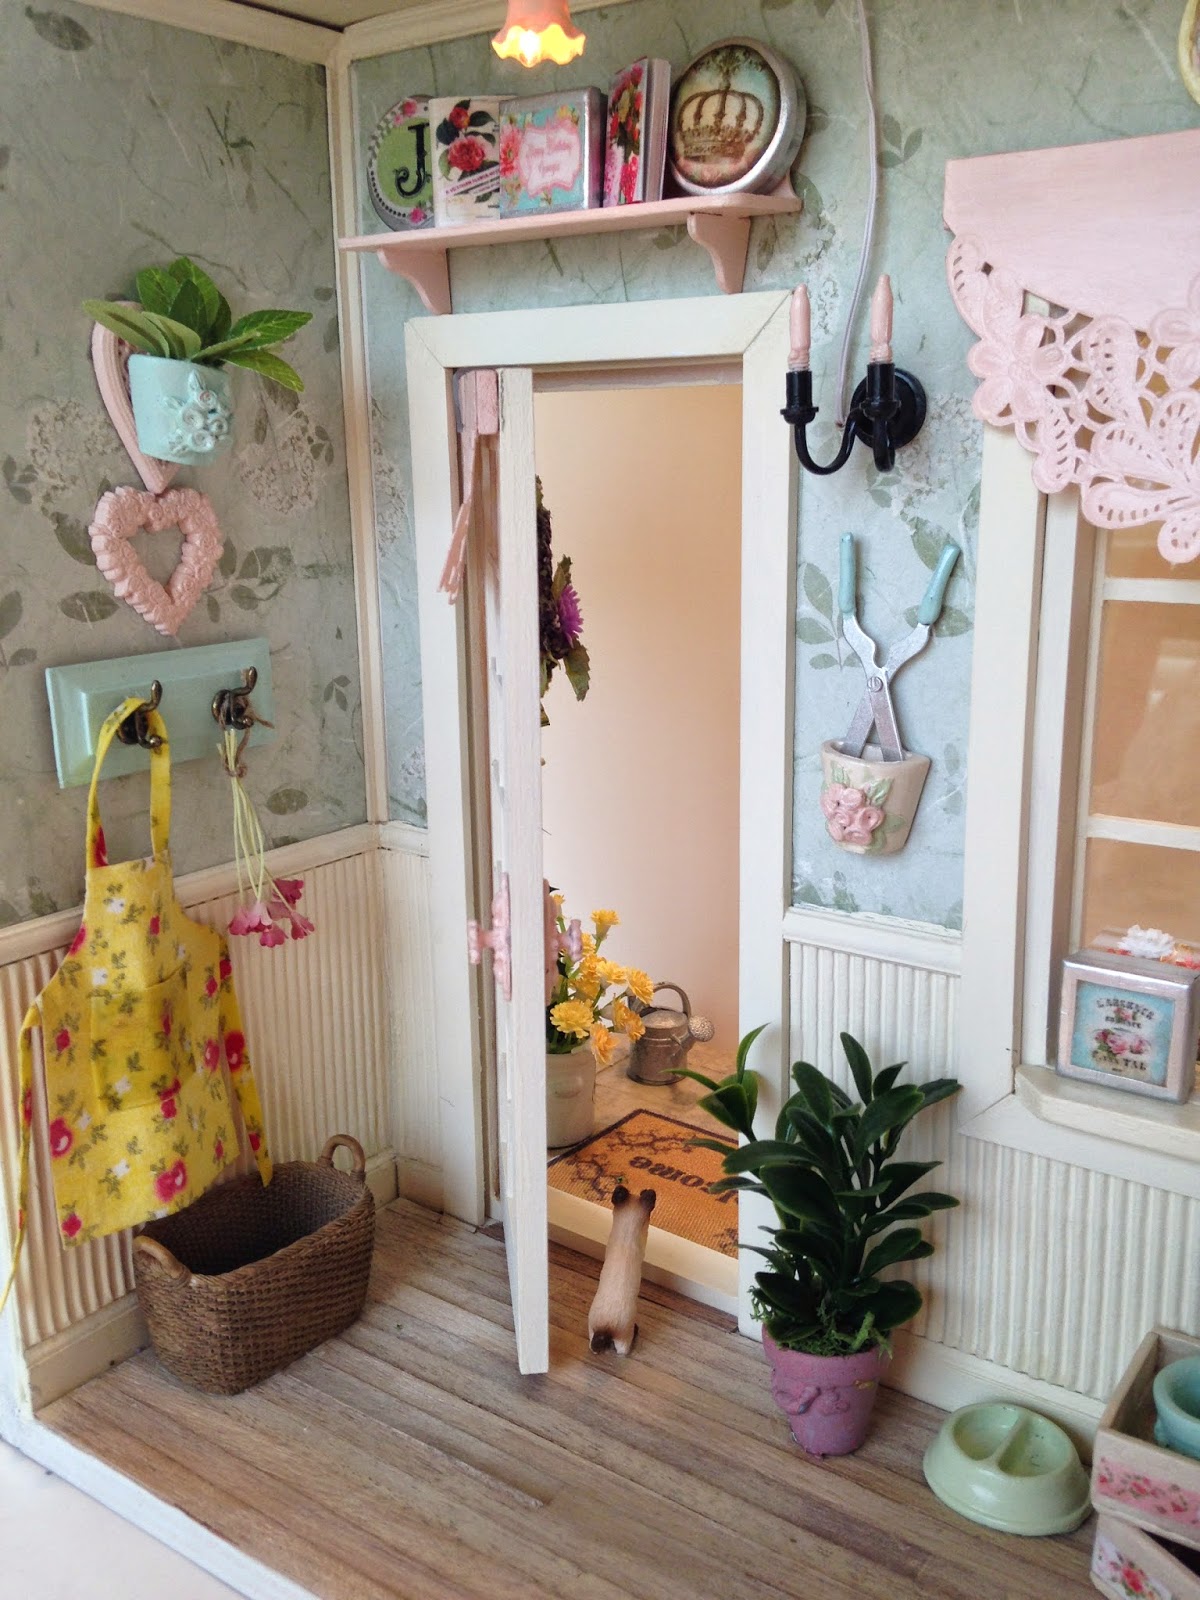
My auntie Jackie, who this project is for, was grandmas first child. I know Jackie misses grandma very much also. I wanted to put a piece of grandma in the potting shed for Jackie, so here it is...

When I was a child grandma made quilts for every member of the family. It was always great to look at everyone's because it was like going back in time. She'd take pieces from someone's favorite old shirt or dance costumes or Halloween costumes she's made and we grew out of. The quilts were like a tribute to our family's history. 

Mine is well loved and well worn after nearly 40 years, but it is still so special to me. I took a sacrifice square of my quilt to make a miniature apron for the potting shed.


I know when I tell Jackie about the apron she'll be just as moved as I am to have made it from a part of grandma Ellie.

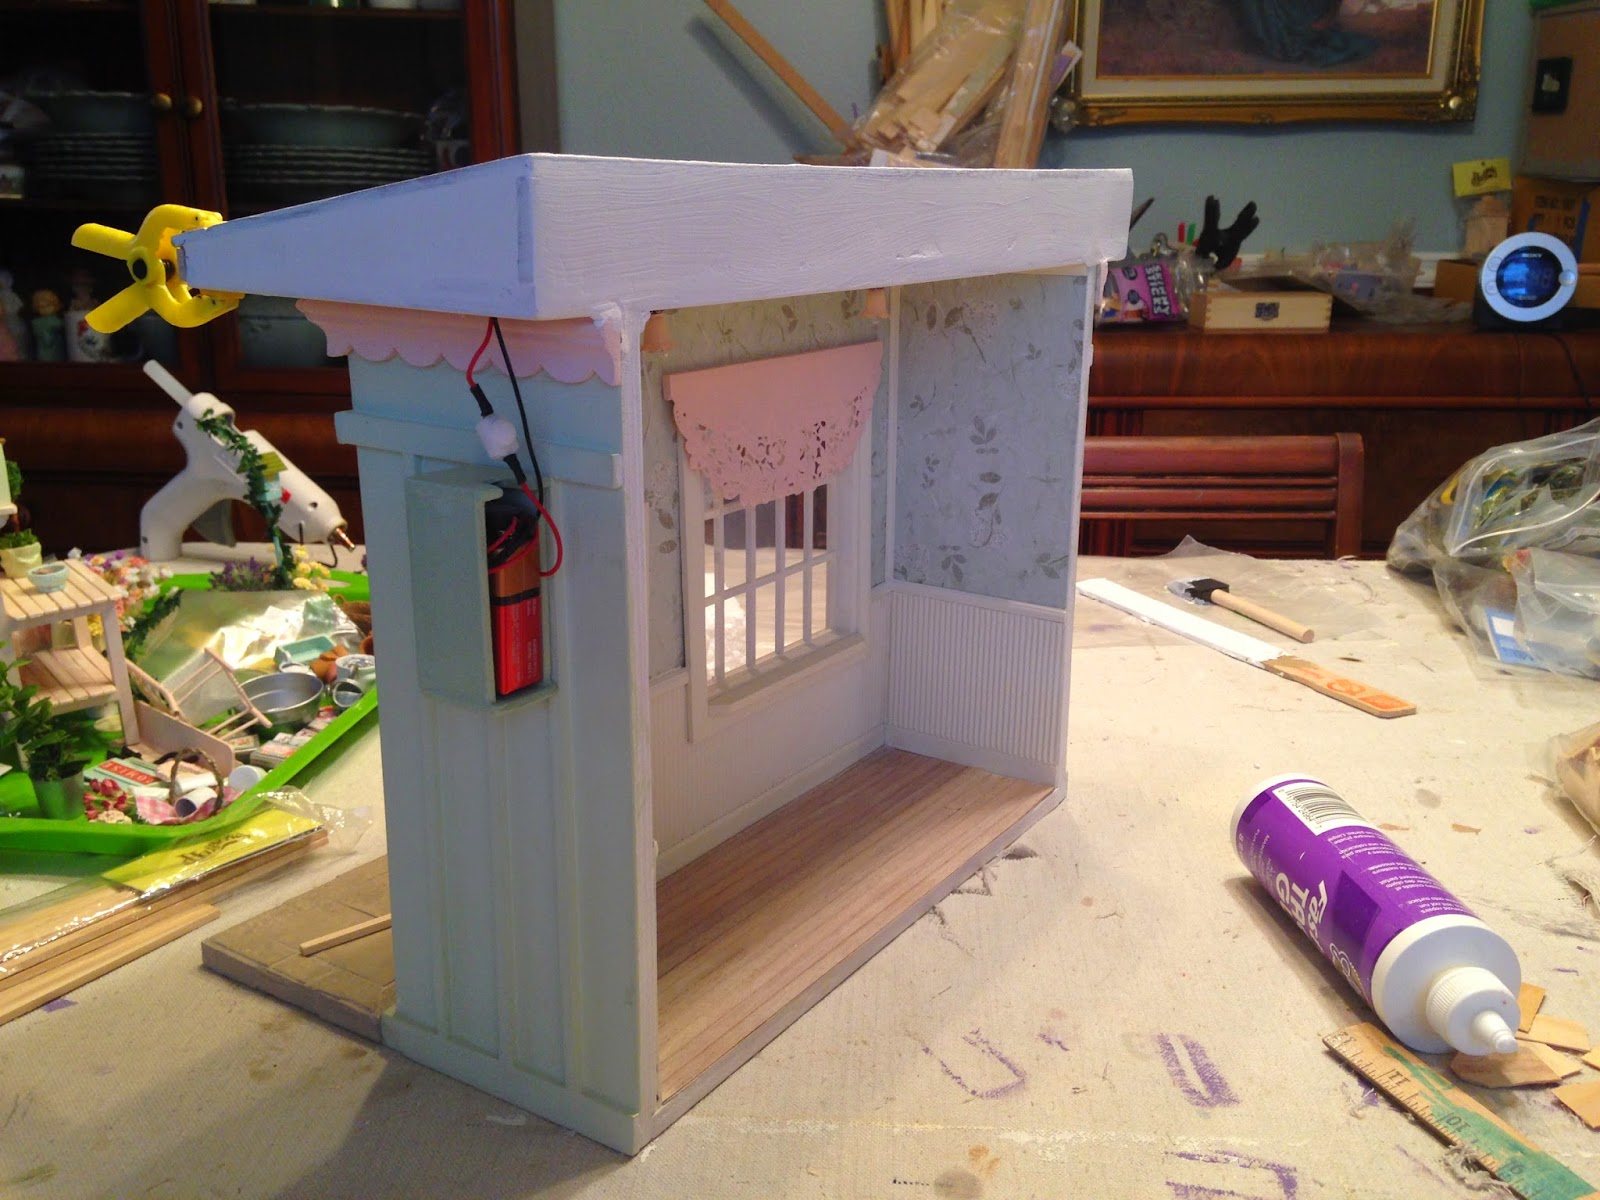
After tears of gratitude for having had someone so special shaping my life were wiped away, I moved on to drilling holes to install the lighting.


I so love that this entire project is all about love, family, and especially gratitude.

Wednesday, April 8, 2015

To Do - Ta Da!


Today was a fun and productive day! I still have many things on my "to do" list, and it seems like for every task I cross off I add a couple more, but I am on a creativity high and am having awesome and giddy moments!

I made, painted and sealed some flower crates and the window box. I painted the rain barrel. I added the sealer to yesterday's painted items. I added a couple coat hooks to an old drawer front floating around in the mini junk drawer (it's actually a large plastic unit with several drawers, some better organized than others). I finished a couple bird houses, a floral arrangement in a pitcher and used a decal from a Chrysnbon stove kit to adorn some canisters.  


Just putting the items in front of the little shed makes me happy, and I'm excited for the next projects on the list!


More tomorrow!

Tuesday, April 7, 2015

Abracadabra


The word Abracadabra is mostly associated with magic tricks, but historically it was also believed to have healing powers when inscribed on an amulet. Well, working on miniatures is most definitely healing for me, and I'm going to imbue that same healing power into Auntie Jackie's Potting Shed for her!

Abracadabra was also appropriate today in that all of these little items were transformed...


Into these little treasures...


When the day finally comes that I am ready to decorate and adorn this little potting shed, that will truly also be magic!

Tonight after dinner I hope to turn my attention to more wood crafting. I need to make a bench, a birdhouse or two, an "electric box" to house the 9 volt battery for the lights, lattice, flower box, and flower flats.

It will be a nice break from so much painting!

Monday, April 6, 2015

Some Fun Details Today!

The painting of the "stones" went much better and lots easier than I'd expected! I used a very warm, light grey and a soft neutral brown color, then applied with part of an old kitchen sponge. I like that the colors blend in with the shed rather than competing with the cheerful green color.


I had lots of leftover grout from doing the laundry room several years ago. It's the powdered stuff with tint already in it. I mixed up a batch and then put it into an old frosting gun with a very small tip. This worked great, as I just traced the grout lines, then went back over them later with a soft sponge to help the grout look better. I then did an all over wash with a soft cloth several times.

Overall, I like the look, and will be even happier as soon as the embellish the grout lines with moss.


I really hate sitting there when I am waiting for paint or glue to dry - mini minutes are precious time!!! During the down time on the rock paint and grout, I began to make the potting bench for inside the shed.


A gluing jig and misc extra wood is a blessing! Especially when my brain is firing on all cylinders! 


Almost done!


Now it just needs a couple coats of shabby looking paint and some adorable accessories!


I wish it was tomorrow already!

But then, I do have my adorable husband to snuggle up with, so maybe I shouldn't be so hasty...


Recycling Day!

It seems like the common theme running through the day is recycling! Aside from it being our actual recycling day in my neighborhood, everything I've touched on Auntie Jackie's Potting Shed today is derived from something created for something else.

I was rummaging through my desk drawer a couple weeks ago, and came across some little black rubber pieces. For the life of me I have no idea what they were for and why they ended up in the drawer. The great thing tho was that as I pulled them out of the drawer a tiny gate remote control battery had gotten stuck in the end of one. I immediately thought GARDEN HOSE SPRAYER! A piece of an old Chrysnbon stove kit, a shrink tube, a bead finding and some green wire later and now I have a wonderful garden hose!

A screw came out of an old pair of glasses I'd had from several prescriptions ago. I stuck them aside thinking someday they may be useful.  As I was making space in by bins I took a closer look at them with my mini eye. Suddenly, I realized I had the perfect garden hose reel, too! It was the piece that sits on your nose. Add to that a scrapbooking plastic scroll work piece painted black and now I'll have a fancy and more realistic looking reel and hose for FREE!


Some other mini junk drawer items got a fresh coat of paint to make a candle holder, hanging light fixtures and some wall decor. I also found an old watch that will make a perfect shabby chic wall clock! If I replace the battery it will actually work, too!


The piece of scrap walnut wood flooring turned out just how I'd hoped after a heavy sanding and some whitewashing.


I've never tried the egg carton tile or brick idea before, but taking chances is part of the fun of working in miniature (as opposed to experimenting in real life). So, I've laid out the pattern and glued them down to the porch. This afternoon I'll be experimenting with getting just the right paint colors on them. I might try some artists chalk too, to help vary the color.

According to Connie at My Miniatures, after they are painted and sealed you just grout them like other tile work. Wish me luck!


Sunday, April 5, 2015

So Much Fun!


It feels like a got accomplished today, but more importantly, I was having a wonderful time!

The gingerbread trim has been attached, and the "lace" curtains painted, trimmed, attached to the cornices, then glued in place.

I added a trim piece to the interior window seal so there'd be space for some delightful little mini items!


Between the drying times, I figured out and assembled the light sconces for the inside, and repaired and old exterior light that's been floating around in a drawer for a couple years.

I got out the mini spray booth (an old box from a pair of boots), and turned some icky brass fixtures into wrought iron, and some plastic junk drawer items into enamel flower pots and galvanized looking buckets,


I had a recycled piece of walnut flooring for the interior floor, so I gave it a heavy sanding and then white washed it to help it look old and shabby chic.

I painted the porch in a linen color, then began to cut up the egg carton to make the pieces for the tiles.


That's where I'll have to stop on Auntie Jackie's shed for the night. I need to turn my attention to returning my work space to at least minimally functional, and clean up from a weekend filled with many busy activities.


I hope all of you are feeling the excitement of a new project, and also grateful for the abundance of creative opportunities!

More to come soon!

Saturday, April 4, 2015

It was a good day!


The exterior walls are painted in a soft green, and after an advanced mitering lesson from my wonderful and patient husband, the top gingerbread trim has been cut, sanded, then coated with pretty pink paint three times. It's looking like after dinner mints and I'm loving it!

My son, Ande, is at the age where all of his friends are starting to get married. In fact, he was certified to become a Justice of The Peace in 2013 just so he could actually perform the marriage ceremony for a couple of his closest friends. It was awesome!

Anyway, since it does not look like I'll be getting a new daughter-in-law or any grandbabies anytime soon, I'll just be grateful for all the pretty wedding invitations from his friends. Especially the ones I can turn into goods for my mini projects. The photo below shows how I'll be using this beautiful card stock for window coverings!


That'll do it for me for the night! Gotta surf the web for more inspiration and my daily dose of window shopping. Back at it again in the morning!


On A Roll!

I absolutely LOVE this part of a miniature project. You know, the part where the ideas you've had in your mind are suddenly becoming a reality! The creative process is in full swing and everything you're doing is coming together nicely!

The house is quiet, just me (except my adorable beagle George who's curled up at my feet under the table) and some Sasquatch Chronicles podcasts. A perfect way to spend a Saturday afternoon!

I've glued the walls and floor together then spackled the joints on the interior. Just have to do a little sanding and touch up paint inside.


I applied a coat of primer, then sanded the outside. Once that was finished I began to add the exterior trim pieces.


Next, I'll spackle, sand, prime one last time and then add the exterior base color. I just love being on a roll like this and making a dream into a reality! Feeling so blessed and so grateful to be able to accomplish the things I love to do!


More to come...