Search My Blog!

Use the Search box below to find keywords that you're looking for quickly and easily!

Search Feature

Showing posts with label Sinks. Show all posts

Thursday, August 4, 2022

My Recipe For A Kitchen

Just last week I had no idea what I was going to cook up with this kitchen. But once I got out the Grand Hotel paper pack to assign the patterns and colors to each of the remaining rooms in the Willowcrest, my design choices for the kitchen came cascading into my mind. I liked them so much, I began to salivate! This is definitely not the paper I ever thought I'd be using in the kitchen, but sometimes, it's fun to fix something new!

Before I could really get going on anything, I needed to finalize my cabinet and appliance layout. Those would dictate every other thing I did in this compact room. I got out the ruler and graph paper to measure exactly how many inches I had to work with, then took them over to Design Space to design the cabinets. In cooking, it's what you call mise en plase. And I really like it when me is in place! I seem to be making a habit of using chipboard cabinetry in my kitchens, but I enjoy making them so much! Maybe one day, I will have a laser cutter and then I can switch to wood. :O)

It takes a lot of pieces even for a small kitchen!

The appliances were an easy choice - I had them leftover from when I did the Storybook Cottage's kitchen. They weren't the right ingredients for that project, so I put them on ice. They seem to have been meant for the Willowcrest! Both Russ and I liked the apricot color, and I thought for a moment about going with a peach themed kitchen. But the pretty rose vine wallpaper convinced me to repaint the appliances.

Once the plain lower boxes proved a good fit, the upper cabinets
could proceed. I used every bit of available wall space.

The wallpaper provided me with all the accent colors, and the appliances provided me with the era. Now we were cooking! With those ingredients sorted, our recipe was developing. It turns out that our second empire home will be stuck for all time in the early 1940's. Our brave homeowner finds herself unexpectedly alone and needing to find ways to be self reliant. When your man is away fighting evil in the war, you gotta do what you gotta do to keep the home fires burning. Our lovely home will become somewhat of a boarding house, with the entire attic space "to let". 

The accent colors came from the wallpaper using the
 closest acrylic paints I had on hand.

In this concoction, the kitchen has been recently updated. It has the feel of both 30's and 40's kitchens with design elements such as raised panel cabinets and a "porcelain enameled" sink. Luckily, in the 21st century, we can rustle up tiny "porcelain enameled" sinks with our 3D printers!

The cabinet hardware, cabinet feet and the appliances are painted Barn Red to match the darkest rose buds in the wallpaper. I can almost hear the music from that era playing on the kitchen radio, and almost smell the home cookin'.

The cabinets have their doors, pulls and feet installed.

For now, the upper cabinet rests on top of the stove rack.
It'll be hung up higher on the wall.

Once I added the above fridge cabinet to the recipe, it made the fridge seem
perfectly at home between the two doorways. 
Kitchens from this era were not as "fit out" as they are today.

Once you add details like crown molding, lace shelf edging,
painted handles and feet, the chipboard cabinets really come alive!

The sink really has the right flavor profile for this kitchen. Here's a look after lots of sanding and glossy finish applied. If you were really determined, you could spend a long time sanding to make PLA look like real porcelain. The holes have been drilled for the taps and faucet, but the drain is part of the 3D printing process.


I made a wee strainer for the drain. It may be only 5/16" round, but it gives off big flavor!


And it fits perfectly into the drain, flush with the drain ring. I wish I'd had regular bronze paint instead of a paint pen so I could have gotten the whole thing painted. The paint marker's tip is too wide to get in there! Ah well... It still looks cute.


To make the faucet, I used a screw-base cup holder in "brass" as the spout, then a "brass" earring back as the aerator/nozzle. Gem Tac works great for gluing these tiny metal parts. It's a strong hold, plus you can clean it up after it has dried because it is like rubber cement (but with no odor). Sometimes your junk drawers have just the right ingredients.


For the taps, I had straight pins, spacer beads and earring backs on hand. They look great in retro kitchens!


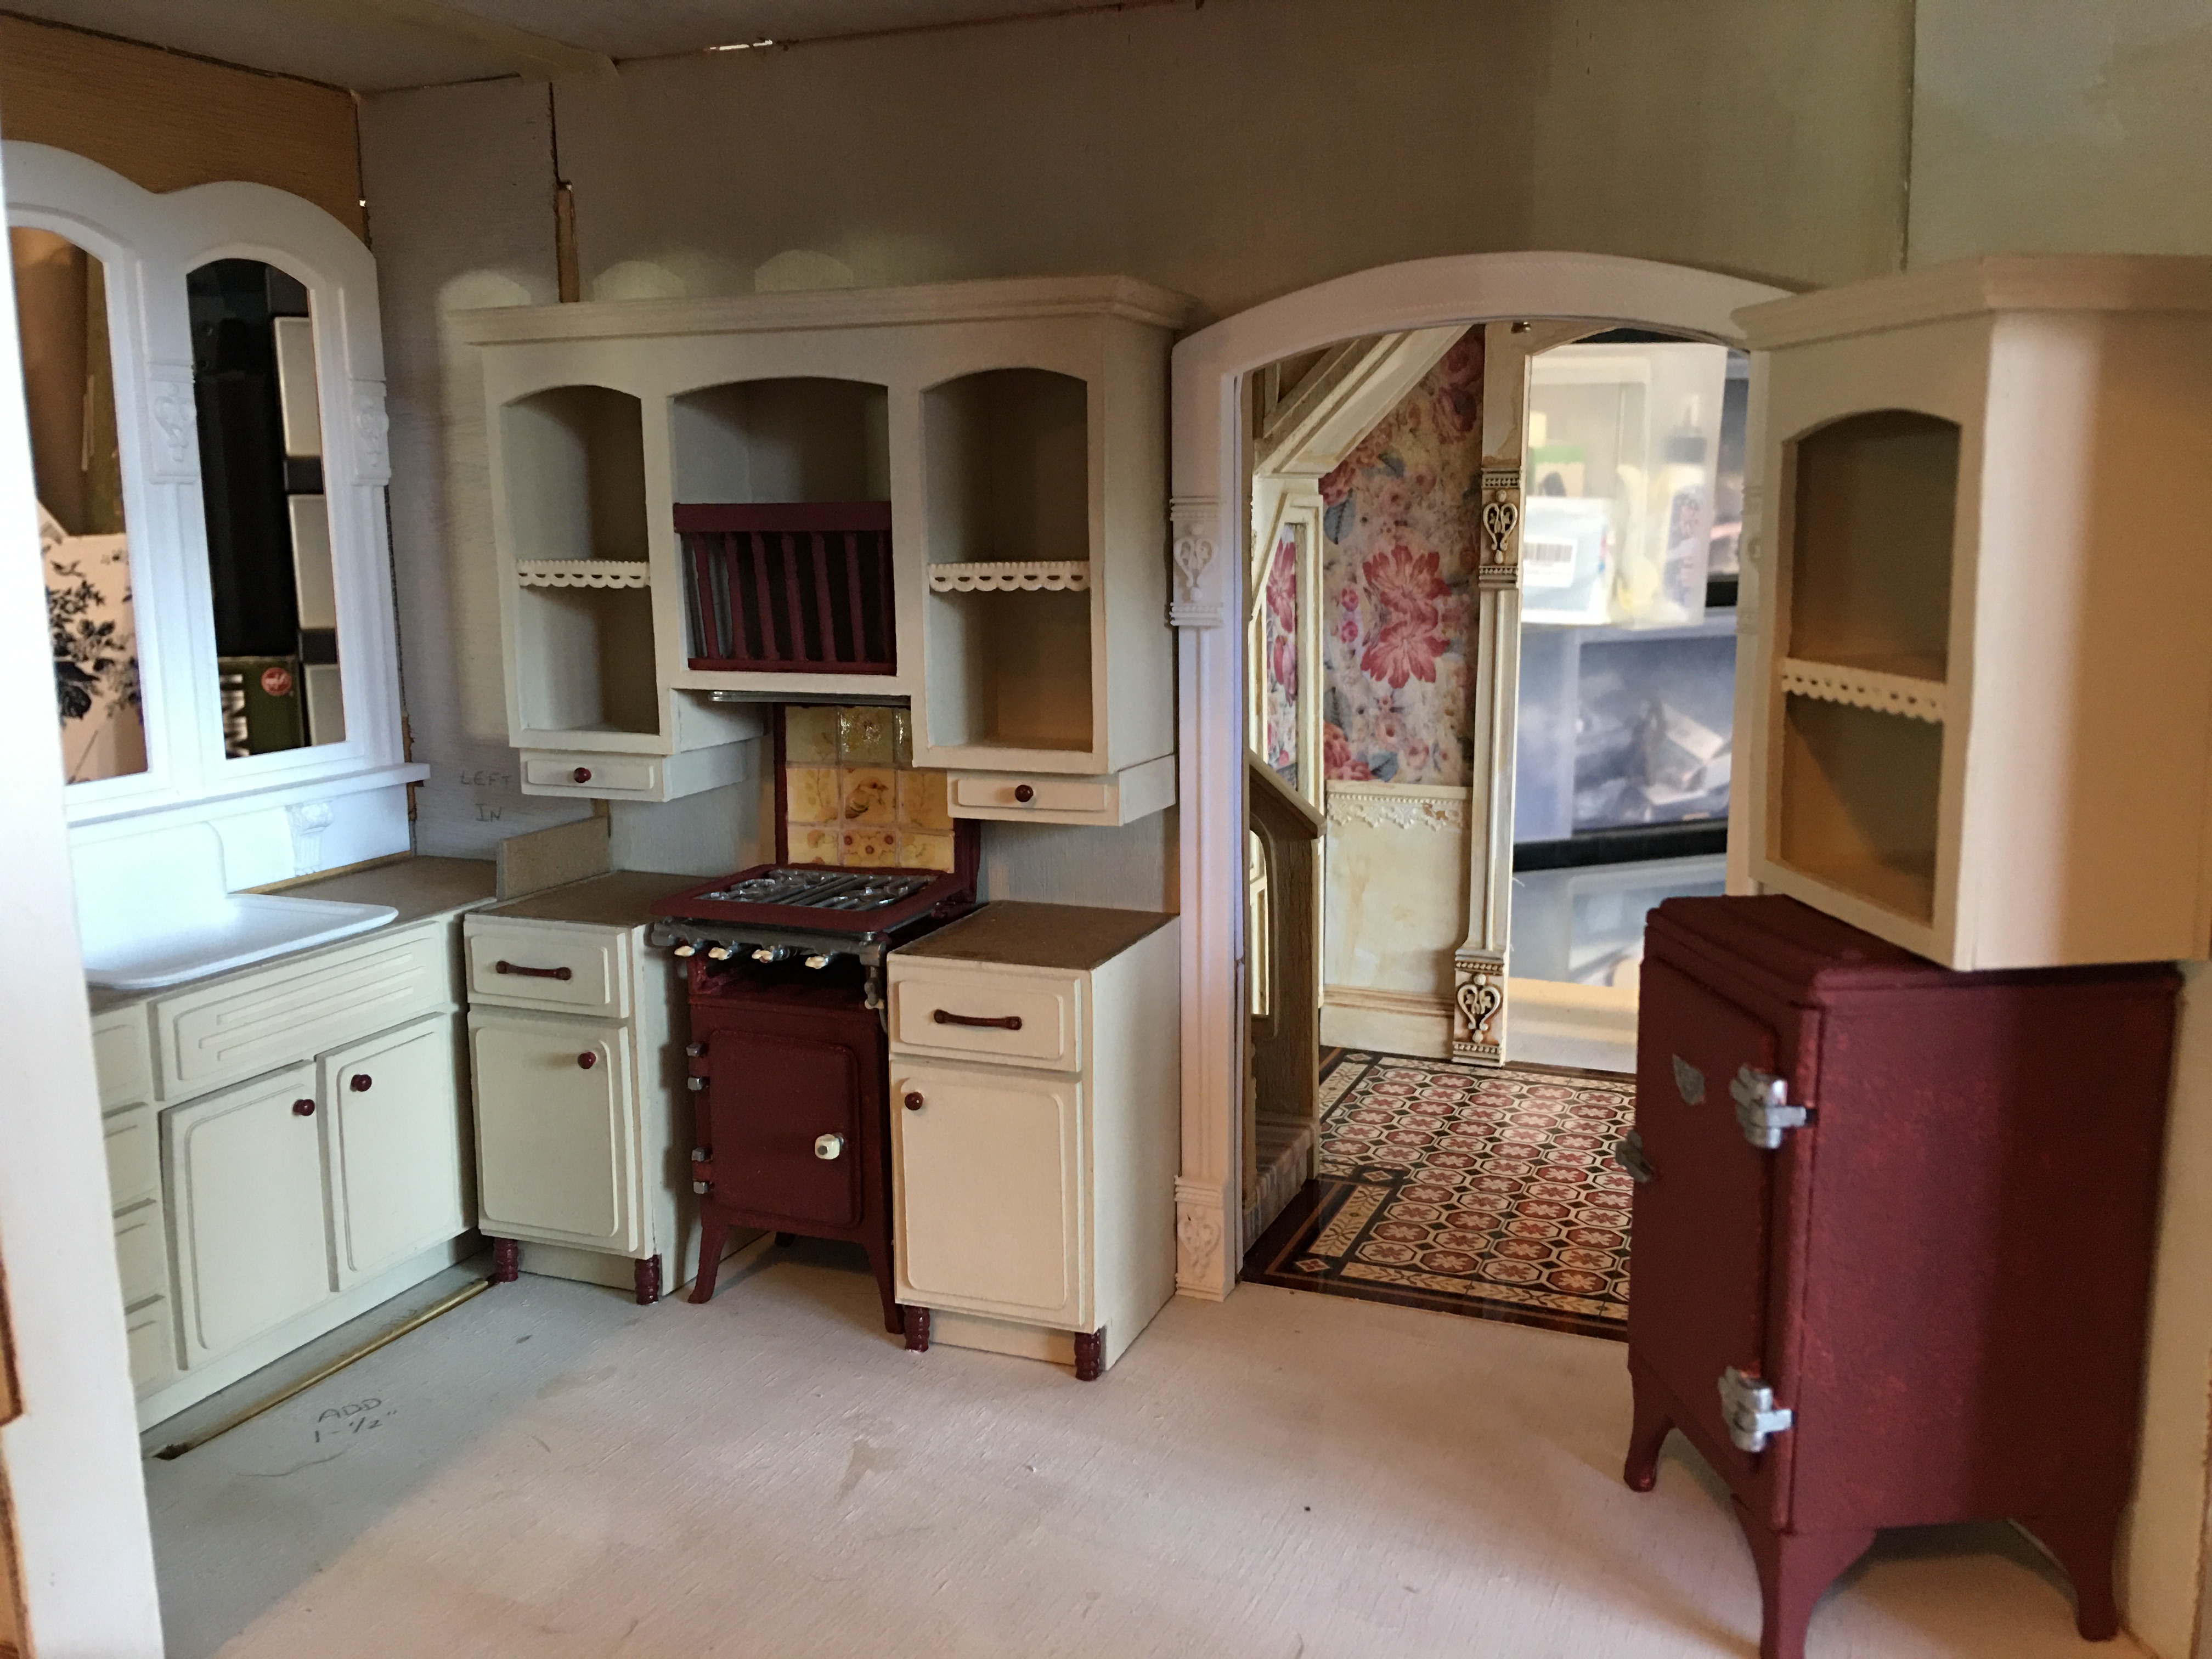
This photo is taken with everything in dry fit to make sure it all works together. Each piece is just set in and on, so you have to ignore the crooked and just notice the "feel". It's only a taste test.

Countertops and backsplash are just set on for now.
Sink is not fully seated into it's holes in the counter or countertop.

I love how the sink looks with the beam of sunset light shining on it! So "film noir"! 


Here you can see a better visual of why I wanted to have a tall apron on the window, and why I needed to raise the window up a bit. The sink fits here perfectly, now.


For 1940's era countertops, I had my choice of tile, marble or Formica. I used illustration art board as the base, then made various shades of Moss Green to create a look that can be either marble or Formica. Just a dash of this and a dash of that and viola! Soup! I gave it metal edging in a color that matches the faucets, because 40's kitchens craved their metal edging.


It was imperative to have all of the cabinets in place so that I could make an accurate template for the tile floor. I painted more illustration art board in green and beige, then cut 3/4" square tiles. I am laying them on the diagonal, alternating colors in the field. For the border, I will use Barn Red tiles in some way. 

But that is for dessert, my friends! I bid you Bon appétit and I'll see you next week! I hope you enjoyed my recipe for a kitchen!

xo xo,
Jodi

Thursday, December 3, 2020

Cornucopia

 Hi Guys!

This week has been abundant with various and sundry activities, not any of them concluded, but all of them fun! So this post is going to be an amalgamation of the week and I hope you enjoy the variety!

First off I'll share that I made a little start on the porches for Vera and Virgil's cottages. I dug through my supply drawers and auditioned options, and at least figured out that each cottage porch will have a totally different aesthetic. For Vera, I am going with something very feminine and almost Victorian in detail...


For Virgil, something a little more country/rustic. I had some fencing assemblies left over from a Creatin' Contest kit, and what a great opportunity to use them!


I am slowly making progress, but haven't had a good chunk of time yet this week to dedicate.

Over the long Thanksgiving weekend, we opted for safety above getting the family together. Since it was just Russ and I here at home, we took on a couple fun new activities together. One was assembling the LEGO Mandalorian Razor Crest set. We hadn't built LEGOs since our kids were growing up, and had never done one together. It turned out to be a lot of fun and we are just starting bag 3 out of 6. There are over 1000 pieces, so it will take us a while longer. It's not technically minis, but if I can convince Russ that working on small things together can be fun, he may just start to imagine us creating a cool, MANLY mini project together in the future. ;o)


We also got a new game for the Nintendo Switch. It's called Animal Crossing New Horizons. It's a lot of fun, filled with wit, humor and some fun facts about the flora and fauna that you collect in the game. If you don't want to become addicted or have another adorable activity take over your free time, I recommend avoiding it, lol!


Back in the spring, I mentioned that I was participating in another Instagram group swap. We would each be given only 1 person, anonymously, and would be given questionnaires filled out by them in order to make gifts perfectly tailored to our recipients current project. Based on my recipient's requests, I made a bathroom vanity and lots of accessories. Due to all of the Covid craziness, the deadline to mail the packages was pushed to October 31st. 


When I received my package and saw that it was from Australia, I squealed a little because I knew it was from Sam (BluePrint Minis). If you know her, you know she paints incredible mini paintings. You can see a past swap gift I received from Sam in a post titled So Thankful.

This time, I was working on Pound Cake, the bakery, so I asked for bakery related things. Sam not only painted a cupcake series and framed them in the coordinating colors of the bakery, she spoiled me rotten with other handmade and purchased treasures, too! Thanks Sam! I am so lucky to have been assigned to you! I love every single thing!


Sam is a busy lady so mostly posts on Instagram now. You can find and follow her @blueprintminis.

And I think, finally this week, I should tell you about a new project in the works. You know me... I never reach the end of one project before I become obsessed with a new idea. This time, it's for someone else, someone very special to me. That's the best motivation for me to finish a project! And this person, in spite of my best efforts, has not shown much interest in minis. Until now. And believe me, I have seized upon this. For now, I'll share the structure...


And one of the amazing items that will become a part of the project. Maybe it will give you a clue...


The rest will come soon enough. After I finish (I am determined) Vera and Virgil's cottages. Porches, roofing and wiring to go!

In spite of the state of the world these days, I hope life is busy but good for each of you, too. Happiness can sometimes be achieved simply in the way we choose to frame the events surrounding us. I'm trying hard to make my frames as positive as possible, and to help others do the same.

xo xo,

Jodi

Sunday, June 14, 2020

Meet Vera and Virgil... and the Lavender Vanity Drawing Winner!

Hello everyone! It's been a busy 10 days and I am in shock that June is half way over already! And kind of relieved that 2020 is half over, too. What a challenging year, so far! I sure hope that 2021 will be much kinder to all of us! Let's focus on the positive, though, and enjoy a little bit of mini happiness!


Meet Vera and Virgil


Vera and Virgil are the mice who will be taking up residence in each of the two Lisa's Country Cottage kits. They are next door neighbors who are courting one another, and are engaged in budding love. With new homes to look forward to and getting to know one another, it's an exciting time for them! As their names suggest, they are old fashioned to the core and will be taking things as slow as molasses on a cold winter's day. :O)


Speaking of slow... I have been making slow progress on the yellow cottage. I bet you won't be surprised to know that the yellow cottage will be Vera's. Can you guess the color theme for Virgil's cottage? :O)
I started by painting the windows and doors, finishing the pop outs with T-111 like siding, and using the Cricut to create a fun texture stencil for the gables.


Here's how the facade is coming along. The main body of the cottage will be finished in clapboard siding but not until I have the interior painted, papered, floored and trimmed.


A little more about Vera and Virgil...

The creator of these precious needle felted critters is Yuliya of WoolenBoutiqueUa on Etsy. I contacted her about a mice couple that she had listed and asked if it was possible to have clothing done for them in yellow and blue. She happily agreed and knitted them new sweaters. She also made the adorable and color perfect dress for Vera at no extra charge! And then shipped them lightning fast! Her pricing was so affordable and the shipping charge was so reasonable, especially since there was tracking the entire way from Kherson, Ukraine.

Original Listing Clothing 

After Yellow and Blue Request

 When they arrived, they were wrapped in a box in beautiful wrapping paper and finished off with a bow! So thoughtful!


They stand on their own by adjusting their wired tails, and the craftsmanship and finishing are excellent. Look at those whiskers and the tiny wooden heart buttons! I love them, and based on my experience, can't recommend Yuliya's work highly enough. She has a nice variety of mice and other animals, and her costuming is charmingly detailed.


I am excited about continuing work on the cottages for Vera and Virgil so that they can get settled in and start living their dreams! Now that they are here, I'm sure I'll get lots of input on their wants and needs. Hopefully, each cottage will be novel enough and will reflect each of their unique personalities!

But first... We have a drawing to get to!!!

I'd like to thank each of the 53 entrants and also each of the followers who come by to share this passion and it's seemingly never ending excitement and creative possibilities with me!

~Thank You~!

I only wish I could show my gratitude by giving a mini treasure to everyone!

Drum roll...


And the winner is...


Congratulations Jocelyn Redmond!


I hope that you are more than delighted when
you receive your minis in person!

I have your email so will send you an email to get your address!


This was so much fun and thank you again to all who entered!

Come back soon and I will share my crazy 3D printed kitchen farmhouse sink disaster story and how Vera's little kitchen came to be!


Be safe and well, my friends, and with an open mind and a loving heart we'll get through this. And maybe even be better people for it. 💗

xo xo,
Jodi