

With all those Geraniums ready to go, I only needed to make a couple other flowers to have what I needed to fill the flower boxes. I didn't want them to compete color wise with the house structure, but instead be a cohesive complement to it. So with all those pinky-peach Geraniums, I decided some nice off white Dahlias would be lovely. For these, I had Bonnie Lavish kits. I needed twenty of them, and luckily, had four kits - each kit makes six. The challenge was that petal sheets from two kits were a perfect off white, and two were white white. I was able to color the petals in my palest yellow ProMarker, Buttercup, then use the blending pen to wash out most of the color. I also brushed some alcohol ink onto the leaf sheets to give them more depth in color. They came out great!

To plant the boxes, I followed the recommendation for planting in pots from the SDK Kits. I also dipped each wire into glue before pushing into the air dry clay. The soil I used is Woodland Scenics Fine Turf Soil.

And here are the flower boxes all planted. I needed to keep the long box pretty low profile, since it will be placed across the back opening, separating the upper and lower floors. To the small flower boxes, I also added pale pink Daisies from Bonnie Lavish kits. I'll get some photos of them installed onto the cottage soon, but don't want to install them yet until I know I am ready to attach the house permanently on the landscape base.


With the flower boxes filled, it was easier to know how much more I'd need to make to fill the planters and pots for the rest of the garden. So next, I decided to tackle the tea blend planter. I don't necessarily have kits for all of the herbs and flowers that make good tea blends, so for these I'm going to have to attempt my own. One of the easiest looking flowers was Chamomile.

I thought I could create a reasonable facsimile using flower punches, yellow Floral Foam, Lycopodium, and floral wire.

I dipped the end of each wire into Fast Grab Tacky Glue to create a nice ball on the end, then let dry.

Once dry, I dipped in regular Elmer's School glue, then into the floral foam. I used my fingers to gently shape and press the foam into the glue, then let dry.


Meanwhile, I punched petals from plain white printer paper, and calyxes from some left over green colored silk paper.


Once the floral foam centers were dry, I assembled. Push one white petal up, almost touching the floral foam. Add a tiny dot of glue, then seat the petal against the floral foam. Do the same with the next petal, offsetting the petal from the first. Then add the green calyx. I also made a few stems without white petals to simulate flowers in earlier stages of growth. To these, I added and extra calyx petal.


For the leaves, I made a bundle of the flower stems, wrapped lycopodium around them and secured with a wire. I cut off the excess wire, squirted hot glue into a water bottle cap, inserted the bottom of the bundle and held there until the glue was cool and the flowers secured. Then I cut away the bottle cap.

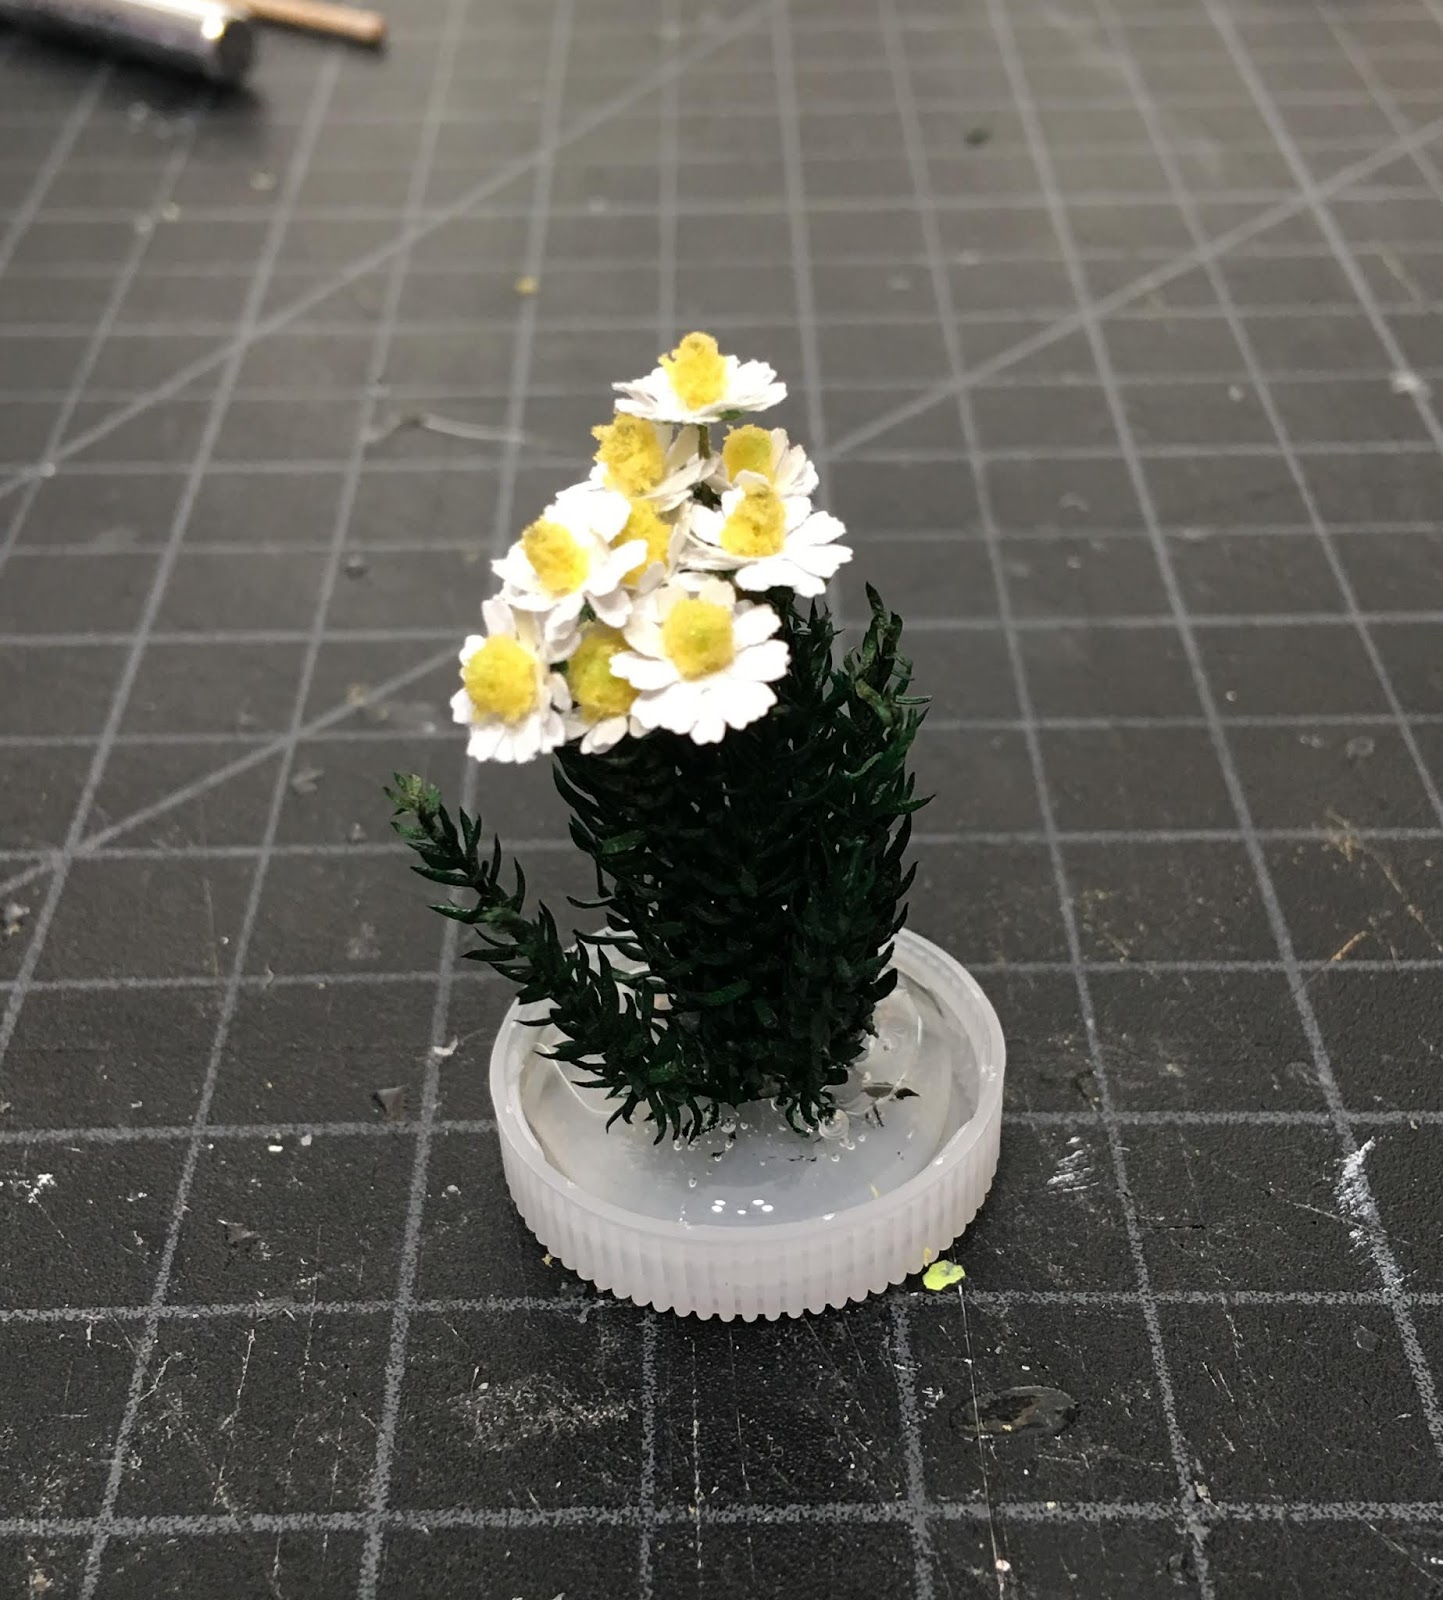

Then I just fluffed, shaped and arranged.


Back soon, I hope, with more tea and bee garden goodness!
xo xo,
Jodi
Wow Jodi! You amaze me. I want to be like you when I grow up. Everything is so beautiful.
ReplyDeleteAh jeeze, Thanks Carrie! But there's really nothing amazing in me. I just become possessed with a laser like focus when I have a goal in mind, and I really, really want to make a lovely garden for the cottage! It's a good thing that my mom decided to downsize and move to AZ, because I had all these kits from the flower shops I was planning then decided against making for us! And you already are just like me - absolutely mad for minis and willing to try everything to make your mini dreams come to life!
DeleteGorgeous. Now I'm getting more excited about miniature gardening!
ReplyDeleteThanks Sheila! I'm excited for your WC garden, too! It's going to be positively magical with all you've got planned! You're going to enjoy it very much!
DeleteThese are simply beautiful!!!
ReplyDeleteThanks Marion! I am happy that you like them! :O)
DeleteThe long box looks stunning and all your flowers are fantastic. I make little balls from yellow felt for the center of my daisies. It's good to know there are other ways.
ReplyDeleteHugs, Drora
Thanks Drora! Felt is such a great way to make Daisy centers! I don't have yellow felt, but I did get a bag of nine colors of floral foam for $1.00, so I am so happy it is coming in handy, finally! It's been fun to try and figure out ways to make what I have look like a real life flower - I'm working on a Bee Balm experiment now and will share what happens!
DeleteThank you, thank you, thank you. Jodi you are so generous in sharing how you do things. I cannot be happier, flowers are my favourite thing, so here I am again learning a lot from you. I am more sure than ever thah with all those fabulous flowers your garden will be gorgeous!
ReplyDeleteThank you, Alex, for being so generous with your kind comments and encouragement! It makes me so happy to share everything, especially things that may work for my mini friends! I hope you do find some useful nuggets, but your gardens are always already so wonderful!
DeleteYour planter boxxes are Very Romantic looking Jodi. I love the combination of colors you've chosen forthem and the flowers themselves are Incredibly Realistic! Since these are going to be elevated, perhaps a draping plant could squeeze in with them too?
ReplyDeleteBut I especially like your mini Camomile because I have some growing wild in my back yard along with some Feverfew. It looks just like your mini plant and when there is a lot of it, it emits a beautiful fragrance in the early summer. By the way, I've been busy pinning your tutorials and will be refering to all of them in the future- so Inspirational! ❤️
Thank you Elizabeth! I have debated on adding a couple trailing flowers and vines, but was afraid to go too far and regret it! I shall continue to mull the idea while they wait for permanent installation...
DeleteOh how I wish there was a way to capture and release the smell of a flower garden in miniature! I have never smelled a real Chamomile, but I'd sure love to! It sounds like your garden is FULL of great tea making plants, and I will look into the Feverfew! I am honored that you would use any of my experiments and take them to the next level!
¡Fantásticas! Parecen tener vida.
ReplyDeleteGracias Isabel! Los que tienen el follaje salvaje parecen ser más reales, y otros aún tienen un poco de caricaturas, ¡pero seguiré intentando capturar la magia!
DeleteThanks for a few minutes of fun and joy… it was great to watch the photos and your tutorial how you've made the chamomiles was so well explained and shown. They turned out awesome and I think no tea related planter could ever be complete without them. Your flower planters are so pretty and I'm really looking forward to see them in place.
ReplyDeleteHugs
Birgit
Thank you, Birgit! It makes me happy to hear than you enjoyed the post, and I hope you won't mind if there are a lot more to come! I still have soooo much to do in this garden! I wish I could stop time and be able to focus exclusively for the next few weeks, but life and responsibility keep calling!
DeleteYour plants are fantastic. Of them all, I love the chamomile best.
ReplyDeleteThanks Megan! I'm learning more and more as I go, especially that kits produce much better results than the homespun punch versions! :O) But sometimes, you just have to improvise!
DeleteThe Geraniums are striking! Wow all the flowers are so detailed, amazing that it's all from paper. Maybe for Christmas I'll have to put together a wishlist of flower punches :) Can't wait to see all these blooms outside the cottage.
ReplyDeleteI wonder if you are starting to get a Christmas or winter dollhouse itch? I often find it's hard to keep up a seasonal project when the weather changes. Soon you'll get to bring out your Gingerbread house!!
Hope you're having a great weekend!
Thanks Kristine! The Punch Bunch mini punches are the ones most in scale with 1:12, but aren't always an exact match to the petals and leaves of the real plants and flowers. So it depends on how finicky you want to be. Hanky Panky sells a wide variety of punches in better matched scale and detail, but they are expensive. If you're only making a small bed or a pot or two (or a vase), I recommend the kits, especially the SDK kits.
DeleteI am not planning any holiday builds or scenes this year, at all. The Sweet Christmas Cottage is on display year round, though I won't light it up until around our US Thanksgiving in November. I am not big on Halloween, but do have an autumn house in my future plans. I'd have to start it in January, though, to have it ready for fall! I think my next project is going to be the Brimble's Mercantile kit. If this cottage is ever finished! :O)
Hi Jodi! Clearly I have been gone longer than I thought... and you have a Green Thumb!!! Your garden is growing at a fantastic speed..... especially compared with my own mini plantings...! LOL! The kits you have been using are all looking great... and you have been adding those extra touches of detail that make them so much more realistic! And the chamomile you have made from scratch are lovely! Now I want some more soothing tea.... :)! I am amazed at the "organized" method you have of producing your garden... I tend to work in a one plant one at a time mode... no wonder I have nothing planted yet!!! I look forward to seeing how all the window boxes look on the cottage... I bet they up the "charm" factor by a huge amount... as if that is even possible with this adorable cottage! Keep up the great work... I am always learning something from watching you! :):)
ReplyDeleteHi Betsy! Thank you for the lovely praise! I have been working on the cottage exclusively for five months now, and was shocked to realize that the entire month of September has been dedicated to the hardscape and flower/plant making! At this rate, and with so many other things to make for the garden, I imagine October will be spent in the garden, too! You may not have all of your gardens finished, but those lilacs alone are going to be a spectacular feature that was so worth the time and dedication! Plus, you've been producing stories and finishing up challenging tasks on so many projects! Your productivity has been immense, too, you're just spreading the love!
DeleteI don't know much about the flower making and gardening stuff, but am learning a lot from trying and experimenting. I'll be happy to know if anything I share helps or inspires you in any meaningful way!
Hi, Jodi - You certainly have a mini green thumb! The planter boxes are beautiful;
ReplyDeleteall the flowers are so realistic, I expect to have fragrant scents wafting right out of my computer screen. I love the way you've created the chamomile flowers from scratch - what a great technique, and completely successful. You are such an inspiration; I can't wait to see more.
Marjorie
Thanks Marjorie! After attempting a few plants and flowers of my own interpretation, I have a whole new level of awe for Ilona! I might have tried harder, and made several more attempts if I were making a single plant or pot. But with soooo much still to do, the pressure is on. I am afraid that "good enough" has to be good enough for this cottage garden! I hope my efforts encourage everyone to try, though, because it's so much fun to see what we can make from paper!
DeleteYour flower are amazing!
ReplyDeleteThank you Fabiola! 💗
DeleteYour work is just lovely, all of it!
ReplyDeleteThank you, Carol! 💕
DeleteYour flowers are so pretty. I am anxious to see how your finished garden will look!
ReplyDeleteThanks De! Me too! I am longing to get things "planted" and see it all together!
DeleteSuch pretty, pretty flower boxes! Can you come do mine in real life, please? :-) Your method of doing chamomile was spot on, and the way you made it into an easily "plantable" clump is very clever!
ReplyDeleteThank you, Deb! But trust me, you don't want me going anywhere near your real flower boxes or garden! Real life gardening is not my forte. Just ask the dead burning bush I just had removed! If I have to remember to water it, feed it, trim it or in any way keep it alive (other than setting the sprinkler timer each summer), it will curse me and die!
DeleteHello Jodi,
ReplyDeleteYour flower boxes are just amazing. I really love the colors you chose. However, the star of this show are the chamomile. What a great job you did. the petals are perfect and I really like the centers. Once again, they are very realistic. thank you for all your tips and trick...especially on how you painted the flowers. You did a fantastic job and I am pretty sure I would go nuts making flowers.
Big hug
Giac
Thank you, Giac! I really thought I would go nuts with the monotony of the flower making, too. But surprisingly, having a goal and a commitment, it just made me more determined to get through them! I am happy to say, though, that I am nearly finished, and any flowers in my near future will be single planters or vases!
Delete