Search My Blog!

Use the Search box below to find keywords that you're looking for quickly and easily!

Search Feature

Showing posts sorted by date for query storybook cottage kitchen. Sort by relevance Show all posts

Thursday, August 31, 2023

Details, Details, Details...

Adding the trunkhouse to the Fairytale Treehouse project is like literally adding a whole additional household to the project! Roz needed lots of stuff. What I vaguely thought I had in my supply stash or that I could "borrow" from waiting projects (like the Storybook Cottage or Pound Cake) was vastly different from what I found there. You see, I stopped impulse buying in 2018 as a policy and only shop now for the things I REALLY want or REALLY need or DEFINITELY can't make. This discipline supports my goal for a worry free retirement.😜 And it forces me to excercise my creativity muscles. But it's not so good for the mini stash.  Luckily for me I had made an extra set of 3D printed kitchen stuff last fall. Those pieces provided almost everything Roz needed. What was also fortunate was that she was thrilled with the style and variety, and was totally excited that each piece could be custom painted in colors to suit her preferences. Hooray!

Some of last fall's unfinished 3D printed kitchen collection.

It wasn't long before I had things painted and she had an organization plan. Then we got busy loading the shelves. It turns out Roz and I make a pretty good team! What follows is a bit of a preview of our progress so far.

The three wall shelves below will live between the sink and the stove. They are perfect for food storage and daily essentials like dry good canisters, stacking mixing bowls and honey.


This floor shelf also lives between the stove and sink (under the wall shelves) and is perfect for storing everything Roz needs for baking up her delicious desserts. There is also a handy utensil crock and a pear shaped cookie jar which will always be filled with Rozario's favorite charcoal chip cookies. That's not a type-o! I did say charcoal chip. Like most dragons, he loves his cookies burnt! Here's another fun fact: According to Roz, only the most magically gifted cooks in this forest have stand mixers! Electricity magic is MIT Masters level magic, apparently. 😜 


Between the stove and the breakfast nook will be the wall shelf that holds pots, pans and casserole dishes. In spite of being a height challenged bear living in a tall person's world, Roz's special anatomy gives her an advantage. She simply flutters her wings, hovers in the air and grabs what she needs. Unfortunately, this often frightens new company. So, to keep everyone calm, she keeps a stool handy. When visitors come by she pretends to need it to reach high places like everybody else. 😜


Magically inclined or not, there's nothing more irritating when you're cooking than losing or dripping something in a hard to access crack. Having straight backed furniture in a round room would certainly increase those odds and could drive anybeary nuts!  So, for the back of the sink, I added a contoured Sonotube scrap so that it would seat right against the wall. Then I added a matching top so Roz would have a handy place to grow all her herbs and spices. Hopefully, eliminating the crack will prevent any "magic" words escaping from Roz's kitchen!


And while we're talking about the sink, I've been making and gathering a few essential items Roz needed there, too. An assortment of cleaning supplies will be handy underneath the sink. Something Roz always likes to have on hand are steel wool scrubbing pads. If your mini folks happen to need S.O.S. pads, too, I made a box printie and tutorial to share.


Above the sink and next to the window will be a small shelf for holding paper towels, a plant and a coffee grinder. Though there won't be much wall space left, Roz still wanted to hang a couple framed art pieces. She's become a big fan of the beautiful watercolors done by talented local gnomes.


Opposite the sink, across the viewer's opening, will be two more wall shelves. They will be installed one over the other. The lower shelf will store some of Roz's favorite cookbooks as well as her current collection of aprons on the pegs below. The upper shelf will store a vase of flowers, a coffee pot and a large beverage pitcher. These only come down for entertaining company. Her handy step stool will be stored right underneath for quick access. 😜


In a corner of the breakfast nook will live the open hutch. Here, Roz has places for all her dinnerware. She keeps her favorite Pothos plant next to her favorite photo (which was taken with Birgit's gorgeous purple and white pansies). Roz takes cuttings from the Pothos all the time, roots them in water and then gives them to all of her friends. You can see by how short the branches are now that she's made a lot of friends since moving here! Not to worry - both the Pothos and her friendships will grow wonderfully strong with time and attention.


This single shelf will live between the arched windows in the breakfast nook. It is home to her new sparkly purple tea set which she will use only for special occasions. Below it will be the photo of her, Rosey, Fluby and Rozario. Just look at how amazing these lovable characters are! Their creator must be a person who is wildly imaginative, brilliantly gifted and incredibly generous!


Roz also asked if I could provide her with a hanging system for drying her herbs and flowers. I was happy to accommodate that request! She makes all sorts of things with them from her own special tea blends to spice blends and medicine. She's a very knowledgeable Fairy Beary Godmother and we are all so lucky to have her with us!


Once dried and crushed, Roz will store her herbs in the tins of her new spice rack. She wants to keep it close to her cooking pot because she tastes and adjusts a lot when she's cooking. She loves to have a salt pig filled with her favorite sea salt and a garlic pot with roasted garlic handy, as well.


Believe it or not there is still so much more on our list to add! Rugs, kitchen towels, cleaning supplies, gadgets and more food! And when all that is done Roz will need to bake special treats for the kitchen's christening party! Details, details, details! And that is why, my friends, the big kitchen reveal will have to wait until next time. Hope to see you then!

xo xo,

Jodi

Thursday, August 4, 2022

My Recipe For A Kitchen

Just last week I had no idea what I was going to cook up with this kitchen. But once I got out the Grand Hotel paper pack to assign the patterns and colors to each of the remaining rooms in the Willowcrest, my design choices for the kitchen came cascading into my mind. I liked them so much, I began to salivate! This is definitely not the paper I ever thought I'd be using in the kitchen, but sometimes, it's fun to fix something new!

Before I could really get going on anything, I needed to finalize my cabinet and appliance layout. Those would dictate every other thing I did in this compact room. I got out the ruler and graph paper to measure exactly how many inches I had to work with, then took them over to Design Space to design the cabinets. In cooking, it's what you call mise en plase. And I really like it when me is in place! I seem to be making a habit of using chipboard cabinetry in my kitchens, but I enjoy making them so much! Maybe one day, I will have a laser cutter and then I can switch to wood. :O)

It takes a lot of pieces even for a small kitchen!

The appliances were an easy choice - I had them leftover from when I did the Storybook Cottage's kitchen. They weren't the right ingredients for that project, so I put them on ice. They seem to have been meant for the Willowcrest! Both Russ and I liked the apricot color, and I thought for a moment about going with a peach themed kitchen. But the pretty rose vine wallpaper convinced me to repaint the appliances.

Once the plain lower boxes proved a good fit, the upper cabinets
could proceed. I used every bit of available wall space.

The wallpaper provided me with all the accent colors, and the appliances provided me with the era. Now we were cooking! With those ingredients sorted, our recipe was developing. It turns out that our second empire home will be stuck for all time in the early 1940's. Our brave homeowner finds herself unexpectedly alone and needing to find ways to be self reliant. When your man is away fighting evil in the war, you gotta do what you gotta do to keep the home fires burning. Our lovely home will become somewhat of a boarding house, with the entire attic space "to let". 

The accent colors came from the wallpaper using the
 closest acrylic paints I had on hand.

In this concoction, the kitchen has been recently updated. It has the feel of both 30's and 40's kitchens with design elements such as raised panel cabinets and a "porcelain enameled" sink. Luckily, in the 21st century, we can rustle up tiny "porcelain enameled" sinks with our 3D printers!

The cabinet hardware, cabinet feet and the appliances are painted Barn Red to match the darkest rose buds in the wallpaper. I can almost hear the music from that era playing on the kitchen radio, and almost smell the home cookin'.

The cabinets have their doors, pulls and feet installed.

For now, the upper cabinet rests on top of the stove rack.
It'll be hung up higher on the wall.

Once I added the above fridge cabinet to the recipe, it made the fridge seem
perfectly at home between the two doorways. 
Kitchens from this era were not as "fit out" as they are today.

Once you add details like crown molding, lace shelf edging,
painted handles and feet, the chipboard cabinets really come alive!

The sink really has the right flavor profile for this kitchen. Here's a look after lots of sanding and glossy finish applied. If you were really determined, you could spend a long time sanding to make PLA look like real porcelain. The holes have been drilled for the taps and faucet, but the drain is part of the 3D printing process.


I made a wee strainer for the drain. It may be only 5/16" round, but it gives off big flavor!


And it fits perfectly into the drain, flush with the drain ring. I wish I'd had regular bronze paint instead of a paint pen so I could have gotten the whole thing painted. The paint marker's tip is too wide to get in there! Ah well... It still looks cute.


To make the faucet, I used a screw-base cup holder in "brass" as the spout, then a "brass" earring back as the aerator/nozzle. Gem Tac works great for gluing these tiny metal parts. It's a strong hold, plus you can clean it up after it has dried because it is like rubber cement (but with no odor). Sometimes your junk drawers have just the right ingredients.


For the taps, I had straight pins, spacer beads and earring backs on hand. They look great in retro kitchens!


This photo is taken with everything in dry fit to make sure it all works together. Each piece is just set in and on, so you have to ignore the crooked and just notice the "feel". It's only a taste test.

Countertops and backsplash are just set on for now.
Sink is not fully seated into it's holes in the counter or countertop.

I love how the sink looks with the beam of sunset light shining on it! So "film noir"! 


Here you can see a better visual of why I wanted to have a tall apron on the window, and why I needed to raise the window up a bit. The sink fits here perfectly, now.


For 1940's era countertops, I had my choice of tile, marble or Formica. I used illustration art board as the base, then made various shades of Moss Green to create a look that can be either marble or Formica. Just a dash of this and a dash of that and viola! Soup! I gave it metal edging in a color that matches the faucets, because 40's kitchens craved their metal edging.


It was imperative to have all of the cabinets in place so that I could make an accurate template for the tile floor. I painted more illustration art board in green and beige, then cut 3/4" square tiles. I am laying them on the diagonal, alternating colors in the field. For the border, I will use Barn Red tiles in some way. 

But that is for dessert, my friends! I bid you Bon appétit and I'll see you next week! I hope you enjoyed my recipe for a kitchen!

xo xo,
Jodi

Thursday, August 26, 2021

Contemplating Kitchen Styles

It's always a fun decision process for me when it comes to my mini kitchens. I generally begin with deciding what type and period of appliances I want to utilize in order to emphasize the style of the project. Naturally, different builds call for different looks, different methods, different kits and many "made by me" challenges. I have spent a lot of time reflecting throughout the Beachside Bungalow project about what style of kitchen I wanted, and that has lead me to revisiting decisions I made about many of my past kitchens...

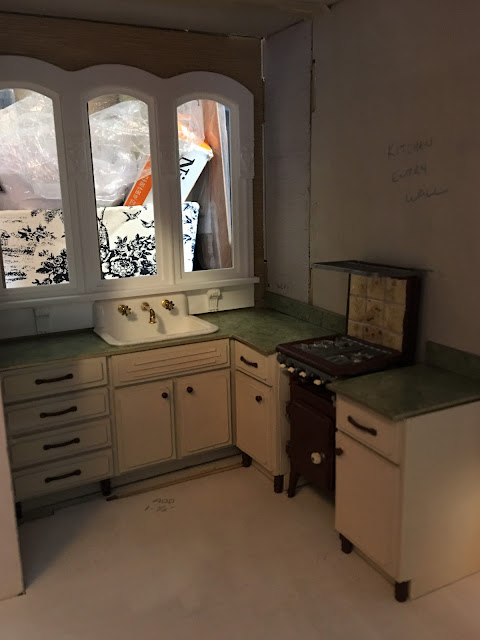
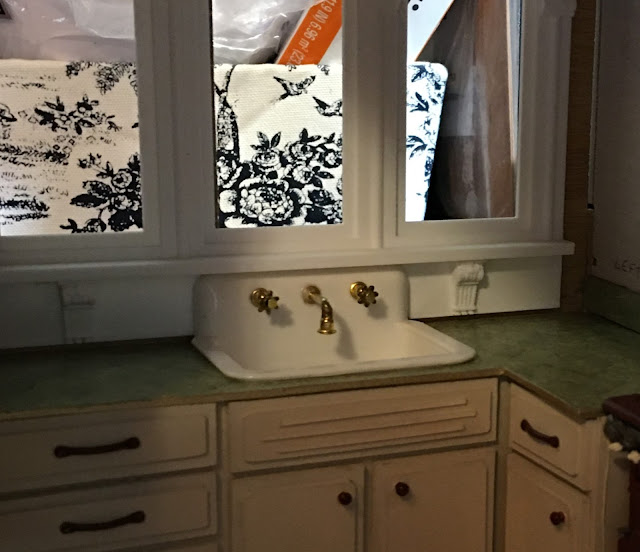
A cutsie cottage style kitchen seemed to fit the bill for the Storybook Cottage. Here, I made the cabinets from chipboard and assembled/finished kits for the stove and fridge from Phoenix Models. That was an odyssey to get them assembled and painted. I did it twice! But I truly LOVE the end result. Who wouldn't want pink appliances in their cottage kitchen?!? The sink was a Reuter Porcelain free standing that I took apart and built into the cabinets.


Cutsie was also the style for the Lisa's Country Cottage kits in which the mice, Vera and Virgil, reside. Their ovens and cabinets were created in Design Space and cut with the Cricut Maker. The sinks were created in Tinkercad and printed on my 3D printer. The stovetops were Houseworks kits I had in my stash for years. Here, simplicity was called for, and I wanted kitchens that you'd expect to see if you were reading a bedtime storybook about Vera and Virgil to your grandkids. Seeing these photos makes me excited again to decorate them!

Vera's Kitchen

Virgil's Kitchen

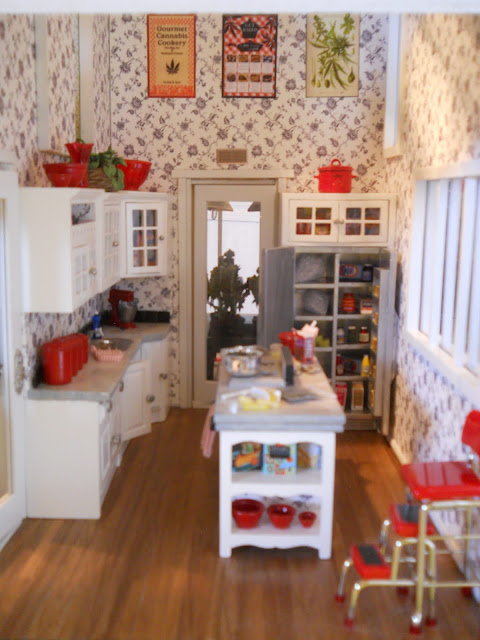
Sometimes it's fun to take a kit and make it your own. I reconfigured a Realife Miniatures Kitchen kit to create a country retro look in the Real Good Toys Barn Bash. I love these types of projects because perfectionism can be put aside for fun and frivolity! The crooked little stools were made from take out chop sticks.


In The Three Pigs build I delved into the Tudor style. Here, an open fire oven and hearth made perfect sense. Indoor plumbing by way of a Chrysnbon sink kit was an added luxury for the time. But who could deny these happy little fellows anything? With The Big Bad Wolf stuffed and hanging above the mantle, they are able to fully enjoy the first peace they've had for a long, long, time! The hearth was my first venture into foam core and egg carton bricks. Making it was so much fun, it added fuel to my mini fire!


There were also a few modern kitchens along the way, like the one in the New Orleans Kit. The cabinets were Elf Miniatures kits I purchased in 2016 for the Beachside Bungalow. When that project kept being put farther back in the queue, I was inspired to use the cabinets here. While I'd love to have a kitchen like this in real life, building this dollhouse kitchen was also a dream come true!


Alki Point was my first venture into 3D designing and printing back in 2015. Back then, I had to design something in Tinkercad, upload it to Shapeways, order and pay for it, wait for shipping and then hope the piece came out great. If not, I had to tweak the design, re-upload, reorder, pay for shipping again and hope the second time was the charm. It was expensive to keep trying until I got it right.... All the white pieces in this kitchen were my first designs, including the sink. I have come a long way since those early days, and am so grateful to have a 3D printer at home now! The design to printed prototype process can be counted in days now instead of weeks!


My latest attempt at a modern style is Natasha's Kitchen. I had kits for the ovens and dishwasher from Elf, but the sink, gas cooktop and wine cooler were my own design and build. I printed the sink and cooktop pieces on the 3D printer, created the cabinets and housing with the Maker, and cut my own aluminum. It was very exciting to know that, if very careful, I can make my own! Natasha and I are still eagerly waiting for our opportunity to set it up with all it's décor. A summer virus has her sidelined, but we're grateful that the Covid test came back negative!


The Sweet Christmas Cottage was meant to be a 40's era confectioners paradise! I combined opened barewood Dollshouse Emporium shelves with a Jane Harrop Sink Kit so that every Christmas themed food and treat could be seen and appreciated. There was even a gingerbread house decoration station with all of the candy decorations in glass jars. This was as whimsical a house as I could come up with, down to the paperclay cookie roofing shingles. The thrill of looking at every tiny thing in this house never wanes. This one still takes me the longest, for all the time I sit and daydream, while dusting.


CannaBliss, done back in 2012-2013, was one of the first mini projects I embarked on after my long hiatus from the hobby. I think I ordered every item from the HBS/miniatures.com catalog for this kitchen! Never one to leave well enough alone, I added wallpaper to the drawers and cabinets, "glass" to the cupboard doors, and painted the appliances with the best silver paint they had at the time. I also covered the countertops in "marble" paper, applying it with Mod Podge. Boy I've come a long way since those early days! Knowing what is possible and not being afraid to try (and fail) is the key! I guess I'd call this style contemporary. This project was dismantled and sold a few years ago to make room for new dreams.


So what am I trying to achieve with the Beachside Bungalow's kitchen? Referring to the broad story for the era and occupant, I see the house in current times. Being built in the 1940's, the house has received small renovations and improvements through the years, but kept it's simple character. I see a kitchen that you'd commonly see in any American neighborhood today. It should be clean and contemporary, simple, not dated but definitely not top of the line. Great meals can be prepared here, but it's not going to make the cover of any design magazine. It's efficient and open to the great room because time with friends is Kairi's top priority in life. She is an artist, after all, and though she inherited the house from her great aunt, she just doesn't have the budget for swanky.

Doing something fresh, new and a little challenging is always an exciting goal for me, too. When I got out the graph paper to begin putting ideas down, here's what I came up with...

Right wall with side by side fridge (old MBS kit in my stash), drawer units, gas stove
with microwave overhead, a combination of closed and open cupboards above.

Island with sink and dishwasher, drawers and under sink cabinet.
Countertop overhang on the opposite side to provide eating surface for meals.

With all of this in mind, I'll be designing the appliances to print 3D, and the cabinets to cut with the Maker. The appliances will be standard white with a few fun details, and the cabinets will be painted. I imagine if you stripped them, there would be several layers of color from over the years. Even though the style is simple, designing the parts and pieces that make up the appliances is going to be a big challenge. It's also a great opportunity for me to dive a bit deeper into my Qidi XOne2's capabilities (and my own).

Sneak peek stove/oven design.

Sneak peek prototype.

This will be a big endeavor with lots to print! With luck, I'll be back next week with progress to report! And hopefully, with some tips to share for those of you considering taking the plunge into the world of 3D printing.

Have an inspired and creative week, my friends!

xo xo,
Jodi

P.S. This week I wanted to share a link to a new blog started by a longtime Blogger mini community member, Marilyn O. (burygardeners). It's called Mini-Epilogue, as this is Marilyn's last mini endeavor. Her most recent big project, Dalton House, was dismantled and sold to become someone else's dream come true. Marilyn kept the furnishings and fixtures from six of her favorite rooms, and will reassemble each of them into room boxes. It's going to be a great adventure, and so apropos for all of us facing the inevitable downsizing of our collections. Just think: If you had to give up 90% of your collection, what would you keep and how would you display it? Marilyn has come up with a great solution!

She's had several blogs over the years, and even had a YouTube channel for a time where she shared her amazing knowledge with the mini community! If you click on her profile, this is the amazing body of work you'll see:


I hope you'll treat yourself to to Marilyn's work, and that you'll Follow Mini-Epilogue!