Search My Blog!

Use the Search box below to find keywords that you're looking for quickly and easily!

Search Feature

Showing posts sorted by date for query flowers. Sort by relevance Show all posts

Thursday, October 5, 2023

For The Boys...

While this Fairytale Treehouse Project is full of what is traditionally thought of as "feminine" aspects like flowers and frills, I didn't want to forget that there are a couple strong masculine personalities living here who bring just as much joy to the story. Wayne and Rozario, having strong opinions on their own design aesthetics, gave me plenty of ideas about what kind of beds they wanted to spend their nights in. This week's focus was for the boys. 

I first consulted with Rozario to give him a bunch of options for bed styles. He, being a beloved pet, wanted a pet bed. But not just any old fabric covered floor cushion. No. His bed had to befit a creature as special as he is. After all, you don't see pet dragons every day! I jotted down things that were important to him (comfort, grandeur, outdoor elements and, because of his limited bedroom nook's size, storage), then got to work in Design Space.


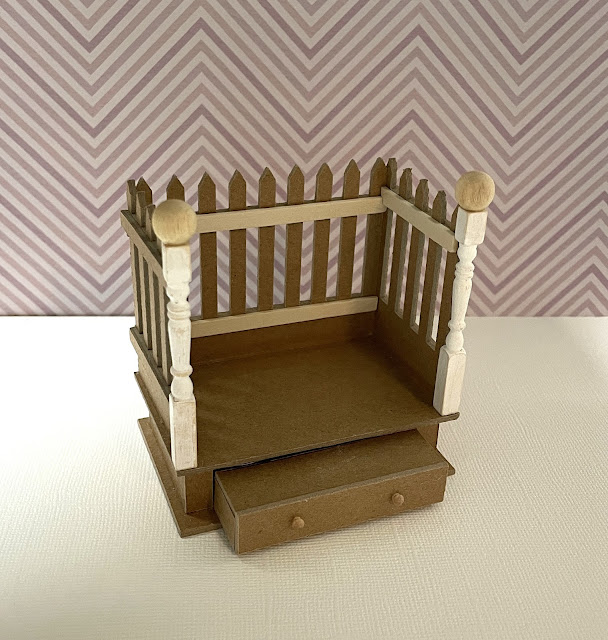
Rozario thought it would be really fun to pretend he was sleeping in the yard every night like a lot of dogs get to do. But he didn't want a dog house. A roof that is too close to his head can be dangerous, as he sometimes breathes a little fire when he snores. He discovered that the hard way, long story. He said a yard would have a fence, so he wanted some kind of fenced in feeling. His wish was my command! I created a three sided fence atop a princely platform.


In order to make it easier for Rosario's tiny legs to climb into bed, I made a pull out step drawer.


And included a storage cubby in the back of the drawer so he can store some of his favorite toys. I also added a couple fancy fence posts to the opening. He can pretend that he is guarded by powerfully magic staffs as he drifts off to sleep each night. 


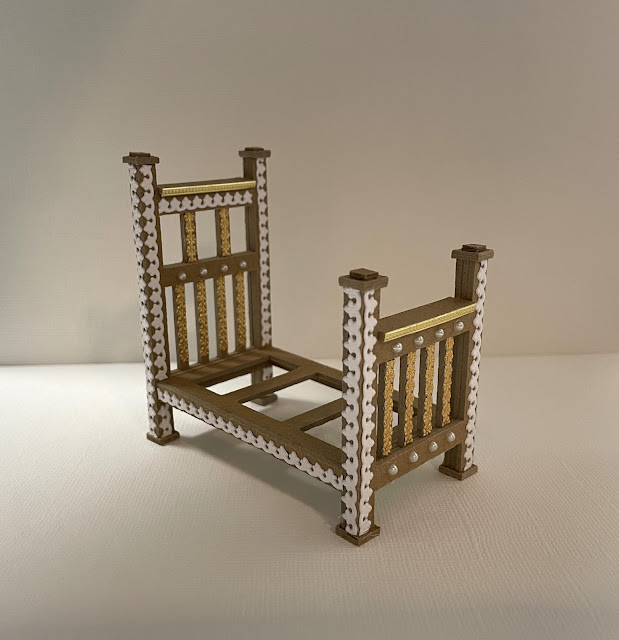
While I was busy on Rozario's bed, Wayne popped in to share his ideas. He's a busy guy so I gave him my full attention. Wayne told me his wishes were pretty simple: he's a craftsman, so he wanted Craftsman styled furniture but with a Tudor twist. And he'd love a comfortable mattress and bedding. Wow! I love a guy who knows what he wants! 

Designing Wayne's bed in Design Space was fun, especially since this was my very first piece of furniture in true half scale. It is so adorably tiny, but at just 2", so is Wayne!


His bed is pretty simple: a three layered headboard, a three layered footboard and a simple mattress support piece to bridge them together. I couldn't resist including a few fun trim accents to the posts, which Wayne really appreciated. The assembled bed measures just 2" W x 3-1/2" L x 3-3/8" H.


Before I could begin to accentuate the beds with paint and detail, the boys needed mattresses. They got the same cushy models as the girls, only their ticking is a dark purple stripe with no hearts or flowers. Way more masculine! Rozario needs just slightly less sleeping room.


With that done I could get to the fun parts! I added many "carvings" to Wayne's bed to make the simple craftsman design feel more Tudor-like, as requested.


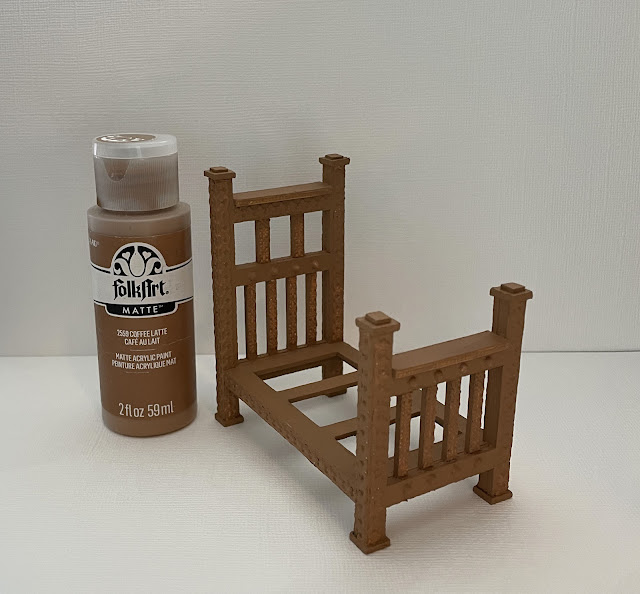
Then gave it a base coat of Coffee Latte.


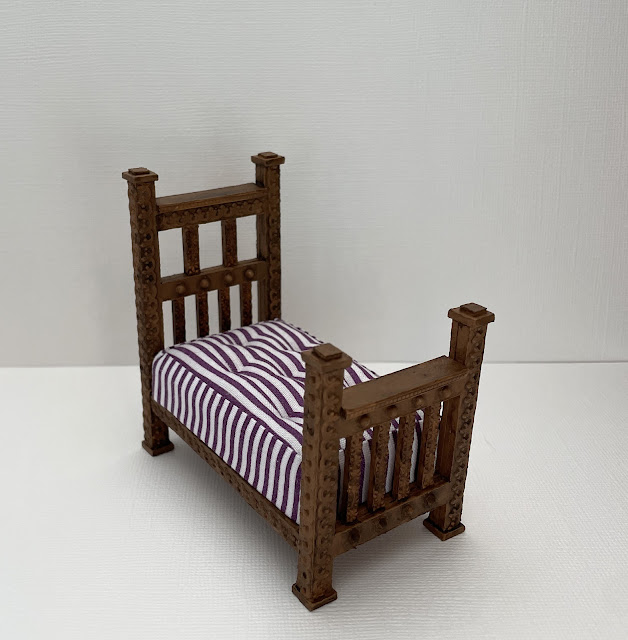
Then a glaze coat with a darker chocolate color. Wayne loves his wood fairly unadulterated.


And with the mattress...


Let's see what Wayne thinks... Hooray! He approves! And with all the work he's got on his plate, he really appreciated my help.


But he said the ultimate test required him to take a nap. He'll get back to us shortly...


Rozario's bed needed a base coat of white.


After a little sanding of the rough spots, I gave it a base coat of Purple Cow followed by a couple coats of Amethyst metallic paint. Some areas were highlighted in Emperor's Gold paint, then I added metallic domes and Dresden trims, leaving them gold. Now it's fit for royalty!


 And with the mattress and the drawer step deployed.


But the final test was to present it to Rozario. He seemed thrilled, but it was hard to tell.


Because once I showed Rozario how the drawer worked and he saw the toys, the consultation abruptly ended. Time to play!


I am so happy that the beds for the boys were a success! And don't worry! I haven't abandoned the girls' and Roz's beds. It's just that for the sake of organization it seemed more efficient to get everyone's actual beds completed before I drug out the sewing machine to make all the bedding for everyone. Me + Sewing = Knots In My Stomach so any sewing project is always preceded by a little avoidance and/or procrastination. But, I'm determined to become a decent seamstress, one day, so off I go... Wish me luck! 

Back next week with, hopefully, something resembling bedding for everyone!!!

xo xo,

Jodi

Thursday, September 14, 2023

Some Finishing Touches For Roz's Kitchen

There were a few things to finish up before Roz could invite the whole treehouse gang over to have the first celebration in her kitchen. I had to wait for my liquid hairspray to arrive so that I could pin and spray the aprons into a "natural looking hang" when placed on the pegs of the shelf. I learned the liquid hairspray trick many years ago from the amazingly creative Casey of Casey's Minis. She's got a wealth of knowledge from her decades making minis, and though she rarely posts these days, she is still often thought of and appreciated!


And finally this last shelf for the kitchen can be checked off the list!


If you remember from the chair cushion tutorial, I still needed to finish up the ties for the chairs. I was able to adapt the bow making video from Heather at My Mini Front Porch for my 1/8" ribbon. I added them to the cushion ties (all 16 of them) and I really like the "fairytale" look this gives to the chairs. Roz's chairs all match the one on the right and the other two are Goldie's.


Once the chairs were finished I made a runner and a vase of flowers for the table. It is ready to be set now with all the goodies for the party. 


Roz and I went back and forth on whether or not she wanted curtains of any kind. She didn't want to block the light or interfere with her herb pots in the kitchen window, but she does really love how a nice café curtain adds to the décor. So, the compromise was to add a floral swag valance above the half round windows in the breakfast nook. It won't block the light but still adds the charm she loves so much. 


Just a side note here for anyone building a trunkhouse with an addition in the back with no access except through the main room's opening... Decorate the room before you attach it! Holy buckets it is nearly impossible to reach in there and if you can manage that you'll have to guess where to put things because you can't see past your own arm!!! I hope the valences are fairly straight and close to where they are supposed to be because there are no do-overs!

Sneak peek - still needs touch-ups.

The final, final touch was preparing all the food for the party. Roz asked me to help because she wanted the treehouse gang to be surprised. Believe me - I warned Roz that my worst skill in life (besides sewing) is cooking/baking. Oh, I make a few good things, but they're limited because I really prefer anything else to being in the kitchen. Unless I am cooking with company. Then it's fun. I told Roz since we were doing it together I would be her sous chef.

No matter what the fairytale is, there always has to be a little reality behind the "magic". I got out all my food making stuff (a lot of it acquired and never used when I was planning Pound Cake) to see what I might be able to learn to make quickly. I had some molds and some Hearty air dry clay. I mixed a little dough color into the clay, brushed the molds with cornstarch and made a few loaves of French bread, some tart crusts and some crackers. 


To add the fresh baked look I brushed on some Tamiya Baking Master chalk.


I filled the tart crusts with lemon and strawberry slices and "cherries" (no hole beads). I made the appropriate color sauces using UV resin and artists chalk. They came out pretty good.


I wanted to make a few cakes, too. The more I made the greater the odds at least one would come out well enough to use. I had a bunch of 3/4" round chipboard circles left over from some project or another, so I stacked them into "layer cakes". Half would be base painted "chocolate cake" and half "white cake". I found that by drilling holes and adding toothpick handles, I could do a better job decorating them. Spinning them to paint on the "frosting" was genius!


You can see in the background a bunch of Bundt cakes, too. They were leftover from the last time I experimented using molds and air dry clay to make food. Three are "chocolate" and two are "vanilla/lemon". This was beginning to make me very hungry! 


All the chocolate cakes got a layer of "frosting" - Mod Podge mixed with a little "chocolate" paint made a lovely ganache. One got "nut sprinkles" added to the sides. I think I got the nuts on Etsy but a lot of my dessert making supplies came from Stewarts Dollhouse Creations during the planning of the bakery project.

I was trying to put the nuts on just the sides of a white cake, too, but wasn't careful and got it on the top. That left me no choice but to cover the whole thing with nuts. Then you could still see the white frosting under them so my fix was to paint "chocolate" over it. Now it's a Nestle Crunch cake. Sounds delicious, right?!? See? Good thing I made extras for accidents!

I had roses from Stewarts, a pineapple cane, Tamiya Deco SaucesSugar Sprinkles and 3/8" wooden furniture plugs that I made simple cupcakes from. The hardest part was deciding how to use my ingredients to decorate each one and then being brave enough to try. I'd say they came out pretty well and after I pick some things for Roz I'll have a good start on the bakery's displays.


Speaking of displays... back when I was planning the bakery I bought some things to experiment making cake stands. I thought gluing plates on top of vases from Natty Collection on Etsy would make unique cake stands. I really like the way they turned out.


I had cabuchon settings and various metal bead caps and spacers to try out, too. Since Pound Cake has a black-white-gray color theme, I painted them all black.


And here's what I ended up with, though Roz's party preparations are still not finished!


Hopefully, and with some focused effort, Roz's kitchen and her party will be ready to share with you next week! 🤞🙏👷‍♀️

I'm going to go take a nap now! 😜

xo xo,

Jodi


Thursday, August 31, 2023

Details, Details, Details...

Adding the trunkhouse to the Fairytale Treehouse project is like literally adding a whole additional household to the project! Roz needed lots of stuff. What I vaguely thought I had in my supply stash or that I could "borrow" from waiting projects (like the Storybook Cottage or Pound Cake) was vastly different from what I found there. You see, I stopped impulse buying in 2018 as a policy and only shop now for the things I REALLY want or REALLY need or DEFINITELY can't make. This discipline supports my goal for a worry free retirement.😜 And it forces me to excercise my creativity muscles. But it's not so good for the mini stash.  Luckily for me I had made an extra set of 3D printed kitchen stuff last fall. Those pieces provided almost everything Roz needed. What was also fortunate was that she was thrilled with the style and variety, and was totally excited that each piece could be custom painted in colors to suit her preferences. Hooray!

Some of last fall's unfinished 3D printed kitchen collection.

It wasn't long before I had things painted and she had an organization plan. Then we got busy loading the shelves. It turns out Roz and I make a pretty good team! What follows is a bit of a preview of our progress so far.

The three wall shelves below will live between the sink and the stove. They are perfect for food storage and daily essentials like dry good canisters, stacking mixing bowls and honey.


This floor shelf also lives between the stove and sink (under the wall shelves) and is perfect for storing everything Roz needs for baking up her delicious desserts. There is also a handy utensil crock and a pear shaped cookie jar which will always be filled with Rozario's favorite charcoal chip cookies. That's not a type-o! I did say charcoal chip. Like most dragons, he loves his cookies burnt! Here's another fun fact: According to Roz, only the most magically gifted cooks in this forest have stand mixers! Electricity magic is MIT Masters level magic, apparently. 😜 


Between the stove and the breakfast nook will be the wall shelf that holds pots, pans and casserole dishes. In spite of being a height challenged bear living in a tall person's world, Roz's special anatomy gives her an advantage. She simply flutters her wings, hovers in the air and grabs what she needs. Unfortunately, this often frightens new company. So, to keep everyone calm, she keeps a stool handy. When visitors come by she pretends to need it to reach high places like everybody else. 😜


Magically inclined or not, there's nothing more irritating when you're cooking than losing or dripping something in a hard to access crack. Having straight backed furniture in a round room would certainly increase those odds and could drive anybeary nuts!  So, for the back of the sink, I added a contoured Sonotube scrap so that it would seat right against the wall. Then I added a matching top so Roz would have a handy place to grow all her herbs and spices. Hopefully, eliminating the crack will prevent any "magic" words escaping from Roz's kitchen!


And while we're talking about the sink, I've been making and gathering a few essential items Roz needed there, too. An assortment of cleaning supplies will be handy underneath the sink. Something Roz always likes to have on hand are steel wool scrubbing pads. If your mini folks happen to need S.O.S. pads, too, I made a box printie and tutorial to share.


Above the sink and next to the window will be a small shelf for holding paper towels, a plant and a coffee grinder. Though there won't be much wall space left, Roz still wanted to hang a couple framed art pieces. She's become a big fan of the beautiful watercolors done by talented local gnomes.


Opposite the sink, across the viewer's opening, will be two more wall shelves. They will be installed one over the other. The lower shelf will store some of Roz's favorite cookbooks as well as her current collection of aprons on the pegs below. The upper shelf will store a vase of flowers, a coffee pot and a large beverage pitcher. These only come down for entertaining company. Her handy step stool will be stored right underneath for quick access. 😜


In a corner of the breakfast nook will live the open hutch. Here, Roz has places for all her dinnerware. She keeps her favorite Pothos plant next to her favorite photo (which was taken with Birgit's gorgeous purple and white pansies). Roz takes cuttings from the Pothos all the time, roots them in water and then gives them to all of her friends. You can see by how short the branches are now that she's made a lot of friends since moving here! Not to worry - both the Pothos and her friendships will grow wonderfully strong with time and attention.


This single shelf will live between the arched windows in the breakfast nook. It is home to her new sparkly purple tea set which she will use only for special occasions. Below it will be the photo of her, Rosey, Fluby and Rozario. Just look at how amazing these lovable characters are! Their creator must be a person who is wildly imaginative, brilliantly gifted and incredibly generous!


Roz also asked if I could provide her with a hanging system for drying her herbs and flowers. I was happy to accommodate that request! She makes all sorts of things with them from her own special tea blends to spice blends and medicine. She's a very knowledgeable Fairy Beary Godmother and we are all so lucky to have her with us!


Once dried and crushed, Roz will store her herbs in the tins of her new spice rack. She wants to keep it close to her cooking pot because she tastes and adjusts a lot when she's cooking. She loves to have a salt pig filled with her favorite sea salt and a garlic pot with roasted garlic handy, as well.


Believe it or not there is still so much more on our list to add! Rugs, kitchen towels, cleaning supplies, gadgets and more food! And when all that is done Roz will need to bake special treats for the kitchen's christening party! Details, details, details! And that is why, my friends, the big kitchen reveal will have to wait until next time. Hope to see you then!

xo xo,

Jodi