Search My Blog!

Use the Search box below to find keywords that you're looking for quickly and easily!

Search Feature

Thursday, August 17, 2023

If You Can't Stand The Heat...

Don't work on the kitchen!!!

Hi Guys! What a week! Summer always seems to pull me away from minis, but add heat to the equation (anything over 85 degrees), and my productivity plummets! If I am plopped right in front of several fans I can reasonably cope. But when temps get to a certain point there's just no relief from the heat. Call it my reasonor if you prefer, my excuse, but due to an increasingly common (and unwelcome) PNW heat wave, I have little kitchen progress to share. I do have a few good things started, though!


At my desk with 3 fans blowing in the room.
That's 36 Celsius, my friends. 
At 12:34 AM Wednesday, it was still 88!

I did try to tackle some items. The first thing Roz's kitchen needed were groceries. I had Grocery can blanks to make labels for, so I decided to make a few other common food labels/packages, as well. Some products I already had perfect digital images for and only had to resize them. Some labels were readily available with Google searches. And some things I totally made up on my own. Fairy Beary Godmothers should use products like "Nice Flour", "Sweet's Sugar" and "Friendship Coffee", don't you think? 


And I know Rozario, like every growing dragon, loves to eat his Chari-O's for breakfast! 


It's easy to measure for how large to make a label when your grocery item is a box, but what about making a label for a dowel or canned goods? If you're lacking a bendable ruler with enough small increments, it's a challenge. Luckily, we live in modern times when Google makes it almost like cheating! Finding out how long to make a label for a simple oatmeal container, for example (and all your cans), is only a few keystrokes away. The number you need is is the Circumference. If you're like me, it's been a LONG TIME since you had to remember that factoid! 🤯

First, you'll need to find the Diameter of your dowel. Measure across the widest part of the circle. Or to find the Radius, measure half of the circle (the results will be the same). Enter the Diameter (or Radius) into the circumference calculator and you will know the Circumference (the minimum length in inches you need to wrap a label completely around the dowel).

In my case, for my Rolled Oats canister, my dowel is 5/8" or a .625 Diameter or a .3125 Radius for a Circumference of 1.9635 inches. That means if I make my label around 2" long, it will leave just a little extra to overlap. 


Thanks Google! That was easy!


I also wanted to include a few glass canning jars and some honey. Polymer clay canes, alcohol ink and UV resin made quick work of this task! 

Last fall I made 3D printed egg cartons and little separate eggs to go inside them. It was fun to finally use them, though the "brown" I mixed up for my eggs needs a little more adjusting. Next time Tasha brings me her farm fresh eggs, I'll use it for reference and keep notes!


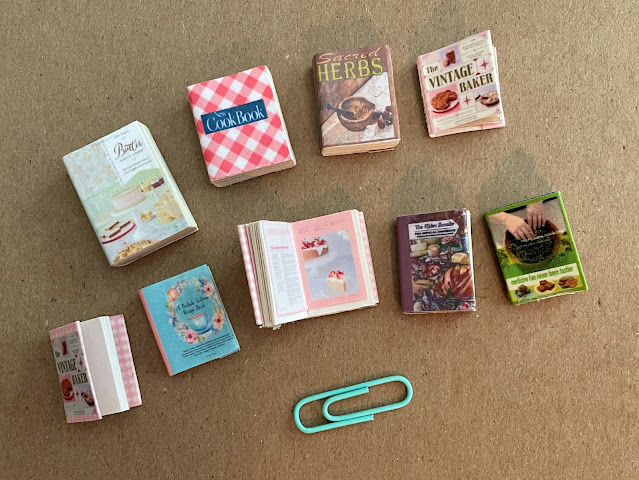
I worked on some cookbooks for one of Roz's shelves. Some will open and some are "just for looks". Though she could totally whip up a delicious meal with just her wand, she actually enjoys the whole cooking process! 


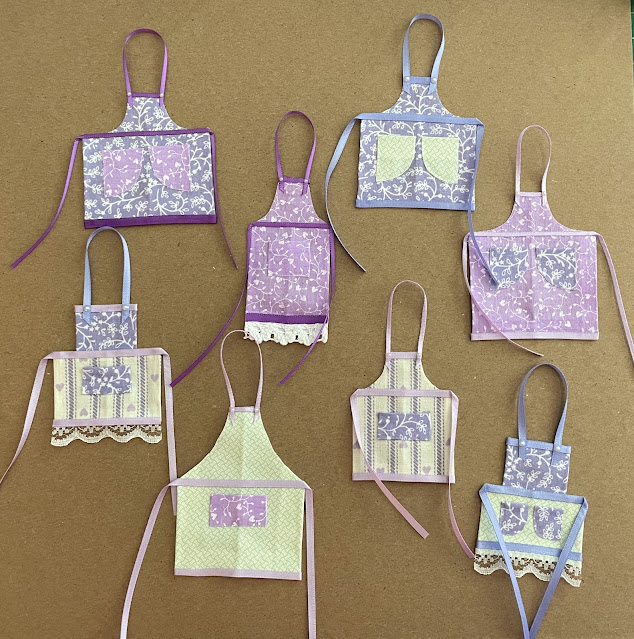
I made a ton of aprons (actually, only 8 😊), figuring I might as well do some for Goldie while I had all the stuff pulled out. I still need to make them hang in a natural looking way on their hooks (they're not for Flat Stanley, after all!), and to add the bows to the ties. But they're just as cute as I'd hoped for! At some point Roz and Goldie will have to have a fitting, too.


One very special thing I worked on will be a surprise for Roz. Shhhhh! Don't tell! She misses the old gang back in Germany so much! She'll be delighted when she sees this framed photo of her, Rozario, Fluby and Rosey taken by Birgit just before she set sail (or wing?) for America! It will be hung so that she can see her dear friends as she starts each day at the breakfast table. There will be lots more "family photos" in various places throughout the trunkhouse, too.

Fluby, left. Roz, center. Rosey, right. Rozario, front.

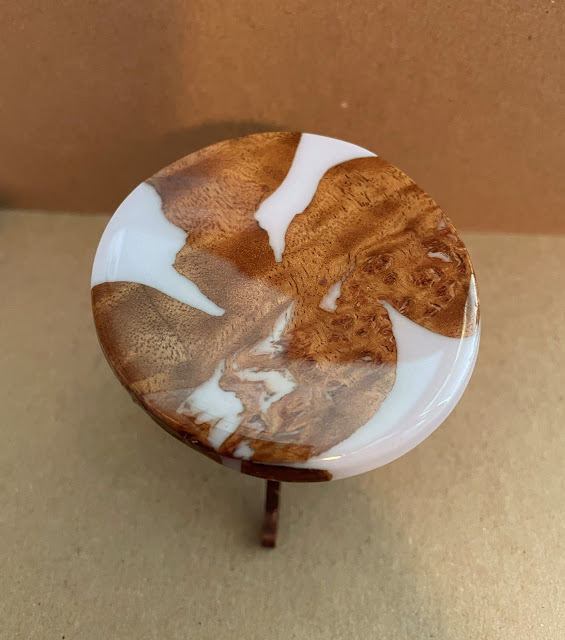
You all know by now how much joy I get from minis, but the most unexpected and precious thing I have received from being involved in this passion is the opportunity to meet and connect with so many kindred spirits! It is because of Birgit's kindness in creating Roz for me that I get to work on this wonderful trunkhouse. And because of the trunkhouse, I have received another amazing gesture of kindness from a longtime reader and friend, Sharon. You see, Sharon's talented husband and son made a gorgeous epoxy river table for their family game room. When Sharon saw it she thought a mini version would be perfect for someplace in the Fairytale Treehouse project! She shared the photo and asked me if I thought so too. After I got up from falling out of my chair I said "Yes! YES! Yes, Please!!!" 😄😄😄

Here is the table Sharon's husband and son made for her... Incredible, right?!?

And Sharon's pretty toes! 😍

And here is the mini version made just for me!
W~O~W! 😍

So beautiful!

Isn't it absolutely jaw dropping?!? It is hard to tell with my wacky lighting, but the resin is the most beautiful soft lavender color! It's so perfect for this dwelling! Sharon has even placed the epoxy river table top onto a House Of Miniatures Tilt Top Table kit that she beautifully finished for me! 


Thank you so much for your kind thoughtfulness and generosity, Sharon! 💗 And a special thanks to your incredibly talented husband, too! It must have been quite a challenge to perform this kind of craftsmanship at 1/12th the scale he's used to! Mini people really are the nicest people there are! And so talented, too! The entire treehouse gang LOVES the table so much that they are currently debating where it can be best appreciated. I think, to be fair, every room should get to have a turn with it!

And that, my friends, is the sum total of all I could do in the heat this week. This weekend the kids et al will be here to help us with a backyard project. My job is to keep everyone fed. Yep - it's the hot kitchen for me no matter what it takes. At least I'll have great company!

Back sometime soon with, hopefully, better progress!

xo xo,

Jodi

Thursday, August 10, 2023

Running Water

It doesn't matter whether you live in a fancy McMansion or a pioneer log cabin in the woods. Let's face it - running water is a necessity! It is one of the first things on the priority list of every housing project everywhere in the world. And a trunkhouse made for a Fairy Beary Godmother is no different.


Thank goodness the folks who will inhabit this multi-family forest abode have Wayne, the resident handyman/craftsperson. Practically as soon as I had that Chrysnbon Dry Sink kit completed Wayne was working to address the "Dry" part. First, he drilled a hole in the sink for the water to escape through. Then, he installed the drain and pipe system. Don't ask me where the water will drain to - that's Roz's department (though I suspect that she has some magic recapturing system in mind for watering her flowers).

Pot metal drain and pipe purchased on eBay.

It can be handy to be so small!

Sometimes it takes two pipe wrenches for the job!

Once the sink was ready to receive water, Wayne could install the source of it. Again, please contact the "Magic Department" for technical information. 😜

Wayne went with the same pump system that he installed for Goldie and Alice. It is a reliable method, after all, so why reinvent the wheel? Everyone loves the classic, rustic patina! And when your sink already has that "lived in" look, a messy cook is so much more at ease and can concentrate on her cooking.


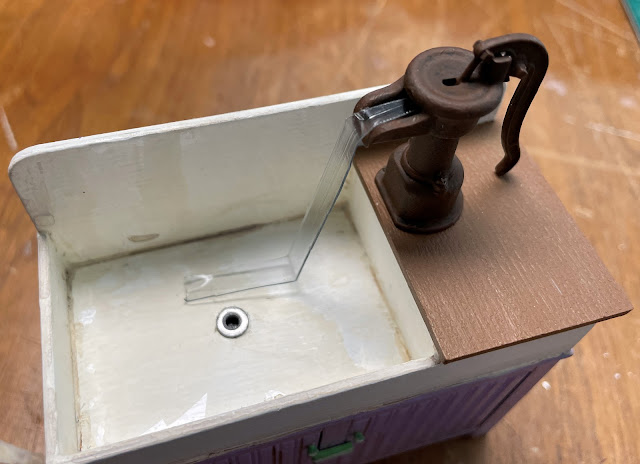
When it came time for the H2O, Wayne only had to provide the infrastructure. Roz's magic did the rest! A simple piece of plastic packaging, bent at the right angles was the substrate for a UV resin waterfall. 


Add a drip, shine the UV flashlight and keep going until you like the flow rate!


On and off.

Wayne got to be the first one to wash his hands... Looks like I'll need to make some soap!


And then Roz and Rozario got in on the fun! The gang is celebrating being one step closer to moving in!


Thanks to some amazing knowledge and great advice from Betsy and Julia, I knew what a Victorian cook stove and a parlor stove's fire light should look like! Thanks so much, ladies! I'm so grateful for your help! 

For the parlor stove, I added a bottom to the Chrysnbon kit. As it comes, the kit's bottom piece is actually a grate so the light shows through. Both advisers said that for a coal stove (any stove, really) that is a bad sign! It means the bottom is likely rusted through and a very unwelcome event is imminent! We don't want that - especially in a trunkhouse! After installing a solid bottom, I added an extra orange LED bulb in the main compartment to give off better ambiance.

Original kit design with bottom grate.

Light leaked out the bottom before.

With piece of cardstock glued in to block light.

Firelight with one bulb under "coals".

Now with extra orange LED chip light added.
No need for a sweater in the parlor!

For the cook stove, apparently there should not be a great amount of light from the flames coming out the vents, as that is also a bad sign. I am going to leave the cook stove's "fire" as is.

With a couple major tasks completed for Roz's kitchen (and the parlor), it was time to think about food and dish storage. With round walls and a very cozy amount of space, it was prudent to go with open shelving like in Medieval times. I utilized more Sonotube scrap for the back of the units (because it is already curved perfectly), then just added horizontal chipboard shelving at the lengths and depths I needed.


I painted and added trims, then gave them a little aging with an antique linen ink stamp pad. It seems to go on well, then I turn my back and the ink practically disappears. Anyone else have that happen? Maybe it just dries a lot lighter. I'll keep working at it.


I am working on gathering and making all the things Roz will need for a fully functioning kitchen. Luckily, I have many "prototypes" left over from the 3D kitchen item adventure I went on last fall. Hopefully, Roz will like them. She's going to need lots of groceries, too. I hear Rozario eats his weight in food every day! 

Until next time...

xo xo,

Jodi

Thursday, August 3, 2023

Totally Analog

You may have noticed that during the whole trunkhouse portion of the Fairytale Treehouse project, in spite of having a wonderful "Machine Park" (Birgit's name for my Cricut Maker and 3D printers) at my fingertips, I haven't used any of it. It isn't an oversite, and in fact, has been totally intentional. You see, an important goal for me on this whole adventure was to reconnect with the joy and freedom that came with minis in the early days of my miniature passion. Before my need for tougher challenges and perfectionistic aspirations faded that joy a little. Before adding in so many complications and steep learning curves. I wanted to concentrate on creativity, whimsy, exploration and analog ingenuity. I wanted to use up good things from my stash, utilize recycled materials and to enjoy many aspects of making minis that I hadn't for a long time. One of those "old loves" was making minis from kits. 

There are some fantastic old time kits that are still being made and/or sold as New Old Stock, many of which I've had in my stash but had yet to experience. The majority of Roz's fixtures and furnishings will be made from kits. Chrysnbon, House Of Miniatures, and Calico are among them. Some I have had in my stash for a very long time, and some are new arrivals. Some I will reimagine in order to suit her personality (and to accommodate the trunkhouse's particular round room challenges). Others, I will simply play with products and finishes that sound fun. 

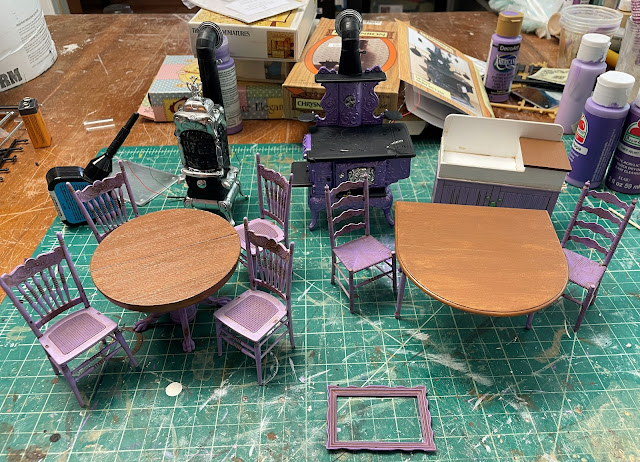
I started with the Chrysnbon kits. A Parlor Stove, Cook Stove, Dry Sink and table and chairs for Roz's kitchen. I also had a table and chairs for Alice and Goldie's kitchen so I decided to get it done at the same time. I love the compact scale of these kits as well as the detail and accessories that come with them.


I've gotten the tables and most of the chairs assembled (two more are on the way after a "mind change"), but I have many more rounds to go with all of them while I experiment with aging techniques. Nothing I've tried so far is "It", but I'm far from giving up yet. 


For the parlor stove, I didn't like the way that the provided acetate fit into the kit's windowed pieces, so I played with another option. I blocked off the openings from the back side with masking tape, then carefully applied UV resin to each of the windows in the grid from the front side. Once hardened, I applied another layer of the resin over the back where the tape had left a bumpy residue. It seemed to smooth it out and clarify it better.

Taped back side.

Resin to be applied in each square.

Before the application of additional resin over the tape texture.

After applying the resin over the tape texture.

I sanded the "chrome" pieces a bit before assembly to take down the intense shine. I like the way it seemed to age the pieces and leave some black wear marks behind. I had a particularly troublesome time assembling the "chromed" kit pieces, even after carefully scraping off the glue joint areas. I ended up assembling the base surround onto the stove rather than as a separate assembly because of it. It worked out okay in the end, but boy are those "chrome" pieces slippery! 


For the stove's interior fire light, I wanted it to be very subtle. I didn't want it to be the first thing you noticed when you looked into the parlor and I didn't want it to seem like it was too hot in this tiny room. Just a feeling of warmth is all it needs. It is so hard to tell at this point if I have achieved that, so I'm not going to actually install the stove until the last thing. That way I can adjust the lighting, if necessary.

Should the light spill out the bottom?
Should more "flame" appear in the windows?
More research is needed...

That was also my goal for the kitchen's cook stove fire light. To start with, I only added one orange LED chip light. 

Placed inside the cap of Cricut blade packaging to keep
it from moving around inside the stove.

The LED's resister needed an enlarged hole.

Seems pretty bright with a 9 volt battery.

Light is only supposed to peek out of the baffles on the side, I guess. You can see the flame reflected on the wall, and that may be enough - we'll see. If not, I suppose I can punch a few holes in the wall separating the oven from the fire.


Other than starting on the kits, I was able to get the front and balcony doors affixed to the trunkhouse. I am super excited to see them once they're nestled into the bark of the tree! But that is going to be a bit farther down the road.

Roz's front door.

From inside the parlor.

The bedroom balcony door.

Seen from inside.

Current status of the exterior of the trunkhouse.

What comes in the next few posts will probably be a mixed up jumble of things. Hopefully, in a few weeks, everything will come together and I can get Roz and Rozario moved into their house in time for... 

Brace yourself... A four letter "f" word is coming... 

Fall!

That's right! Time flies, especially Summer! And for those of you living through the record breaking heat, fall will be most welcome!

Hope you're all enjoying your time whatever the season!

xo xo,

Jodi