A fun play on words, dangerously close to blasphemous, but also true! Where else can you get away with so much embellishment, color, florals and texture but in a dollhouse? I took full liberties with every opportunity as I worked this week, and though it might seem gaudy to some, it's good gaudy when it comes to my idea of a fairytale treehouse! Let me share with you all the gaudy details! 😊
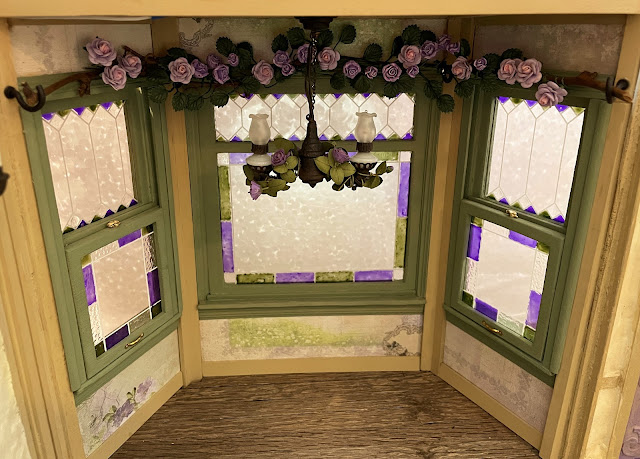
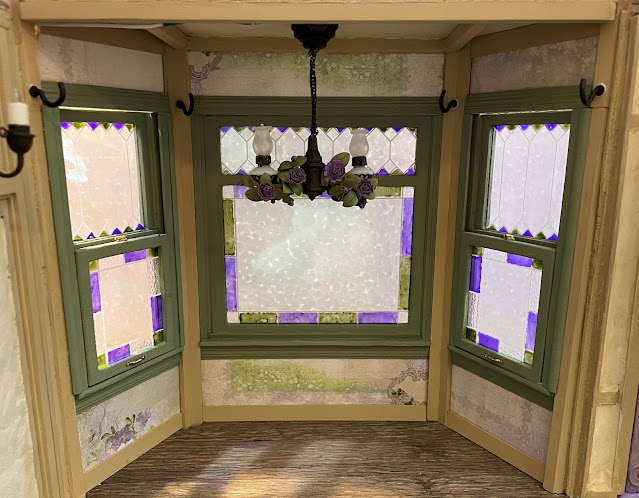
First, after installing the bay window's light fixture, it got me thinking about window coverings. I didn't need to actually cover the windows - it's not like the treehouse will be in a housing development where you can look out your window and see your neighbor brushing his teeth. So, maybe just a valence... a valance of flowers!
How it came to be... I had this polymer/resin rose vine floating around in my landscaping drawer for a very long time. It came as part of an ebay lot of furniture I bought a long time ago. Unfortunately, it was red, a color I haven't had the need for in any mini setting, so far. But, with a little paint, first a neutralizing coat of white and then a shade of petunia, it was perfect! I even changed the color of the leaves and applied a dirty water wash to bring out more of the vein details.
After its color transformation, Wayne found me a length of grapevine from a wreath in my stash, cut it to size for the bay window and then helped me wire the rose vine onto it.
 |
| Perfect shape for the bay! |
 |
| Painted petunia then wiring to the grapevine. |
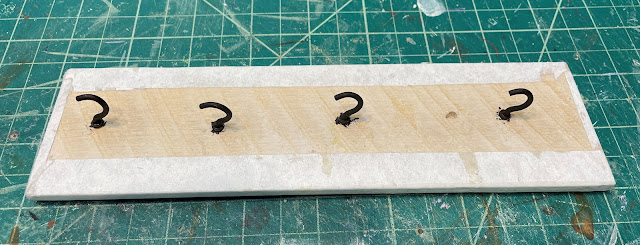
Wayne and I continued working in the kitchen, adding the sconces on the sink wall and then another flower valence with mulberry paper flowers above the window alcove. I found some leftover leaves from a flower kit to add as filler.
I wasn't thrilled with my first idea for the kitchen's ceiling light. Luckily, Wayne found a metal fairy garden lantern in my stash he thought could work. He salvaged parts from a beat up ceiling fixture and came up with a scheme using a plastic bowl from my stash. He removed the metallic "flame" from the fairy lamp, drilled a hole into the plastic bowl, slipped it over the light fixture base (after painting it bronze) then glued it to the lantern. To help conceal the wire, I painted it green like a vine, wound it around the lantern and then wove in a mulberry paper flower. We make a great team! I hope it will provide enough light. Otherwise, we'll have to come up with something else to make an additional fixture. We'll test it once we start the ceiling installation process.
 |
| Rustic metal fairy garden lantern, lamp base removed from a beat up ceiling fixture and a plastic bowl. |
While I was working on lighting again, my "new old stock" ebay fixture for the girls' ceiling arrived in the mail. I had made a reasonable "make offer" offer and it was accepted. This time, I painted it green, wove a piece of grapevine wreath through the arms, then added more flowers. I think the girls should have plenty of light in their bedroom now.
Working out the 'Chicken and Egg Conundrum', it seemed prudent to stay focused on kitchen tasks this week. Before all the upper floors/ceilings can be installed the stove wall has to be fixed in place. Once the stove wall is in place it will be much more difficult to reach into the kitchen. Better to finish the big and challenging stuff before the walls/ceilings are in the way. That meant making the sink cabinet and shelving.
As you can see, I went full Tudor "carving" mode on it. And boy was it fun! I cut it from chipboard on the Cricut Maker, then added basswood trims, Dresden and other embellishments from my stash. I made the tub sink from Kraft card with a chipboard base.
Painting the sink cabinet in a neutral, monochrome color really took down most of the garishness, but still left such wonderful details. Especially once the dirty water wash settled into the crevices. The sink is painted in the same "bronze" effect as the lighting fixtures and then given an eyelet drain. The girls insisted on having lavender knobs.
For the countertops, we went with 1/8" x 1/4" "butcher block" stained with the Fred's Weathering Stuff. Wayne made rustic open shelving with scrap basswood to match. The rusty water pump brings fresh well water up for the girls to use whenever they need it. Goldie has been sorting through my stash of kitchen minis and doing a little shopping for some of the things I don't have, while Alice is looking for new places to adorn with flowers.
Wayne insists that before the kitchen ceiling/girl's bedroom floor can be installed, we have to install the great room's balcony. It has a support beam that the girls' floor needs to rest on. But it needed lots of prep work. First, Wayne and I added Betsy's "glue trick" bark in several layers, letting each one set before the next layer. Then we painted its base color, dry brushed highlights and added an overall dirty water wash. At that point it was ready to be attached to the balcony floor. You should have seen how Wayne expertly affixed the clamps - he is incredibly strong for such a little guy! Notice that we also applied Dresden "carving" to the face of the floor beams. Wayne has such creative ideas, but who knew treehouses could be so much work?
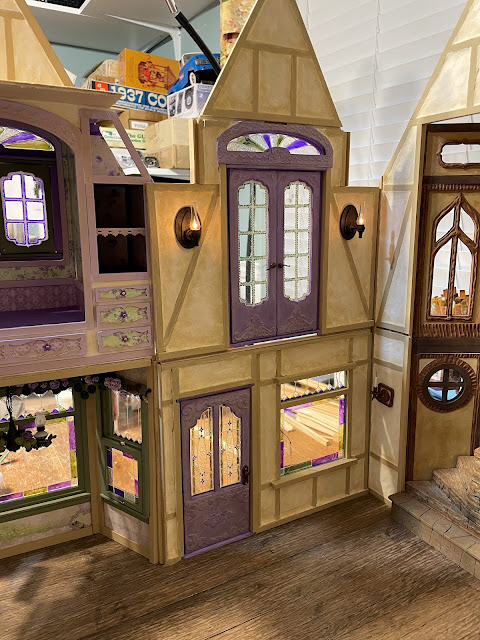
Before the balcony can be installed, we had to install the sconces that will live above and below it. It would have been harder for me to hold them in place while Wayne nailed them to the wall with the balcony in the way. The sconces on the first floor, flanking the staircase, went in easily enough, though the left sconce seems to be a wee bit crooked. Wayne says it adds character. Ah well, at least the lights still work!
Then we installed the balcony sconces on either side of the French doors. Our luck is holding out - these sconces are still working, too! 🤞
You'd think at this point, after all our prep work, that we'd be free to get the balcony floor installed. Nope. Things just weren't quite gaudy enough yet! Once we'd experienced the fun, success and ease of beefing up the flower vines for the kitchen bay, we realized we'd need many more for the rest of the treehouse! Luckily, Christine, the owner of MiniatureCrush had just what we needed and shipped them out lightning fast! Now we can continue embellishing flower vines to drape over the balcony and other places before we take the next steps. Wayne is working on the landscape design while he waits for me to finish the flower vines.
 |
| White flowers... |
 |
| Become lavender. |
So this, my friends, is where I'll leave off for this week. Next week, I hope to share all the florals, all the resources, all the progress and more Good Gaudy!
xo xo,
Jodi


I love it all so much, Jodi! The flowers look amazing, and it's so cool how you dyed them and made them fit with the style of your dollhouse. Everything looks amazing. I adore the photo of your dolls with their little toolbox! That's the best!
ReplyDeleteThanks Michelle! It adds an extra element of glee when you can make something work from your own stash! Glad you like the little characters that will inhabit the treehouse!
DeleteI had so much fun reading this post, thinking all the while that I would praise your husband for being so helpful and then I thought, no, Wayne is her son--what a sweet boy for being so helpful and then it dawned on me that your son isn't named Wayne either. Wayne turns out to be a creature of many talents. Certainly your work on the tree house is amazing and I love the rose valance and all of the other beautiful details, but you have taken your recording of such work to a totally new level with your story telling, bringing to life the little girls
ReplyDeleteand Wayne.
Ha ha! Thanks Ann! I have asked, cajoled, begged and pleaded with Russ to get involved with me on the mini projects. He'd be so good at it! But sadly, other than encouraging and supporting me, and occasionally being a sounding board, he has no interest in minis.😢 Luckily, on this treehouse, Wayne is indispensable! I am so happy you enjoyed the post!
DeleteLa cocina se ve preciosa con las flores tan bien encajadas en las distintas zonas pero el mueble del fregadero es maravilloso.
ReplyDeleteEncaja perfectamente y parece de una cocina a escala real. Casi se pierde uno entre la realidad y el sueño.
Un saludo
¡Gracias Marian! ¡Me alegro mucho de que te guste el progreso de esta semana! ¡Sería divertido si tan solo pudiera hacer una casa de la vida real tan fácilmente como una mini!
DeleteJodi, desde luego Wayne está siendo el mejor arquitecto, director de obra y "chico para todo" no sé que habrías hecho sin él jajaja!!
ReplyDeleteMe encanta esa mezcla de estilos, la imaginación se puede desbordar hasta límites insospechados y todo combina perfectamente!
Las flores por las ventanas, en las lámparas, en la cocina... realmente es una auténtica casa de hadas y las niñas serán tan felices en ella, que siento envidia por no ser tan pequeña como ellas y poder visitarlas, aunque lo haré con la imaginación y en mis sueños!
Que sigan las obras!!!
Besos.
¡Gracias Pilar! ¡Estoy encantado de trabajar con Wayne y sus talentos indispensables! Y realmente disfruto tratando de imaginar lo que verías en una casa del árbol de cuento de hadas. ¡Se vienen muchas más flores! ¡Me alegra que te guste el progreso!
DeleteHi Jodi,
ReplyDeleteWayne, the smart little fellow, had some brilliant ideas with a knack for amazingly implementing them. (I read the heading Good Gaudy before reading the rest of the text and thought here I'm going to see Antonio Gaudy's embellishments ha ha.)
Hugs, Drora
Thanks Drora! Yes Wayne is incredibly helpful! As for Antonio, I am so happy that you mentioned him as I have had a wonderful time learning about him. What an amazing and creative body of work! Hugs!
DeleteThis looks wonderful Jodi! It's nice that Wayne was able to live a helping hand (or rather, paw) to you and the kitchen and all the embellishments look wonderful! I can't wait to see the balcony installed!
ReplyDeleteI'm sure that Alice and Goldie are thrilled with all of this new work on their treehouse and are just itching to move in and call the place theirs!
Thanks Julia! Wayne's paws are very helpful, indeed! I'll be excited when the balcony is ready for installation, too, though I keep getting sidetracked on other things that need my attention first! Ah, well - it's all fun!
DeleteQué barbaridad! Has trabajado muchísimo, menos mal que Wayne te echa una mano pequeña y experta, jajaja. Me encanta la alegría que le han dado las flores al ambiente, las niñas van a estar encantadas con el resultado. Un beso
ReplyDeleteGracias Matxalen! ¡Me alegra que te gusten los avances! ¡No es realmente trabajo cuando es tan divertido!
DeleteLots of fun details there Jodi. The balcony and kitchen both look great, and I love the addition of roses and vines here and there - in my own real life craft room, I actually have a velvet rose vine arrangement across the top of one of my windows. Looks just like your bay!
ReplyDeleteThanks Shannon! I am having so much fun pretending that anything goes here because it's "enchanted"! Flowers can grow anywhere - even indoors! I bet your craft room windows make you happy every time you look at them!
DeleteOh my Goodness, Jodi, this is So Much Fun!!! I am loving every single layer of "gaudy" detail you are adding to Everything! The flower "valances" are a brilliant touch and give the perfect amount of decoration, whimsy and color without taking away from the gorgeous windows! And I have Always wanted to make a flower be-decked chandelier! Why not several??? :):)! You are a wizard with your lamp conversions!!! (I am going to have to become a little braver with the lighting in my projects) And as for the usefulness of Wayne and his handy apron and carpenter skills, you and the girls are so lucky to have him on your project! The kitchen cabinets look amazing!!! It must have taken some magic skills to do all that carving! (I guess he is happy to wait his turn with the attic apartment decor?) :) And the balcony with it's "glue trick" wood effect is so perfect! I am so so happy to have helped even a little bit! :) The floors and sconces look great and I can't wait to see the vines that are in the making! (I don't suppose there is going to be a rope swing hanging from the ceiling somewhere???) :) This project is no end of fun fantastic inspiring ideas! I love Love Love it!!! Keep up the wonderful work! :):)
ReplyDeleteThanks Betsy! I never knew it could be so much fun having permission to break the rules! My problem is going to be my imagination - I am not used to this kind of creative freedom, so surely I will miss many opportunities to enchant this treehouse! I can't wait to see your floral chandeliers - they will be incredible!!! And I can't begin to count the ways your creativity has inspired me over the years - the idea that you can sculpt with glue is the least among them! I love how our minds are going in the same place - rope swings - YES! I can't wait to share what I have in mind for the girls in the great room - I just hope the idea works out the way I am thinking it will. I think I have sourced the perfect thing to make it happen! 🤞😜💗
DeleteWonderfully beautiful, really fairytale-like, and how you make everything so beautiful, the roses, the balcony, the sink with pump is beautiful. Not to mention how you repainted the lamps, much better.
ReplyDeletethe last greetings Gonda
DeleteThanks Gonda! I am enjoying every new opportunity that this project brings forward. So many fun kinds of crafting with every new room. I just hope I don't overlook anything or this project will never be finished. These girls and Wayne are eager to be moved in!
DeleteQuite a lot of work to paint each rose in a different color but well worth it! Overall, I never cease to admire your precision work.
ReplyDeleteThe above comment is from me ;-)
DeleteThanks Millimari! I find that if I am in the right frame of mind, where I am excited about seeing an idea to its conclusion, even a long process doesn't feel like work. I actually enjoy being able to dive in and bask in the process. It is relaxing for me. Even the tedious work of laying many egg carton bricks in a herringbone pattern is a delight and a priviledge. If I find that a task feels like work, it's time for a break, lol!
DeleteThe kitchen is amazing and flowers make it special. The furniture is so elegant and the colors are perfect. The sink with pump is a brilliant idea and it blends well. The floors and sconces look great and I look forward to seeing further progress.
ReplyDeleteThanks Faby! I am glad that you like the flowers, kitchen and colors! I am having a lot of fun with this project and I hope I can make this feeling last a good, long time!
DeleteWhat a wonderful post - and I mean it! ;O) I've enjoyed it to the fullest!!! All your wonderful ideas... and how you brought them to life... with a little help (and even a bit more) from Wayne. So good you can't see my face now... I have to admit it, I'm a bit jealous still. You have Wayne, who can carve, build, measure and even do math... and I have You-know-who who can eat a big bowl of strawberries in a wink of an eye. Well, at least he has some talent at all and I love him anyway as every Mom should love her fluttery son... however... it would be nice if Mr. X would be able to use a hammer too and not only a spoon to shovel strawberries... eh... where was I...
ReplyDeleteThe flower valances were a brilliant idea... so beautiful and so perfectly matching with the whole atmosphere and especially the stunning windows. And I love the sink, you never stop to amaze me with your ability to create breathtaking furniture with simple materials and the way you're transforming them. Pure magic!
But apart from all the beautiful eye candy, all the wonderful inspiration and the fun this post offered it also made me smile. It's amazing how different meanings in languages can be and I wonder how "gaudy" could become so negative in English. Perhaps it's the fault of the "y"? Okay, maybe your English gaudy has a different origin... but in Germany (mostly in the southern and especially the Bavarian parts) we still use the word "Gaudi" - and this is a very positive word as it means "BIG FUN" It's origin is Latin... "gaudium" (= fun, joy) with the verb "gaudere" (= be happy, have fun). And perhaps you do remember from our Advent posts that the 3rd Advent Sunday is called "Gaudete"... yes, an imperative. ;O) Regarding this take the word of a German friend: This was for sure good gaudy - or as Bavarians would say "A Mordsgaudi!". No doubt about it! *smile*
Hugs
Birgit
Sometimes you just can't help but love someone, even if they only create a lot of work for you and contribute nothing productive. I know this well, as I seem to have two of the sweetest, cuddliest and most loving furry boys who, in spite of my many efforts to train them, won't even bring me their food bowls or put their toys away! At least Fluby is adorable, highly photogenic, an amazing spokesman and a humorous host on your blog!
DeleteI'm happy that you like how the sink and the valences came out! They were so much fun to make, especially knowing that they will provide a nice home environment for the treehouse dwellers!
"A Mordsgaudi!" = A whale of a time! I love it! I'll be sure to share it with Tasha! Now it could be with gaudy that us Americans turned a good thing bad - we tend to do that, unfortunately. The word came into popularity around the time Las Vegas was becoming itself and Elvis created Graceland. Nowadays, if you really want to describe something as over the top or just too much, trendy Americans use the adjective "baroque" to describe it. I like the German connotation much better!
Me encantan todas las flores de la cocina. Alegran muchísimo. También lo bonito que has dejado el fregadero.
ReplyDeleteMenudo avance que has dado!!!
¡Gracias Isabel! ¡Me alegra contar con su apoyo entusiasta!
DeleteWow! You've made so much progress. Wayne is such a big help, you're lucky to have him. I love the flowers. It's a fairytale treehouse, it has to have flowers. I can't wait to see more. The mitering for the balcony is wonderful!
ReplyDelete