
The construction phase of the treehouse had to come to a full stop for the planning and preparation of the lighting. It seemed smarter to have all of the fixtures ready to go as I reached the room/area where they needed to be installed, rather than stopping to prepare them each time I reached the point of needing them. So, out came my drawing paper and out came my drawer of ebay lot lighting fixtures. Luckily, I had plenty of them. I considered where lighting would be most effective, what type of lighting worked best for that space (i.e. ceiling, sconce, lamp etc...) and then looked at my options. Soon I had a plan, but I also had a whole lot of shiny gold finish to deal with. That just wasn't going to work for this fairytale treehouse.
Like me, you'd probably be surprised at all the components that make up dollhouse lighting. And that many of them can be removed. This makes things much easier if you intend to repaint them. Some of the parts, like the shades, can be swapped out or replaced with parts from other fixtures. Just take a good look at the fixture, play around with the parts so you see how they work. Also look at other things in your stash and apply a little imagination. I hope this post leaves your wheels turning with ideas and possibilities for reimagining your own lighting!
 |
| First light lit up in the treehouse! |
Once I knew which lights I was going to use, I started prepping them for painting. I removed all the parts that could be removed, then used masking tape to tape off the things that I couldn't. I also made a painting jig using an old box and closet pole so that I could spray the light fixtures while they hung. I didn't care about getting paint on the wires - they will mostly be hidden, anyway.
 |
| Makeshift spray jig. It looks like the gallows with all the fixtures hanging there. Time to execute to the shiny gold finish! |
 |
| Some parts removed, others unscrewed, many masked off. |
I sprayed them first with a light coat of primer, then about an hour later, I sprayed them with several coats of flat black. I wanted to be sure I got all the areas of gold covered. I did miss some spots, but was able to cover them with flat black acrylic using a paint brush before the next step in the finishing process.

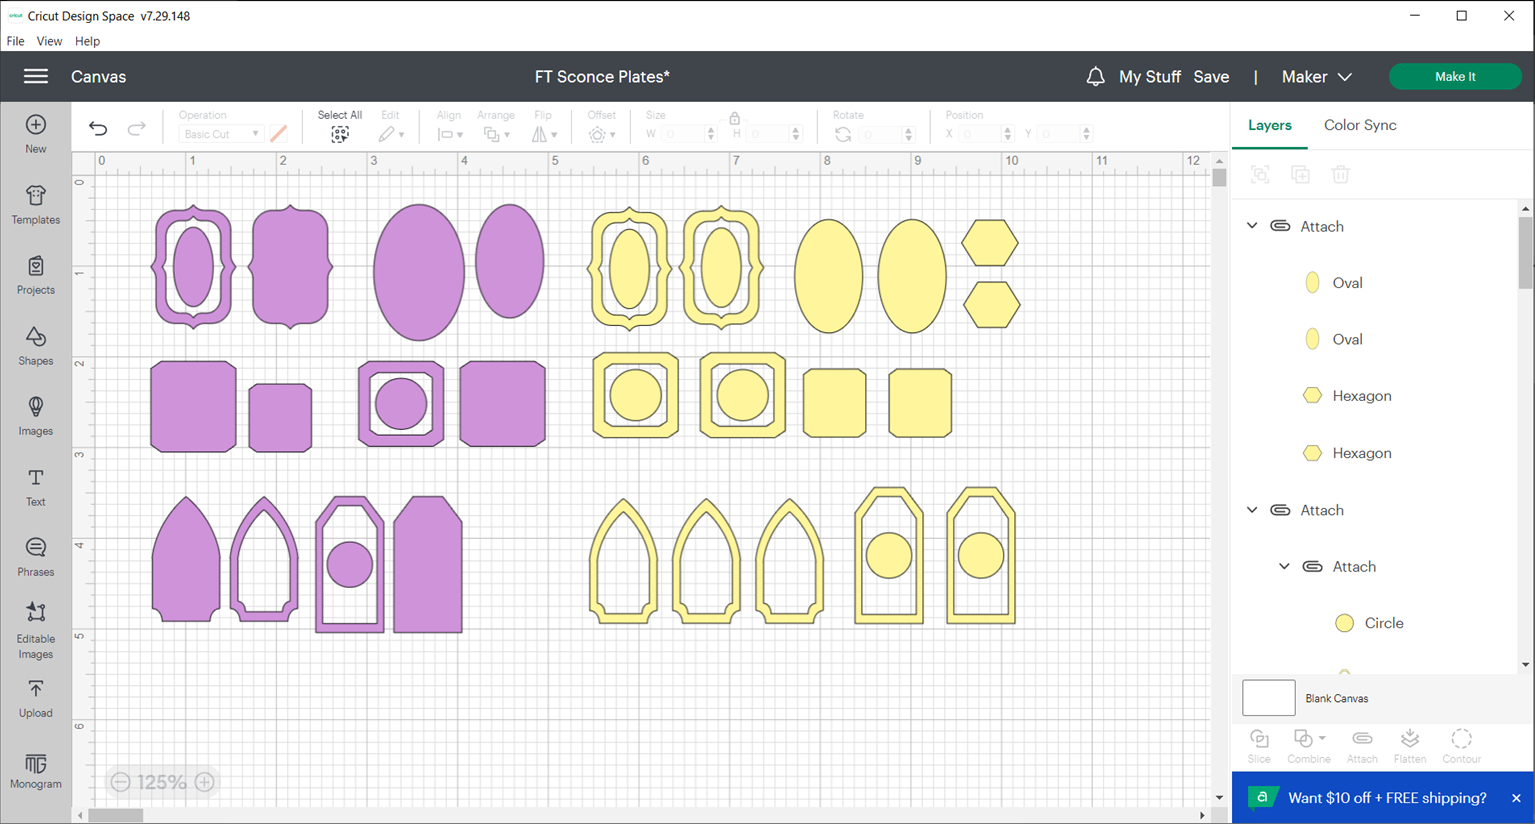
With the base color finished, the next step was getting the fixtures to look like what fairytale lighting looks like in my mind. Again, I go right back to the Tudor era. My impression from looking at photos was an iron metal with a bit of a rusty/bronzy effect. To achieve this, over the black base color I employed brown iron oxide, nutmeg brown and burnt sienna along with some glazing medium to lengthen the working time and add depth. I didn't get 'in progress' photos of the painting process because I have shared it so many times before: pounce, splotch until you like it. Instead, I'll share the before and after effects of the fixtures. I also want to say here that as an added detail, I created sconce plates for all of the sconces in Design Space, then cut them from 1.5mm chipwood and layered kraft card. Here are the shapes I used...
 |
| Chipboard Purple, Kraft Card Yellow |
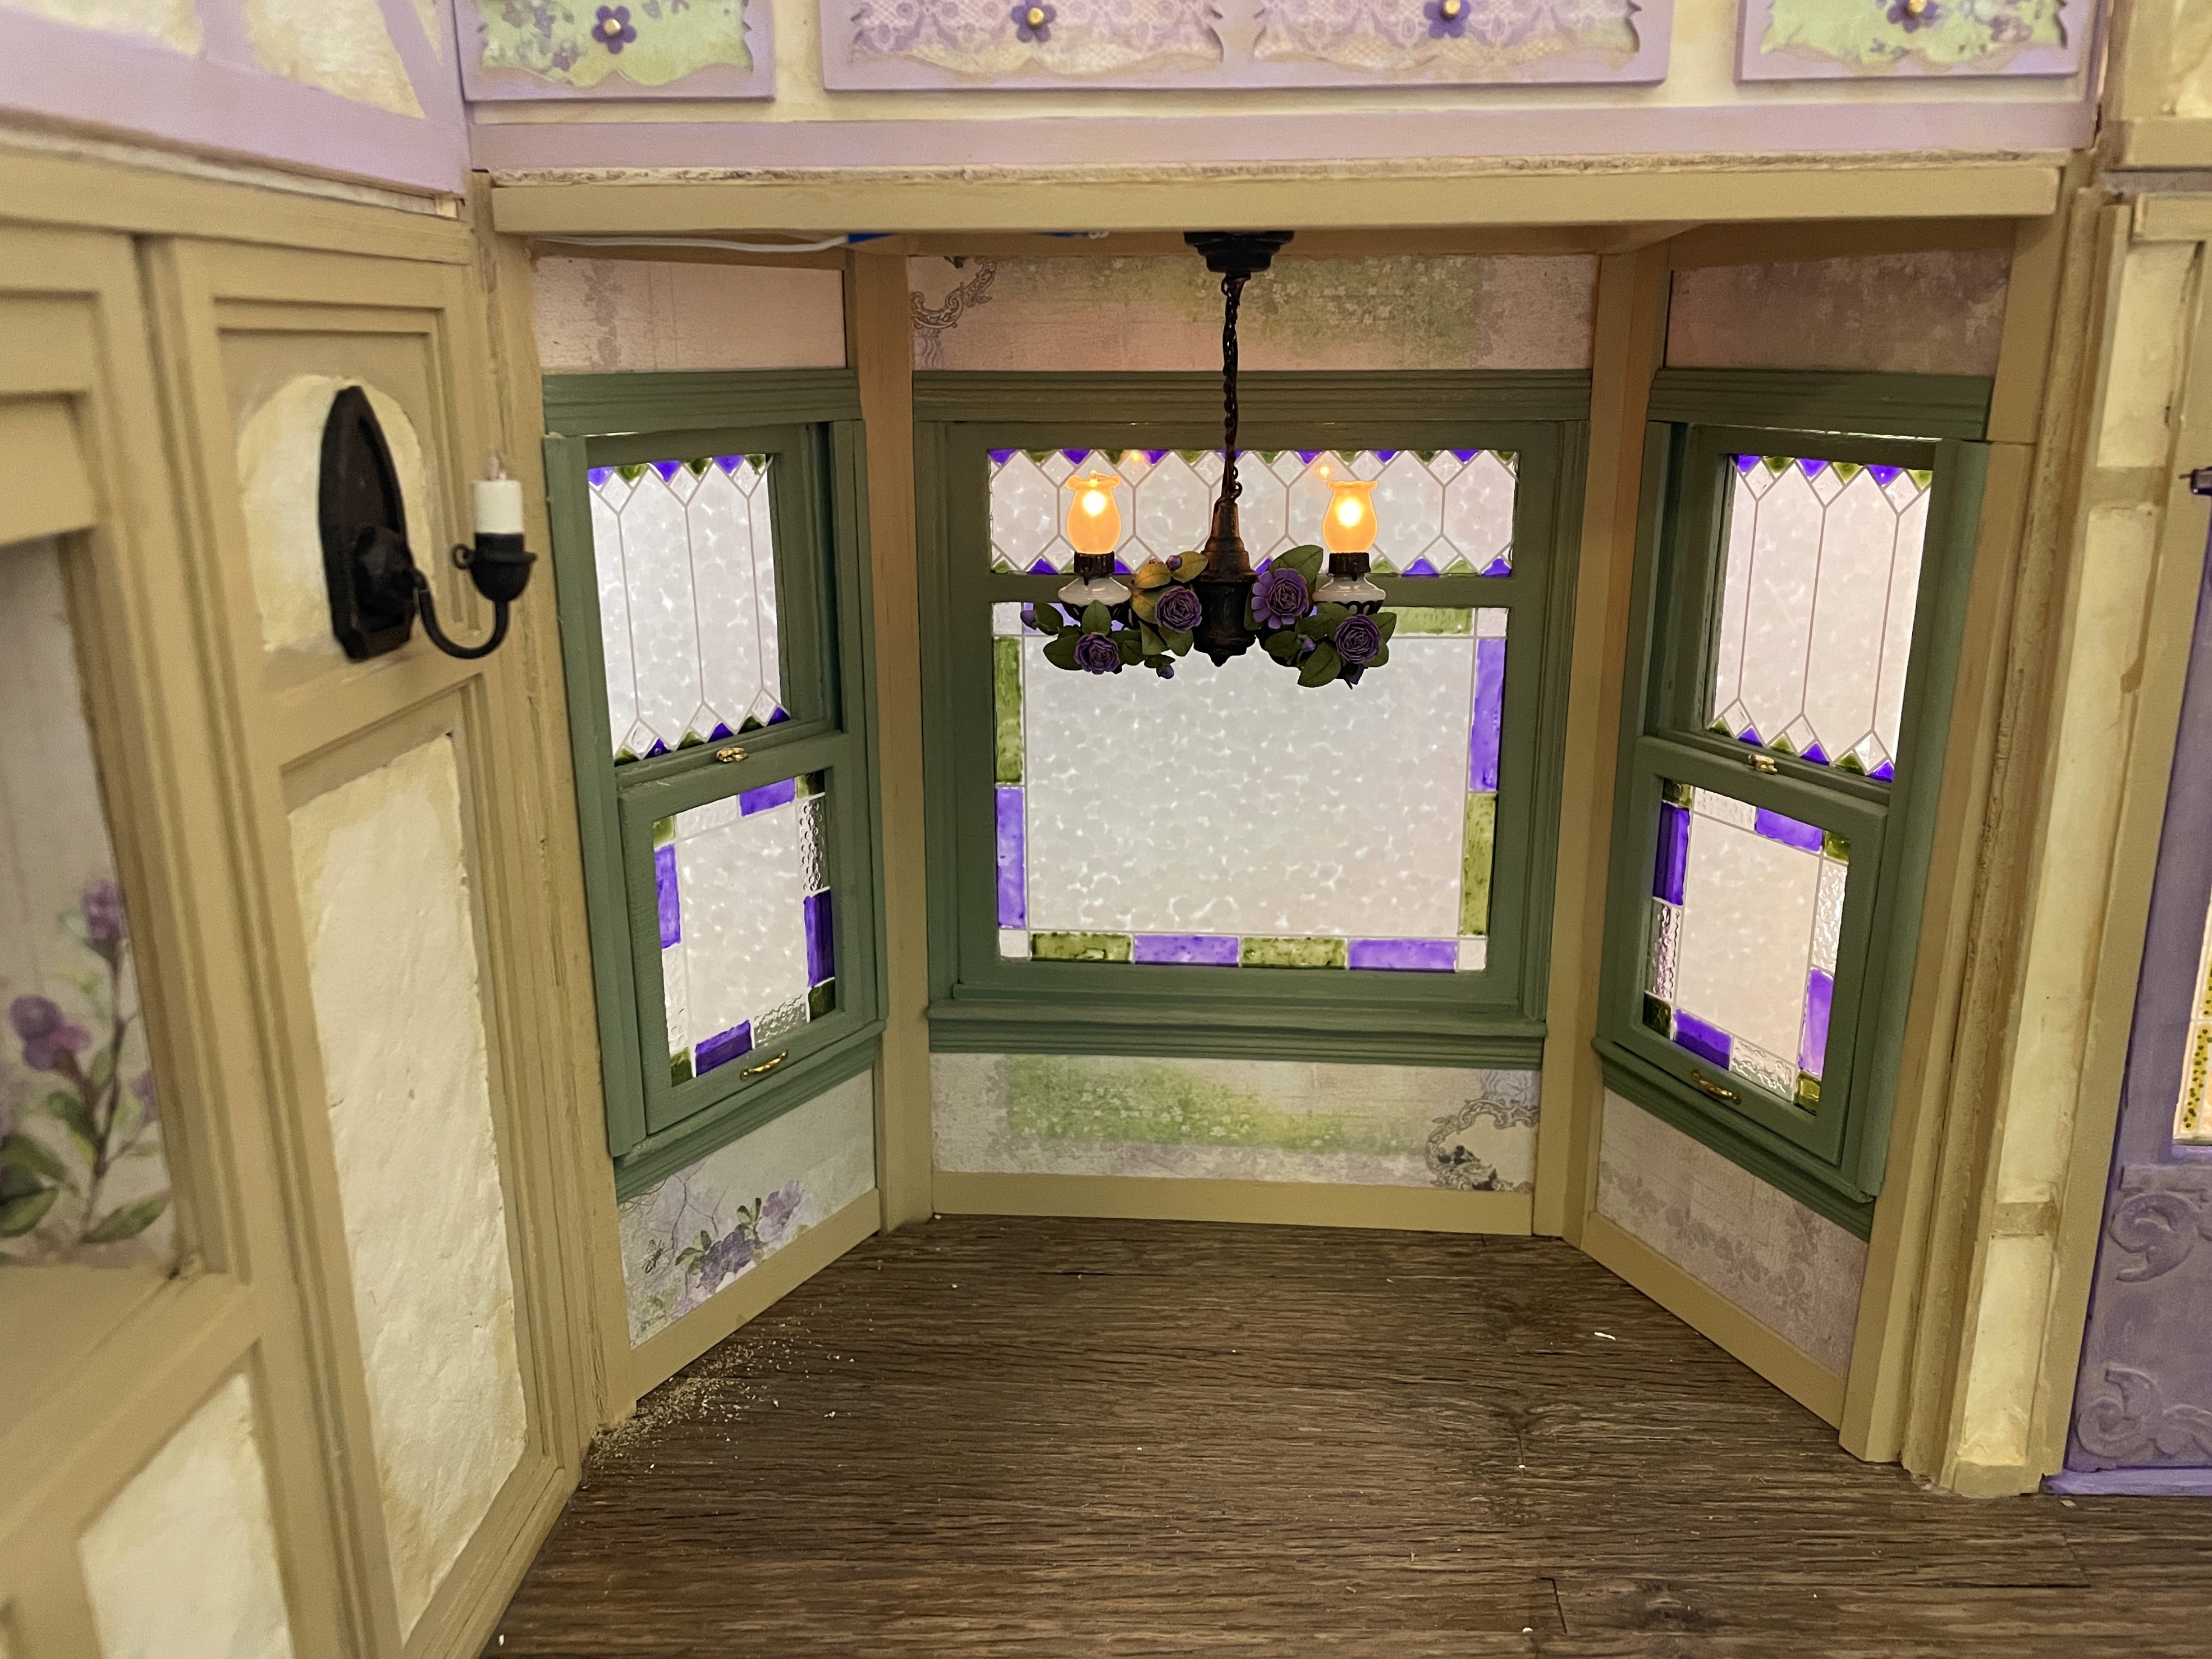
First is the kitchen's bay window fixture. It started as a Chrysolite kit, and after painting, it became a bronze fixture. At that point it was just screaming for flowers to be woven through its filigree. Luckily, I had some ready made purple flowers left over from the flower shops I finished last year.


The Great Room fixture's character really came to life once it had been bronzed. I really like the way it came out. I added ivory paint and some dripping wax to the candle slip covers to help make them a little less "stark white" and a little more "rustic" in character.


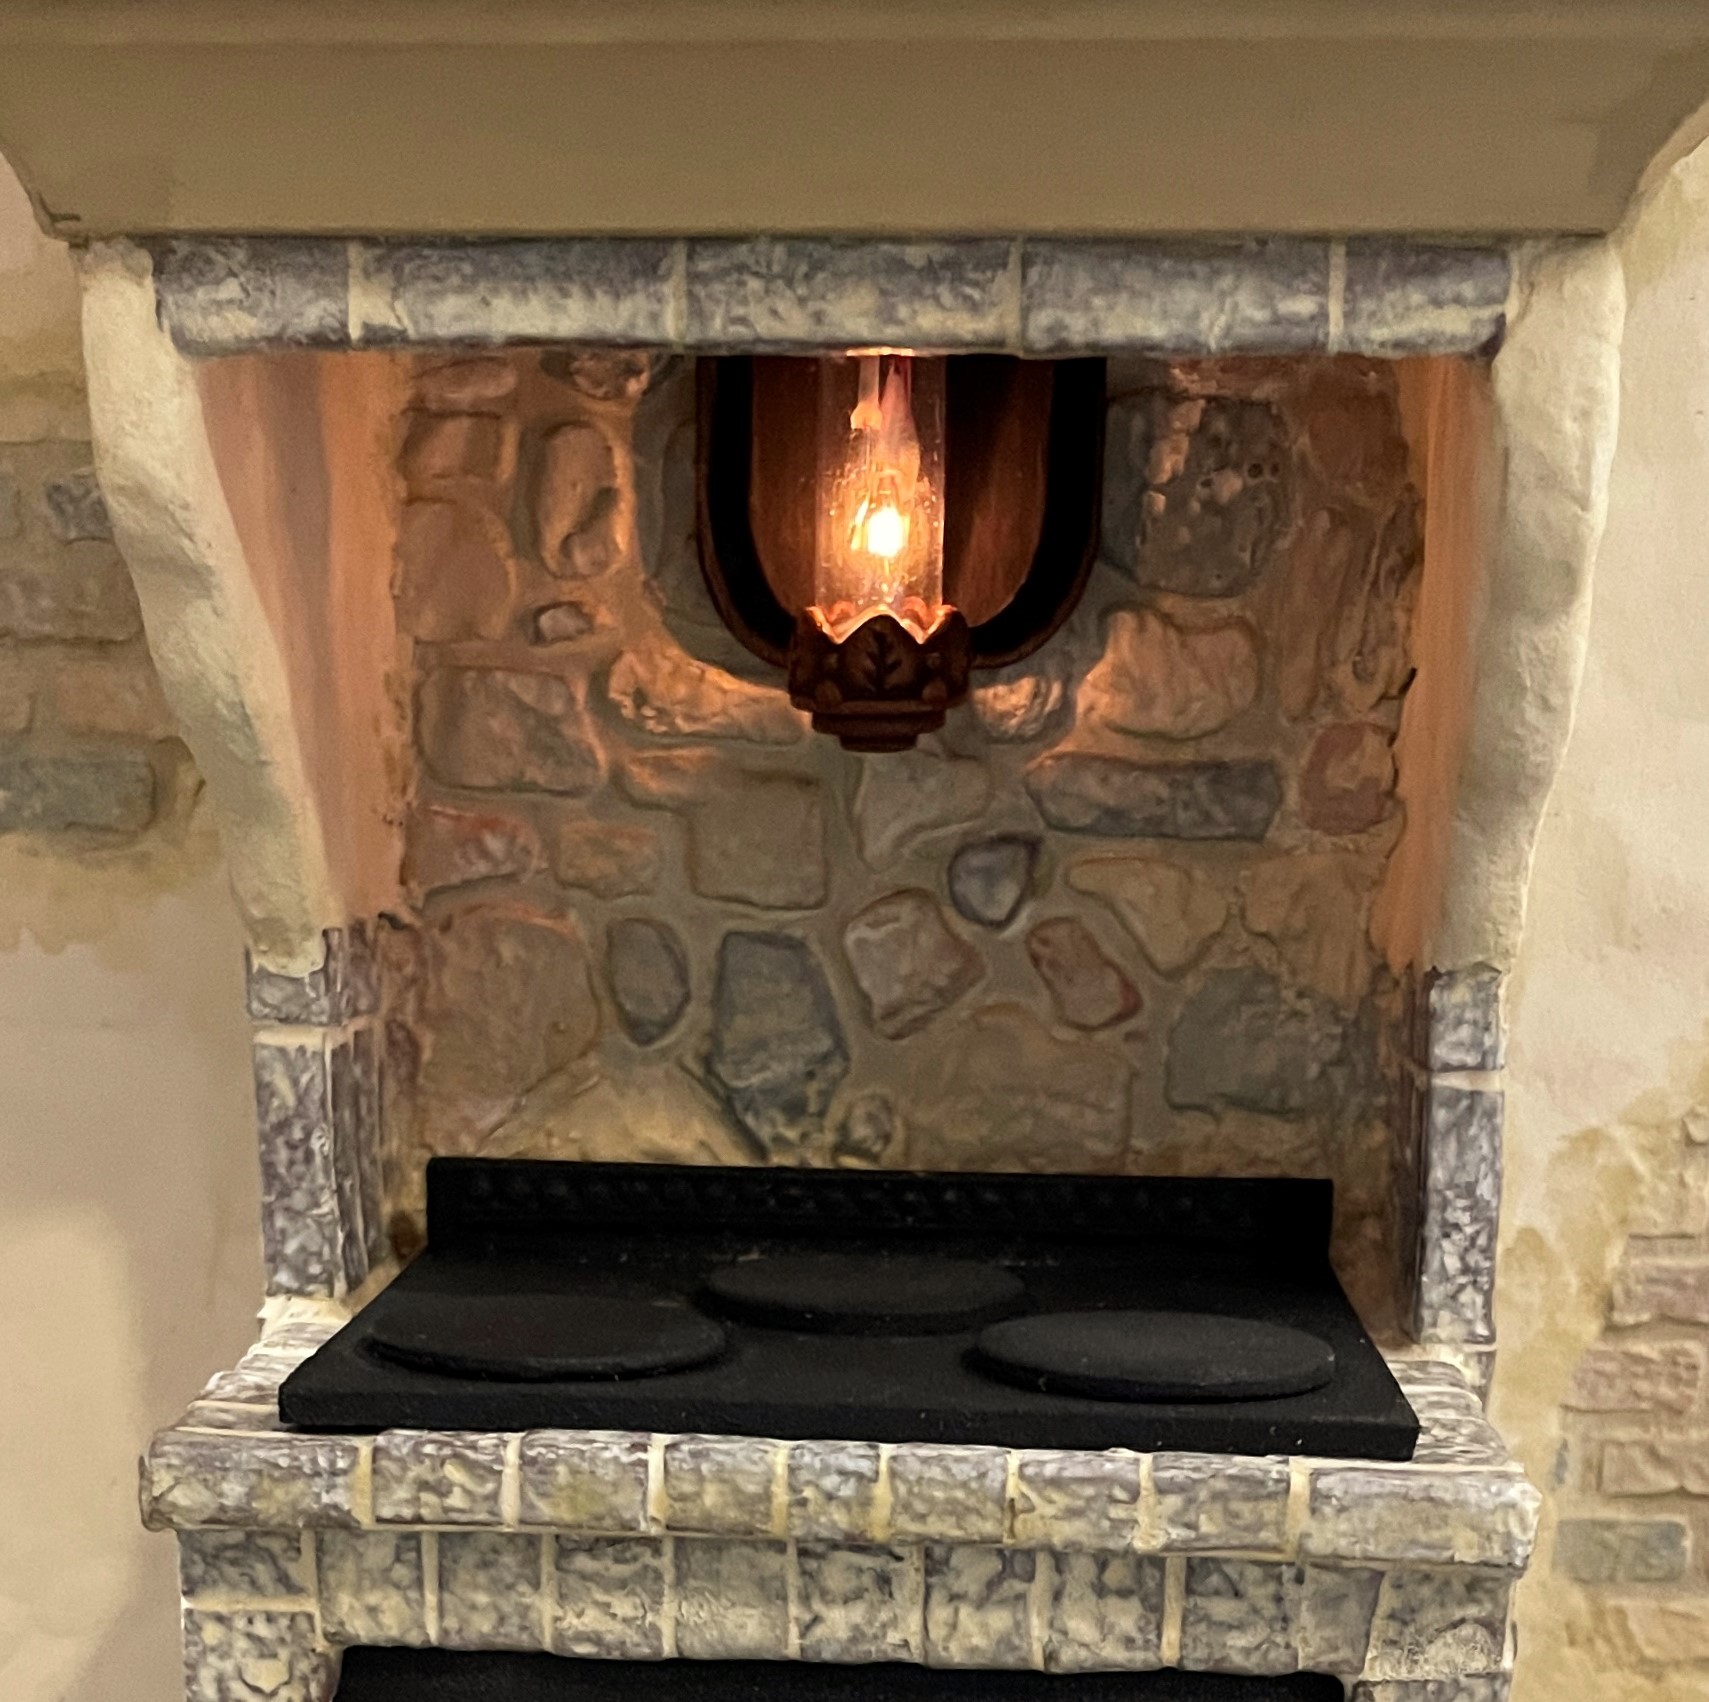
The next set of lights are going to be used as open flame candlelight fixtures, say on fireplace mantles. One is sold as a set and just needed to be painted. The next is a single, originally sold as a torchiere lamp, but by removing the shade and adding a painted straw tube, becomes a candle.


Speaking of bulb changing... Did you know that your fixtures' bulbs can also be changed out? Whether they have bi-pins or screw bases, you can switch between candle flame or more traditional looking bulbs. This provides additional possibilities to match the lighting to the time period or genre of your build.


These shaded fixtures already had an interesting shape, so by simply changing the finish, switching to fancier scalloped shades and adding sconce plates, they really look lovely.

Other than painting and adding double layer sconce plates, these hurricane glass sconces didn't need much to fit into the story.


Now we come to the girls' room lighting. This is definitely not the place for bronze or wood colors, no. This is the purple place, the green place, the fairytale space. And what better to light a fairy space than flower sconces? For these ornate sconces, I removed the screw-off acrylic flowers, removed the bulbs, primed and then painted with the room's colors. These will flank the future fireplace.

For the girls' cubbies, they needed reading fixtures. What started out as a modern metal fixture has been magically transformed to something more sweet and fairy like. Simply by switching shades to scalloped ones, painting and adding sconce plates, they are totally different. An added benefit to sconce plates is that they help distribute the weight of the fixture, helping it to adhere and stay put on the wall. More gluing area is always better!

Of course, once I had the lights ready I couldn't wait to get started installing them! I started with the kitchen bay fixture as this was the best time to reach in - while the kitchen's ceiling was out of the way. It's such a relief once the fixture is installed when the lights are still working!


Next, I installed the sconces that flank the future sink. I really like the Tudor style sconce plates!


I didn't chronicle making the above stove light fixture because it was a total afterthought. It is made from three single candle flame bulbs stuffed inside a necklace container pendant and then hung from a hook on a sconce plate.

This post is getting ridiculously long, so I'll only torture you with one last install - the girls' cubby reading lights. They are so excited about reading in their beds that they are already tearing apart my fabric drawer looking for the perfect bedding material!


Because of this little lighting side adventure, my progress on the actual structure of the fairytale treehouse came to a stop. But now, as construction resumes, each time I reach a new area and need to install a fixture, it'll be green lights all the way!
Hope you found something useful here to employ in your own magical creations!
xo xo,
Jodi
I love how the lights look! The purple and green flower sconces are so pretty! And the flowers wound through the kitchen chandelier are perfect.
ReplyDeleteI had a thought about Wayne's light, are the shades of a material that you'd be able to cut the tulip 'ruffles' off the bottom of the shade? Just eliminating those for a straight edge would give the fixture a more masculine look and if the edges get too rough you could wrap a strip of bronzed cardstock around the perimeter to hide the edge.
Thanks Sheila! Your idea for Wayne's light is a great one. You have my wheels turning now! Glad you like the sconces and chandelier - you can't go wrong with pretty colors and flowers, right?
DeleteThe house comes alive with the lighting. You have an impressive e supply of lighting to choose from. I like the idea of creating sconce plates, too. I always learn something new from you.
ReplyDeleteThanks Ann - I HAD a good supply of lighting but I've just about wiped it out, lol! It feels good the because I KNEW I'd use them one day! 😊 You know me - always looking for an opportunity to add another layer of detail. I hope you get to expand on the idea in your next lighting project!
DeleteWow!!! I'm so amazed by all your beautiful lamps, sconces, candles, etc. I had no idea there were so many options, no idea that you could make so many changes to them...and no idea how wonderful they'd be in a dollhouse! My brain is buzzing with ideas. I'd say your lighting was well worth the pause in construction.
ReplyDeleteThanks Michelle! Lighting a dollhouse is definitely a financial commitment worth the investment, but there is no need to go gold, lol! I hope you can take these ideas and find use for them in your projects!
DeleteTransforming the shiny gold to dark bronze was an excellent idea. All the lamps, wall scones and other light fixtures shed magical light in every corner of the rooms. My favorite is the kitchen lamp.
ReplyDeleteHugs, Drora
Thanks Drora! The bronze definitely helps tell the story we are trying to tell here! I'm glad you like the kitchen fixture with the flowers!
DeleteYou did indeed get the gears in my head turning, Jodi! Those are some truly awesome lighting transformations! I really love the Alice and Goldi's reading lights - I need them in 1:1!
ReplyDeleteJulia
Thanks Julia! I hope you can soon transform your fixtures into something that helps set the stage for your project! It is so much fun to let the creativity go wild! As for 1:1 lighting... Let's just say my dollhouses have better lighting than my house does, lol!
DeleteHi Jodi, I love how organised you are. It would cost me so much to stop doing the floors and ceilings to do the right thing of preparing all the lights before any further construction. I am just too impatient, can´t help myself! So, I really admire that you are strong enough to do the right thing. Also love the commitment you are displaying with this building and its style and "soul". Nothing scape your eye! The girls are very lucky and I am sure they appreciate dearly how you are considering every single detail.
ReplyDeleteAll the light fittings look just right and on the right place, my favourite one is the kitchen bay fixture, it is gorgeous!
I am not coming to blogger very often but sure I will keep coming to follow you and this magical adventure, xxx.
Thanks Alex! "Organized" is such a nice word for what I've got. I am pretty sure it's OCD, lol! It does trouble me to stop my progress in one direction to go in another, but I am usually happy with myself that I did. Kind of like flossing when you're so tired and just want to go to sleep. 😊 It is also a wrestle with discipline to be patient and go slowly enough to further the details, often having to redo something when I know I can make it better. But I have found over time that I truly enjoy giving that amount of love to a project, and when I go slower I appreciate the gift it is to indulge in this passion that much more. I guess in simple terms it is a labor of love.
DeleteI am so glad you are popping in to see the progress! Instagram is nice for seeing a lot of minis in a little time, but I love how connected Blogger makes me feel to my kindred mini friends. 💗
Me encanta la transformación de todas las luces de la casa, han quedado magníficas!! Ahora seguirás disfrutando y haciéndonos disfrutar de los siguientes pasos en la construcción de la casa, bravo!!
ReplyDeleteBesos.
¡Gracias Pilar! Es divertido ver lo que puede llegar a ser de las cosas cotidianas. Ahora tengo que esperar que la cantidad de luz que proporcionan las luminarias sea suficiente. Mi cajón está casi vacío ahora, lol!
DeleteDear Jodi, YOU ARE AMAZING!!!! The transformation of these light fixtures is simply awesome! That you did so many different "models" but all with the new theme and they all turned out simply fantastic is a Wonder beyond my imagining!!! I am simply amazed!!! And the best part is how wonderful and exactly right they all look!!!! What an enormous accomplishment! Thank you for sharing your methods.... the spray paint marathon clearly was time efficient! I can only scratch my head in wonder... (being the type who has not managed to make a "unified theme" for much of anything ever!!!) I am so enjoying this building journey... I just can't say how much inspiration it provides! :):):)
ReplyDeleteThanks Betsy! If ever I'm having a bad day and doubting myself I am going to come back here and read your incredibly kind encouragement! 💗 I do have to admit that my marathon spray painting and light finishing production line could have had a smidge to do with laziness. 😊 I am so happy to have inspired you, though, one of my creative heroes!
DeleteMenudo cambio les has dado a las lámparas y apliques, mucho mas en consonancia con el ambiente, me encantan las de las niñas, quedan unos ambientes acogedores y armoniosos. Me encantan.
ReplyDeleteUn beso
Gracias Matxalen! ¡Es bueno tener su voto de confianza en los cambios de imagen de las lámparas! ¡Poder personalizar elementos para nuestras mini historias es solo una de las razones por las que esta pasión es tan satisfactoria!
DeleteLas lámparas han cambiado muchísimo y la adaptación es estupenda. Tanto en color como en los nuevos elementos como las flores.
ReplyDelete¡Gracias Isabel! ¡Realmente me estoy divirtiendo con todos estos toques especiales! ¡Agradezco tu aliento!
DeleteYour new version of the lamps is perfect for this house. My favourite is the lamp with flowers, so refined.
ReplyDeleteThanks Faby! It is wonderful to have so many opportunities to personalize this project! I could probably spend several years on it an never run out of things to do!
DeleteLate again (my garden has a very demanding attitude in spring *sigh*) but not too late to say fully convinced: What a wonderful post! ;O) However, for a moment I was wondering if one of us should get an attorney for these poor innocent looking lamps being sentenced to hang from the gallow... but after this one second of wondering I remembered they really needed to be sentenced for their crime of being way too shiny. *LOL* I've always disliked this typical shiny gold tone of these brass miniatures so I'm first in line to assure you that this was the best and most stunning improvement you could ever grant them.
ReplyDeleteYou've worked once more miracles with a total makeover of these standard pieces. Adding flower touches was a stroke of genius and I also like the change the plates make to the sconces. But what I like the most of all is the cozy, friendly and inviting atmosphere your flowers create... perfect for a fantasy project, not too much... but enough for all sorts of adventures and fun.
Hugs
Birgit
You are never late and always bring sunshine to my day! I hope you are having a wonderful time in the garden! Everything is blooming late here this year but finally beginning to pop.
DeleteI suppose hanging the fixtures from a pole was kind of shocking! I should have had them all arranged in beauty shop chairs instead, focusing on a nicer theme like "makeover" rather than death, lol!
I'm glad you like the progress and the flowers, though I can't guarantee that they will stay "just enough" for long. These girls have gone flower wild and Wayne seems to have no end to his energy in helping them! I am going to have to come up with a clever way to help keep the dust to a minimum...