Search My Blog!

Use the Search box below to find keywords that you're looking for quickly and easily!

Search Feature

Sunday, April 3, 2022

On The Inside...

As human beings we have known for eons that what is inside a person is far more important than what kind of shell they come wrapped in. After all, our bodies are merely the vehicle which takes us through this life. If we dedicate ourselves to developing the soul that inhabits us, we can become truly beautiful. Yet still we struggle to see what is inside a person, and in fact, go to great effort and expense ourselves to keep our faces and bodies looking young and free of ageing. But how do we tend to the parts of us that are harder to see? It is baffling how we can see the truth right in front of us and yet we do not see. These thoughts were a constant companion this week as I focused on finishing the insides of the flower shops. You see, while there will be a front facade attached, obscuring an easy discernment of what is inside, I thought it was paramount for them to be filled with beauty all the same.


For the peach shop, I focused on the colors of Easter, drawing on memories as a child of the frilly dresses that were a part of every family Easter celebration. This was the one time of year where it was cool to leave my tomboy ways at home and revel in all things girly!

*You may have noticed that I have one bulb in the chandelier that is fussy. A tiny twist will get it going, a tiny bump will knock it out. Isn't this always the way with a project that is destined to be enclosed??? I will continue to work on a solution...


The fireplace includes twin pitchers but each distinguished with purple and pinky/peach bouquets of their own. The mantle centerpiece is made up of yellow roses, which symbolize friendship. There is also a bowl of wrapped candy and a pillar candle. The candles in the hearth were made using my own tutorial and are backed by a mirror (pot metal frame, metallic pen and craft mirror) to reflect the candlelight when they are lit. The topiary on either side are housed in the common resin type planters available at mini shops everywhere. I have finished them with a teal colored glaze and dirty water wash.


The left side of the shop is home to a half round display stand - a kit I got more than five years ago when this project was in the planning phase. I believe it was a Dragonfly International kit so they may still be available. On the display I have placed a mix of clear vases, some glass and some plastic. In them are several kinds of blooms which the florist can use to make up bouquets upon request. There are also pre-made pots for customers with last minute needs.


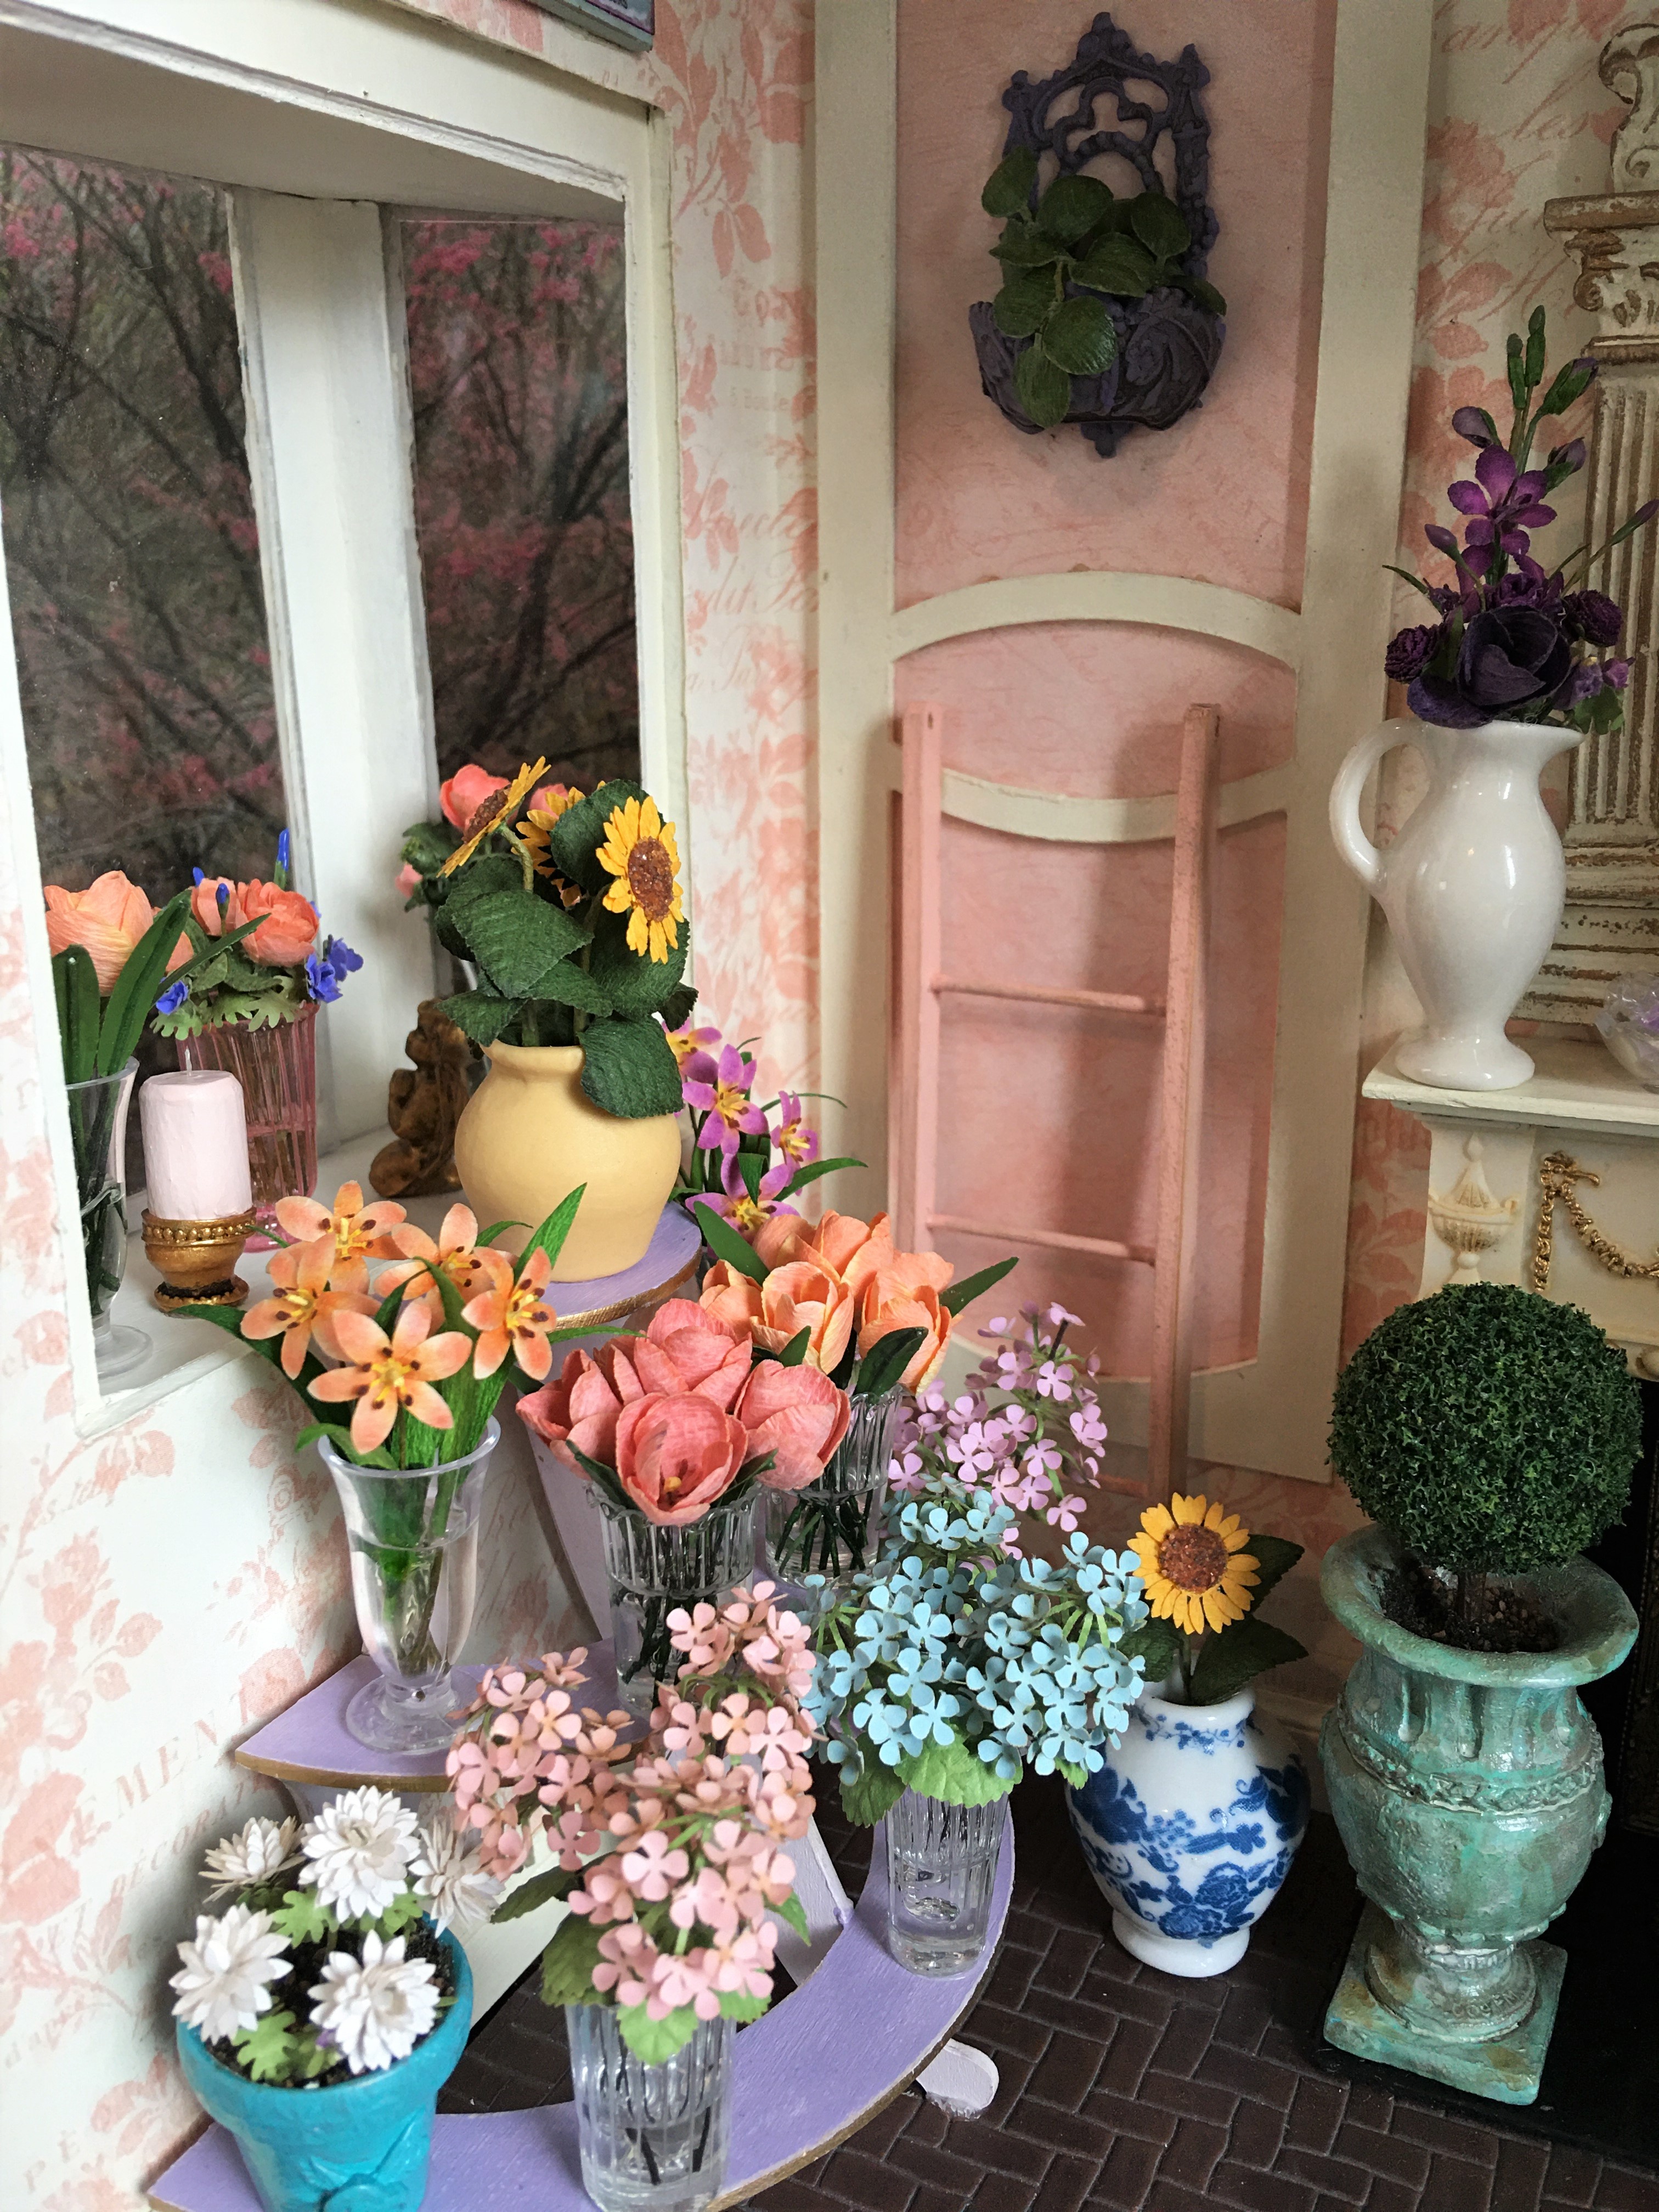
To entice customers to come in for a look and a smell, there are ready made vases in the bay window.


Here is a wider view of the left side of the shop. There is not much floor space left by design.


On the right side of the shop there are more displays, more ready made bouquets and several gift items available. One need only stop in for a moment to find the perfect, last minute gesture of affection for that special someone.


A closer view...


And one last look at the most unobscured view of the peach shop's insides. Soon, she will be safely enclosed in her shell.


And now for the blue shop. Bonnie - If you are lurking, stop here...


Much like it's sister shop, there is not much floor space to walk around. 


The fireplace is much like the peach shop, only more colorful with pink and peach flowers in purple glass vases. 


There are candles and a mirror in the hearth, and topiaries in pots all for sale...


On the left there are displays with single stem blooms for making up bouquets and last minute gifts, as well.


On the right, yellow roses, hydrangeas in every color and more gifts can be seen.


And now my friends, I can call the inside of the blue shop a good work well done, too!


It feels great to have filled the inside of these flower shops and to have had such fun doing so after all their idle years! Next week, I hope to share the finished exteriors. While I'd love for the outsides to be beautiful and enticing, I want the viewer to be just as thrilled when they look inside. A good reminder for us all.

xo xo,

Jodi

Saturday, March 26, 2022

Merci Bouquet

A little play on words to express my gratitude for generous bloggers who share their techniques and files, and also to the angels who helped to make sure that I had (nearly) enough flowers made for both shops!

Let's start where I started in the bouquet making process... Figuring out how many vases and pots and décor things I'd need to fill out each shop. I got out my pot and vase organizers and spread out various place holders in each shop just to get a rough idea of how many vases/pots I was potentially looking at having to make up. I was pretty much convinced after this exercise that I would be terribly short of flower stems! And that I would nearly wipe out my supply of vases and pots!


I determined that in order to have enough containers, I was going to have to make some. That's where some luck and gratitude came in! After a Google search for galvanized flower pots, I came across the We Love Miniatures tutorial on how to make galvanized flower buckets. Annie even provided a pattern for the buckets on her web site! We Love Miniatures Pattern Downloads Thanks so much, Annie!

I was able to bring the pattern into my graphics program, then isolate and clean up the pattern for import into Cricut Design Space. For those of you with a Cricut, here's a link to the file. It has 28 buckets and bottoms and fits on one piece of Cricut Kraft Board


My first cut didn't include the bottoms - that was an improvement I added after I realized it would be much easier to have my Maker cut the bottoms for me.


Following (almost) the tutorial in the video, I made up many buckets. 


Annie provides another great video on how to give things a zinc effect. I used it as a guideline for painting mine, though I included glazing medium in my silver and white layers and then finished them off with a satin varnish. I love how they turned out! Thanks again, Annie!


And here they are with the loose flower stems arranged inside. I arranged them as best as I could in the empty buckets, then grabbed the bunch and held them together, hoping not to disturb the arrangement too badly, while I filled the bucket with hot glue. Then I carefully popped the bunch in the bucket and wrangled any rebels back into submission. Once the hot glue had set, I was able to turn, bend, spread and arrange them until I liked the presentation.


I bet you're wondering if I really did have enough flower stems to fill both shops. The great news is - I did! And here is what I have left. 


I still need to add flowers to the hanging basket for the peach shop, but I have leftover leaves, a few fuchsia stems and a whole new Bonnie Lavish fuchsia kit to use. I can do that close to the end, though. I also had to make up five different sets of herb leaves, but they went pretty fast. 

Here are the vases I made up for the peach shop. In the clear glass and plastic vases, to hold the stems in and give them the look of resting in water, I used UV Resin And a UV Flashlight. For the non clear vases I used hot glue.


And the herb and flower pots. The herbs are SDK kits, and the topiaries are made up of huckleberry branches from my stash and MBS Squeeze Me Bushes. I think they are the 1-1/2" size. The little herb pot labels are 3D printed leftovers from when I made Tasha's Kitchen in 2020. Playing around with the alcohol inks to get the right shade of green for the herbs is challenging but fun!


I'll save the big reveal photos with everything loaded into the shops for next time. I want to hold back the blue shop's vases, pots and décor, too, in case the recipient stalks me, lol! She can't help but spy on me from time to time! I want her to enjoy a surprise!

Merci beaucoup for stopping by! See you next time!

xo xo,

Jodi

Sunday, March 20, 2022

How Much Is Enough?

How much is enough? Though I've been making flowers for weeks, it feels like my progress is slow. So slow that I wonder if I’ll have to adjust my Easter deadline. And, at the same time, I’m enjoying the process so much that I don’t ever want it to end. Truly, I’m just feeling so grateful that I’m allowed to bask in this glorious pleasure. At some point soon, there are household chores that won’t be delayed any longer. There again, I’m so grateful to be married to a guy who values a joyful soul more than a clean floor. :O)


This past two weeks (since my last post) I have embarked on several new flower varieties, though I stayed within the purple, orange, yellow and pink colorways. First were the lilies made from an SDK Miniatures kit


It was fascinating to see all of the color combinations that lilies come in. I settled on orange, purple and pink using alcohol ink markers and a blender by Windsor & Newton. When it came to the pink ones, I departed from the inspiration photo so that I could experiment a little. The flowers in the back are carnation kits by SDK Miniatures.


Next up were peonies from a kit by SDK. Here I used Ranger Alcohol Ink in shell pink, though the color comes out a very pretty and vibrant coral color on the kit's silk paper. I gave some of the blooms more petals than others to replicate the various growing stages.


These glorious roses were made from an SDK kit commemorating N.A.M.E.'s 50th anniversary. They came with a pretty square, opaque vase and a yellow ribbon. Yellow roses represent friendship, so this was a perfect color for my project. Trying to vein the leaves was tedious, so I opted to apply veins with a straight edge tool and ink pad.


These gladiolus kits took a lot of steps and patience to accomplish, but I really did enjoy the process. I just took my time and tried to work on them when I was in a peaceful and grateful state of mind. I wanted the choice to put them in vases and/or pots, so only attached one set of leaves to the flower stalks and left the rest of the leaves on their own floral wires as the instructions say. I love that there are buds and full flowers in all stages.


We went to Tasha's new house for dinner last weekend. She is in a rural, country setting, so from the freeway to her house there are many farms. I was delighted to see grazing fields full of daffodils! Spring is really here! Do cows eat daffodils? If so, they must love this time of year, too! Mine are a little bright, so before I place them in front of the shops, I think I'll dust them with a little brown artists chalk dust. The daffodil kit by SDK does not include buds, but it's easy enough to make them up as you complete the kit's steps.

I guess I should probably state here that SDK has not paid me or provided me with anything to promote their kits. I just enjoy them a lot. :O)


For the greenery that I need for the bouquet vases, I made up some eucalyptus branches from an SDK kit. I also made the lilac kit and made extra leaf stems for greenery - there are plenty extra! To color the leaves I used Ranger Alcohol inks. They come in various shades of green, and can be mixed and blended with their blending solution. It gives the leaves amazing shading and depth!


Mary Kinloch sometimes has rejects in her eBay store. They are the laser cut sheets where something went wrong and all are not perfect but many are still usable. I bought this daisy sheet for $2 and had enough passable petals to make thirteen daisies. I used leftover leaves from a Bonnie Lavish daisy kit. They will make great filler flowers.


I wanted to put a hanging basket out in front of each store. I had a couple cheap unfinished hanging baskets in my stash, so I stained them and then filled them with Paperclay. I covered the surface with glue, then sprinkled "dirt" on top. The SDK kits come with dirt, and there is always extra. I save it and never run out, but you can use scenic dirt, as well. I then applied glue in between the slats and applied reindeer moss over it. Once the glue was dry, I gave it a haircut. A moss covered hanging basket.


To fill the basket, I used an SDK Fuchsia kit. I thought I would have enough to make both baskets, but because I wanted a really full basket, I made one complete basket first. Turns out I did not quite have enough flowers and buds to make two baskets. There are plenty of extra leaves, though, so I will go with another idea for the second basket. It will be fun to figure out a solution!


I left the back of the basket flat so that the petals wouldn't interfere with the wall.


I'd like to believe that I have enough flowers to fill the shops -  seventeen different varieties! Some will go in vases, some will go in pots, and some will fill buckets with single color/variety stems. That process begins next, right after I publish this post, and will reveal the truth of the situation.


If it looks like I am falling short, I have the materials I need to make up topiaries, herb and plant pots, or I can just add some more décor type junk. In any case, it will be a fun and fulfilling endeavor!

I hope spring has brought fun and fulfilling endeavors to your doors, too! And to my friends in the southern hemisphere who are heading into fall... I hope the change of seasons is a welcome relief for you, as well!

xo xo,
Jodi