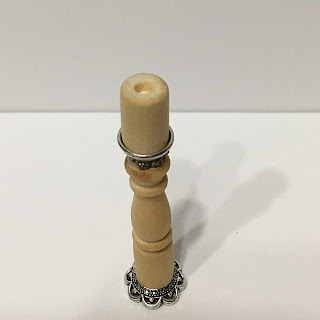
Here is a fun and easy way to create your own customized 1/12th Scale Candle Pillar & Candle!
Materials:
- Veranda Spindles
- 3/8" to 1/2" Bead Caps and/or Spacer Beads
- 26 - 28 Gauge Floral Wire
- Paint for "Wicks"
- Paint for Pillars
- Paint for Candles
- Mod Podge
- E6000 or Similar Contact Cement
- 250 & 400 Grit Sandpaper
Tools:
- Hobby Razor Saw & Miter Box
- Wire Cutter
- Paintbrushes
- Sewing Pin
- Toothpicks for Applying Glue
- 1/8" Finger Drill or *** Dremel w/ 1/8" drill Bit (see step 3) ***
- Xacto Knife
Step 1 - Start by cutting the top section off the Veranda Spindle. The top will become your candle. Sand smooth.
 Step 2 - I like to do them in pairs. Two Veranda Spindles will become a matching set of three pillars. In this case, on the second Veranda Spindle, cut off the top and bottom to become candles. Sand smooth.
*** I used my Dremel tool with a 1/8" drill bit to carve out my recess. The same can be achieved by hand with careful Xacto knife carving and sanding.***
 Step 4 - Glue the base bead cap to the pillar base, spacer bead and candle holder bead as shown to the pillar top. Do not glue candle yet. Let dry.
NOTE: You have the option of painting the pillar and beads all one color, or keeping the finish of the beads so they stand out. I have given an example of each in the tutorial header photos. If you are not a careful painter, you may want to paint the pillars before applying the beads. :O)
 Step 5 - Here is an example of the different looks you can achieve using various style beads. The possibilities are limitless! Just play around and have fun!
Now Paint in your desired color/s.
 Step 6 - Using your finger drill or Dremel, drill a recess into the candle portion of the Veranda Spindle about 1/8" deep. Sand down, smooth and round the edges.
NOTE: If you want to make used looking candles, make the opening bigger and less uniform. You can simulate candle drips later when applying paint and Mod Podge.
 Step 7 - Paint the candles in your desired color. You will most likely need to apply two coats, letting each one dry before adding the next. Sand between coats to achieve a smooth candle like finish. Applying two coats of Mod Podge at the end, again letting each coat dry before applying the next, will give you a nice candle like luster.
 Step 8 - While your pillars and candles are drying, paint the floral wire the color that you'd like your wick to be. I chose black so that it would show up better in the photos since my candles were white. If you want new candles, white would be more authentic. Black would be great for used candles. Once dry, Cut the wire into 3/4" lengths. Touch up any bare metal.
 Step 9 - After the candles have dried thoroughly, use the sewing pin to create a small hole in the center of the candle for the wick.
 Step 10 - Dip the wick in Mod Podge, then insert into the hole. Let dry completely before trimming down to size with your wire cutters.
Step 11 - Glue the candle into the pillar and enjoy your work!
For this set of pillars, I painted them entirely in Tim Holtz Metallics Aged Bronze, then applied a Patina finish Guilders Paste.
For this set of pillars I just painted in acrylic pink, distressed a bit with sandpaper, sealed with Mod Podge and left the silver finish on the beads.


Wow love this tutorial... I’m definitely going to try this. Thank you ☺️
ReplyDeleteWonderful thank you for sharing
ReplyDelete