

Greetings my fellow mini crazed!
There are so many things to love about this time of year! A BIG one is that miniature related blog posts seem to roll out more regularly, so ideas and inspiration are everywhere! It is truly a feast for the eyes and an uplift to the heart! It can also be a very hard time for a lot of us, too. The onset of holiday stress, loss of loved ones, depression, anxiety and even the uncertainty brought on by our ever changing world. To those of you who need a little extra love and support, my heart and prayers are with you. Please reach out to me or anyone you care for - it truly helps so much to share!
I am continuing to work on the soap shop with every minute I can spare. Time for playing is precious few, especially when you're in demand! Rusty is such a little doggie - he gets cold this time of year! He wants to be held and cuddled constantly! And he is so hard to resist! And Woodson always wants to play! That is... when he's not looking for extra treats! In spite of all the wonderful distraction, I managed to get a bit of mini-ing done.
The next step for the shop fixtures was to paint them with FolkArt chalk paint. But first, they needed some detail! I ordered some things to add detail to the fixtures like adhesive pearls and braided tapes etc... But they hadn't shipped yet and I was not willing to wait. I had to rummage through drawers and "borrow" things from other project stashes to get started.
To the grocery stand fixture, I cut out a section of embossed decorative border from a sheet I had tucked away for the New Orleans (still waiting for it's turn in the queue, but now that RGT has discontinued production on that kit I am sooooo glad I have it!). {{{Side Story Interjection - There was a lot of waste around the embossed area of the border sheet, so a little lightbulb went off. I grabbed some paper punches to see if they would work on the thick and velvety material. I found that the EK Tools stamps went right through the material and left clean cuts, but the Punch Bunch mini and small sized punches didn't really have the clearance needed for this material. Oh well, I'll file that info away for a later time... Now back to the regular program}}} I also cut and filed the loops from some nice fleur de lis jewelry findings and stuck them on with Elizabeth's favorite: Quick Grip! Worked great! I also added some dimensional stickers to see how they'd look once they were painted over and sanded.


I added on a couple thick coats of gray chalk paint (I had white and black so I mixed 'em!) to all of the shop fixtures, then sanded them smooth. It's the coat for the under color that will show through in places at the end.

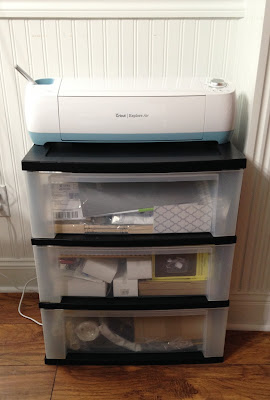
I had to do more rummaging for some of the other pieces. I was okay with using some of my stash of JMG because {{{Side Story Interjection - My New Cricut Explore Air arrived, and now I can cut as many beautiful scrolly accent pieces as I want to! I am still waiting on accessories and supplies, but I will post all about it soon. The hubs and son are working out of town for several weeks right after Thanksgiving (which is being hosted at my house this year and we have LOADS of people coming), so I will be here with only the doggies and LOTS of time for learning new things. Now back to the regular program}}} I stuck on more detailing where it seemed appropriate, on top of the first coat of white chalk paint. Then I added another layer of white chalk paint, let it dry, then sanded it smooth again. Following the easy directions, I sanded random spots a little more to reveal some of the gray paint underneath. Some spots went down to the wood, too, which I really liked.


Even the silver metallic stickers look awesome with a tiny bit sanded off!


The final step to finishing off the fixtures was to add the FolkArt wax, let them dry overnight, then buff... But WAIT!!! I am losing my place here... FIRST, I knew that I needed a little extra detail on the shabby fixtures to add a bit of CHIC! I saw Casey's really easy basket tutorial when I was dreaming about this project a year ago, and ordered the Penelope canvas from The Needlepoint Joint then! Great service! It was a simple matter to measure, cut and sand the Woodsies for each cubby. Since I made 23 of them, it was a real basket party!


I made them all in only a couple of hours! Great tutorial, fun and easy to do and so satisfying to see them done!
But then, in keeping with the spirit of and vision for the project, I decided overnight to paint them all white. Ever painted things with lots of holes in them? Oh yeah! I got more paint on my fingers than anyplace else! And let me tell you, that chalk paint isn't easily removed! I didn't run embroidery floss through them - yet. I may or may not. I am not sure at this point if I want anything to compete with the colorful accessories. I like the idea of having them be the only color - the fixtures should just be the canvas. Here you see some of the baskets drying, along side the fixtures that are waxed and drying. I decided to use the clear wax because I wanted smooth and shiny, but not so used and worn. I did try the white wax, but it has more of a yellowing effect, and that made the piece I tried look a little dirty. No one wants to shop at a dirty soap store!!!

{{{Side Story Interjection - I have been collecting some really fun glassware over the past year for this project and couldn't wait to set it up! I know it is waaaaay too early in the project, but I just had to see how they looked! Swoon - I just LOVE pretty, girlie glass! Soon I have to decide how I will fill them up! The seller included some soaps and candles as a Thank You for being a patient buyer, but I'll need to make MORE of EVERYTHING! Now back to the regular program}}}


After the waxed fixtures sat, I was able to begin wiping and buffing them. I actually let them sit two extra days because I was distracted - more on that in a minute. By the time I got to them, the wax had dried. Just a really quick buff with a cotton napkin and they were smooth and felt "finished".

For the next part of the project, I need to have a lot of working space. This won't be my first time making silicone molds and casting with resin, but I'm using more "professional" materials and will be working on more complicated models. In other words, I expect to wreck the joint! I think I should get the Creatin' Contest photos finished and get The Three Little Pigs: Revenge packed away for the library.
In the meantime, I'll be getting better acquainted with the Cricut Explore Air machine and the Cricut Design Space software. I'll post a full report on it next time!
Until next time... Don't squat with your spurs on!
Jodi
 |
| Rusty (1-1/2yrs) left, Woodson (1yr) right. Both are Miniature Pinscher (even my puppies are miniature!). I can never capture them when they're still! |
To the grocery stand fixture, I cut out a section of embossed decorative border from a sheet I had tucked away for the New Orleans (still waiting for it's turn in the queue, but now that RGT has discontinued production on that kit I am sooooo glad I have it!). {{{Side Story Interjection - There was a lot of waste around the embossed area of the border sheet, so a little lightbulb went off. I grabbed some paper punches to see if they would work on the thick and velvety material. I found that the EK Tools stamps went right through the material and left clean cuts, but the Punch Bunch mini and small sized punches didn't really have the clearance needed for this material. Oh well, I'll file that info away for a later time... Now back to the regular program}}} I also cut and filed the loops from some nice fleur de lis jewelry findings and stuck them on with Elizabeth's favorite: Quick Grip! Worked great! I also added some dimensional stickers to see how they'd look once they were painted over and sanded.


I added on a couple thick coats of gray chalk paint (I had white and black so I mixed 'em!) to all of the shop fixtures, then sanded them smooth. It's the coat for the under color that will show through in places at the end.

I had to do more rummaging for some of the other pieces. I was okay with using some of my stash of JMG because {{{Side Story Interjection - My New Cricut Explore Air arrived, and now I can cut as many beautiful scrolly accent pieces as I want to! I am still waiting on accessories and supplies, but I will post all about it soon. The hubs and son are working out of town for several weeks right after Thanksgiving (which is being hosted at my house this year and we have LOADS of people coming), so I will be here with only the doggies and LOTS of time for learning new things. Now back to the regular program}}} I stuck on more detailing where it seemed appropriate, on top of the first coat of white chalk paint. Then I added another layer of white chalk paint, let it dry, then sanded it smooth again. Following the easy directions, I sanded random spots a little more to reveal some of the gray paint underneath. Some spots went down to the wood, too, which I really liked.


Even the silver metallic stickers look awesome with a tiny bit sanded off!


The final step to finishing off the fixtures was to add the FolkArt wax, let them dry overnight, then buff... But WAIT!!! I am losing my place here... FIRST, I knew that I needed a little extra detail on the shabby fixtures to add a bit of CHIC! I saw Casey's really easy basket tutorial when I was dreaming about this project a year ago, and ordered the Penelope canvas from The Needlepoint Joint then! Great service! It was a simple matter to measure, cut and sand the Woodsies for each cubby. Since I made 23 of them, it was a real basket party!


I made them all in only a couple of hours! Great tutorial, fun and easy to do and so satisfying to see them done!
But then, in keeping with the spirit of and vision for the project, I decided overnight to paint them all white. Ever painted things with lots of holes in them? Oh yeah! I got more paint on my fingers than anyplace else! And let me tell you, that chalk paint isn't easily removed! I didn't run embroidery floss through them - yet. I may or may not. I am not sure at this point if I want anything to compete with the colorful accessories. I like the idea of having them be the only color - the fixtures should just be the canvas. Here you see some of the baskets drying, along side the fixtures that are waxed and drying. I decided to use the clear wax because I wanted smooth and shiny, but not so used and worn. I did try the white wax, but it has more of a yellowing effect, and that made the piece I tried look a little dirty. No one wants to shop at a dirty soap store!!!

 |
| Dizzy? Me too! |
{{{Side Story Interjection - I have been collecting some really fun glassware over the past year for this project and couldn't wait to set it up! I know it is waaaaay too early in the project, but I just had to see how they looked! Swoon - I just LOVE pretty, girlie glass! Soon I have to decide how I will fill them up! The seller included some soaps and candles as a Thank You for being a patient buyer, but I'll need to make MORE of EVERYTHING! Now back to the regular program}}}


After the waxed fixtures sat, I was able to begin wiping and buffing them. I actually let them sit two extra days because I was distracted - more on that in a minute. By the time I got to them, the wax had dried. Just a really quick buff with a cotton napkin and they were smooth and felt "finished".

For the next part of the project, I need to have a lot of working space. This won't be my first time making silicone molds and casting with resin, but I'm using more "professional" materials and will be working on more complicated models. In other words, I expect to wreck the joint! I think I should get the Creatin' Contest photos finished and get The Three Little Pigs: Revenge packed away for the library.
In the meantime, I'll be getting better acquainted with the Cricut Explore Air machine and the Cricut Design Space software. I'll post a full report on it next time!

Until next time... Don't squat with your spurs on!
Jodi
Hurrah! Your Sunday posting finally showed up today. I had seen a thumbnail of it on Mitchymoo and kept looking for it on your blog. It was worth the wait. Everything in the shop looks great. The glassware is beautiful, as are your baskets and lacy shelves. Give those dogs a big cuddle, They help us through the tough times with their love. I'm looking forward to your molding and lace cutting. It is a bit early but Happy Thanksgiving to you and your family.
ReplyDeleteThanks so much, Sheeley! I am glad it was worth the wait! Pushing the PUBLISH button on Sunday was a little premature! I had to REVERT TO DRAFT real quick, but I was not quick enough! I'll definitely give the puppies your love, and I hope that you have a very joyful Thanksgiving, too!
DeleteThe soap shop looks beautiful Jodi. I'm so glad scrapbooking and jewelry making are so popular, because they give us so many interesting things to use in our minis! Your embellishments look great, and I love the baskets!
ReplyDeleteI love the glass containers too. They will really make the soap shop sparkle!
Thanks Kathi! I am having fun again with this project! Until recently, my horizons were not very broad with regard to looking at other media as an addition to miniature crafting, There is a whole new world of inspiration out there! I get quite lost in all of it, but it leaves so much to look forward to! Hope you and the hubs (and your mom) have a wonderful Thanksgiving! TTYS!
DeleteJodi, this looks fabuoous. And thanks for the basket tuto - real easy and so many ideas came to my head ;-). Now off to the soap production!
ReplyDeleteThank you, Marion! It is really nice that there are still quick and easy things we can make amongst the hair pulling fiddly stuff! Nearly instant gratification is just what I need sometimes! Yes - lots of challenging things to come, and I am so grateful to have the time to enjoy them!
DeleteThe shop is really looking beautiful with the white furniture and accessories...what lovely glassware and it looks charming with the ribbons and pretty contents. You are certainly creative with trims and scraps from other hobbies...looking forward to seeing how the Cricut Explore Air will be used! Cheers, Alayne
ReplyDeleteThanks Alayne! It is so nice to have license to go girly crazy on this project! I just love the bows and lace and am excited to start adding the fun and interesting details soon! As for the Cricut, I have practiced a bit and have finished designing some projects in the software. As soon as all of the Turkey Day celebrations are wrapped up, I will jump in with both feet!
DeleteHow did I miss this post? I love how your added trims look. Gorgeous! The detail is perfect! And those baskets are the perfect touch.
ReplyDeleteNo internet will throw you off like that! I am eagerly awaiting your next post! BTW... Are you going to start back on the beach house soon? It was looking so great with the built ins and the neat tiles and diagonally run flooring that I really want you to finish!
DeleteHello Jodi,
ReplyDeleteIt might have been a pain to paint, but so worth it! They all look so realistic and well done. It is perfect for the space and I quite like the white finish. Your collection of glassware is also beautiful. What a great shop!
Big hug
Giac
Thanks, Giac! This poor project must feel like the fifth wife! I will work on her again, eventually...
Delete