Search My Blog!

Use the Search box below to find keywords that you're looking for quickly and easily!

Search Feature

Saturday, February 27, 2021

The Miniature Zone...

"It is a dimension as vast as space and as timeless as infinity. It is the middle ground between light and shadow, between science and superstition, and it lies between the pit of a person's fears and the summit of their knowledge. This is the dimension of imagination. It is an area which we call The Miniature Zone."

You may recognize my twist on the monologue from The Twilight Zone. For me, being elbow deep in the fulfillment of a long imagined mini dream is just like being transported into a different time and space. And it is... Simply Marvelous!


The above photo demonstrates how utter chaos transforms, and the vision in my mind emerges into reality! But how to get there? Simply one little task at a time...

First, I added some head room to the kit's walls with an additional inch and one half of plywood. And then I glued on the kit's gabled wall sections. Last week I also cut the opening for the window over the sink. A sink window is a Must Have! It's such a treat to gaze through, the view and the possibilities taking your mind away from whatever kitchen drudgery you happen to be currently engaged in. Even five inch tall dollhouse people like it, trust me. :0)

I added an embossed wallpaper to certain sections of the walls - the ones that are going to show. I like it because of it's plain white unobtrusiveness, and yet it still gives texture in a vaguely nautical way.


I glued the back and left wall to the floor. The right wall will remain apart for a time, so as to allow for my very unladylike hands to reach in and manipulate, clamp and have access to things.

The cabinetry, both design and execution was complicated. In fact, I am pretty sure that I overheated my brain circuits and that actual smoke escaped from my ears. Is that why the dogs were looking at me funny?

Overall measurements are simple enough, but start subtracting the thicknesses of material while watching a pretend video in your mind of how parts will fit together and that's where trouble begins. I found that I had confused myself several times. It is indeed an activity for the sharp minded. I used to be one of those...


The numbers on the graph paper have to be converted into shapes in the Cricut Design Space program. Here, I convert fractions to decimals. I usually get them right. And when I don't, or I miscalculate, I must come up with a solution. I often ask myself "what was I thinking?".
Each color represents a cabinet and a sheet to be printed.


The Cricut Maker cuts the flat pack designed furniture parts from 2mm chipboard.

Or 1/16" basswood. It takes stain beautifully.

And then, the assembly begins. You have to remember your intentions. How did I plan to fit these pieces together? As I sit and ponder what I've done, I imagine I have the look of a person who's just been concussed. The lights are on, and there are signs of life, but the systems are coming online again ~slowly~... The dogs stare at me, tilting their heads left then right. It seems I've confused them, too.


Ah yes! Basic box cabinets with simple Shaker doors affixed to solid cabinet fronts. Appliance dummies where appropriate. Now I remember!


And we're getting somewhere...


Time for some paint. I check with Tasha again to make sure she has chosen her favorite shade of Navy. This time, she picks the opposite of the one she chose the first time. Oh nuts! I talk her into the one on the left which is slightly more jaunty because that is the perfect adjective for Tasha.

And much gluing, painting, sanding, clamping later, we have the semblance of a kitchen.

And there's still so much left to do.

And I LOVE it! And I love The Miniature Zone!

This weekend: cabinet hardware, cabinet fronts, loading permanent items into glass front (non accessible later) cabinets, appliance fronts and... Possibly, if time stops for me as it did in the Twilight Zone episode A Kind Of Stopwatch, countertops. But I doubt it.

And making rubber molds of bottles. I need lots of bottles. And I had almost enough mold material for the first mold. Almost. Now I await UPS.


I hope your projects are showing promise and that you find yourself in The Miniature Zone!

xo xo,

Jodi

Thursday, February 18, 2021

Natasha's Kitchen - Roof And Ceiling

In the post before last I'd shown you that I added extensions to the walls to make them about an inch and a half higher. Once that portion of the build was done it was time to move on to the roof/ceiling.

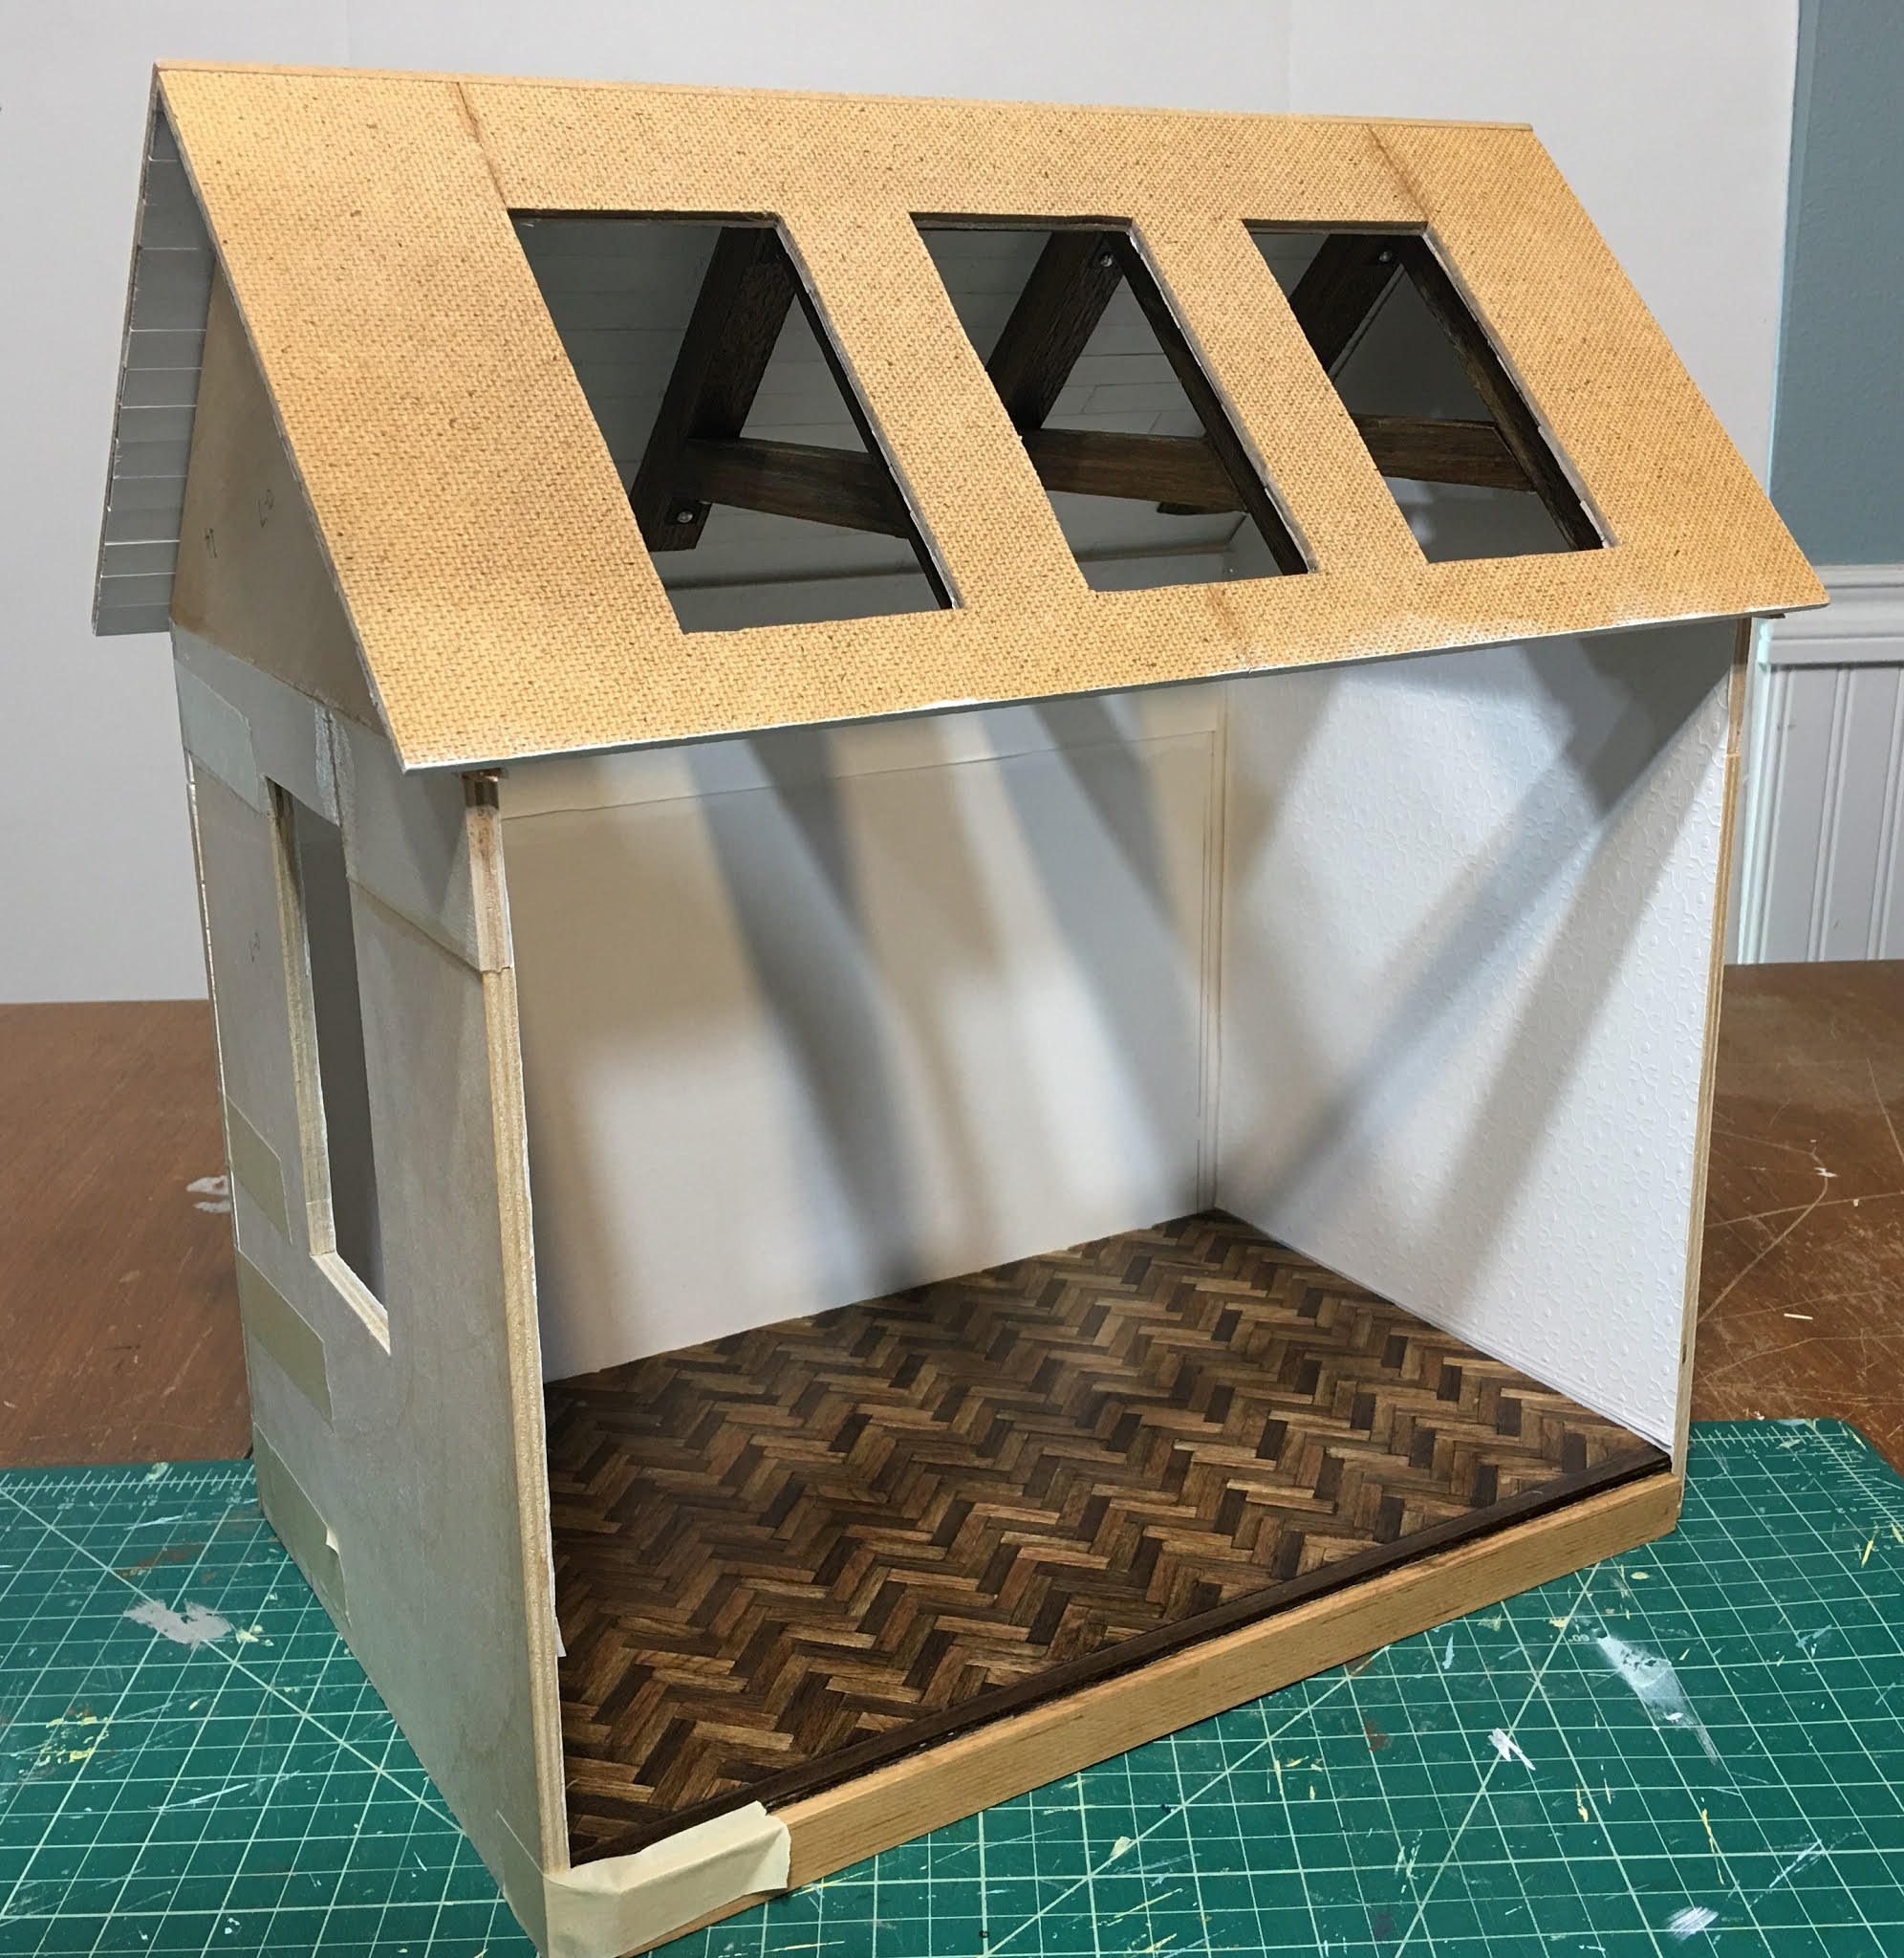
See the groove in the floor at the front of the room box? That is to hold a piece of plexiglass to protect the things displayed inside from dirt and dust. Originally, I had intended to make the front half of the roof hinge open so that the plexiglass panel could be lifted up and removed. But in a "Senior Moment" that I'll explain later, that was no longer an option. I'll share the new plan for removing the plexiglass in a later post on the main structure. For this post, in the interest of not hogging all your blog reading time, we'll stick to the ceiling/roof. 


Although I knew I would be installing lighting in this project, I thought it would also be nice to bring more natural light inside, too. So I cut holes in the front half of the roof for skylights.


While I had the scroll saw out and was already making a sawdust mess, I thought I better just cut the sink window opening, as well. More on that in the next post.


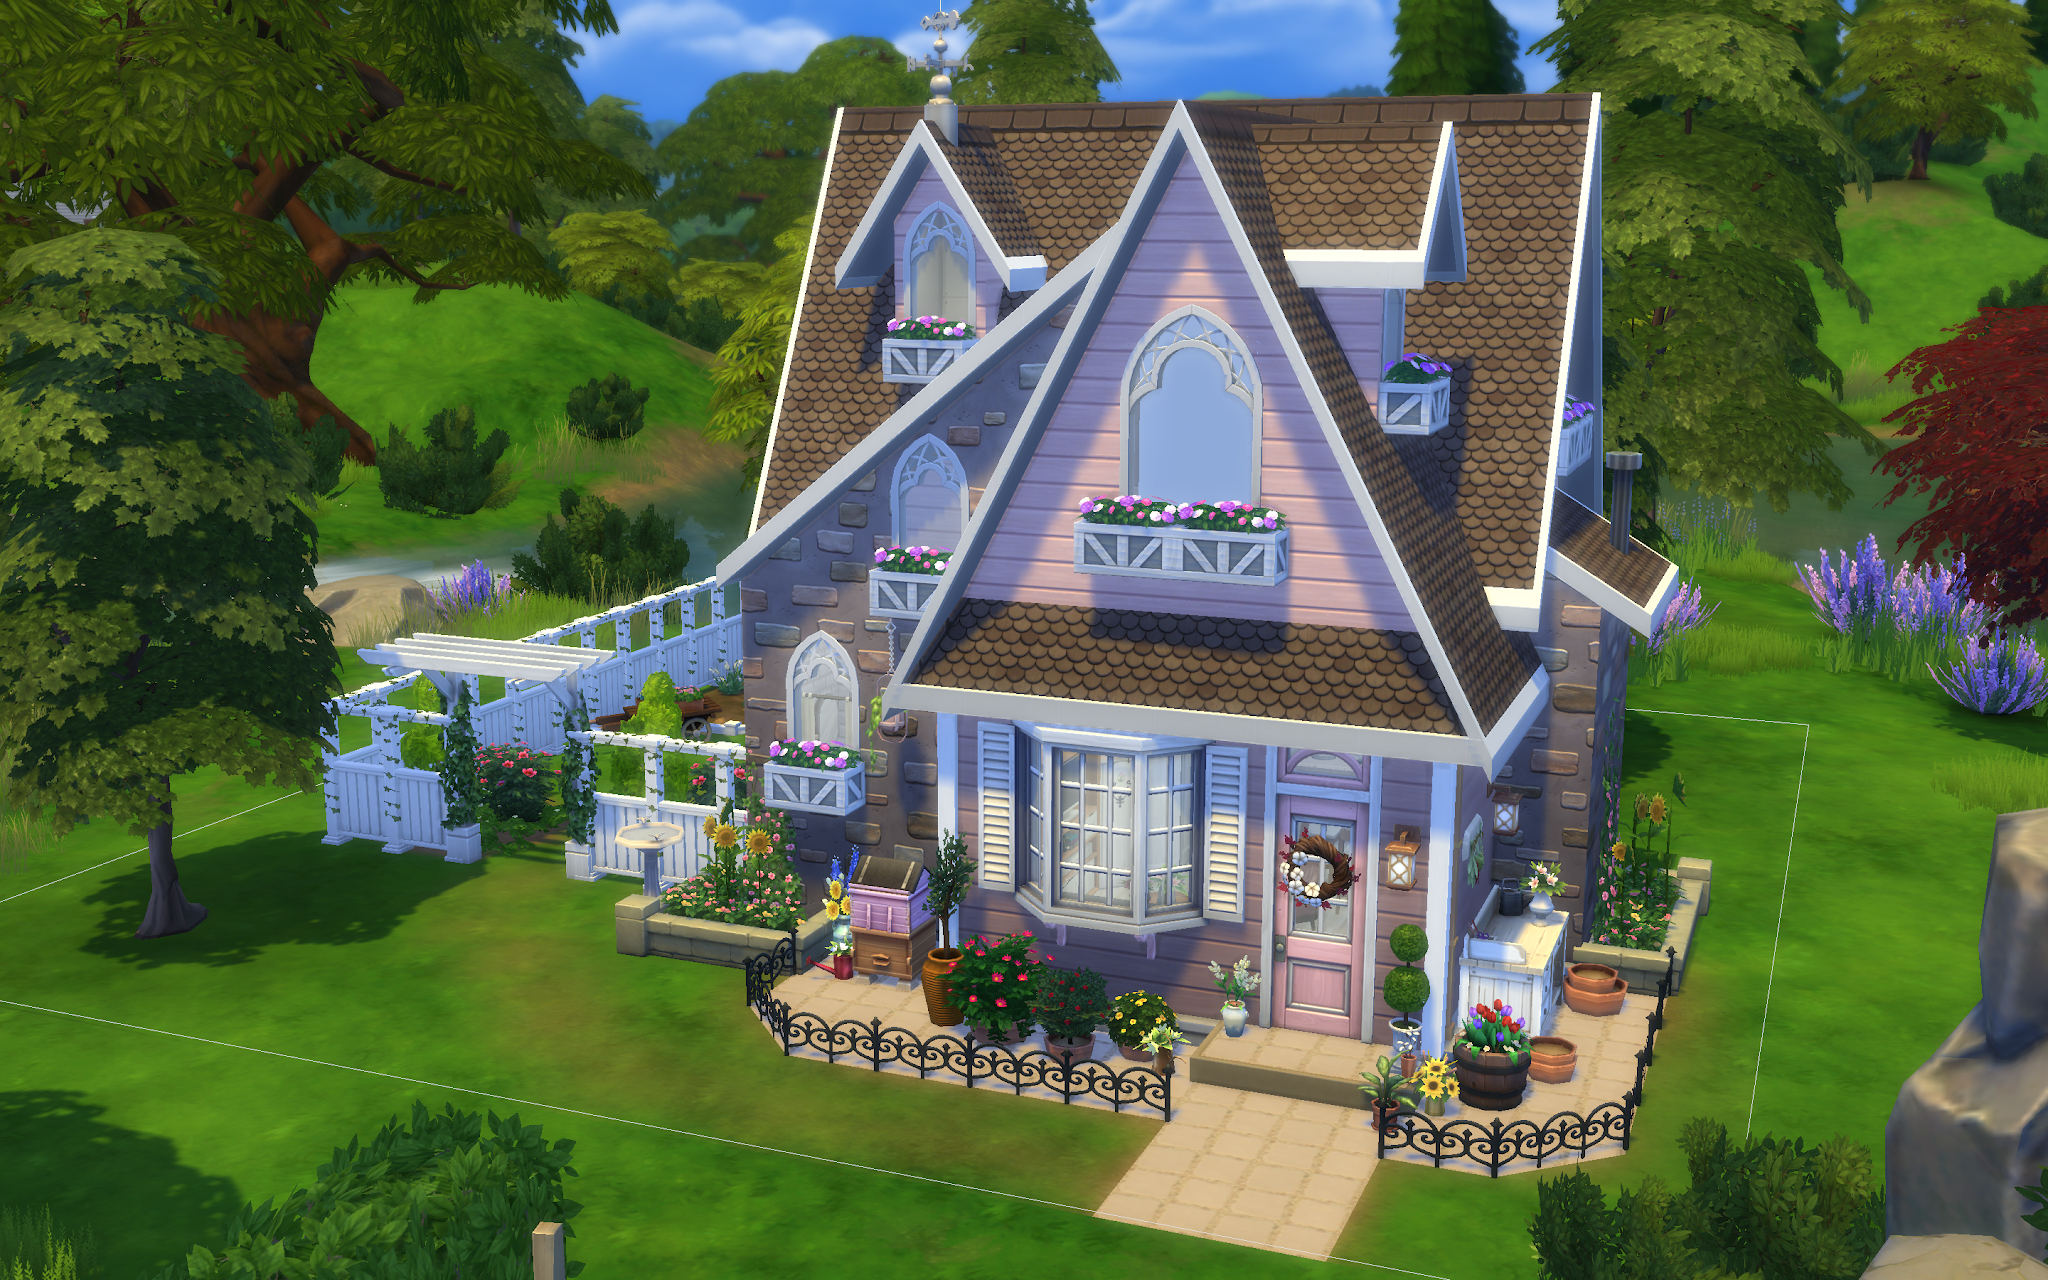
For the inside of the ceiling, I planned on leaving it vaulted with exposed cladding and roof trusses. As if the kitchen were in an old house that had been updated, but also embraced the home's history and the workmanship of an era gone by. Both Tasha and I appreciate Time's Patina, and when played off of more modern fixtures, magic happens. I am no expert on aging miniatures, but I gave it my best shot on the ceiling.

I painted a rough coat of 3 parts water to 1 part brown paint onto 1/16" x 1/2" basswood (both sides to prevent curling). Once that was dry I applied a light coat of white to one side. This is the same method I successfully applied for the shiplap boards in the Display Shop project.


Once dry, I lightly sanded until some of the white paint chipped and revealed some brown paint beneath. This was the look I was going for. 


To begin laying the cladding onto the ceiling, I first needed to join the ceiling with the 5/8" square beam that came in the kit. This is where I forgot that I needed the front roof panel to remain free so that I could attach a piano hinge. Instead, I plowed ahead and glued both roof pieces to the beam. I only realized my mistake after I'd already applied several of the cladding strips, too late to be undone.

Not to worry! "Senior Moments" don't have to be followed by "Charmin Moments". I calmly thought through the problem and contemplated ways I could still have a sliding plexiglass panel. In my next post I'll show you the solution I figured out that will still allow the plexiglass panel to be removed.

Once I had all of the cladding applied, I needed to come up with material to make the roof trusses. I had ordered some material in anticipation of the task, but it was not meant to be. The company is new to ecommerce, lost the order, was backordered on the product anyway, and ultimately issued me a refund. So this is where Russ, the handiest and most helpful husband in the world, came in. 

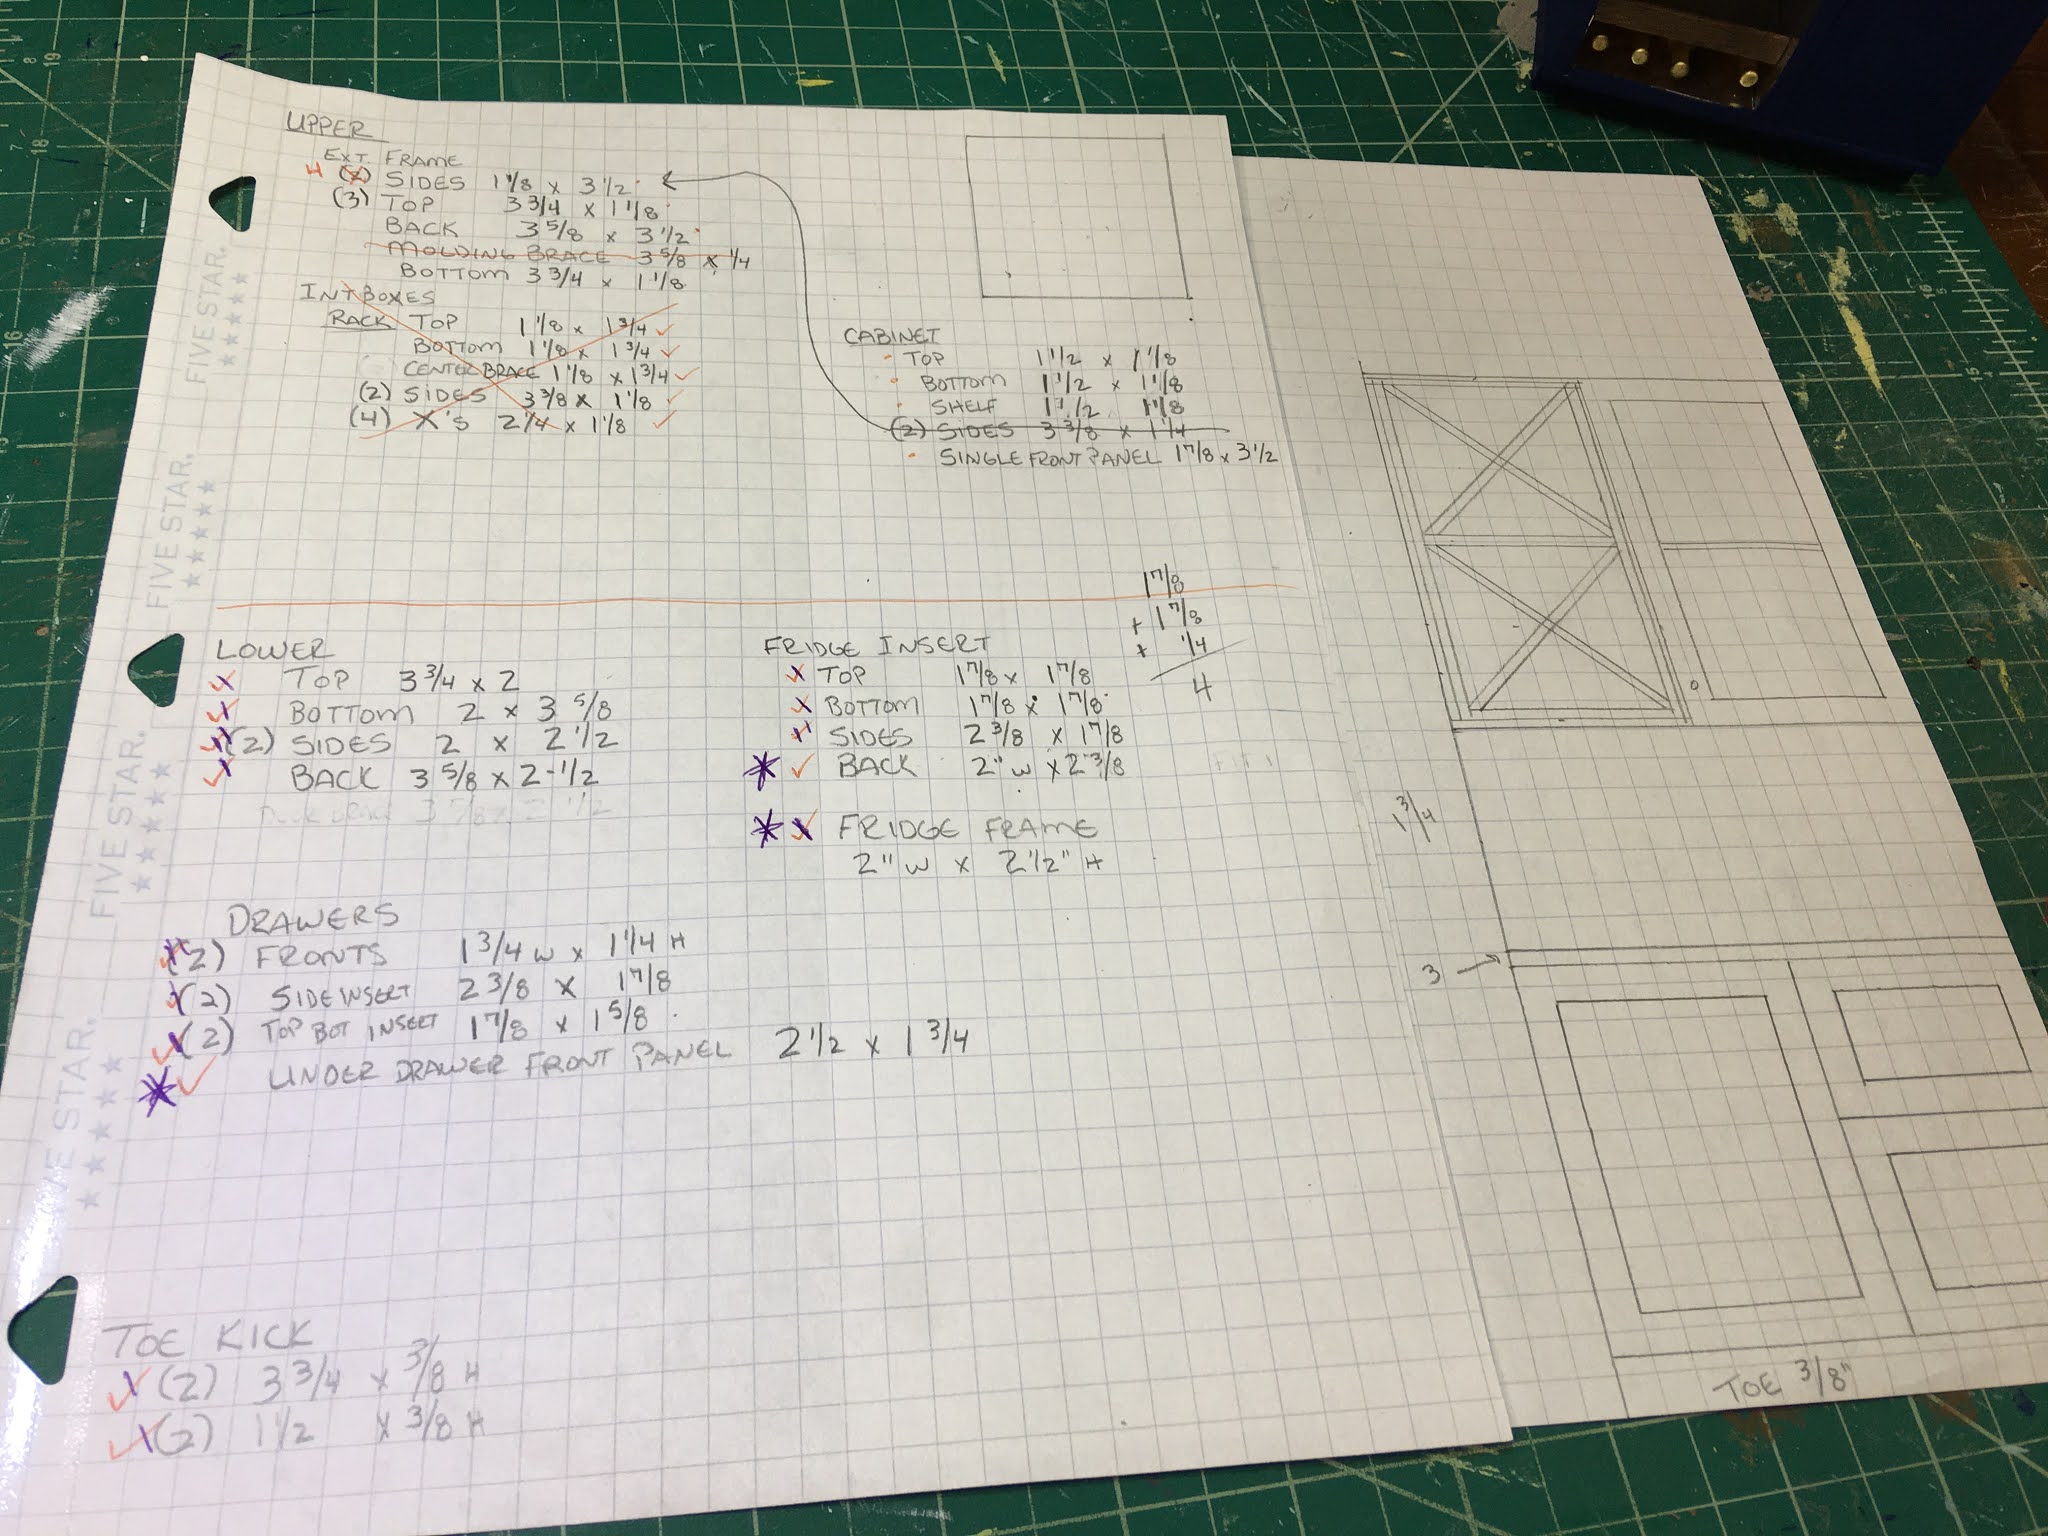
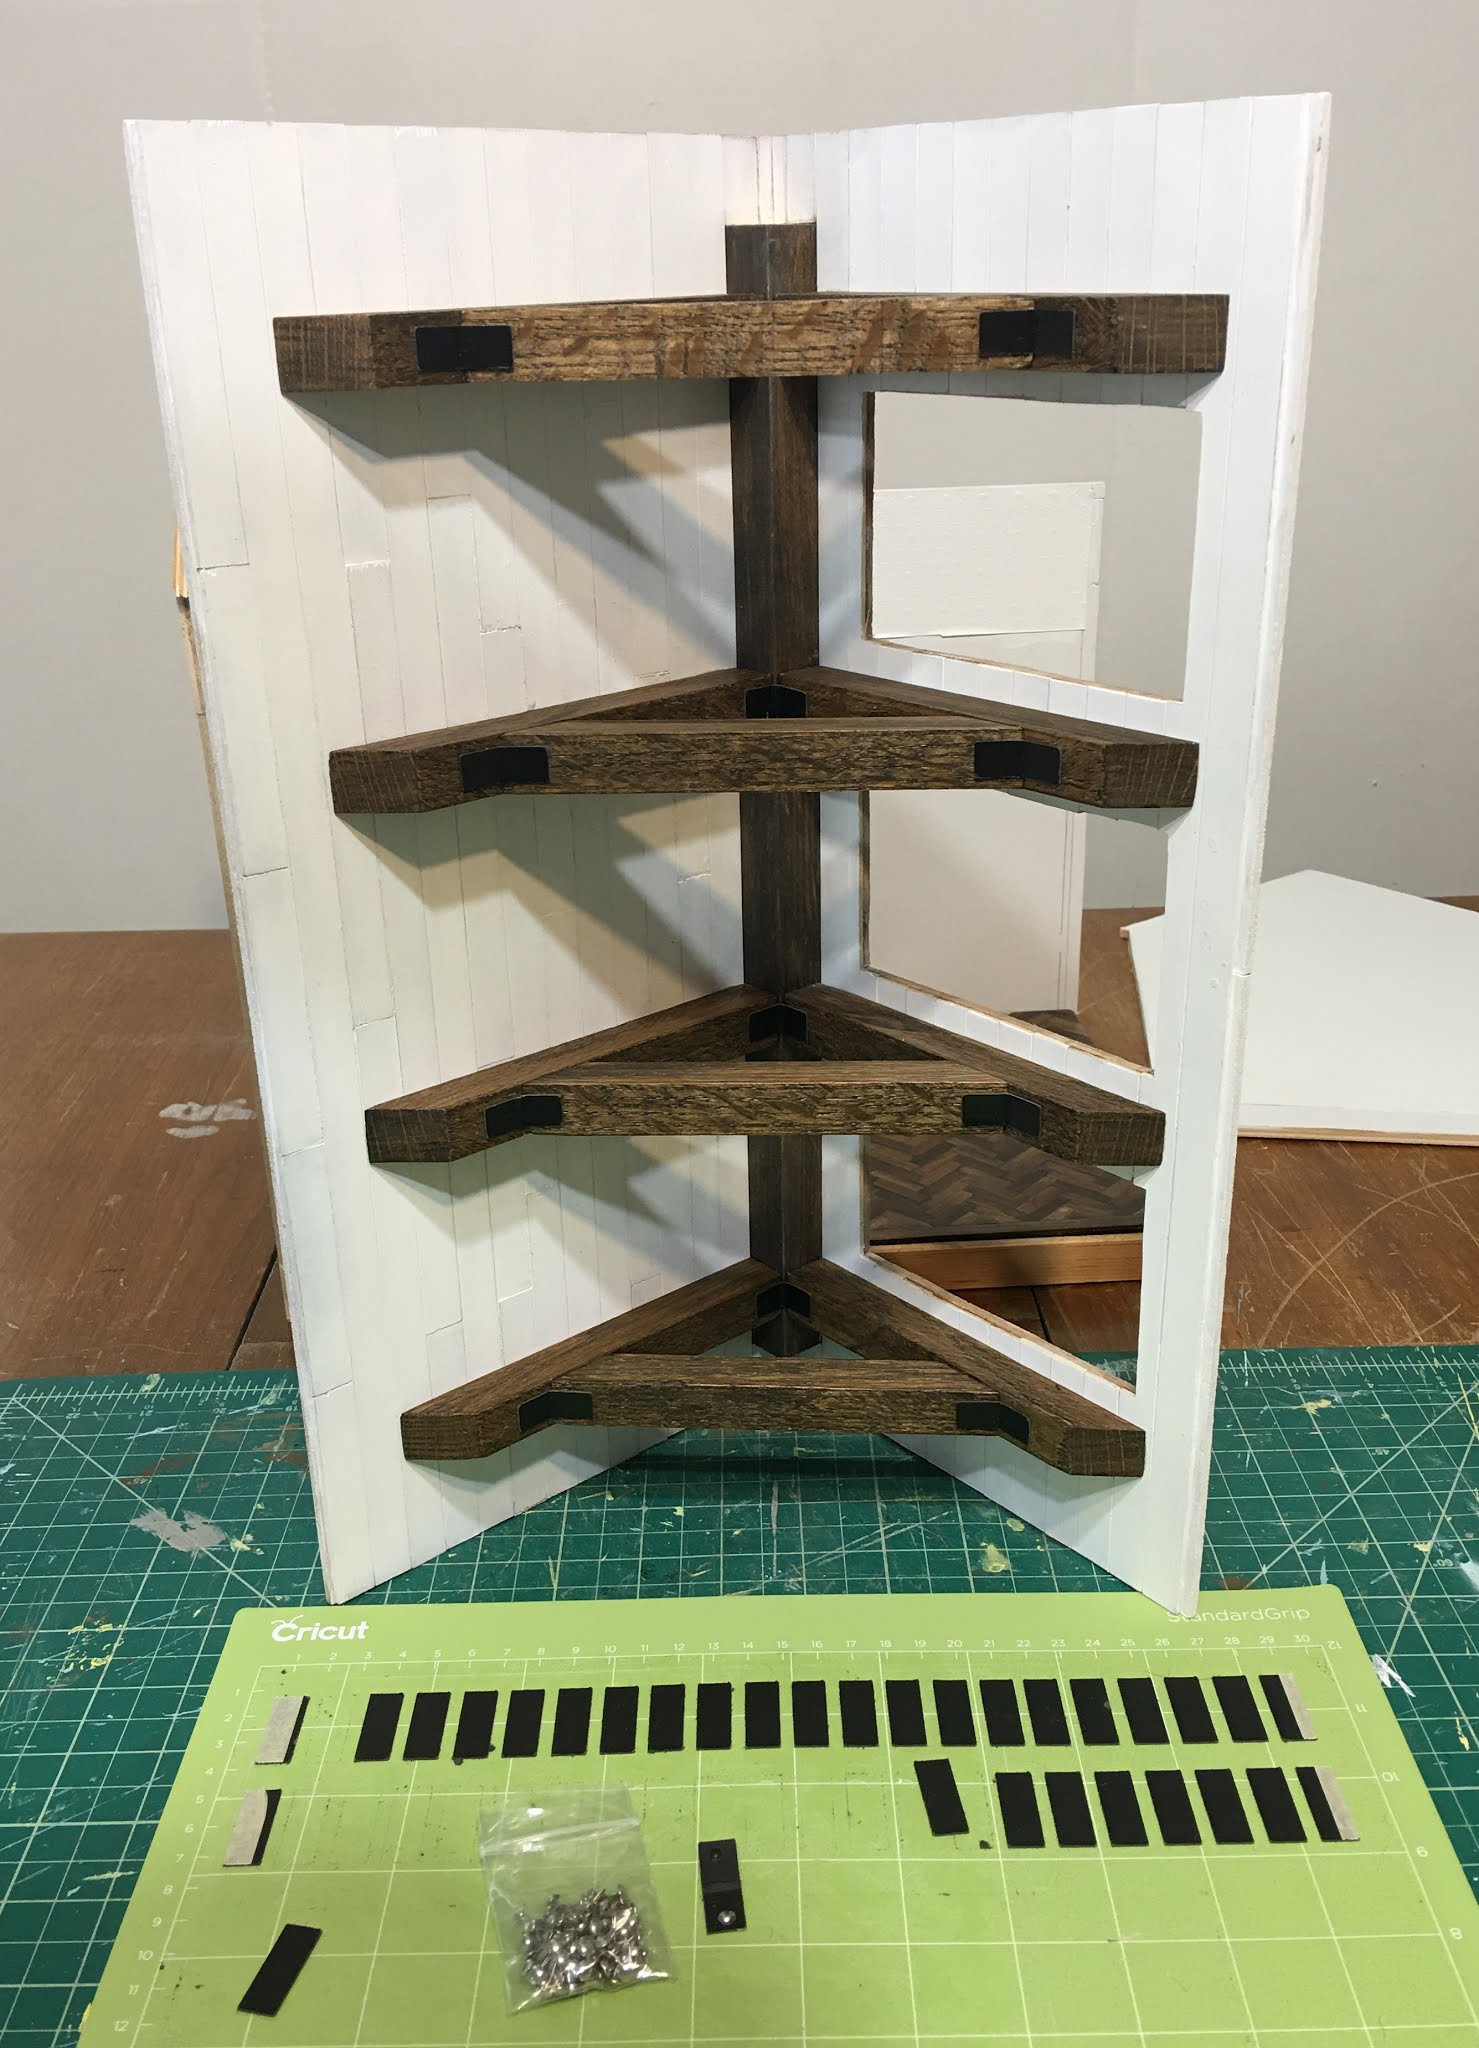
I informed Russ of my dilemma. You see, I have only mini sized wood and molding in my stash, and some plywood. But not anything 5/8" square and not enough of any scraps to do the whole job. And nothing that looked like old timber. But Russ has a real workshop in the garage and had some leftover oak trim from a job. He also has a nice, real sized miter saw that he used to cut down the very hard oak. First, he made it 5/8" x 5/8". And then, going off my diagram, he cut the wood to size and with the angles I needed. All I had to do was sand, stain and install!


Once the beams were in, I cut "iron" straps from kraft board using the Cricut. I cut the fastener flaps off silver metal brads and used them as the bolt heads. 


Here's what the ceiling looks like from inside...


And a peek through the skylights...


The last thing I could do on the roof/ceiling for now was to install the lights. I am using all LEDs in this build from Evan Designs. The ceiling will have six can lights, and possibly two additional pendant lights later on. Those I will try to create and print with the 3D printer. So for now, the 3mm bright white can lights with mounting clips are all I had to install.


I was originally going to mount them right into the ceiling. Due to the angle of the ceiling, the concern that they would give an irritating glare through the skylights and that the roof itself is only 1/16" luan, I decided to install them in the beams, themselves. This was really tricky, because I had to drill deeply enough to allow the mounting clips to seat, but then also at an angle so that the wiring could be concealed all the way through the beam and out through the roof.


Some came out better than others, but luckily, they are barely visible while looking through the front opening, and not at all visible when peering in through the skylights. What I am after here is good lighting, and I think I've achieved that. Phew! I have tested each individual light but still have to test them in the room at the same time to make sure I have enough. With supplemental cabinet lighting, and a few fixtures, Tasha will have plenty of light to play.


I am relieved that I don't have to worry about the roofing shingles just yet. I can procrastinate on that for a while. But if ever the corner trim shows up, I can begin making the skylights. Until then, walls, wall treatments, cabinets here I come...

May your "Senior Moments" always be followed by clever solutions, dear friends!

xo xo,
Jodi

Sunday, February 14, 2021

A Herringbone Floor For Tasha's Kitchen

I mentioned to Tasha early on that I would love to try doing a herringbone floor. I was taken aback at how excited she was about this idea, and then she reminded me how much she loved the chevron pattern. I knew immediately that I better source some great mini sized hardwood and then watch some videos to educate myself on laying herringbone floors. I learned that a true chevron pattern has the ends cut at 45 degree angles, while herringbone ends are straight cut and the boards are staggered. The blade in my mini table saw is known to have a little too much flex, so even with the guide set to cut 45 degrees, I was not confident in the precision and accuracy I could achieve. Better to do the herringbone, especially since this was my first time with this sort of thing.

I sourced the material, cherry and walnut, through an eBay seller called Bill and Walt's. The wood is excellent, as was the shipping cost, speed and packaging. I did subsequently place an order through their web site. It seems this is new to them and they are still working out some kinks. I would stick to placing orders via eBay for your protection, until they are better experienced with ecommerce.

I measured the area of my 14" x 9" floor, determined how many 1" long pieces of 1/16" x 1/4" strips of each species (walnut, cherry, maple) I'd need, then cut and sanded them all. See video for proper ratio of width x length you need to make the pattern. Starting with a right triangle, as suggested in the This Old House video (link above), I began in the center of the floor and worked my way outward.


It went down much faster than I anticipated, and I really, really enjoyed the process! So relaxing!


After making the stain chart, I thought I'd like to use a stain that was light enough to really accentuate the different wood species.


It was pretty, but both Tasha and I agreed that in a more modern kitchen, the drastic variance might fight for attention with all the other features. After applying a few coats of dark walnut, I really like this look much better. I doubt I will share the results with her before the end of the project. Hopefully, it's a pleasant surprise!


This is with about six coats of polyurethane. Hard to capture the shine on camera, but it's beautiful!


After this floor experience, I am definitely excited about having another opportunity to do one!

A Sims4 Homage

I was contacted by a lady who saw a photo of the Storybook Cottage on Pinterest. She asked if I was familiar with Sims4, and if I would give her permission to recreate the cottage and share it with the Sims community. I told her I was familiar with The Sims, and had been slightly obsessed with it for a time when the latest version was Sims3. I said it would be wonderful to see a digital recreation and to have it shared! This is what she created...


Amazing, right?!? Her Origin ID is drpbvibes, and you can download the Storybook Cottage for free to use in your Sims4 town!

Back really soon with more on Tasha's Kitchen! Suddenly, I seem to be making quick and exciting progress!

xo xo,

Jodi