

For those of you who still enjoy the traditional method of making minis, I have created a couple pdf files with patterns and measurements that you can cut by hand with wood, illustration art board or mat board. You can access them here:
Once you have all of the pieces cut and labeled, by whatever method is right for you, here's how to assemble them.

 |
| There are 15 pieces in each fireplace. |
 |
| This pattern may be tricky to cut by hand. Virgil's design will be easier. |
1. Glue two Mantle Tops together, flush on all sides, weighting down until dry. Then glue Sub Mantle to Mantle Top assembly, flush at the back and centered. It is slightly smaller and will leave a nice molding looking reveal on the finished fireplace. Weight down to dry.

2. Glue two Hearths together, flush on all sides, weighting down until dry. Then glue the Sub Hearth to the Hearth assembly, flush at the back and centered. It, too, is slightly smaller, leaving a stepped detail in the final fireplace. Weight down to dry.

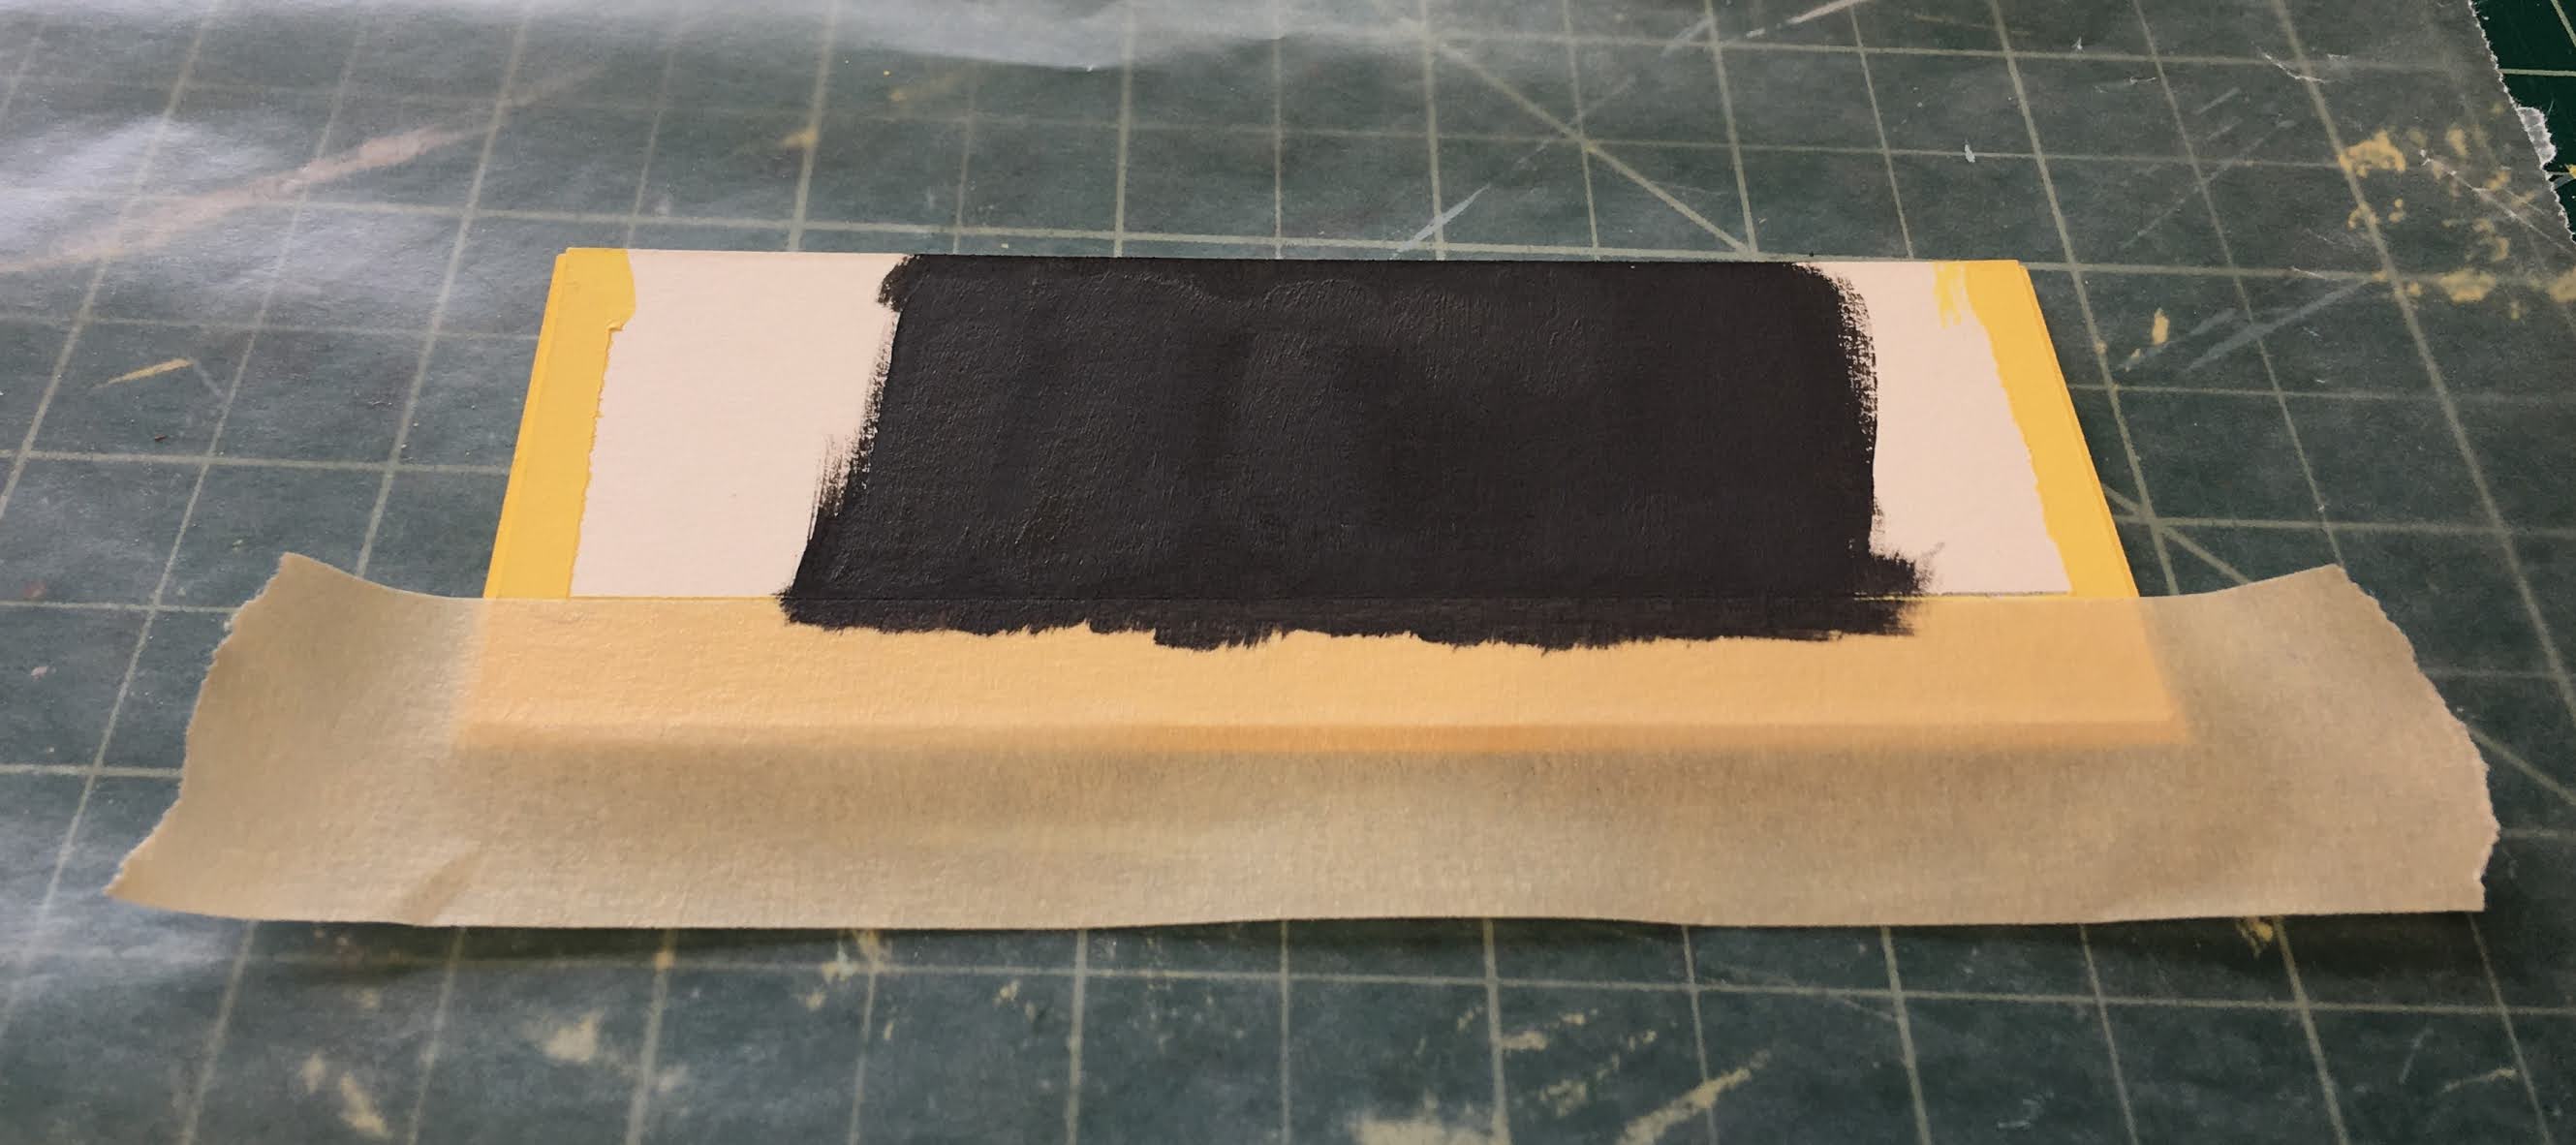
3. Paint Front and Side Panel Overlays. Paint Front Panel and Side Panels in a different color, if desired. Let dry.


4. Paint Hearth assembly in the finish of your choice. I used my tried and true paint and glaze pouncing method, but if you search the blog you can find my methods for marble, too, using charcoal pencil and glazing medium.


5. On the Hearth Assembly, mask off the area that will be inside the fire box. Then apply the finish to the hearth that will show outside of the fire box. Paint the floor of the fire box in your desired color. I used dark gray and masked off the Hearth assembly area once it had dried.

6. Paint the inside of the Back Panel and both Interior Side Panels in the color of your choice. These pieces make up the fire box and should match the paint color on the floor of your fire box. You may also wish to brick these with textured brick wallpaper or make egg carton bricks.

NOTE: I used the Debossing tool on the Maker to deboss (then cut) a brick pattern onto my firebox pieces (Back Panel and Interior Side Panels).

7. Glue dried Front Panel Overlay to Front Panel and Side Panel Overlays to Side Panels. Weight down to dry.


8. Glue one Side Panel assembly to the inside edge of Front Panel assembly. Let dry, then glue the second Side Panel assembly to the opposite inside edge of the Front Panel assembly. Let dry.


TIP: To add strength to my glue joins, I like to run a bead of glue down the seam. Roughly apply and then just smooth by running your pinky in one smooth motion up the bead of glue.


9. Glue Interior Side Panels (fire box pieces) to the interior of the Front Panel assembly. Draw a line 1/4” away from opening to use as a guide for gluing. Let dry.


TIP: If you use chalk paint for your bricked firebox, you can sand them to slightly dull the top layer, leaving more definition in the detail. This looks more authentic (if you look at real fireplace fireboxes) and saves you from a great mess grouting. I used Maui Sand, a dark gray chalk paint.

10. Glue Back Panel to the back of the assembly taking care to ensure all edges are flush. Weight down until dry. Once dry, you will have to paint your edges.


11. Glue Hearth assembly to bottom of fireplace assembly, flush with the back and centered on the sides. Weight down to dry.
12. Glue Mantle Top assembly to fireplace assembly, flush with the back and centered on the sides. Weight down to dry.
13. Spray or brush completed fireplace with the varnish and in the sheen of your choice.
Ta-Da! Adorable little fireplaces that you made!


But how do they look in the cottages?


And when they're lit?


And most importantly, how do Vera and Virgil feel about them???

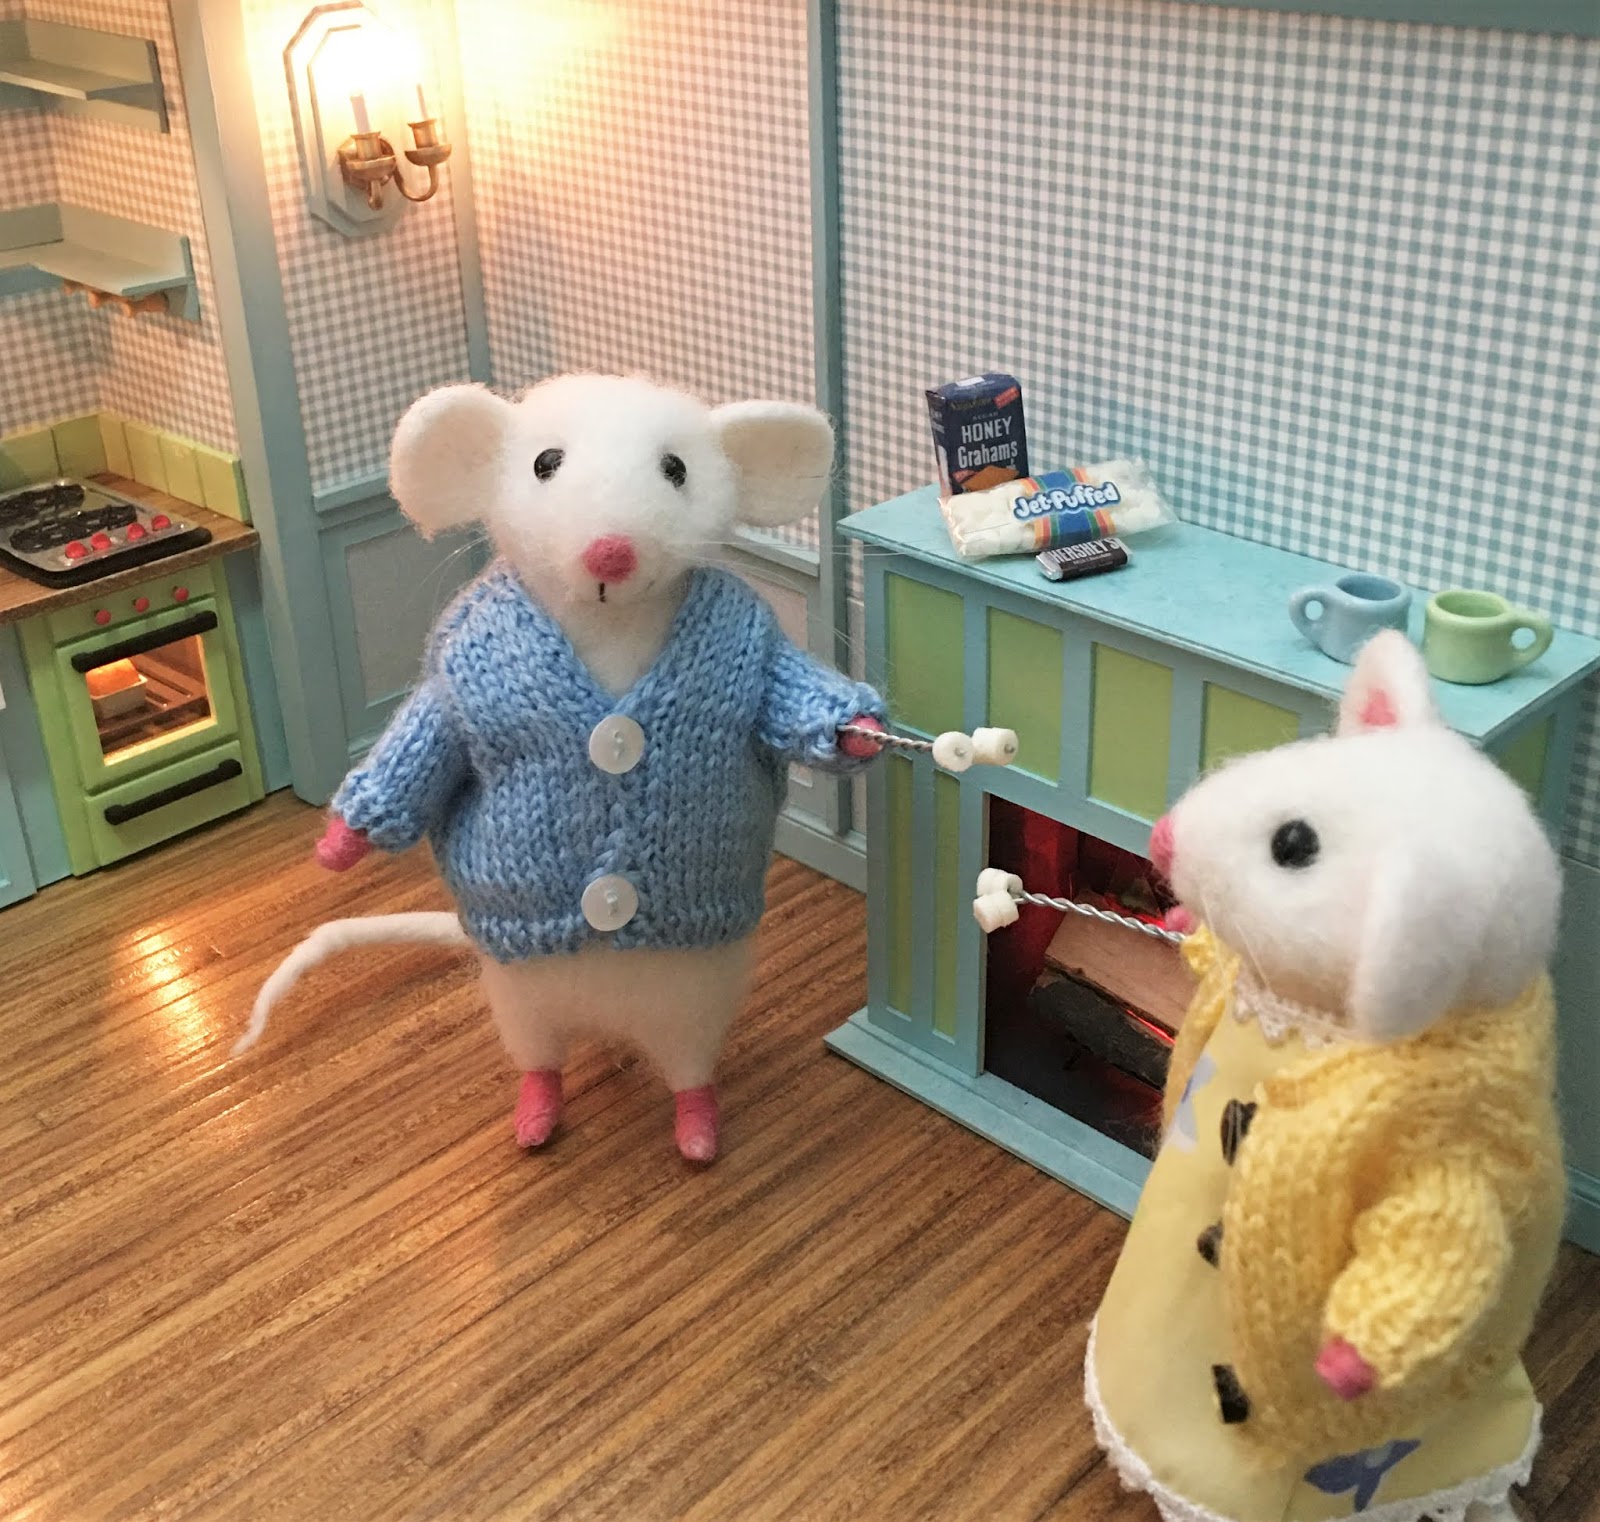


They broke out the S'mores! and are celebrating being one important step closer to move in day!
Hope you found the fireplace tutorials useful, helpful and if nothing else inspiring! Have a great week everyone!
xo xo,
Jodi