

In this tutorial I will show you how to copy a picture into Inkscape, turn it into an svg file, and import it into Cricut Design Space. If you have a Cricut Maker, you will be able to make the two fireplace versions that I created for Vera and Virgil. There are also pdf pattern sheets for those of you who would like to make them the traditional way with wood and measurements.
NEW! Get the project file directly from Design Space


For Maker you'll need -
For cutting by hand you'll need -
Mat Board or
We are going to begin with a fireplace front that I have already made up in Inkscape. Inkscape is a free graphics program with innumerable tools that allow you to manipulate and create images. There are tons of How To videos on YouTube if you want to learn, but for the sake of sticking to one project, this tutorial is only a sampling of Inkscape's abilities as they pertain to this project. To follow along with this tutorial, you'll need to have the Inkscape software installed and save the pdf files provided below. You'll need a pdf reader like Foxit PDF Reader if you don't already have one.
Got Inkscape and the documents? Now you're ready to learn something exciting!
Open Vera's Fireplace Project sheet in your pdf reader. Select the SnapShot tool.

Select the fireplace front image by clicking the top left corner of the image and dragging the mouse to the bottom right corner of the image. Try to get as close to the image as possible without cutting any of it off. A dialog box lets you know the image has been copied to your clipboard.

Open Inkscape. Paste the fireplace image from your clipboard by right clicking your mouse and selecting Paste.

Your image appears.
NOTE: The paste feature also works for any image copied to your clipboard, such as those you might find on the internet.
NOTE: The paste feature also works for any image copied to your clipboard, such as those you might find on the internet.

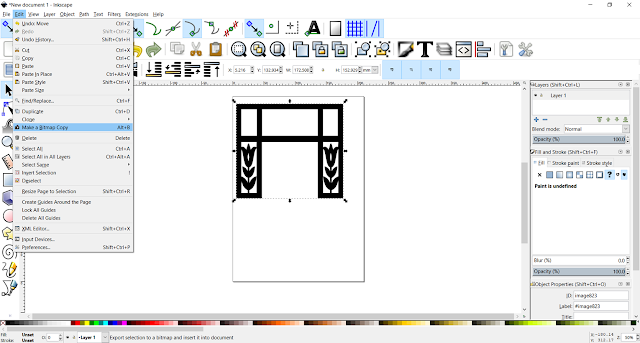
With your image selected (arrows surround it), go to Edit, then Make Bitmap Copy.

You will now have a bitmap copy of the image on top of the original image. Pull the new bitmap image to the side to reveal the original image beneath. Select the original image and delete. Recenter your bitmap image in the workspace.

With the bitmap image selected, got to View, then Display Mode, then Outline.

A red box will now appear over your image. Leave it alone.

Go to Path, then Trace Bitmap.

A Trace Bitmap dialog box will pop up on the right hand top of the screen. Click Update, then OK and then close the dialog box using the X in the upper right.

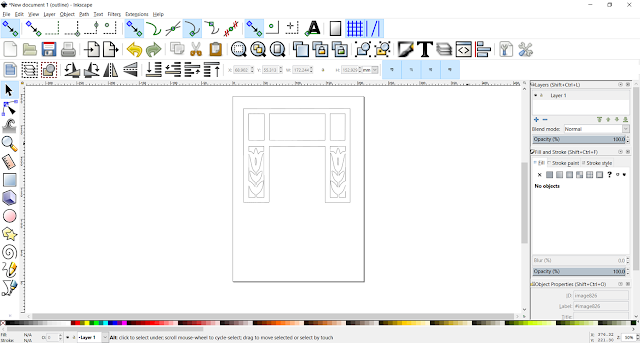
You will now see a traced outline of the image beneath a red box outline.

Select the red outline and delete. If you happen to delete the image, just undo and try again.

Now you are ready to save the image as an svg. To do so, select File, then Save As.

The file type will already be svg. Save to a location that will be easy to find.

Congratulations! You are now ready to upload your svg file into Cricut Design Space!
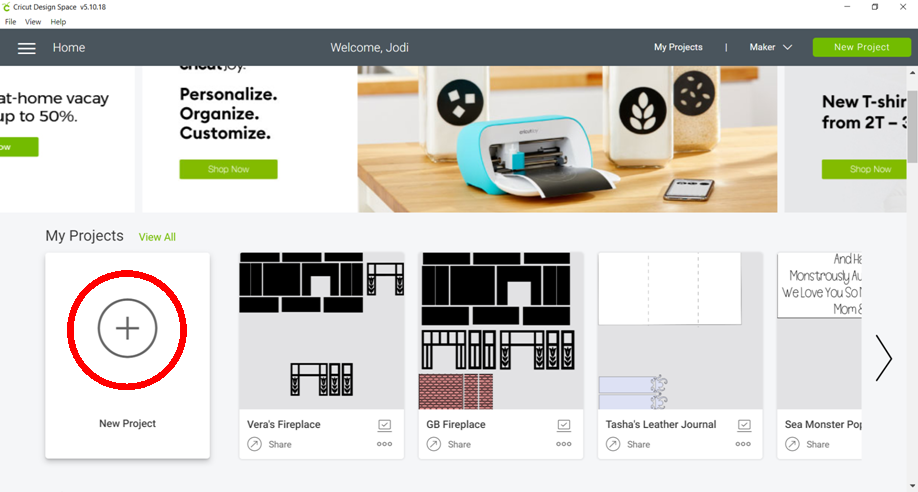
Open Design Space and select New Project.
In the bottom left corner of your canvas, click Upload.
In this screen, select Upload Image

Then Browse to find your svg fireplace front.


In the next screen, you will see a preview of your svg image. It should have a checkered background indicating that the background is transparent. You also have the opportunity here to name your image and assign labels for easier search functions in the future. Once you're happy, select Save.

You will now be brought to a screen telling you that your svg upload was a success!

Now you can select and Insert Image.

You can see that the inserted image is smaller than the measurement you need for the project. Simply look at the project sheet and change the measurements. The fireplace front piece should be 4.25 w (4-1/2") x 3.75 h (3-3/4").

Resized

Now repeat the whole process, from the beginning, for one of the fireplace side pieces. I'll wait...
Once you have a fireplace side piece uploaded into Design Space, resize it, as well. Then, right click it and select Duplicate. Now you have the front and two sides.

Now it's time to make the other parts using Shapes. Select Shapes, then choose Square. A square will appear on your canvas.

Click the padlock symbol in the bottom left of the square to unlock the aspect ratio.

With the square selected, change the width and height of the square according to the measurements given on the Vera's Fireplace Project Sheet pdf. Repeat the process for all 10 rectangle pieces (both the mantle and hearth need 2 pieces each.

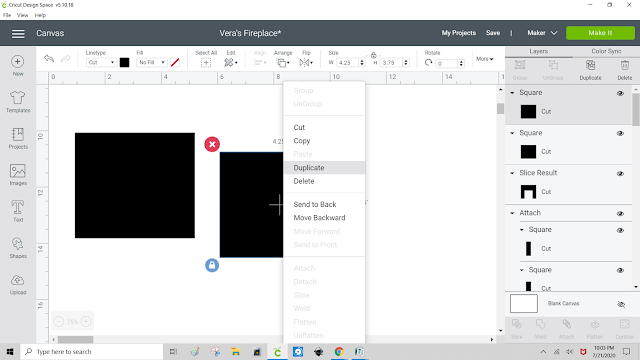
For the solid fireplace front piece with cut out and the solid back piece, insert one new square. Change the measurements to 4.25 x 3.75.

Right click and Duplicate the square two times.

Change the color of the last square to purple.

Resize the purple square to 2.25 x 2.25.

Place the purple square on top of one of the black squares. Select both squares by clicking each of them while pressing the Shift key. When they are both selected, select Align, then Bottom, then Center Horizontally.

With both squares still selected, click Slice.

Remove the purple and black cut outs leaving only the fireplace solid front. You can delete them by clicking the red X in the top left of the shape.

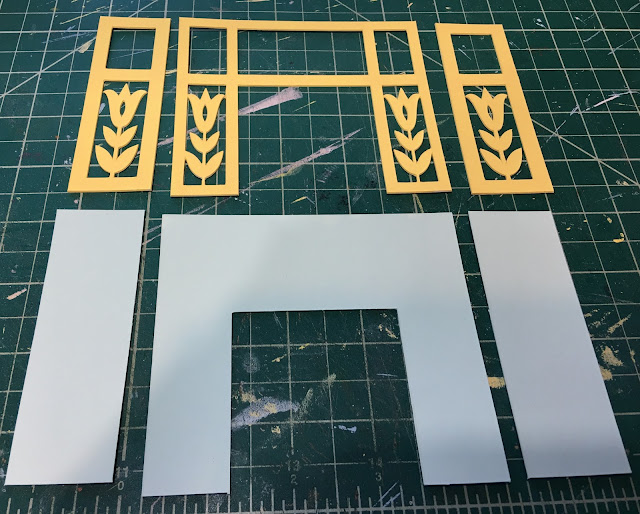
Now you have all of your pieces!

Depending on the dimensions of your mat board, you may have to arrange the pieces manually and then attach them. For example, my mat board is 8.5" x 11". To get the layout you want and to maximize your material do this.
Create a square that represents the size of the mat board you have. We'll call this your material template.

Set the material template to be the bottom layer.

Now arrange your fireplace pieces on top of the material template. Get as many on as you can. You can rotate them by clicking and dragging the rotate symbol on the top right of the shape.

Once you like the arrangement, move the material template off to the side.

Select the grouping of pieces by clicking and dragging your mouse over the pieces.

Now click Attach. This tells the Maker that you want these pieces cut together in the specific arrangement that you have assigned.

Now continue this process until you have assigned all of the pieces. Once you have, delete the material template.

Now you're ready to cut! Save, then select Make It.

In the Prepair screen, select the closest option to your material size. In this case, it is 8.5" x 11", my actual mat board size.

Apply your mat board onto the green mat as is indicated in the preview, then click Continue.

In the Make screen, set the material to Art Board.

If you do not already have Art Board set as a favorite, you will need to click Browse All Materials and select it.

Follow the prompts to load your knife blade into slot B and begin cutting.

Important Note: The default number of passes for Art Board is 17. If you are using the specific mat board that I use, you will only need to let the Maker cut 9 to 12 passes, depending on the intricacy of the cuts. Begin paying close attention to the material when it reaches 7 passes. You can pause the job to check and see if the mat board has been cut through, but do not unload the mat.

Now that your pieces are cut for Vera's Fireplace, you can repeat the process for Virgil's, if desired.
Now we're ready to put the fireplaces together!
1. Once you have all of the pieces cut, label them using the pdf sheet as your guide.


2. Glue 2 Mantle Tops together, flush on all sides, weighting down until dry. Then glue Sub Mantle to Mantle Top assembly, flush at the back and centered. It is slightly smaller and will leave a nice molding looking reveal on the finished fireplace. Weight down to dry.
NOTE: You can sand both mat board and basswood, if needed, to refine the joint lines. Just be careful not to change the shape.

3. Glue 2 Hearths together, flush on all sides, weighting down until dry. Then glue the Sub Hearth to Hearth assembly, flush at the back and centered. It, too, is slightly smaller, leaving a stepped detail in the final fireplace. Weight down to dry.

4. Paint Front and Side Panel Overlays. Paint Front Panel and Side Panels in a different color, if desired. Let dry.


5. Once dry, paint Hearth assembly in the finish of your choice. I used my tried and true paint and glaze pouncing method, but if you search the blog you can find my methods for marble, too, using charcoal pencil and glazing medium.


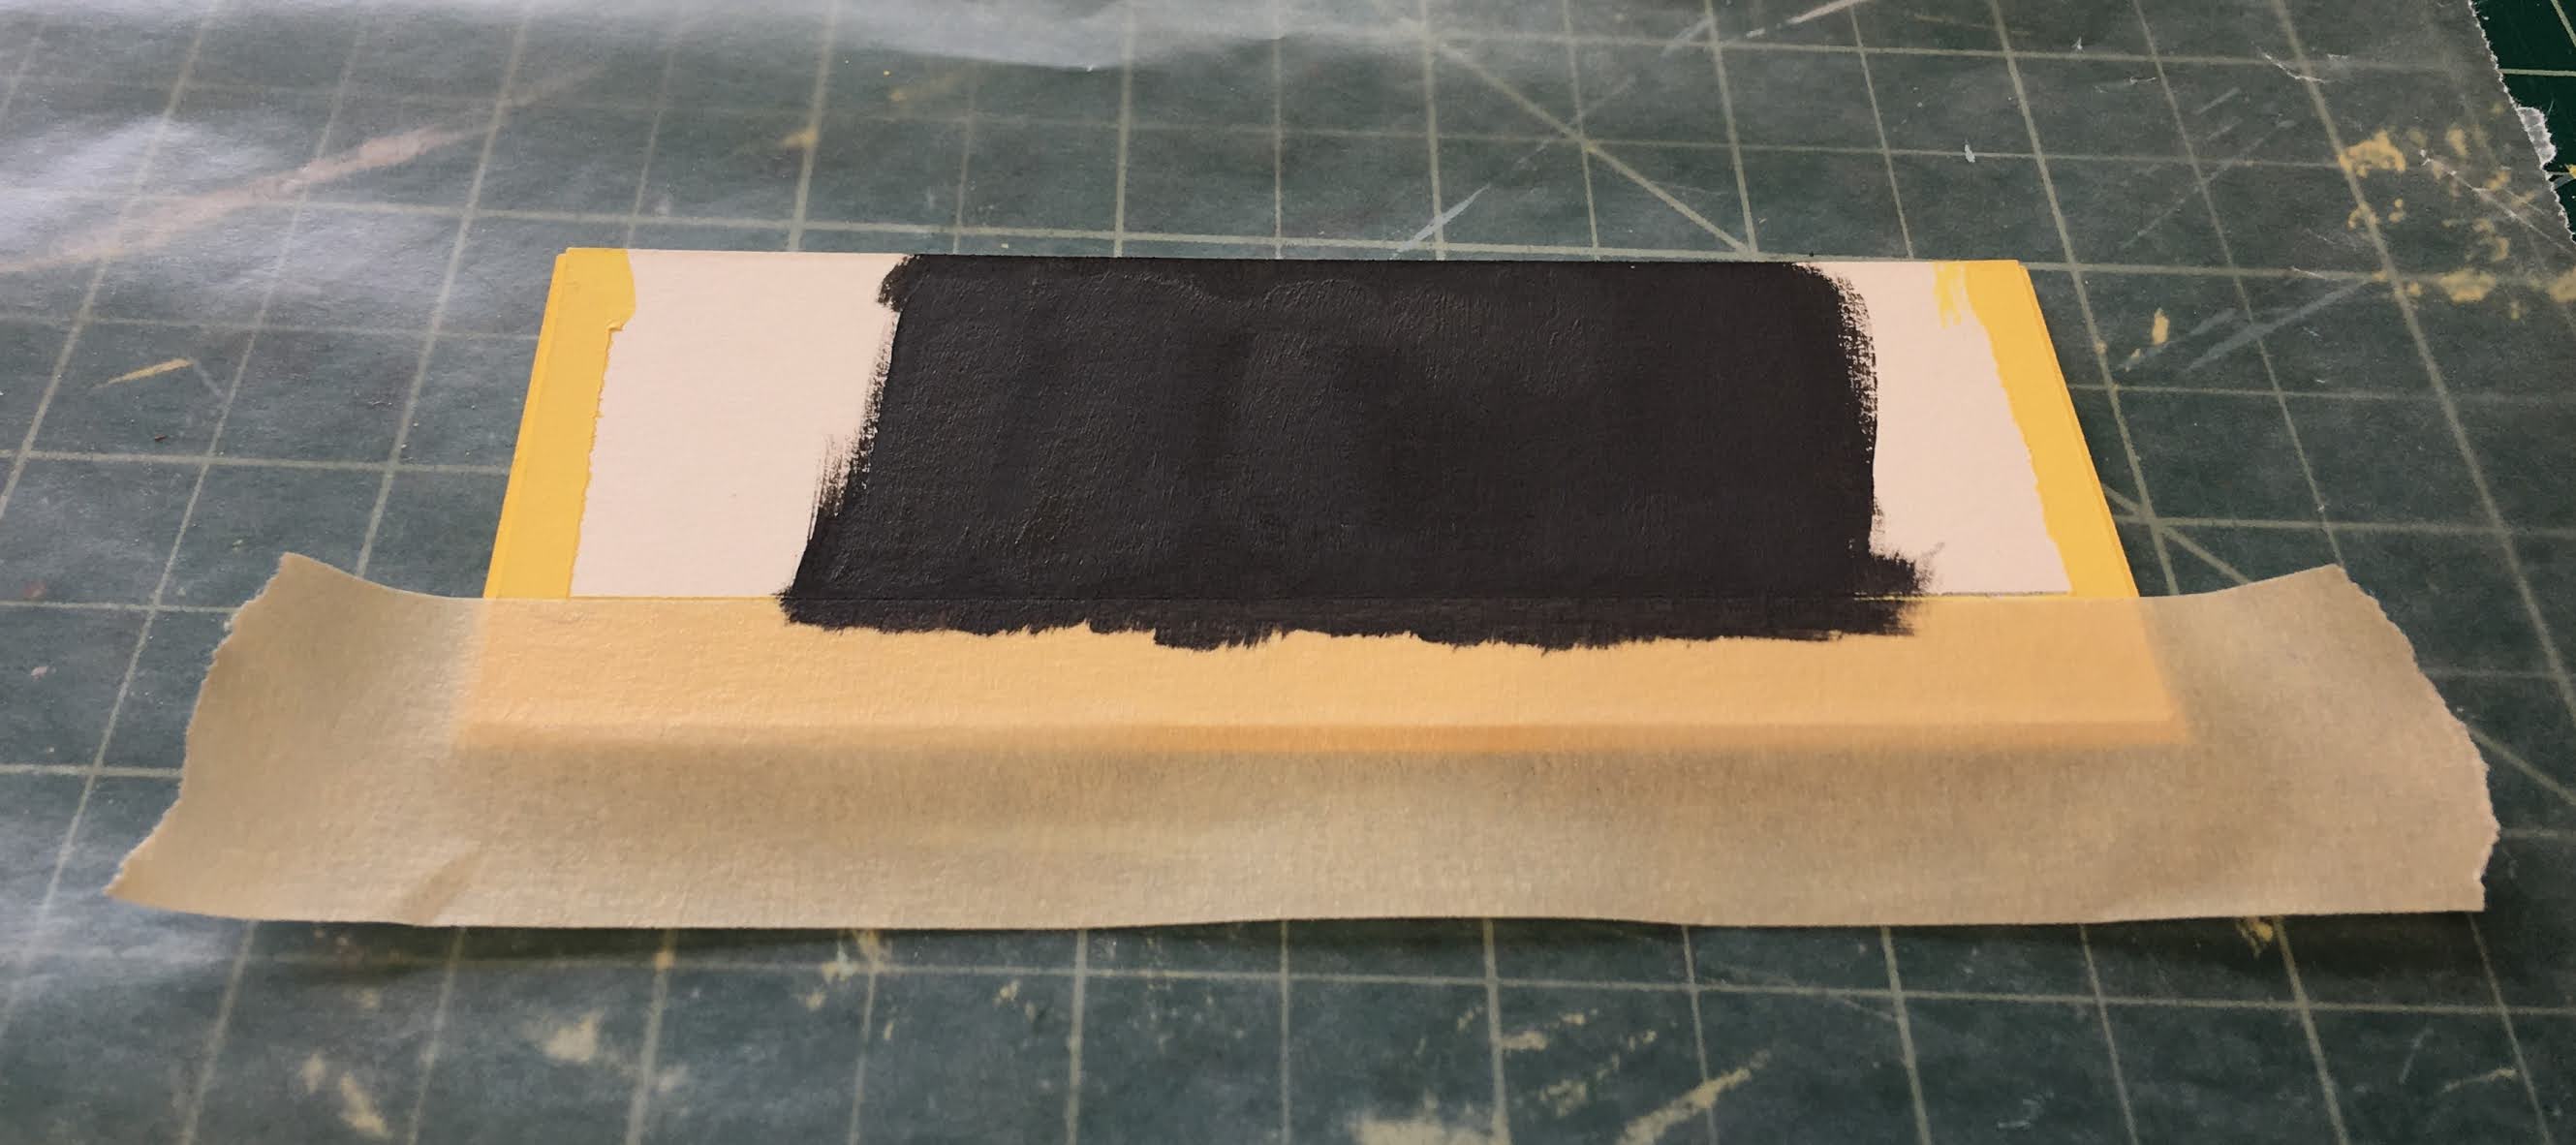
6. Mask off the Hearth assembly area that will be inside the fire box before applying the finish to the Hearth. Paint the bottom of the fire box gray or black.

7. Paint the inside of the Back Panel and both Interior Side Panels in the color of your choice. You may also wish to brick these with textured brick wallpaper or make egg carton bricks.

NOTE: I used the Debossing tool on the Maker to deboss (then cut) a brick pattern onto my firebox pieces (Back Panel and Interior Side Panels).

8. Glue dried Front Panel Overlay to Front Panel and Side Panel Overlays to Side Panels. Weight down to dry.


9. Glue one Side Panel assembly to the inside edge of Front Panel assembly. Let dry, then glue the second Side Panel assembly to the opposite inside edge of the Front Panel assembly. Let dry.


TIP: To add strength to my glue joins, I like to run a bead of glue down the seam. Roughly apply and then just smooth by running your pinky in one smooth motion up the bead of glue.


10. Glue Interior Side Panels to the interior of the Front Panel assembly. Draw a line 1/4” away from opening to use as a guide for gluing. Let dry.


TIP: If you use chalk paint for your bricked firebox, you can sand them to slightly dull the top layer, leaving more definition in the detail. This looks more authentic (if you look at real fireplace fireboxes) and saves you from a great mess grouting. I used Maui Sand, a dark gray chalk paint.

11. Glue Back Panel to the back of the back of the assembly taking care to ensure all edges are flush. Weight down until dry. Once dry, you will have to paint your edges.


12. Glue Hearth assembly to bottom of fireplace assembly, flush with the back and centered on the sides. Weight down to dry.
13. Glue Mantle Top assembly to fireplace assembly, flush with the back and centered on the sides. Weight down to dry.
14. Spray or brush completed fireplace with the varnish and in the sheen of your choice.
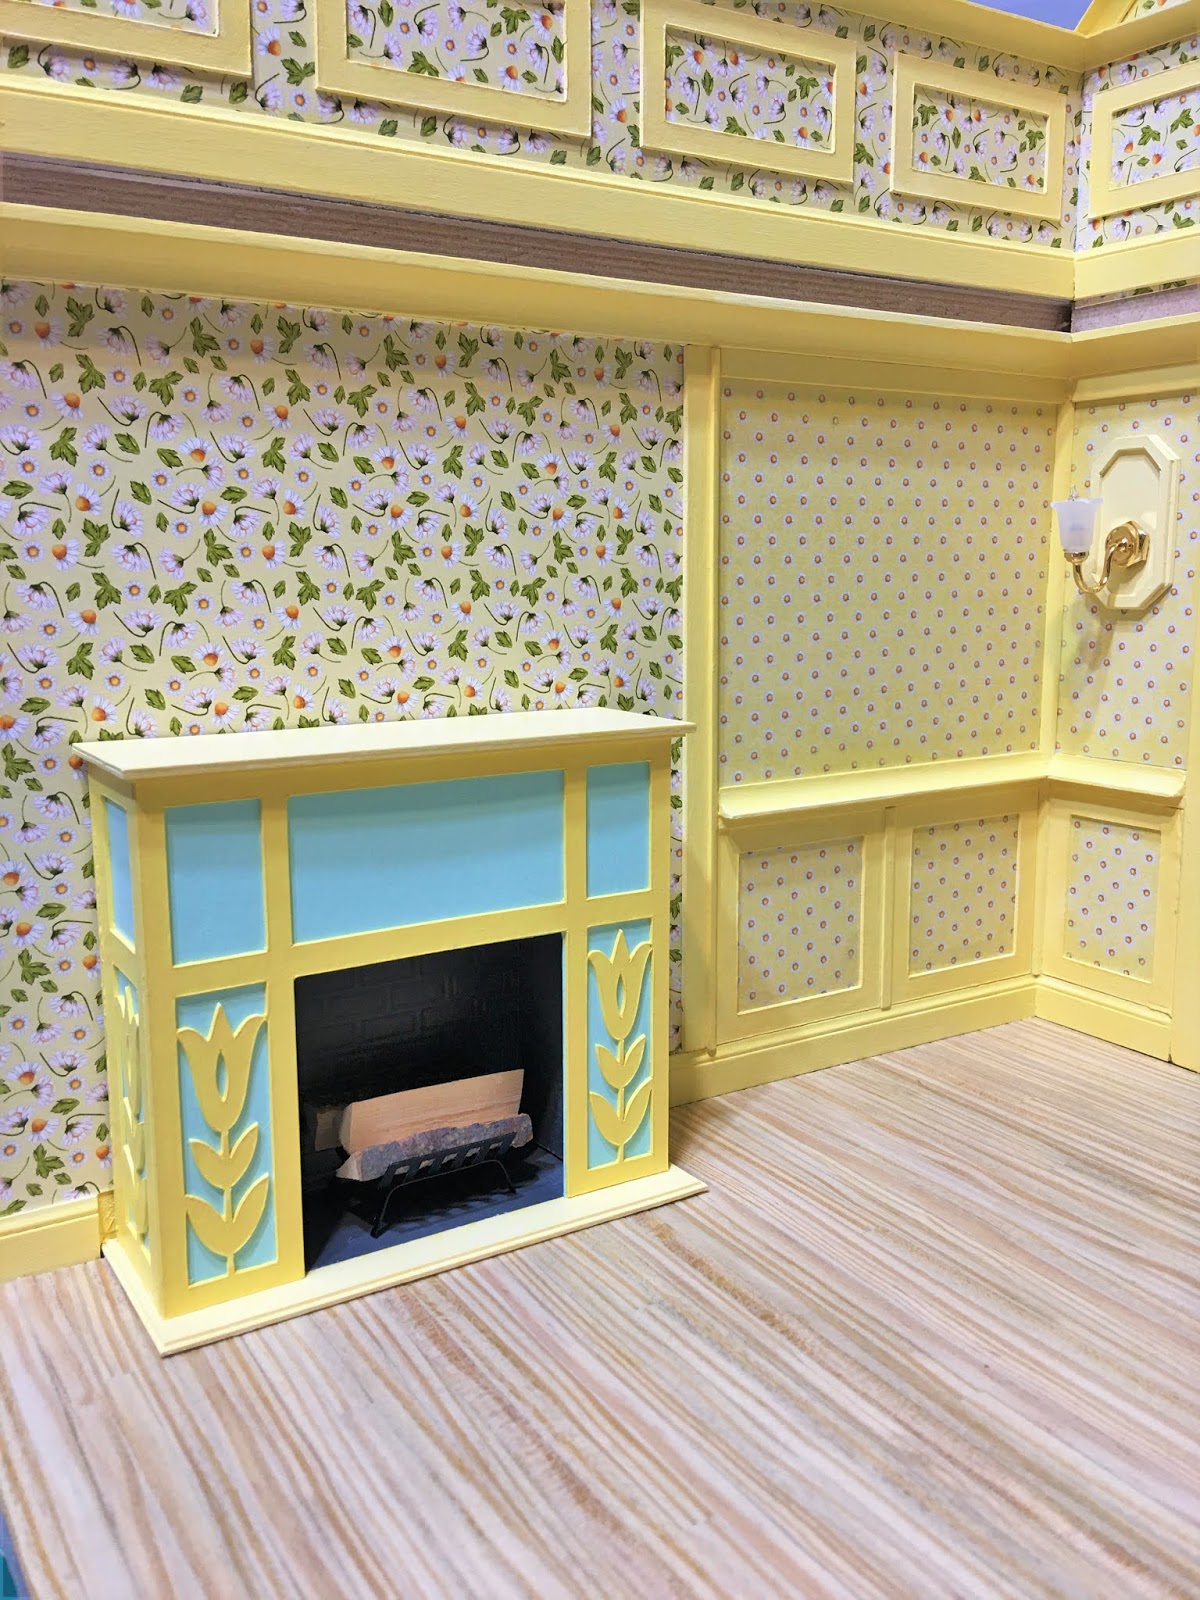
Ta-Da! Adorable little fireplaces that you made!


But how do they look in the cottages?

And when they're lit?


I hope this project was informative, helpful, fun and successful for you!
xo xo,
Jodi
xo xo,
Jodi
I've had pretty good success using a simpler method in Inkscape, although it didn't work with your PDF file--it might have been too big or complex. In Inkscape, I select File, Import, and select the PDF. I move the image onto the blank rectangle, and then simply save the file as Plain SVG (not being sure how Design Space feels about Inkscape SVG). Then I import the SVG into Design Space. The trick is then to get it sized correctly, as you mentioned. If I recall correctly, what I usually do is group all the pieces if they aren't already, then adjust the size of the group until one of the pieces is the right size. If the PDF includes a one-inch square, that's pretty easy. Then they can be ungrouped and colored or hidden or whatever. It would sure be nice if Design Space would just let you import a PDF. I've emailed them asking for that feature, and I encourage anyone reading this to do the same: https://help.cricut.com/hc/en-us/requests/new
ReplyDeleteThanks for the tip Fribble! I'll have to give that a try! Also, on my wish list for Design Space would be to be able to export the designs we make there as svg.
ReplyDeletePlease use metric measurements as well as imperial. I have no idea how big these measurements are. The post is so helpful otherwise!
ReplyDeleteThanks for bringing this to my attention! I'll try to remember to add the metric conversions in in the future. There's so much to posting tutorials, yet you can always make them better!
DeleteI wish you could just share the svg file for this
ReplyDeleteHi Chris! I have added a link to the file in Design Space for the fireplaces at the top of the page. Or you can paste this link into your browser:
Deletehttps://design.cricut.com/landing/project-detail/5ef78be148512502cc86d8c1
Hope you make the project and enjoy it!