Search My Blog!

Use the Search box below to find keywords that you're looking for quickly and easily!

Search Feature

Showing posts sorted by date for query flowers. Sort by relevance Show all posts

Thursday, August 10, 2023

Running Water

It doesn't matter whether you live in a fancy McMansion or a pioneer log cabin in the woods. Let's face it - running water is a necessity! It is one of the first things on the priority list of every housing project everywhere in the world. And a trunkhouse made for a Fairy Beary Godmother is no different.


Thank goodness the folks who will inhabit this multi-family forest abode have Wayne, the resident handyman/craftsperson. Practically as soon as I had that Chrysnbon Dry Sink kit completed Wayne was working to address the "Dry" part. First, he drilled a hole in the sink for the water to escape through. Then, he installed the drain and pipe system. Don't ask me where the water will drain to - that's Roz's department (though I suspect that she has some magic recapturing system in mind for watering her flowers).

Pot metal drain and pipe purchased on eBay.

It can be handy to be so small!

Sometimes it takes two pipe wrenches for the job!

Once the sink was ready to receive water, Wayne could install the source of it. Again, please contact the "Magic Department" for technical information. 😜

Wayne went with the same pump system that he installed for Goldie and Alice. It is a reliable method, after all, so why reinvent the wheel? Everyone loves the classic, rustic patina! And when your sink already has that "lived in" look, a messy cook is so much more at ease and can concentrate on her cooking.


When it came time for the H2O, Wayne only had to provide the infrastructure. Roz's magic did the rest! A simple piece of plastic packaging, bent at the right angles was the substrate for a UV resin waterfall. 


Add a drip, shine the UV flashlight and keep going until you like the flow rate!


On and off.

Wayne got to be the first one to wash his hands... Looks like I'll need to make some soap!


And then Roz and Rozario got in on the fun! The gang is celebrating being one step closer to moving in!


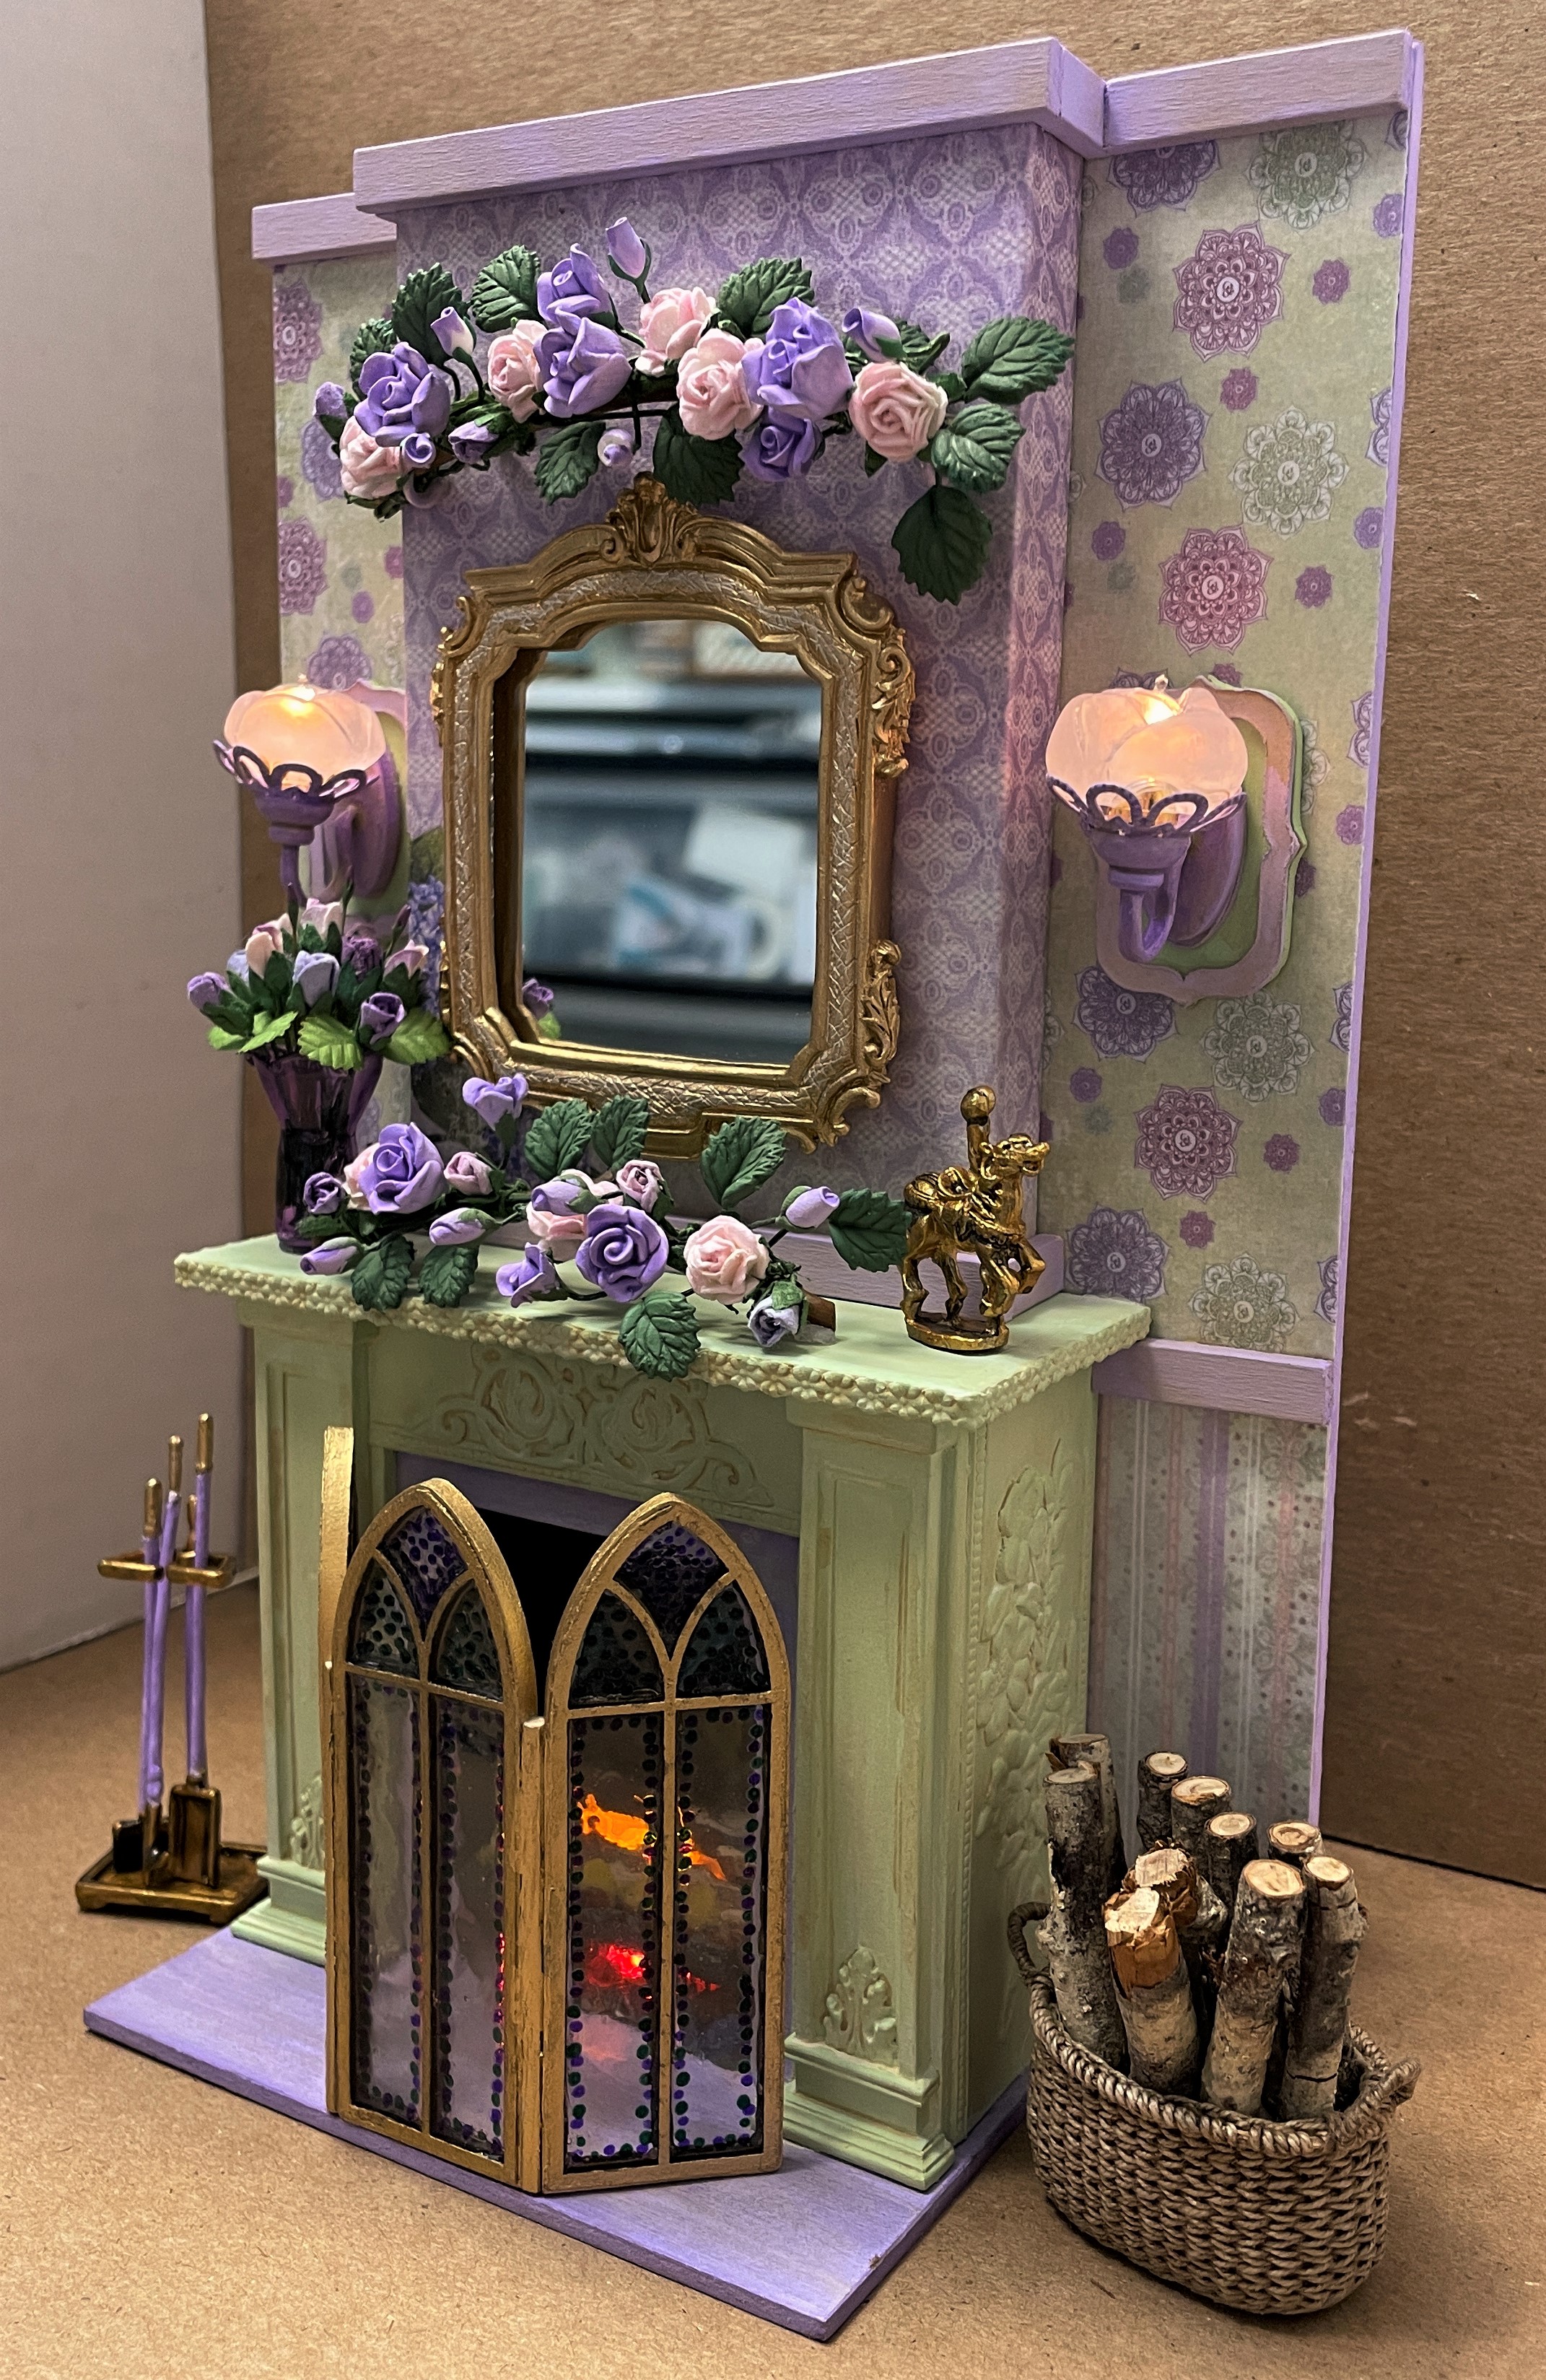
Thanks to some amazing knowledge and great advice from Betsy and Julia, I knew what a Victorian cook stove and a parlor stove's fire light should look like! Thanks so much, ladies! I'm so grateful for your help! 

For the parlor stove, I added a bottom to the Chrysnbon kit. As it comes, the kit's bottom piece is actually a grate so the light shows through. Both advisers said that for a coal stove (any stove, really) that is a bad sign! It means the bottom is likely rusted through and a very unwelcome event is imminent! We don't want that - especially in a trunkhouse! After installing a solid bottom, I added an extra orange LED bulb in the main compartment to give off better ambiance.

Original kit design with bottom grate.

Light leaked out the bottom before.

With piece of cardstock glued in to block light.

Firelight with one bulb under "coals".

Now with extra orange LED chip light added.
No need for a sweater in the parlor!

For the cook stove, apparently there should not be a great amount of light from the flames coming out the vents, as that is also a bad sign. I am going to leave the cook stove's "fire" as is.

With a couple major tasks completed for Roz's kitchen (and the parlor), it was time to think about food and dish storage. With round walls and a very cozy amount of space, it was prudent to go with open shelving like in Medieval times. I utilized more Sonotube scrap for the back of the units (because it is already curved perfectly), then just added horizontal chipboard shelving at the lengths and depths I needed.


I painted and added trims, then gave them a little aging with an antique linen ink stamp pad. It seems to go on well, then I turn my back and the ink practically disappears. Anyone else have that happen? Maybe it just dries a lot lighter. I'll keep working at it.


I am working on gathering and making all the things Roz will need for a fully functioning kitchen. Luckily, I have many "prototypes" left over from the 3D kitchen item adventure I went on last fall. Hopefully, Roz will like them. She's going to need lots of groceries, too. I hear Rozario eats his weight in food every day! 

Until next time...

xo xo,

Jodi

Thursday, April 27, 2023

Fastidious Floral Fairytale Fireplace

I got a little sidetracked and engrossed on something which was completely unplanned for the fairytale treehouse, and it took all week. Surprise! Surprise! 😜


I had intended to work on getting the balcony assembly installed. In fact, I earnestly started that goal by attaching the flowering vines to the balcony posts. 

Repainted vines from last post.

Flower vines wired to balcony before filler flowers were added.

I even filled in empty areas with supplemental mulberry roses and buds. All was going well...

After mulberry roses filled in.

Until I put it in place for a dry fit. Then I began to ponder whether I needed more vines adorning the panels or if there was enough going on on the posts. What about the structural beams holding the balcony up from the first floor? Maybe just green vines there? Yeah, but despite it being two weeks since I ordered them from the Etsy shop, they hadn't even shipped yet. So, I put that decision aside and carried on with the dry fit instead. 

Dry fit with wall and floor/ceiling to decide placement of fireplace.

I had questions about how the girls' fireplace wall would tie in to the balcony. I had always intended to have a railed portion so that you could look down into the great room, but on which side? The balcony or the back of the treehouse? The wall, being a couple inches short, would need to slide one way or the other. In order to know for sure, I had to look at the actual wall, floor and ceiling in place - not just imagine it. Once I saw it in place, my ideas for the fireplace began to bombard my brain. From past experience I know to seize this kind of creative momentum, lest my ideas float right on out into the nethersphere, never to return. So, the balcony got put aside once again until my vine order and solid ideas for it are at hand.


As per my M.O., I designed the structural pieces of the fireplace in Design Space and cut them with the Cricut Maker. Straight cuts? Cheap chipboard? Yes, please! I covered the kit's wall with scrap paper leftover from the girl's cubbies. Because the kit wall is only 1/8" thick, to give a more realistic chimney feeling, I also made a chimney breast, covering it with another scrap. The fireplace itself has a top, a hearth, a back, double layered front, and sides. To the inside, I added egg carton bricks in a herringbone pattern, just for fun. To detail the fireplace, I had a few packs of resin column fronts with an artichoke frieze. They were the perfect size to flank the firebox. Dresden appliques adorn the front, edges and sides.


While the fireplace assembly was drying, I worked on the fire basket. I made a log holder with firedogs out of kraft card. 

No need to point out anything salacious about the firedogs. Believe me - Russ already has. 🙄 

Resizing things down to 1/12th scale doesn't always translate well.

Double layer firedogs, log basket, bracing.

Layers glued to create thickness and detail.

Bent, assembled and painted.

It's always a perfect fit when you make it custom, lol!

For the fire, I placed a half water bottle cap (it's translucent so the light comes through) under the fire basket/log holder and placed a red LED chip light inside. Like the Log Fire With Glowing Embers tutorial, I surrounded it with glowing "ash". I used hot glue to make Sharpie colored orange/yellow translucent flames to go between the wood logs, but it didn't work out as swell as I'd hoped. I need more practice and patience. At least one of the glue strips worked as intended - it almost appears to be flames due to the other three chip lights under the logs.


At this stage I had the fireplace assembled to the wall, toned down with washes, aged with washes, added trims, put the fire logs in place, added sconces and of course - installed a mirror. But it still wasn't nearly finished yet!


It had to be adorned with flowers. A swag above the mirror, a swag on the mantle and then a vase with buds just popping. The carousel horse is pot metal painted with gold to tie in the mirror frame. Accessories will likely evolve later as I switch my concentration from structure to accessories.

Testing the lights.

With the room lights off.

And at the same time, there were also flower vine valences created for the girls' cubby windows. Fairytales are full of flowers, especially fairytale treehouses!

Alice's Bed Cubby

Goldie's Bed Cubby

But fireplaces need other things, too. Not just pretty things, but useful things. I wanted to make a fireplace screen for the girls and I was fairly certain I could find something to make them from this hoard of mine. Sure enough, I had a set of six half scale chipboard gothic windows from Alpha Stamps


I applied Fast Grab Tacky Glue neatly to the back of three of the windows, then placed them on top of some very thin acetate from Cricut Chipboard packaging. Once set, I carefully cut around the edges. Then, to solidify the panes, I filled in the windows with Crystal Clear Gallery Glass.


Once the Gallery Glass was clear and dry, I glued the other three windows on, sandwiching the acetate between them. Then I wrapped them in 1/8" kraft card strips to smooth out the edges.


I painted the frames with a Krylon Gold Leafing Pen, then filled the other side of the glass with more Gallery Glass.


I added some purple and green polka dots with the Sakura Glaze Pens. To attach the window panels together at the correct angle (so they'd fit on the hearth), I sliced 1/8" quarter round in half, making it 45 degrees instead of 90 degrees. Then I glued each half to either side of the center window. When that was dry, I attached each side window. Sorry Betsy - hinges and chipboard do not good bedfellows make. 😊


I also painted a set of fireplace tools and added a basket of logs. The fireplace wall is ready now to help me make my railing side decision.


And it is ready to install into the girl's room.

After flooring, of course!


Unfortunately, my real life house could really use some fastidious focusing. See ya in a couple weeks!

xo xo,

Jodi


P.S.A. On Blogger Issues:

Sometime in mid 2022 the comments I leave for others on their blog posts were mysteriously disappearing, even days after they had been posted - I saw them post! After many searches, I finally found a thread that confirms that I am not (crazy) the only one this is happening to, and a reason for the mystery. Apparently, if your comment disappears from someone's blog, it has to do with their spam filter within the Comments section of their blog. So, it is ultimately up to the blog owner to resolve - nothing you can do.

If you receive comments saying this is happening on your blog, go to your blog dashboard and click on the Comments page. You may see the comment there which has been spontaneously marked as "Spam" for unknown reasons. You can manually approve the comment.


If you don't see the comment, click the question mark symbol at the top right of the page to tell Blogger about the problem. Apparently, they will reset your spam filter which eliminates the problem, at least for a while.


Some others have reported the cause as security settings on specific browsers or a need to clear your cache. Because I have also been unable to backup my blog content since last summer (stalls out and does not save), as well, I suspect that as things are broken in Blogger, they are just no longer being repaired. I hope it is not the case, but I recommend you look into Google Takeout to protect your work. I have mine scheduled to automatically export quarterly and they send my backup files to my email. If ever Blogger ends or starts to charge for hosting, at least we'll have our archives to decide what to do with them.