Getting to the end of a project always makes me itchy to get started on a new one. I have been tossing ideas around in my head for a while now, thinking about what kits I have stashed away and what might be calling to me. After the involved and complicated bashing I did on both the
New Orleans and the
Storybook Cottage kits, I am craving something a lot simpler. Perhaps just a room box type project, and perhaps, since I haven't yet tried the genre, something to display in the fall? That thought was the one that got me remembering all of the fall/harvest/rustic type minis I have stashed away here and there, and soon the idea to combine two of my small kits was born.
In March of 2017 I had the opportunity to visit a miniature shop in Glendale, AZ called Auntie Em's. It was a treasure trove of miniature delights, including lots of new old stock kits. I found Carlson's Old Time Store kit on that trip, and the Victorian Bay Window kit on a subsequent visit. I decided that the store kit wasn't quite large enough on it's own, but if I doubled the floor space and added the bay window kit, it would be the perfect size for a fall farmer's market type of store. The working title is Autumn's Pantry.
Side Note: I've had a lot of questions recently on how I make certain things and what materials and supplies I use. That got me thinking that maybe I have become a little lazy on my blog. It seems I used to share everything in more detail, but somewhere along the way, I began to think I was preaching to the choir and maybe being a little redundant? But in the interest of potentially helping or encouraging any readers to try something new to them, I am going to attempt to be more detailed about what I am doing and how I am doing it. If I inadvertently leave something out, just tell me. I am happy to explain anything, though I am no expert on anything. To me, minis are just about trying new things and having fun!

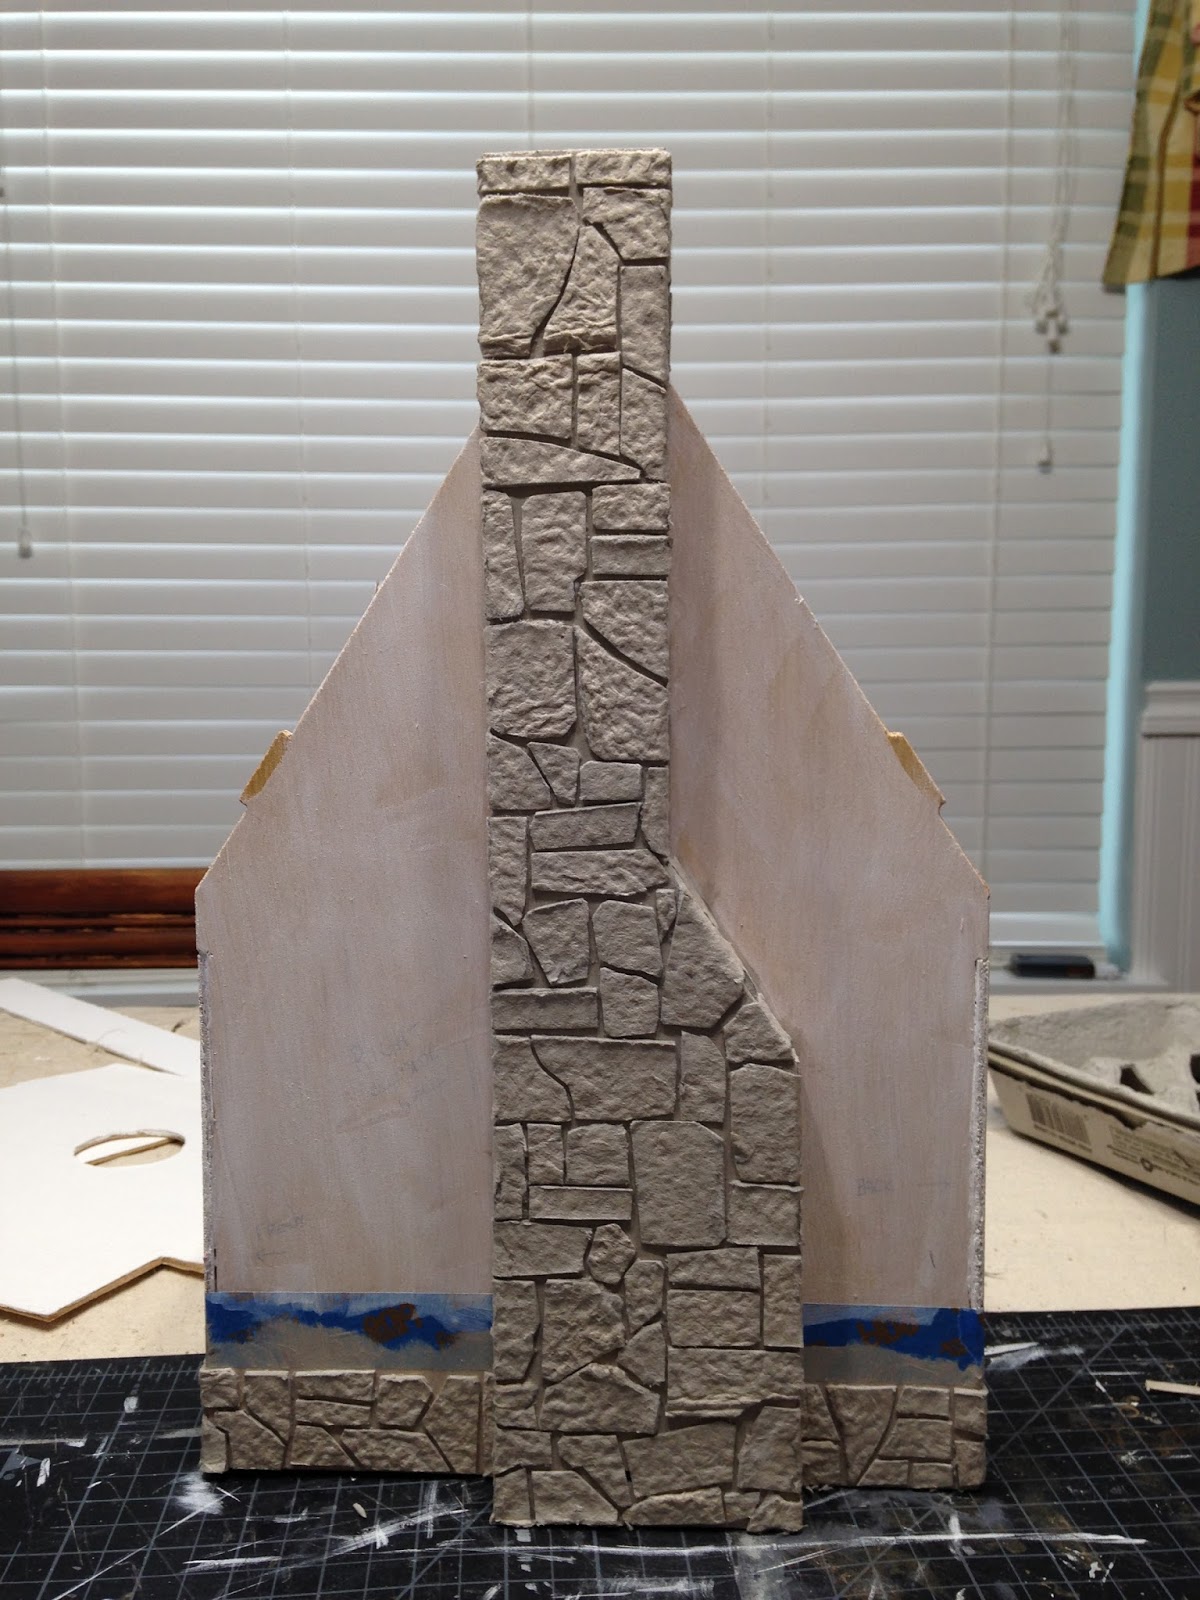
I combined the two original tongue and groove left/right side pieces to make one double right wall. The original floor and roof piece were combined to create the new floor. The original back piece remained the same width, only needing a 3/16" strip added at the top to match the other wall's height. The left wall would be comprised of the bay window kit and two 1-5/16" side walls to match the width of the right wall. The front wall with the window panels and door would remain the same, so the only piece I'd need to completely invent was the main roof. I decided to keep it really simple, giving it the look of a strip mall store with a clear "glass" top to let in more light. The bay window roof would work nicely with the new facade with no changes necessary. It was a little tricky to cut the mitered pieces, but following the instructions, it came out great with just a little finish sanding. More roof photos are coming later in the post...


The first decisions were colors and finishes. I liked the idea of a Northwest theme using a green/burnt sienna color palette accented with brick. I wanted to go with a rustic/country kind of feel, so all of that gave me a direction to go in. I had a big book of scrapbook paper with a nice variety of patterns to use as both wall covering and flooring. To prep it for installation, I took it out to the garage and sprayed
Sealer on both sides, letting it dry several hours in between. To install the flooring, I used
Wallpaper Mucilage, applying it to the back of the paper with a 1" paintbrush. I positioned it on the floor, then used a plastic burnishing tool to smooth out any wrinkles and distribute the paste evenly. Any paste that oozes out I quickly wipe up with a baby wipe. Because of the sealer applied to the paper, the paste will just wipe clean away without damage. Don't leave too long or get too wet - the sealer is only so good.
Because I wanted a shiny floor, after the paper was dry, I took the structure back to the garage, taped off the walls with printer paper, then sprayed a few coats of
Gloss Sealer, letting each one dry for 15 minutes.
I thought the panels below the windows would look nice with some rustic brick. Since it was such a small area, I decided to use the egg carton method. To determine how many bricks I'd need to make, I laid out each of the panels on the egg carton lid. One lid would be plenty with some left over for later sidewalk or planters.
***At this point, you can paint a grout color as an undercoating where the bricks will be applied. If you are going to create a very tight brick pattern and will not be using grout but are concerned that the background might show through, painting a grout color will work fine. If you are definitely grouting, painting a grout color is unnecessary, as the grout will cover all of the open grout lines when done properly.

To get the coloring for my bricks, I squirt a blob of each of the colors I want to use onto a paper plate, going from darkest to lightest. I apply my main color as a background to the entire egg carton surface using a brush. The remaining colors will be applied using an old piece of kitchen sponge. I wet the sponge first to open up all of the holes but squeeze all the excess water out. Then I randomly apply each of the colors from darkest to lightest, blending and splotching as I go. If the sponge begins to get sticky, re-wet and squeeze out again. Once you have a result you like, let dry thoroughly. The benefits to this method are that it's fast, and once you cut and apply the brick, you get a nice random pattern.
 |
| Base color |
 |
| After all the colors are sponged on |
To get consistently sized bricks, I start with strips. I first cut the egg carton into 1-1/4" width strips the entire length of the carton lid. Then I cut them down so that they are in 2-1/2" lengths. Then each of those lengths are cut into 1/4" widths using a piece of 1/4" basswood strip as a guide. Then each strip is cut into 5/8" bricks. Perfect pieces are put into one cup, scrap pieces into another for later use.
To apply the bricks, I draw a center horizontal line with a dot indicating vertical center. Once the first brick is positioned, I add a line of glue and place the rest of the bricks. Then I measure up from those bricks and draw the next line. If you want perfectly aligned bricks, be precise in your work. If you want a little character, just have fun.
I glue the bricks over the edge and when dry, just trim around the edges. It's much faster than fitting each brick to the end.
TIP: You may find that you go through quite a lot of Xacto blades. I sure do! To safely dispose of them, I fill up an empty prescription bottle with the old blades. Once full, I paste a label that says "Sharps" onto the bottle and place in my regular trash bin. Because the prescription bottle lid is locked, there is no concern about someone inadvertently getting injured. Check your county's regulations, as they may be different.
Once the bricks are dry and trimmed, you must apply varnish. I had unfavorable results once using Mod Podge, so now I only use DuraClear matte varnish. I apply three generous coats, letting each one dry thoroughly in between. I know it's frustrating to wait for things to dry when our mini time is so limited, but it really does pay to be patient. Try to have other tasks lined up so that you are making progress on other things during the necessary drying time.
Now it's time for the grout. I have had my best success using
Dap DryDex spackling compound. I just add a bit to a recycled disposable condiment cup. It doesn't take much. I squirt in a tiny bit of complementary color, then mix. The grout wil lighten as it dries, so take that into consideration when mixing up the color. My best application tool is my finger. I squish the grout into the grout lines, wiping away the excess back on to the edge of the grout cup. Once a manageable area is filled, I use a baby wipe to clean up the brick surface. If the surface is extra craggy, you may need to employ the aid of a toothpick to remove excess grout. With a few good coats of sealer, you are safe to wipe several times. If the egg carton surface begins to erode, stop what you are doing and begin the sealing process over again. I learned the hard way so you don't have to!
Let the grout dry thoroughly, then seal again with the varnish.
The backs of my brick panels are visible from inside the store. I decided to make them look like rustic wood panels. I measured out board sections and used a stylus and screwdriver to scribe out seams. Then I painted them burnt sienna and applied a
Glazing Medium mixed with burnt umber (4 parts glazing medium to 1 part paint) over the top. Rustic! The exterior tongue and groove got the same paint and glazing effect.
Meanwhile, during the drying time, I installed the wallpaper. It looks
Really Green! now, but once the built in shelving goes in it will balance quite nicely.
Back to the roofing... Both roofs will be tarnished copper. This requires several steps. First a coat if raw sienna, then a few coats of
Copper Metallic, then an age wash with watered down raw sienna, then some
Verdigris patina gilders paste wax. The door will get the same finish. This is where I'm at with the roofs and door, so far.
I plan to leave the front panel and the main roof removable for easy access, so many of my photos will be taken with a helper to hold the wall in place.
Hopefully, when I see you next time, I'll have the roofs finished, the brick panels installed, the built in shelves fabricated and installed, the regular window panes installed and some handy information about how I achieved a stained glass look in the upper windows of the front wall panel. Lots to do and lots of experimentation, but with such a small scale project, it doesn't feel like too much!
Hope all of you are getting to try some new things, too! Whether mini related or otherwise, new things keep us young at heart!
xo xo,
Jodi