Search My Blog!

Use the Search box below to find keywords that you're looking for quickly and easily!

Search Feature

Wednesday, June 5, 2019

Feeling Grand!


Before I got the doors installed last week, I had a real mess on my hands! The New Orleans was looking like a dumping ground for all the things I had yet to figure out and install. I needed to get the ceiling/roof out for a dry fit to see how things were going to line up. Adding three inches to the interior and exterior mansard walls made getting a perfect fit a challenge!


What I ended up doing was adding 1/8" strips to the tops of all of the walls. Except the interior bedroom/bathroom and bathroom/closet walls, as they had somehow ended up being higher by that much. Once they were all evened out, I attached the crown molding to the walls, before I attached the roof. This seemed easier than reaching in. Because of the angled mansard walls, I "cheated" and used square blocks in the corners rather than having to miter and cut complicated angles. I added the ceiling paper to the ceiling before gluing and nailing it to the house permanently. Then the house went on it's head for the ceiling work. I still had gaps here and there, so I filled them in with wood glue before playing with the ceiling designs.


I had several options at my disposal, so I played around with some layouts. I ended up changing my mind several times.


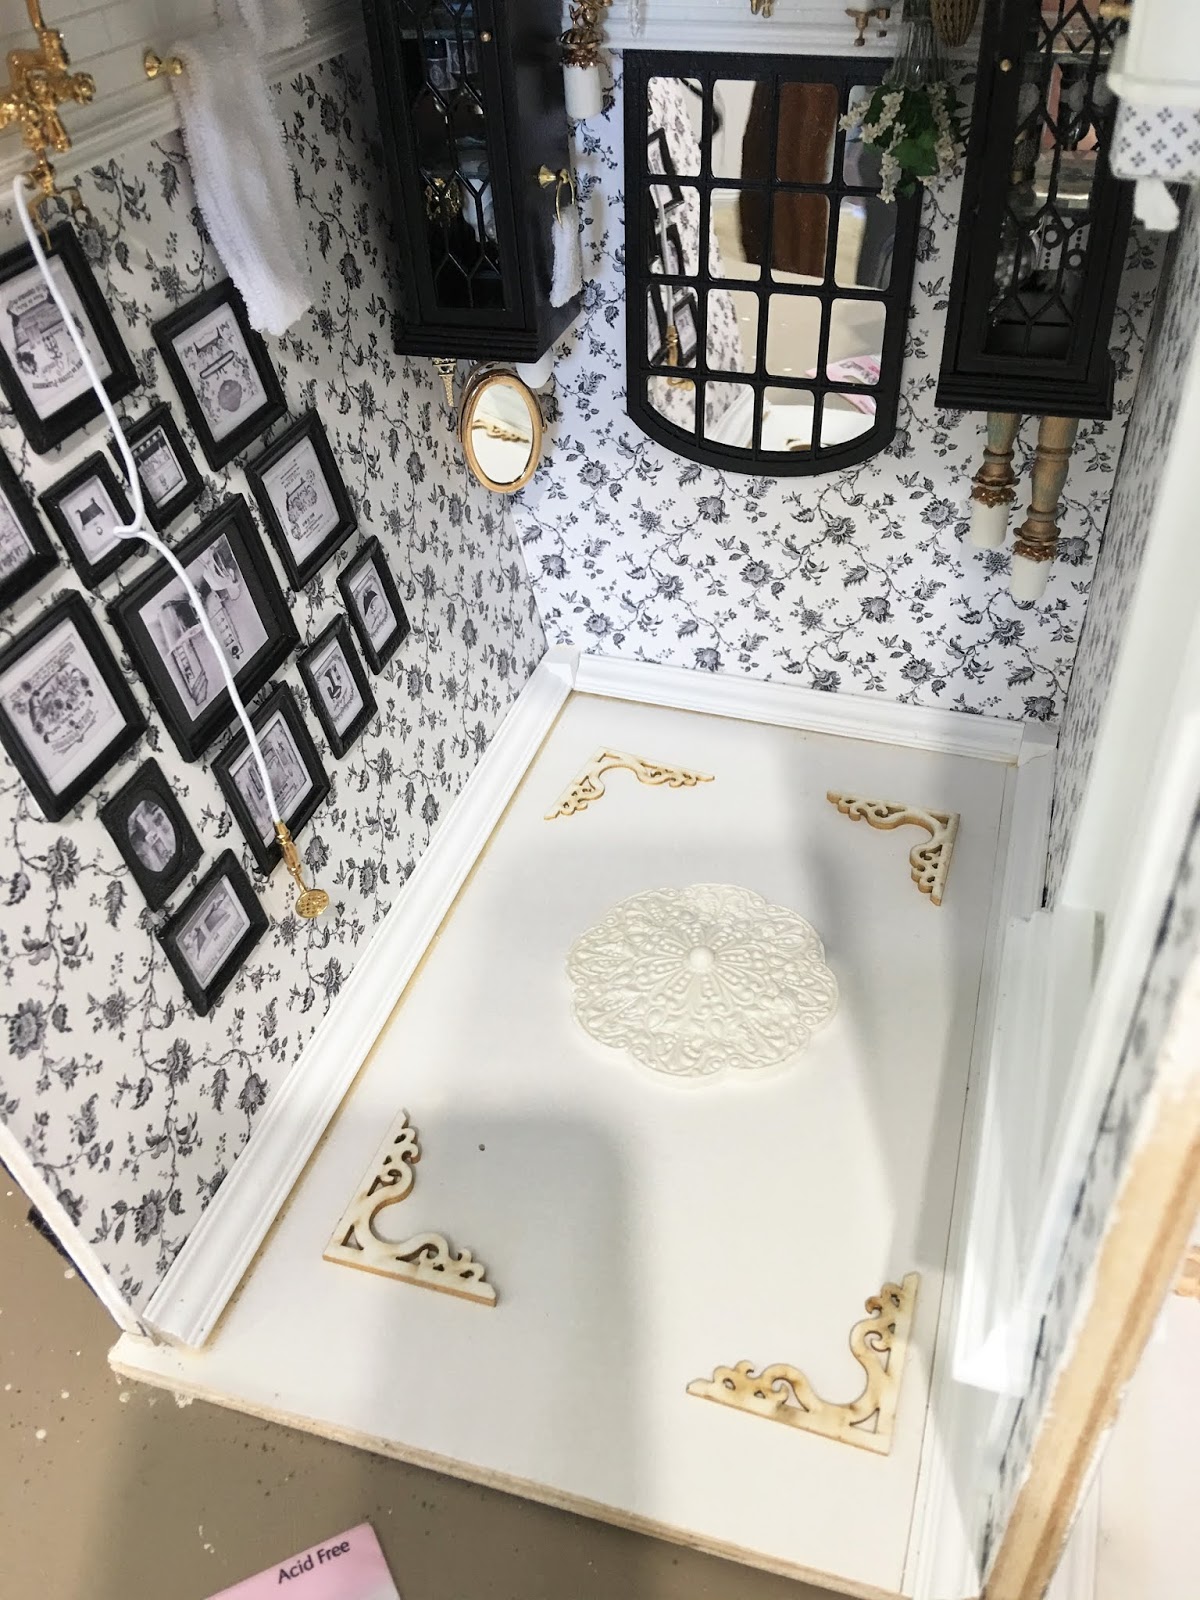
For the bathroom, I wanted to keep it pretty simple by using just a ceiling rose and some corner brackets. I ended up building a frame around the brackets just to give it a little extra detail.


In the stairwell hall, I had a fancy Unique Miniatures ceiling piece, so I just added some JMG laser cut swan brackets to the corners. To get them all perfectly aligned, I used a couple pieces of 5/8" scrap wood glued into an "L" jig. This way, I could line the jig up against the molding and place the bracket into the jig to glue. Because the Unique Miniatures pieces do not lay perfectly flat, I had to use more wood glue to caulk the cracks.


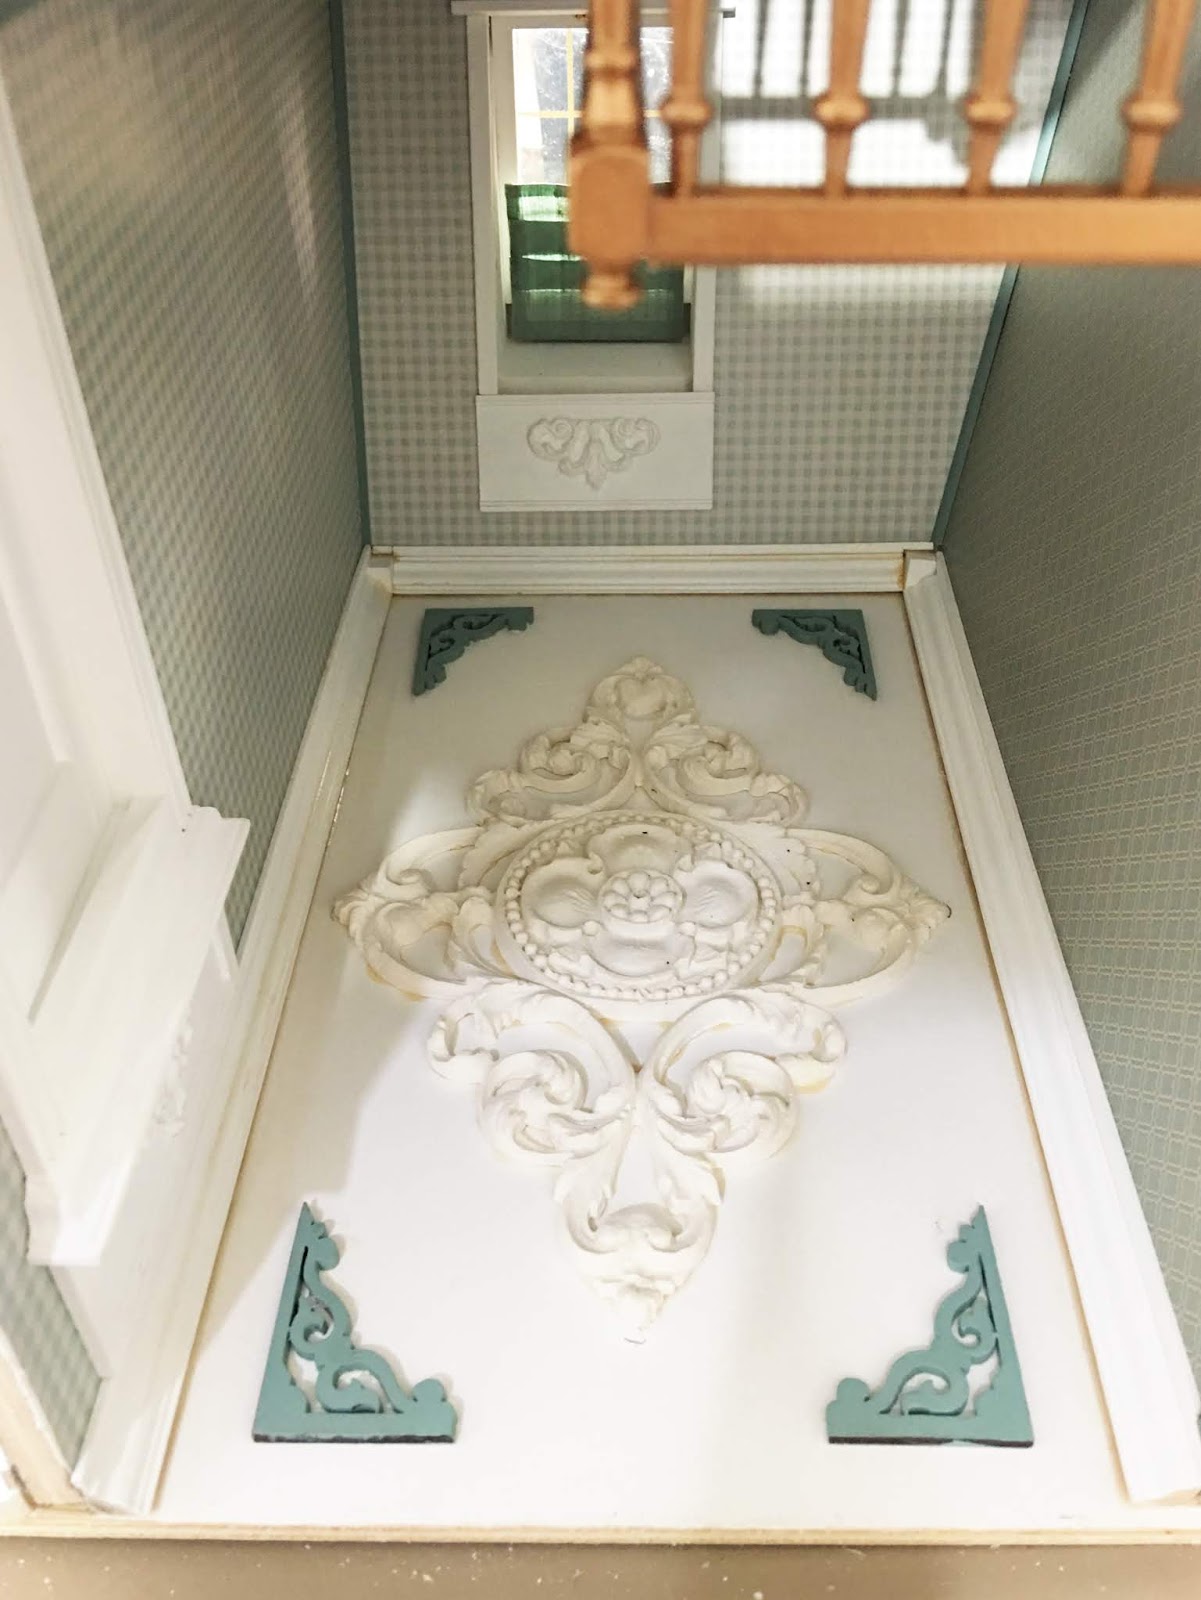
My original plan for the bedroom ceiling was more dramatic. The oval Unique Miniatures piece I had turned out to be a little more egg shaped, and having more surrounding detail seemed to draw attention to the mis-shape. So I opted to create a shallow tray ceiling with 1/2" x 1/16" strip wood and keep to a simpler design. I really like the center resin frame - it is a perfect piece and the detail is lovely.


Once I had the ceilings painted with white chalk paint, it was time to add the lighting! Installing the delicate bi-pin bulbs on the Houseworks chandelier, testing the lights, cutting down the chain to the proper length and gluing the fixtures to the ceiling was nerve wracking!


But with a lot of patience and praying, all went well!


I'm thanking my lucky stars that this part went so smoothly, but I'm not in the clear just yet. I've got two led spot lights to add to each room which means back on her head she goes while I try to carefully drill the holes. Makes me sweat just thinking about it! But while I am sweating, I am also so grateful that this long neglected project has all it's structural pieces in place! I can see the end now, and because the challenges have been so big, the satisfaction is equally as grand!

xo xo,

Jodi

Thursday, May 30, 2019

Wrapping Up A Few Loose Ends

Several weeks ago I said I would share my idea for getting rid of those unrealistically intrusive thresholds that come on dollhouse doors, if the idea worked out. It was in the post where I'd remodeled some Houseworks Victorian Glazed Doors, adding wood panels where the glass used to be and making them taller for the larger doorways. I am so relieved to report that the idea worked and the hall/bedroom and bedroom/bathroom doors are in!


And they function just like I was hoping they would! Here's how I did them...

Make the hinge pin hole open to the front of the jamb so that the door can be slid into place through the front rather than having to be fed up through the bottom.


Cut a trim piece to cover over the hole after the door has been installed. I used 1/8" x 1/16" and cut it to cover the entire length of the jamb..


Measure where the bottom hinge pin will need to be in relation to the jamb (distance away and centered), then make a hole. I used a pilot hole punch, then pushed in the hinge pin with pliers until I reached the depth I wanted. Mark with a Sharpie where the floor meets the pin so you know how far you'll need to seat it into the door.


Remove the hinge pin head (I used wire cutters) and with a small dab of wood glue, insert it into the bottom of the door to the depth you have marked. Do the same for the top hinge pin and insert into the top of the door.


Angle the bottom pin into the hole in the floor, then work the door up and slide the top pin into the jamb opening you made.


Glue the trim piece over the top of the jamb.


Ta-da! Working doors with a realistic transition from one room to the next! Now they just need a little touch up paint, then I'll be ready to tackle the ceilings!


And the other loose end... The D.I.Y. Chocolate shop...

I took the scrap wood to the scroll saw and cut an approximate cash register shape that I'd drawn on the wood.


Made sure the scale was about right, then sanded and sanded...


Added a little paint and some buttons...


A sticker for the back and there is is! A homespun cash register in half scale!


I am just about as finished with it as I want it to be. I thought it would be fun to take it's photo inside the New Orleans bedroom for scale.


I might add a flower box, and I still have to finish up the wiring.


The dust cover is drying now.


Since I am finally wrapping up a few things, maybe I'll even get back to the Storybook Cottage! It's so close, and it's the perfect time of year to spray the furniture! My work area is clean, so it feels like anything is possible!

xo xo,
Jodi

Friday, May 24, 2019

D.I.Y. Puzzle Kit Progress

The little DIY kit project I'd planned with my daughter worked out better than I'd even hoped for! She was really excited at the Cake Diary kit itself, but when she found out that she could replace the papers and flooring with stuff from my stash... Let's just describe her as giddy! I think she appreciates my hoard of craft supplies a little more now! :O)


She initially began looking at what scrapbook paper I had in teal and blue color tones, but once she saw the sunny orange with the blue tile pattern she was set. She loved the leftover piece of Houseworks oak flooring, especially once it was sanded and varnished and came out with the same warm tones as the papers. She also picked out and meticulously cut some brick paper that will wrap creatively from the inside of the shop to around the back side.  We still have a way to go as every step involved customizing, but she couldn't have enjoyed herself more!


Here she is cutting her very first shelf pieces from balsa. We both didn't like the flimsy card meant for the shelving, so we made our own. My smarty pants girl was even very impressed with my math skills! See? Mom does still know something! She will be adding lace detailing to the shelf edges on our next play date. I'll share more progress as we make it! And btw... She said this was the perfect kind of mini project for her because she thrives with a little direction!


On my Chocolatier project I also made some great progress. I began assembling many of the accessories from the kit and quickly had ideas for even better details. For the shelf unit, I auditioned some glass candy jars from my stash and found a few that seemed to work in half scale. I filled them with metallic beads meant to look like foil wrapped chocolates.


I also used some Woodsies and wooden heart shapes to make candy boxes. The paper ones that came with the kit were just fine, though a little too large for where I needed to use them. I laminated three Woodsies pieces together, painted, edged them in gold leafing pen and then added stickers to the tops.


For the small glass case on the main counter, I made "chocolates" using flat backed pearls and stars. I colored them with Krylon Shortcuts paint marker in brown. I like the shiny finish, though I should have left them to dry a bit longer than I had the patience for. The kit provides boxes of chocolates, but they are just a photo inside a box. I like that you can take the kit a step farther if you want to.


I also made chocolate dipped cookies using paperclay and an inexpensive silicone cookie mold. I colored them to look fresh baked, then dipped half of them in white and milk chocolate. Man they made me hungry!


The interior is nearly finished with the exception of a tiny cash register. I am going to attempt with my scroll saw and lots of sanding to create one from a block of scrap wood. We'll see!


I have a few more of the exterior elements to make up and all of the lighting to do. Maybe another week or two and I can say I have completed my first DIY puzzle kit! I am really enjoying it though, and believe it or not. the Storybook Cottage has begun to call me again!


Have a lovely weekend everyone!

xo xo,
Jodi

Thursday, May 16, 2019

Halftime!

Getting the balcony railing installed for the New Orleans felt like a major accomplishment!  I kept at it, installing the last interior wall then starting in on all the trim work. Here’s where you find out just how out of square your build is and how good you really are with your measurements. I'll have some pics for you next week. I have a fair amount of filling and touch up painting to do, and that just got real boring, real fast. I got out the roof piece to begin making decisions on the ceiling molding and suddenly felt lost for direction. Oh how I long for step by step instructions where I don’t have to make many decisions and can kind of just mindlessly enjoy something crafty!

Ask and ye shall receive!


For Mother’s Day this year, my grown up daughter flew to California to visit her paternal grandma. She asked me before booking the ticket if it would hurt my feelings if she was not with me on Mother's Day. How sweet is that? Of course I told her GO! Have fun! We don't need it to be Mother's Day to spend fun time together, and we do it quite regularly anyway! But she went even further to sweeten the deal and will be spending most of this weekend here. Last time she showed me how to make her eggs Benedict recipe with homemade biscuits, but this time we'll be working on new mini projects together!


I have always been curious about the all in one 3D puzzle kits that you see everywhere, and have always wanted to see if I would really enjoy working in half scale. So using the generous Mother's Day Amazon gift card from the same thoughtful daughter, I bought two of them. Mine is the Chocolatier store kit by Spilay. Natasha has less room in her apartment, and because she has very little mini experience I picked the smaller Cake Diary kit by Cutebee for her.


In preparation for this weekend, I thought it was a great idea to crack my kit open to get familiar with the instructions. While there are very few words in English, the photos are pretty self explanatory. Once you get the key to how the instructions are laid out, it's pretty straight forward. The Spilay kit has the parts segregated into bags marked with a letter. Once you find the bag with that letter, you see a photo diagram of the parts you need for that piece of the kit. The instructions then provide step by step photos of how to assemble. The window film, signs and patterns are referenced in the same way as the parts for easy identification. Many of them have already been painted, and my kit included sandpaper, scissors, tweezers, ruler, razor knife, screwdriver and parts to make a dust cover.


I'll report on the other kit brand instructions after we've had a chance to work on it, though they look really similar.


I have only worked on the main large furniture pieces so far, a couple hours over the past couple evenings and am making steady progress. It is such a nice change to just be able to follow directions, and yet I have found some great opportunities to personalize and embellish the pieces as I go. I have added scrapbook paper, lace, different door knobs and even raised the tiny signs by adding wood back pieces outlined in gold leafing pen. We'll pretend that "always" is not misspelled on this one. :O) This person's English is still definitely better than my Chinese!


Aren't they adorable?!? I am truly enjoying this kit and expect to do more in the future. I hope Natasha finds it just as fun and that it turns into a regular activity for us to enjoy together.

As is generally the case, the universe synchronizes the timing on things. Imagine my surprise and delight this morning when I learned via email marketing that Hobby Builders Supply/miniatures.com is now offering these kits on their site!


The most delightful thing about this little halftime experiment is that I am discovering that I LOVE 1/24th scale! I can see myself doing many more projects in this scale, and because it's so much tinier, I'll have room for twice as many projects! Watch out Shannon! Soon I'll be coming for some of those amazing Red Cottage Miniatures structure and furniture kits I've coveted for so many years!!!

Have a wonderful, fun and creative weekend everyone!

xo xo,
Jodi