Hello Friends and Happy Thanksgiving! Those of us who live in the US celebrate all the things we have to be grateful for on this day every year, though it is good to keep gratitude in our hearts at all times, wherever in the world we are. I am grateful to have had a fabulous visit with my amazingly wonderful folks in Arizona. Since I've been home I have done my best to pick up where I left off with the trunkhouse, and that was in the parlor.

In this post I'll share a few details about the chairs I made. While it is not a real tutorial, hopefully it helps you to imagine ways to think beyond the instructions for some of the old favorite mini kits you have lying around. It can be so much fun to make something unique and totally your own, even when it's not totally from scratch.
I started with a couple House Of Miniatures Chippendale Wing Chair kits. Then I looked online for wing chair styles that I liked and could adapt the kits to. Here's the chair I wanted to mimic...

My inspiration chair had a much slighter profile, so I needed to cut the kit's winged side pieces in depth and height.


I also rounded the detail at the top.

The kit's cardstock pieces also needed to be reshaped. The most important step here was to keep dry fitting to see how everything was fitting together.

My inspiration chair was also different in that it had rolled arm rests, where the kit had rolled front/sides and flat arm rests. I moved those rolled kit pieces to the tops of my arm rests, after I trimmed the little lip pieces away. They were intended to secure the cardstock sides in the original kit configuration so I no longer needed them.


The next few steps pretty much followed the kit's instructions, applying a strip of fabric to the edge of the sides, applying it to the cardstock, then applying those pieces to the side pieces.


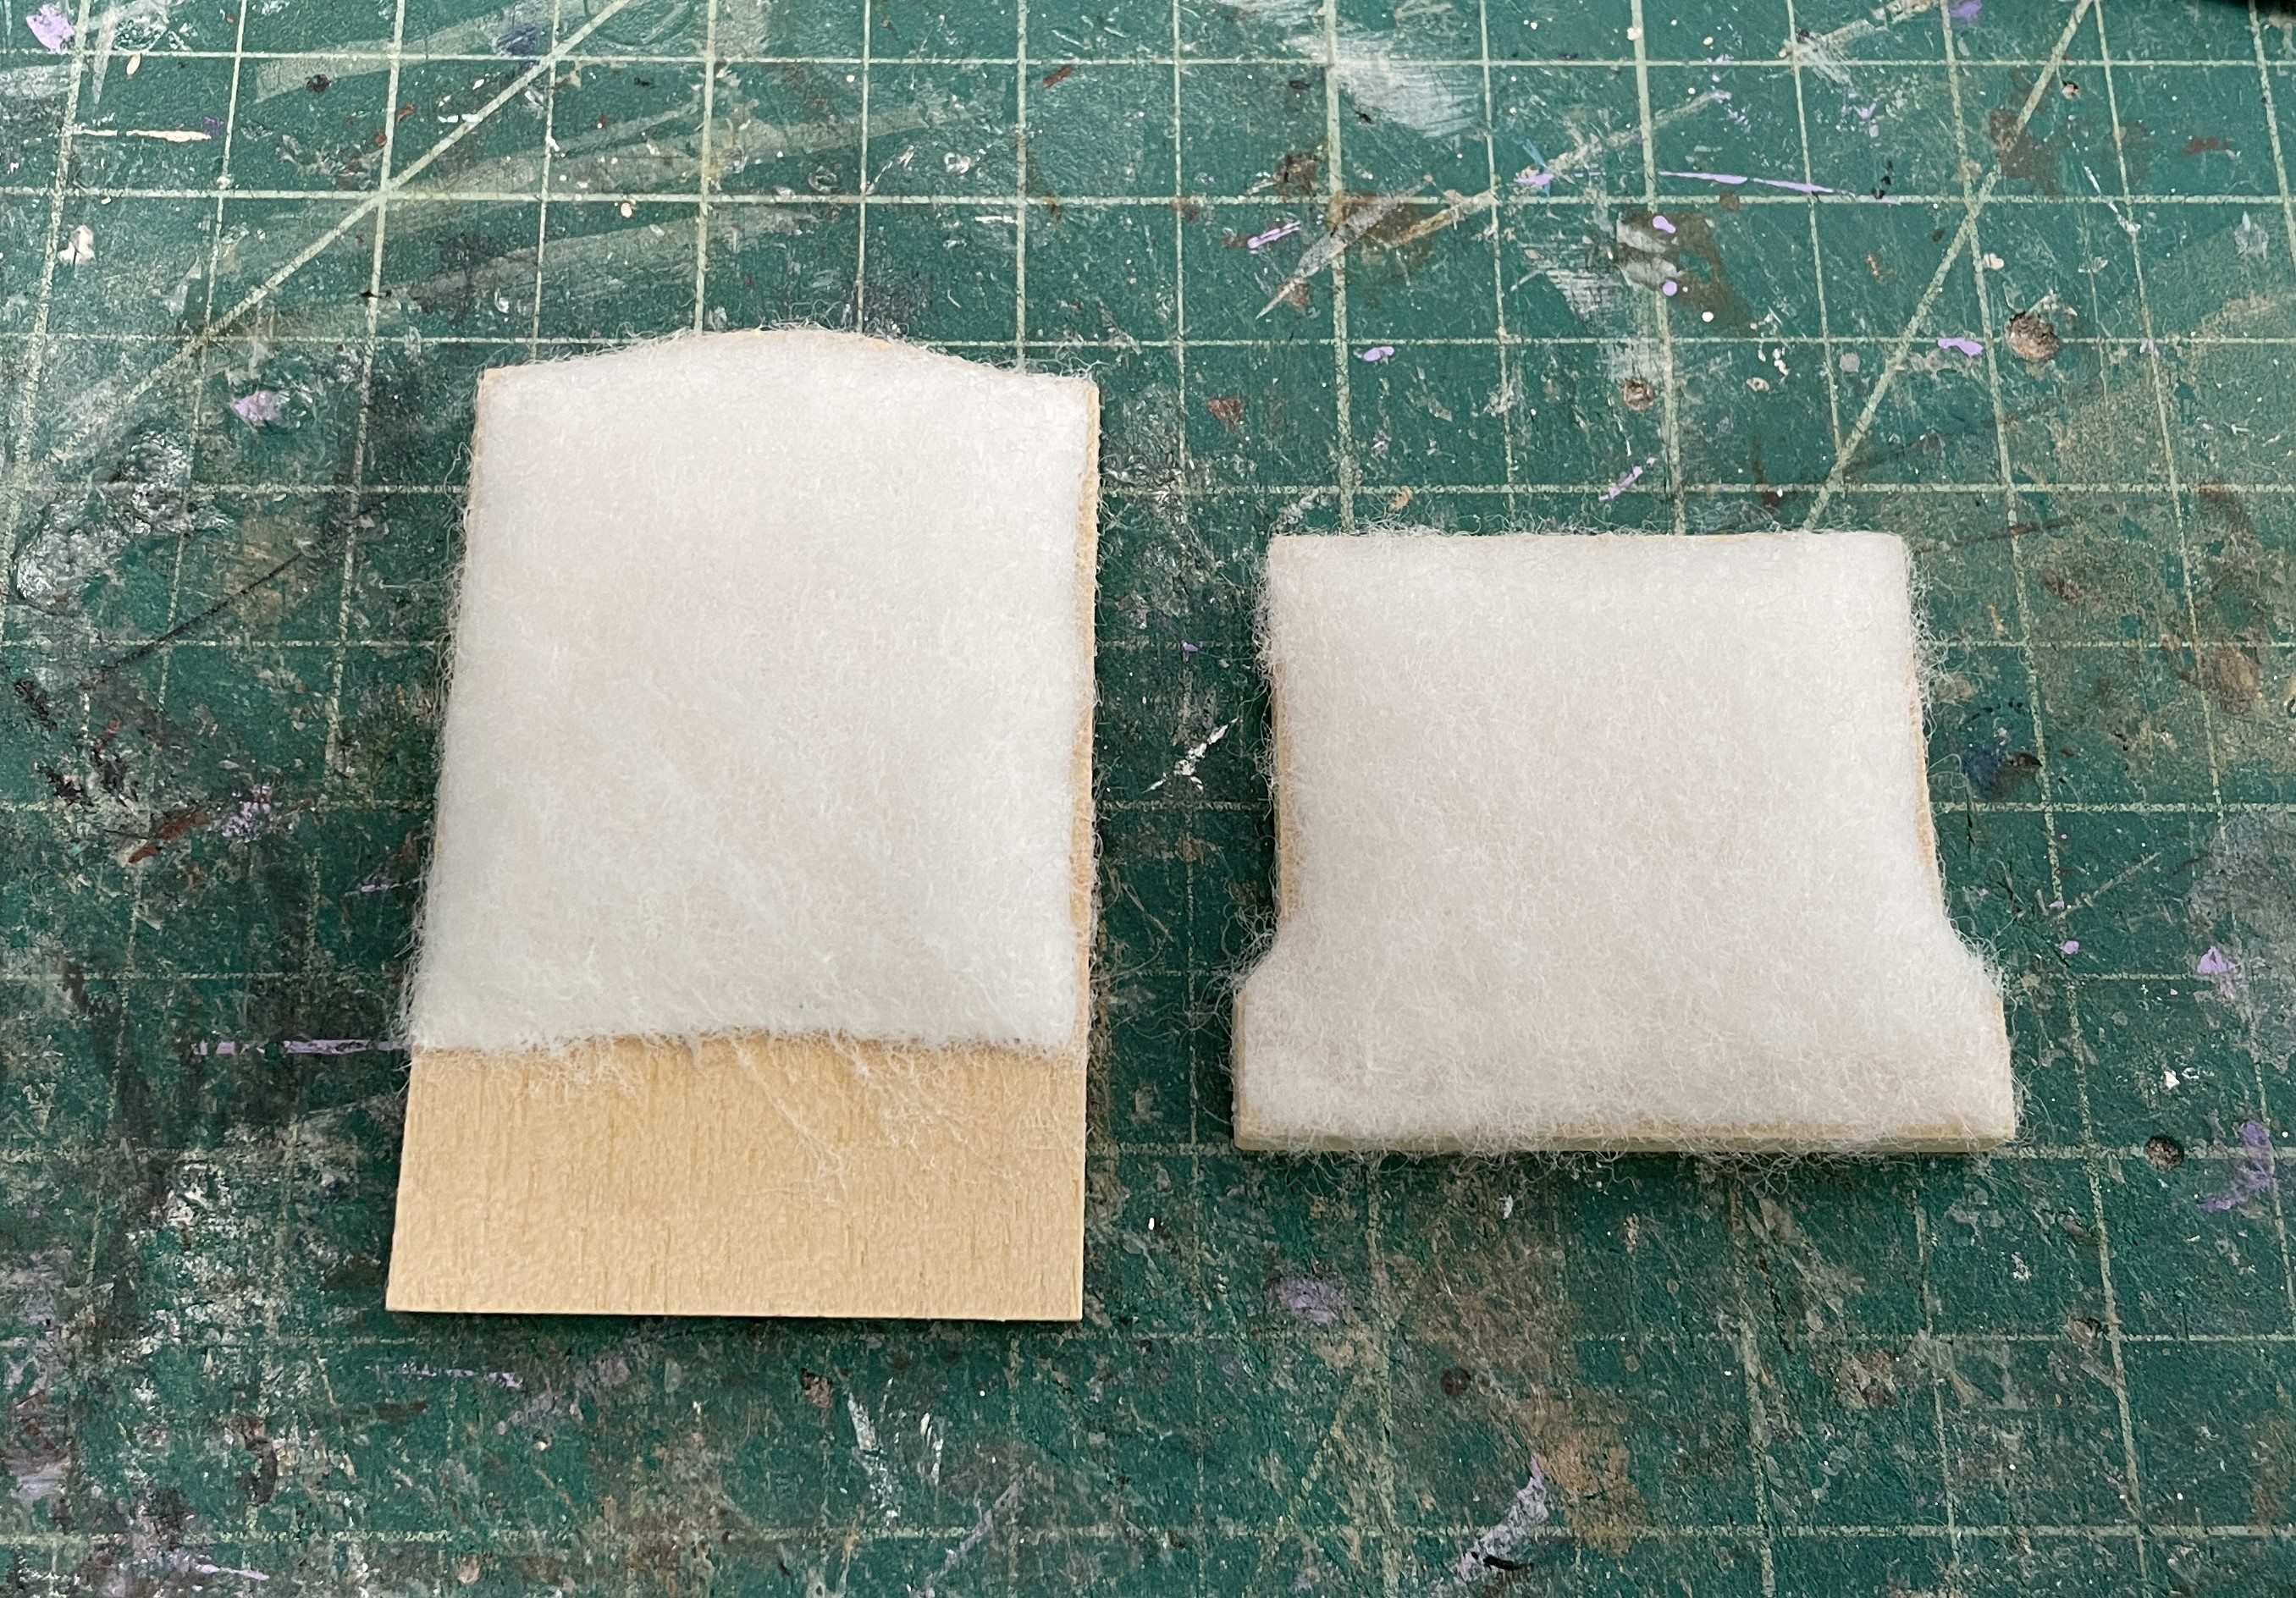
I encountered my first real challenge when it was time to upholster the chair cushions. One of my kits was fairly new and one of them was really old. The chair cushion pieces from the older kit (which are made from some type of foam) were shriveled, brittle and crumbled in my fingers. My solution was to eliminate them from both kits and use batting, instead.
 |
| Left, newer kit foam. Right, older it foam. |
 |
| Two layers of quilt batting. |
Time for fabric...

And cardstock...


All the components are ready for assembly per the kit instructions.

The kit's leg assemblies have always looked a bit clunky to me. Plus, given Roz's petite stature, they are a little tall. Instead, I cut down some short spindles to make more height appropriate chair legs.


And I even hand sewed a couple accent pillows! I think my sewing skills are improving... a little. 😊

Roz loves her new custom wingback chairs and can't wait to see them in the parlor! I'm saving that for the big reveal, but there's so much more to do before then. More progress, hopefully, next week, my friends!
Hope this post has inspired you to rework some of your favorite mini kits to make them your own! Thanks for stopping by!
xo xo,
Jodi