This week turned out to be all about the trunkhouse's windows, doors, ceilings and floors. I am struggling to know the best order to do things in, but I figured if I at least had some idea what is going where, I could work on getting them ready. If I start with the first floor and work my way up, I can just grab the next part when I need it. For those of you who are considering building a trunkhouse of your own one day, even if I proceed in the totally wrong order, maybe my trials, errors and solutions will help save you from a few headaches.
Last week I had cut the floor/ceiling dividers from chipboard. This week, I added some nice wood flooring strips to the floors and some rough and ugly veneer strips to the ceilings (I didn't have enough of the nice ones). Then I treated them all with Fred's Weathering Stuff.
I needed to add rim bracing beneath each floor of the Sonotube to prevent the floors/ceilings from falling through. For this, I cut strips of cereal box cardboard. Trix aren't just for kids! 😊 I laminated many layers to counteract imperfections in my circle cutting. The same cardboard strips, which I'll use as baseboard later, will offer a similar solution for any gaps showing above the floor.
 |
| A paper cutter helps me keep the strips consistent in width. |
 |
| Some strips are tripled where bigger gaps persist. These "joists" will be hidden beneath the floor. You may notice that I primed the Sonotube's interior. |
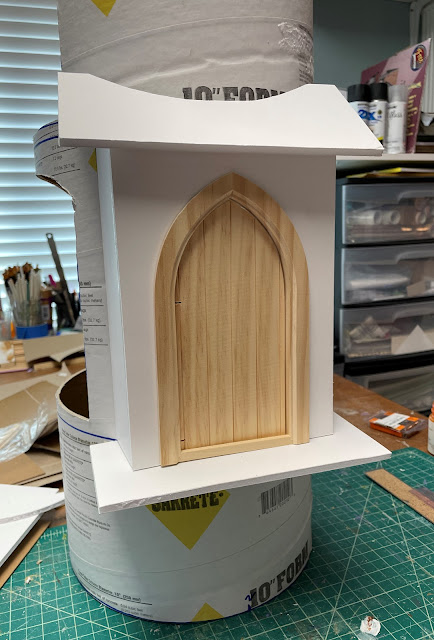
Last week I touched on the challenge I'd face with the trunkhouse's windows. I had a few frames in my stash that I was looking forward to using, but how to create/place a window into a curved wall? I took a little Hobbit liberty for the solution and decided to build out some boxed windows. This will allow me to ignore the curve in favor of the size and shape of each individual window. When all is said and done, it will seem as though the trunk of the tree is much thicker than it is. And an added benefit is that each of these windows will offer a little shelf, of sorts. Who doesn't need more storage???
Some of my window shapes themselves offer unique challenges. Using the half circle windows as an example, not only do they have to fit into a curved wall, they have to have a special frame made for them. To accomplish this, I first measured the outside dimensions of the window - 8-1/2". I cut an 8-1/2" strip of illustration art board to the depth that seemed appropriate, then at every 3/16", I made a slice - not all the way through, just enough so that the strip would bend.
I applied wood glue around the straight edge of the window, making sure where the strip would have to turn the corner there was a slice. I held it in place until the wood grabbed - about 60 seconds or so. Then I let it dry thoroughly. I applied glue to the rounded part of the window frame, and again, held it until it set. Once the glue had grabbed, I secured the assembly with a thick rubber band to firmly hold it for the rest of the drying process.
 |
| Once dry, the frame and housing can be sanded flush. |
Prior to assembling the "boxed window", I traced/cut the window's pattern onto scrap cereal box cardboard. I measured for placement on the Sonotube, traced the window pattern onto the Sonotube, then cut out with a box cutter. With minimal sanding, the window fit. I traced the contour of the curved wall onto the window and will cut away the excess when it's time to glue it in.
This same process also worked for the round window. When I eventually apply the Paperclay to the interior walls, I'll be able to blend the seams in nicely.
For this unique window, I created a foam core box to mimic its shape. Then I traced and carved the curve right into the foam core. Perfection isn't necessary - between the glue, Paperclay and "bark", no gaps will be left behind.
At this point I changed my mind on the placement of the round window which had been installed in the bedroom's alcove. I replaced it with two "leaded" square windows to create more symmetry. For these, I added basewood frames attached to foam core boxes.
I moved the round window beside the bedroom's balcony door.
I had two more of the square "leaded" windows, so I used those to create both the interior and exterior window frames for the front door.
I have an idea for the living room windows which will flank the wood stove - I am waiting for a package before I will know if the idea is actually going to work. Until it arrives, I will spend my time painting the doors and windows, cutting beams for the ceilings and more cardboard strips for the trim. Boring, fiddly, repetitive but necessary. See you next week!
xo xo,
Jodi


