As I was starting the Fairytale Treehouse's kitchen, I kept thinking about Goldie and her dream to create a porridge cookbook. I knew she would need ample space to experiment as well as 'top of the line' appliances. That is, top of the line for the era that she is living in! Suddenly, I had the whole room envisioned in my mind, and the impulse to start on her oven. Sometimes, the order I do things isn't logical. But inspiration can be fickle, so I've learned to follow it whenever it comes.
 |
| Goldie's Oven |
Last week I shared a couple photos of how I began - with the first floor's dividing wall. I drew out my dimensions and then began to create the structure pieces for the oven in Design Space. I truly wasn't sure it was going to work on the first try, but the best way for me to learn is to see a thing in three dimensions to understand it. I got really lucky and the first pieces I cut worked just the way I hoped they would!
 |
| Linfield kit's first floor dividing wall. |
 |
| Oven components in Design Space. Purple are the upper portion of the structure, blue the lower portion and black are the base pieces and inner structural pieces that needed to be cut on another sheet of chipboard. |
After I cut the parts from chipboard with the Maker, I assembled and painted them. I attached the base to the Linfield kit's dividing wall, then added 1/4" channel molding to finish off the wall's edges.


One of the things I have been looking forward to most with this project is the opportunity to use lots of texture - by whatever materials I have available to me or by using any craft supply I can think of trying. For the dividing wall, I'd have bricks showing through Paperclay stucco. I'd clad the oven in a combination of stone and egg carton bricks. The base floor was another fun chance to try Paperclay, this time in the form of river rock.
For the wall's brick and oven's stone cladding, I used Magic Masonry - it's the sticker roll stuff that you apply to the surface, spread stucco (or in my case joint compound) on top and then remove the tape. You are effectively removing the grout lines when you remove the tape, leaving behind the masonry. To add a little texture, I let the joint compound set up for a few minutes to become more firm, then I lightly pounced it with a paper towel.
 |
| Areas of Magic Brick, and the stove top framed in egg carton brick left over from another project. |
 |
| Magic Stone applied to the top of the oven hood, more egg carton bricks applied to various areas. |

In between the assorted masonry applications, I was also working on the oven door. I needed to figure out a way to make it functional, and because it is made of chipboard and not wood, I decided to make paper hinges with a toothpick as the pin.
 |
| Three layers of the door: Frame overlay, oven front with opening and arched double layer door. |
 |
| Frame overlay with egg carton bricks applied. |
 |
| Cardstock paper hinges made by wrapping thicker card several times around a toothpick then securing with Tacky Glue. |
Oven door assembly. Two paper hinges are attached to the door and sandwiched under the smaller inner door arch piece. Two are attached to the oven front and then wrapped around to the inside of the oven front where it is secured with lots of strong glue. Then a toothpick is inserted through all four hinges to allow the door to swing open and shut. Beads have been added to the top and bottom of the toothpick for decoration as well as to keep the toothpick from coming out of the hinges. Dresden appliques have been added to the door, and a silver brad is the door handle.
The black acrylic paint looks really close to cast iron after rubbing it down with your finger. Dulled by dead skin cells, maybe? Eeeewwww!

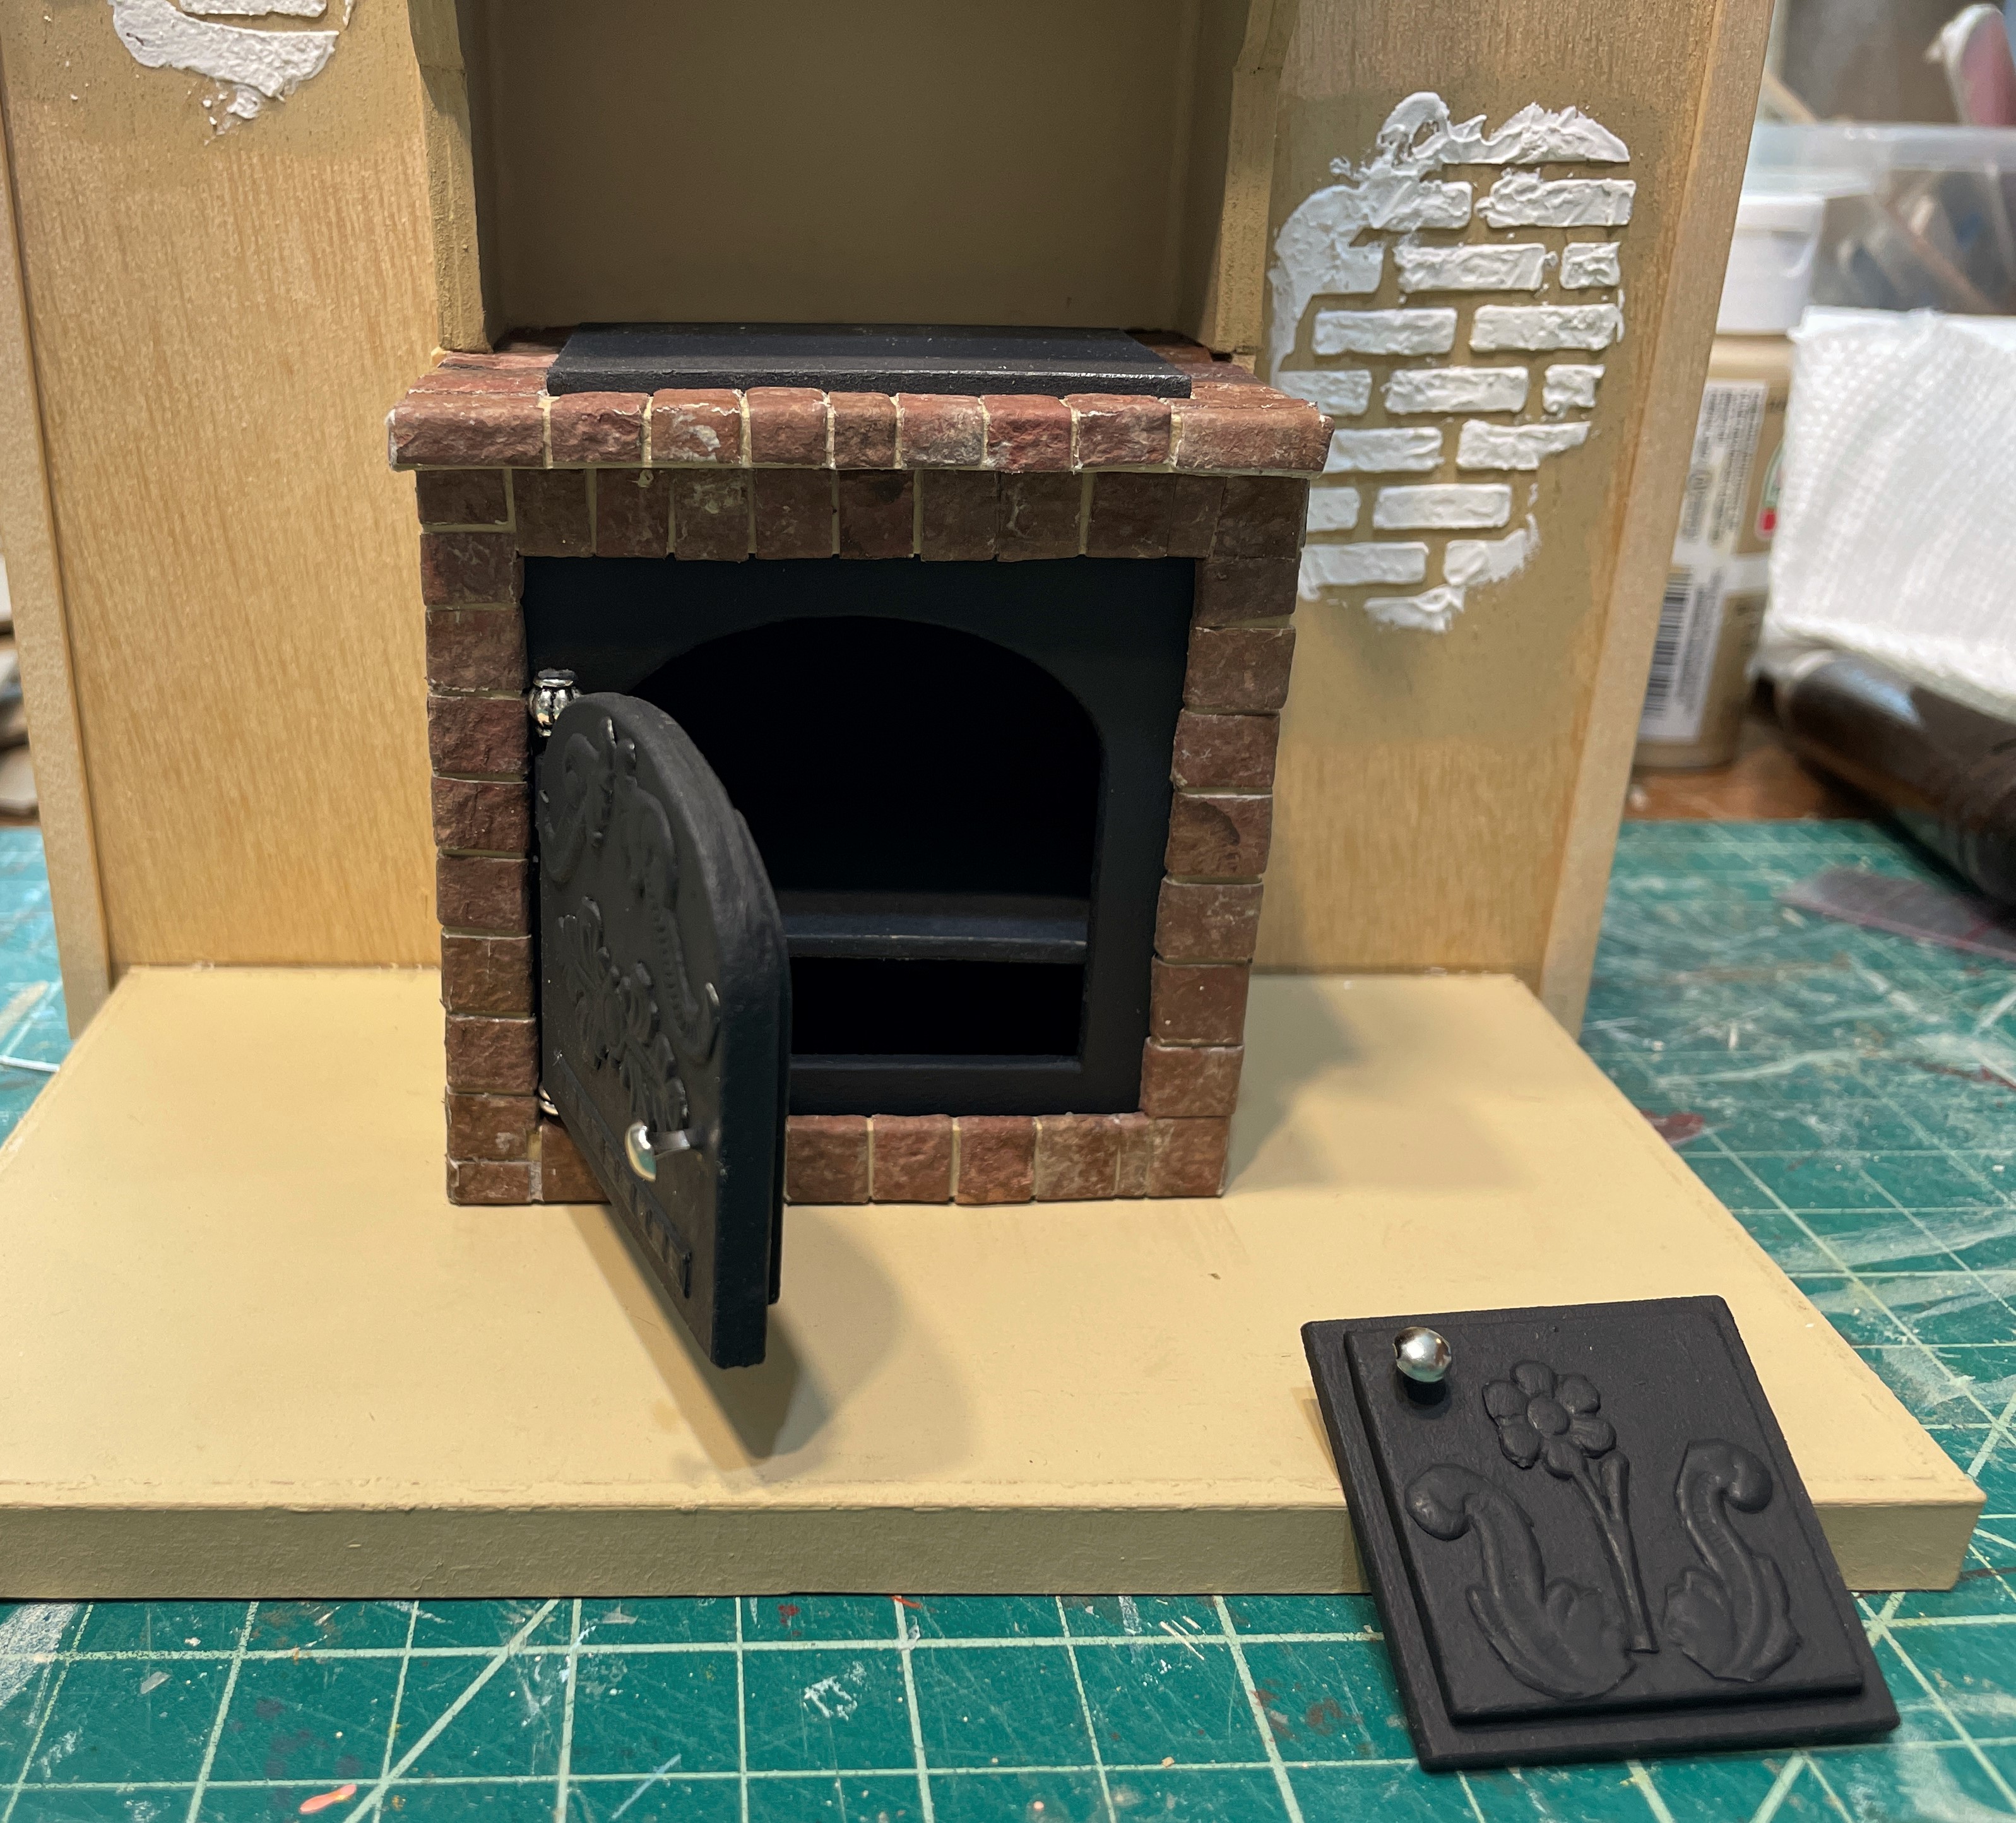 |
| Testing the function - it works! The little door will attach to the side of the oven in order to feed logs into the fire. |
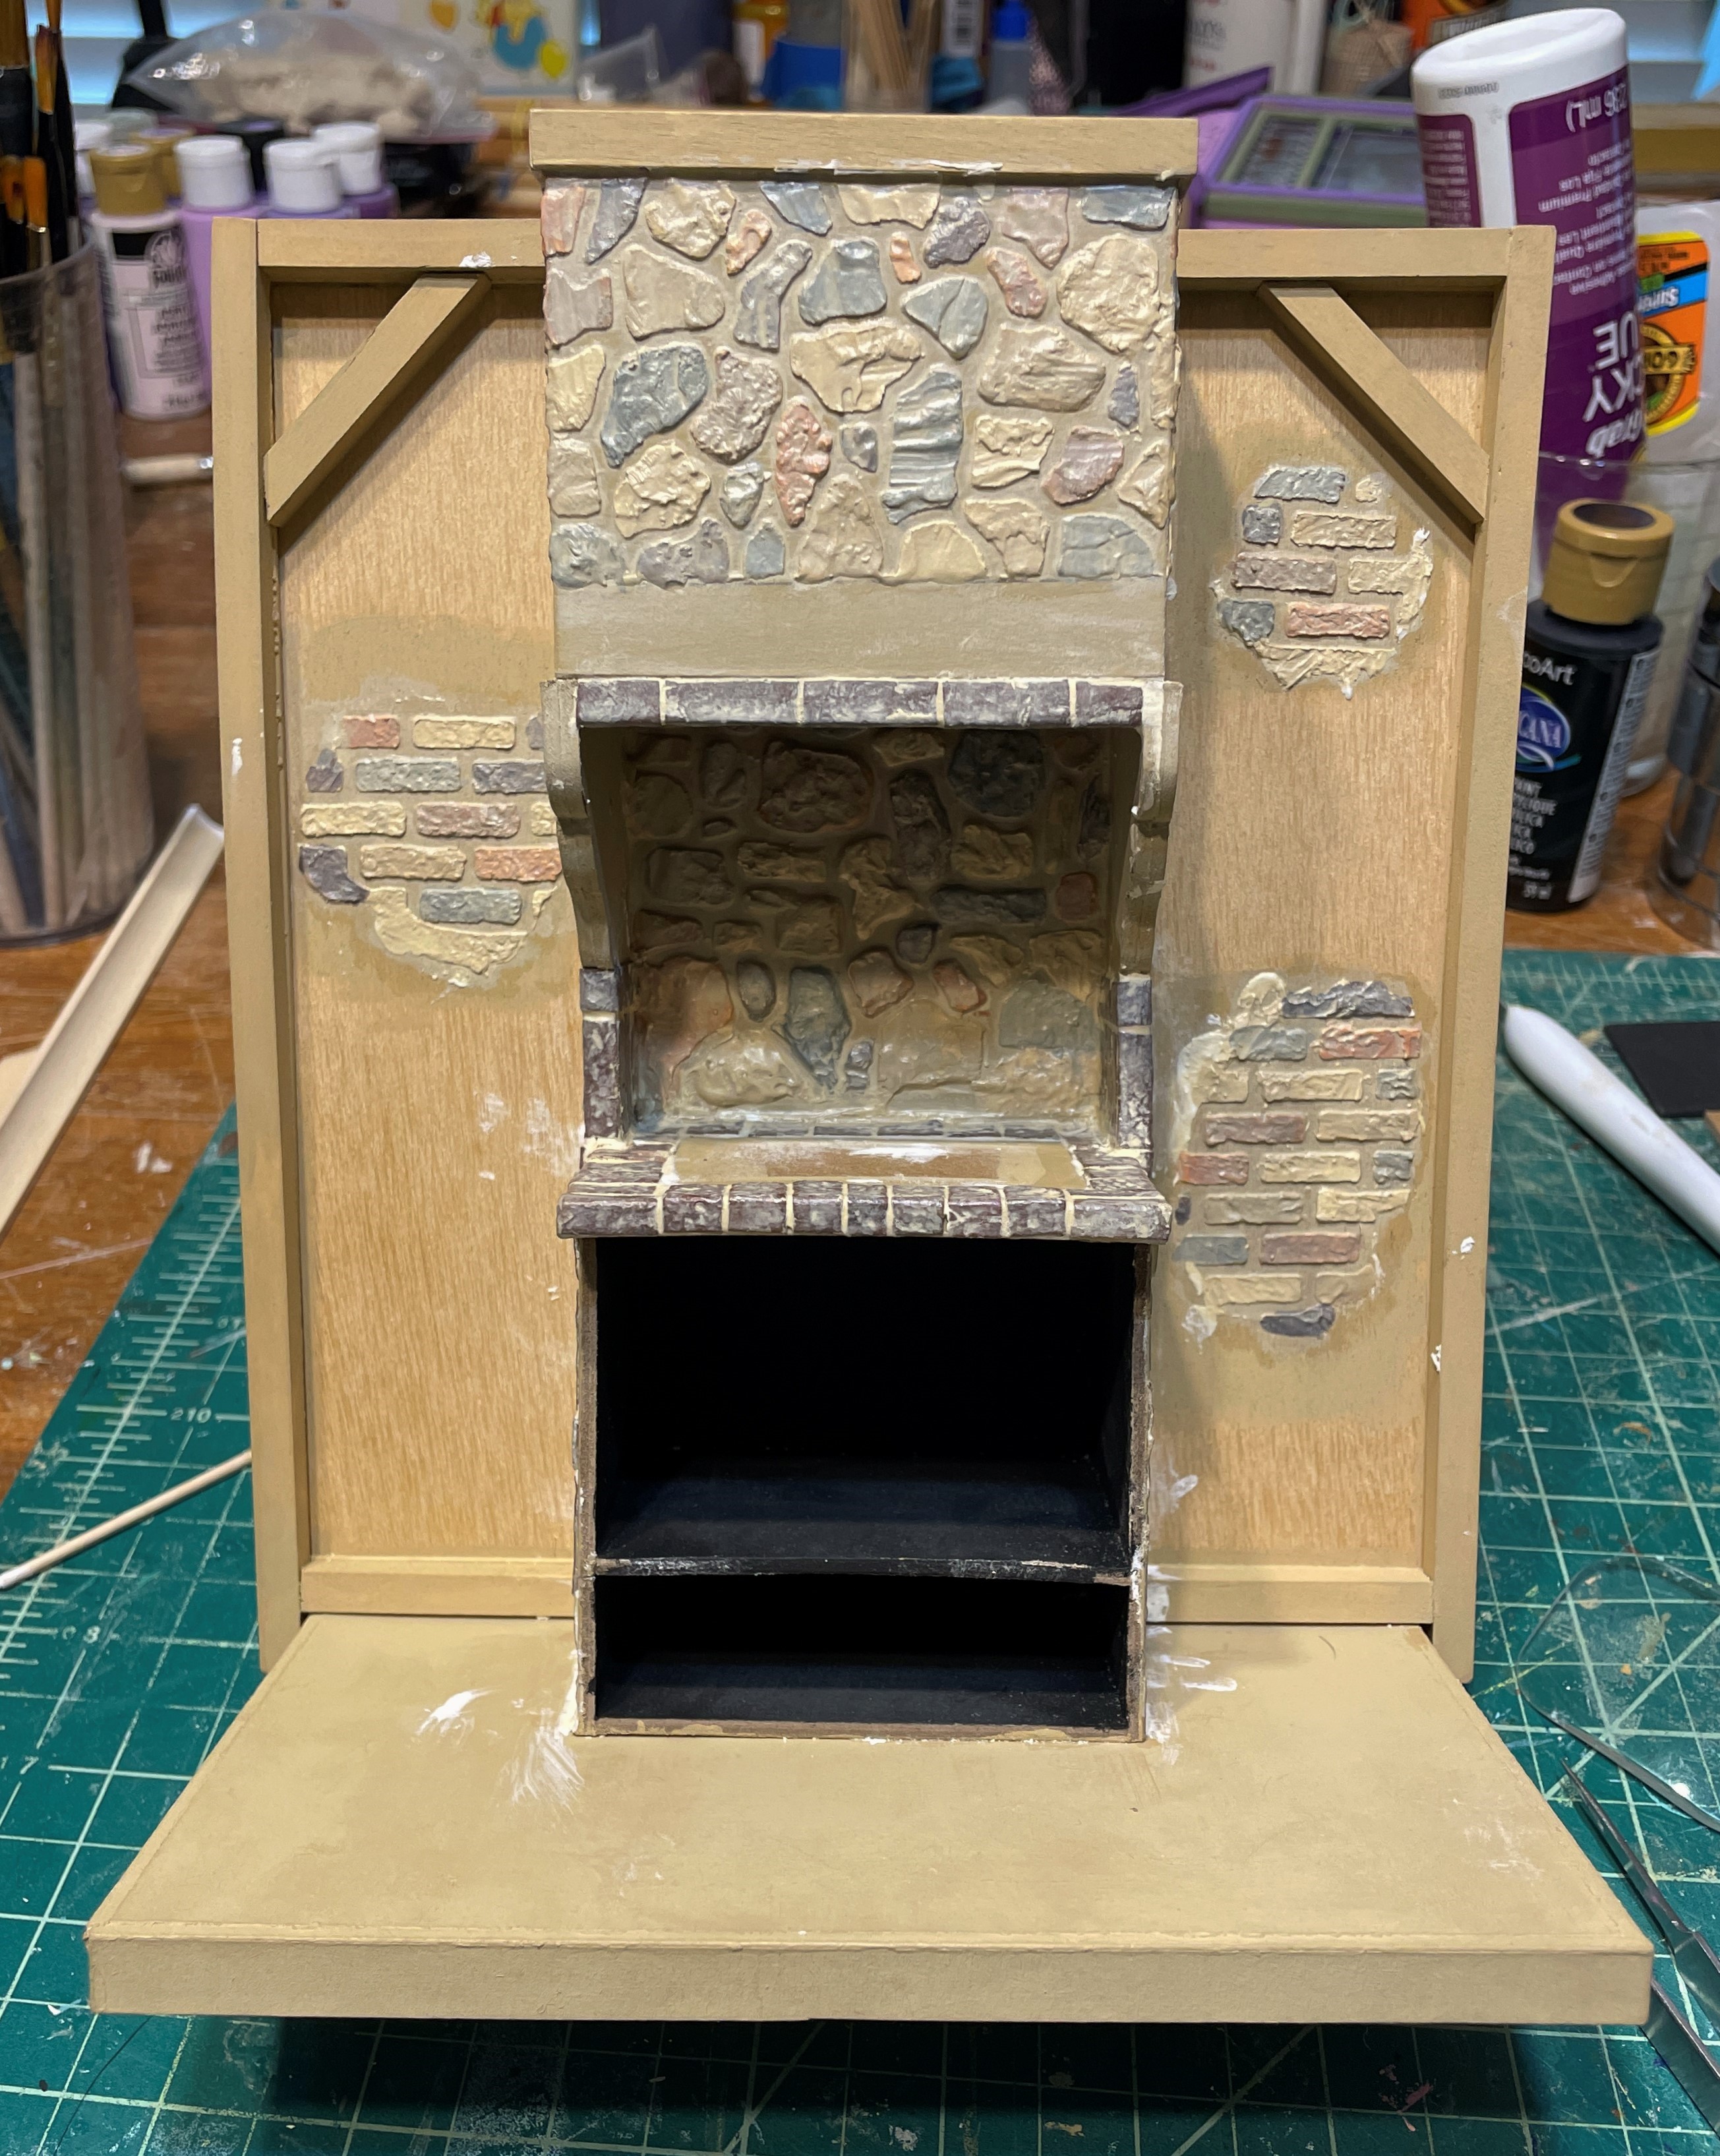
As the finicky glued parts of the oven door were setting, I starting painting the individual bricks and rocks. The look I am after is muted and ethereal, achieved by many whitewashes, but the initial colors are bold. You might notice that I have added 1/4" x 1/4" timbers and brace pieces to the walls to lend to the Tudor illusion.
 |
| Colors taken from the color chart for this project. |
 |
| Wow! Saturday morning cartoon colors! |
 |
| Muted after a bit of whitewashing. |
Time to apply the paperclay stucco! I like my results with the stove wall much more than I do the bedroom and kitchen walls. Practice really does make perfect (or close enough)!

Now it was time to stone the base. I brushed wood glue onto a small area at a time, then rolled up random sized Paperclay balls to squish onto the floor. I found that if the Paperclay cracked while I was forming it around the edge, a little water, rubbed on by my finger, repaired the crack. My stones were a bit thick, so it took overnight for them to dry.
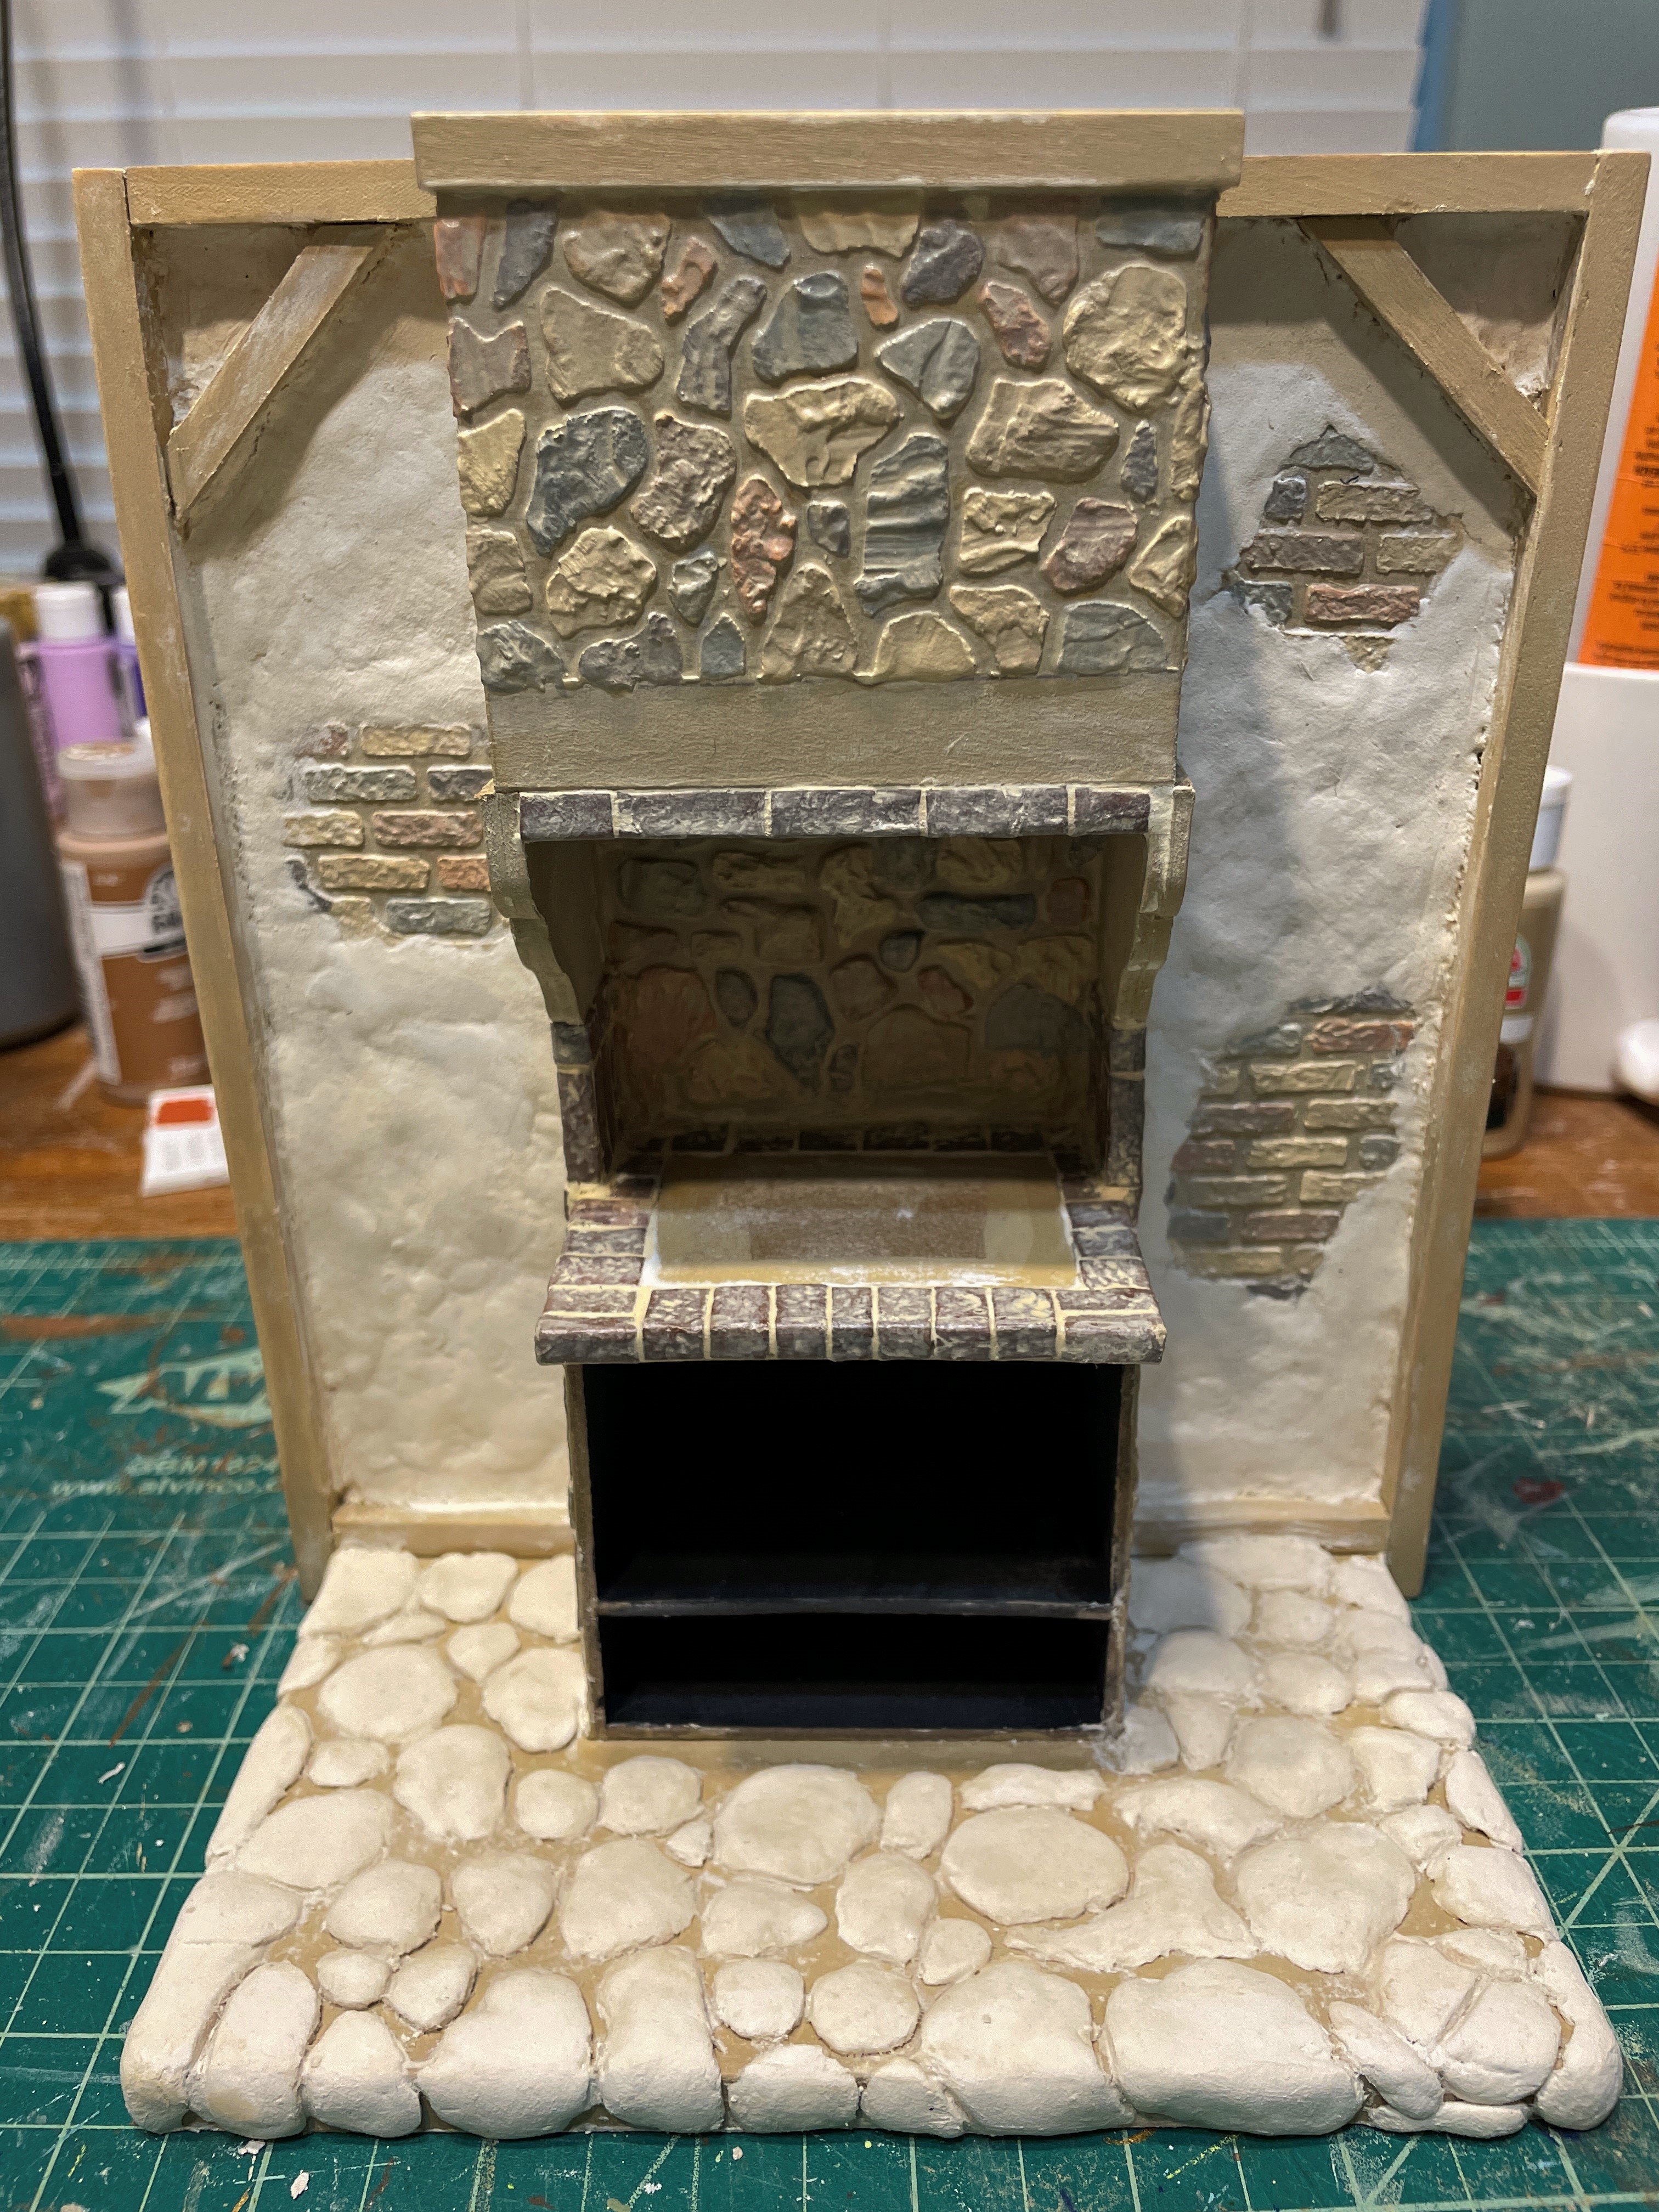
The next morning, I was able to sand the stones to flatten them a bit (more even surface to stand on while cooking) and then paint my individual stones. When they dried, I sealed them with Mod Podge in preparation for the grouting process.

I used my fingers to apply joint compound into the cracks. Because the cracks were so deep, I did a second application once the first had dried. I found it was much easier to remove the joint compound from the stones without damaging them than it is to remove spackle. There must be some added stabilizer in spackle that makes it harder to remove. From now on, I will only use joint compound for grout of all kinds.
You might have noticed that I also added a mantle/shelf thing using cove molding and 1/16" x 1/2" basswood. I can't resist an opportunity to add a surface for displaying minis later on!
 |
| Shelf and joint compound finished. |
 |
| Left profile. |
Time to add years of use to the floor! Hey, I know it's a new treehouse, but patina is charming! I made a slurry of wash with brown, gray and khaki acrylic paint and an abundance of water. I applied about three coats and dabbed up any "overdos" with a paper towel. In between coats, I also aged the stucco and brick around the edges with a khaki wash.

 |
| My LED workroom lights are glaring, but the end photos with ambiance lighting gives the romantic fairytale look I am seeking! |
Finally, it was time to figure out how to make a fire to heat the oven. I have been falling asleep with the intention of coming up with something realistic looking for days. Luckily, my first set of ideas worked like I'd hoped. I love the results!
I made a LED Log Fire With Glowing Embers tutorial and listed it on the Tutorials jump-off page, too.


At last, I could install the oven door and see the completed vision!


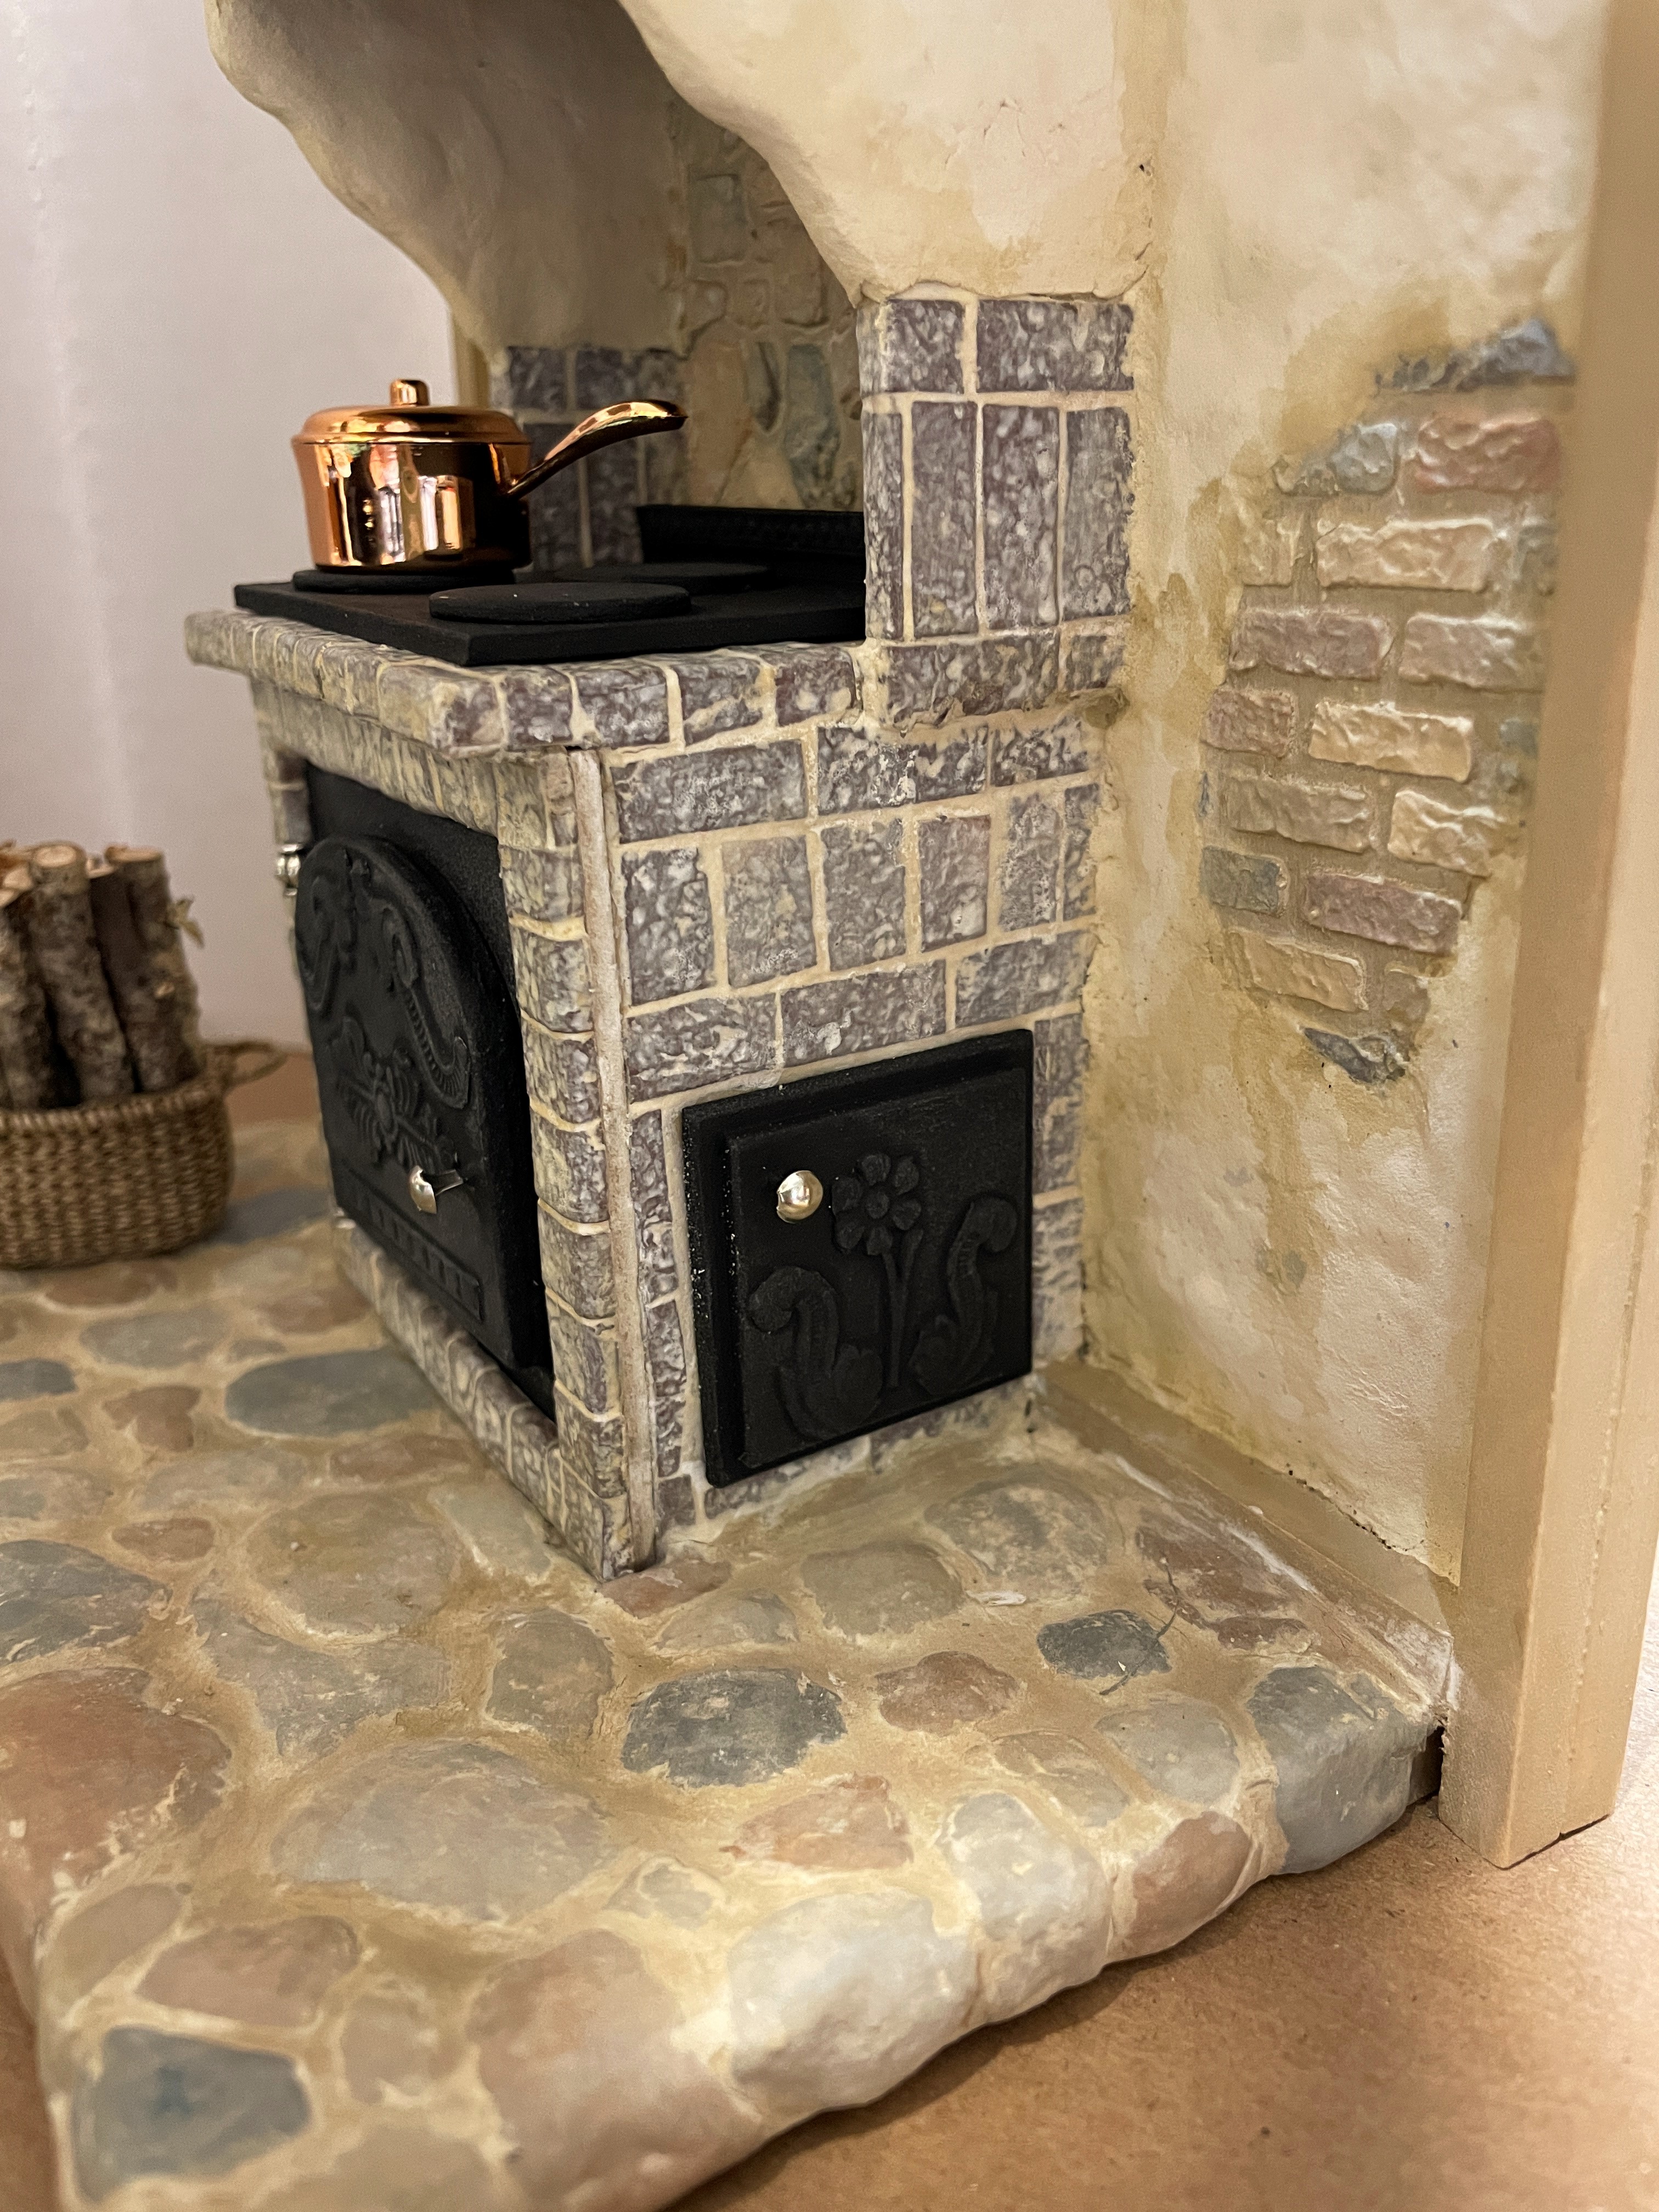

I am so amazed that the oven wall came out so close to how I had envisioned it in my mind, and that it evokes exactly the vibe I am trying to create for this project! Goldie is thrilled to be able to start on her cookbook dream, and I am reminded that it is always best to let inspiration lead you when it comes to miniatures.
Follow your impulses, my friends. You may just discover your untapped creativity!
xo xo,
Jodi