One of the most challenging rooms in the Willowcrest kit is its kitchen. It's a long, skinny room with little wall space and two doorways to work around. Though it's typical of older homes where kitchens were compact and not well laid out, I think it's actually part of the kit's charm. I've seen some super successful and adorable versions where the builder made the most of the original layout, I've seen radical remodels and I've admired versions from true pioneers who completely relocated the room. Having so many wildly different ideas to look at is inspiring, and the opportunity to make even mass produced kits into our own unique versions is exciting! I decided on a happy medium for my kitchen. It won't be big or fancy, but it'll have everything a little cook needs to produce delicious home cooking. And hopefully, it might be my version of adorable, too!
 |
| This sweet kitchen has been left as the kit intends. Photo courtesy of Judy Evans, Pinterest |
 |
| In Elaine's version, she not only extended the bay, she changed the back left corner of the kit, removing the jog in the wall to create more floor space. Photo courtesy of Simply Curious |
 |
| Elizabeth (Studio E) swapped her living room with the kitchen, then created a hallway with a door at the end which leads to a patio behind the kitchen. So genius! Photo courtesy of Elizabeth. |
 |
| Elizabeth's Astonishing Finished Kitchen - Incredible! Photo courtesy of Elizabeth. |
It seemed to me the most efficient way to gain some needed square inch-age was to simply expand the bay. I extended mine by a measly 2 inches, but it's just enough to add a run of counters with a sink under the windows. That leaves the long wall with room for a small stove with counters on either side. A good cook needs to spread out a little! No matter what I tried, all I could come up with for the fridge is to park it across the room between the two doorways. Maybe I can find a way to turn that into an advantage, somehow. We'll see!
 |
| Looking in from the dining room. |
 |
| You can see my "expansion joints". |

 |
| My grandma cooked delicious meals for a family of nine for many years in an impossibly tiny kitchen. This space should do our mini folks nicely! |
 |
| I like to use wood glue as caulking in all my cracks and crevices. The tape keeps the glue from oozing out as it dries. |
I was able to cut the plywood pieces I needed from the unused bedroom/bathroom wall. I cut 2" strips from the piece, then cut those to the lengths I needed. I laminated them with wood glue to the kit's original bay window pieces, adding slots and tabs to make things fit together squarely. I did not want to extend the footprint of the kit by too much for fear of making the facade look weird.
 |
| Kit's original kitchen bay pieces laminated onto strips I cut from the unused bedroom/bathroom wall piece. |
 |
| Future bathroom bathtub alcove will sit on top of the extended kitchen bay. |
 |
| Stairwell wall is still in dry fit here. |
For the interior kitchen window, I replaced the kit's wood frame the same way as the others: scan, turn into an svg then bring in to Tinkercad.


And speaking of windows, I was able to get the stairwell wall window installed, and the wall attached to the house. So much of what I did to the entry, stairs and hallway is impossible to see now, but it feels great to know it's there!

 |
| Thank heavens for abundant clamps! |
I put a couple sconces in the stairwell. It'll have a ceiling fixture, too, once the third floor gets installed. Hopefully, they will be enough to provide a nice ambiance in there. Before I install the third floor permanently, I'll test to see if I need to add hidden supplemental LEDs. I don't want it too bright, just enough to be able to see the peek-a-boo views of it's features.


And here is about all you'll ever see of the hallway from the bedroom doorway...

 |
| This view will disappear once the third floor goes in. |
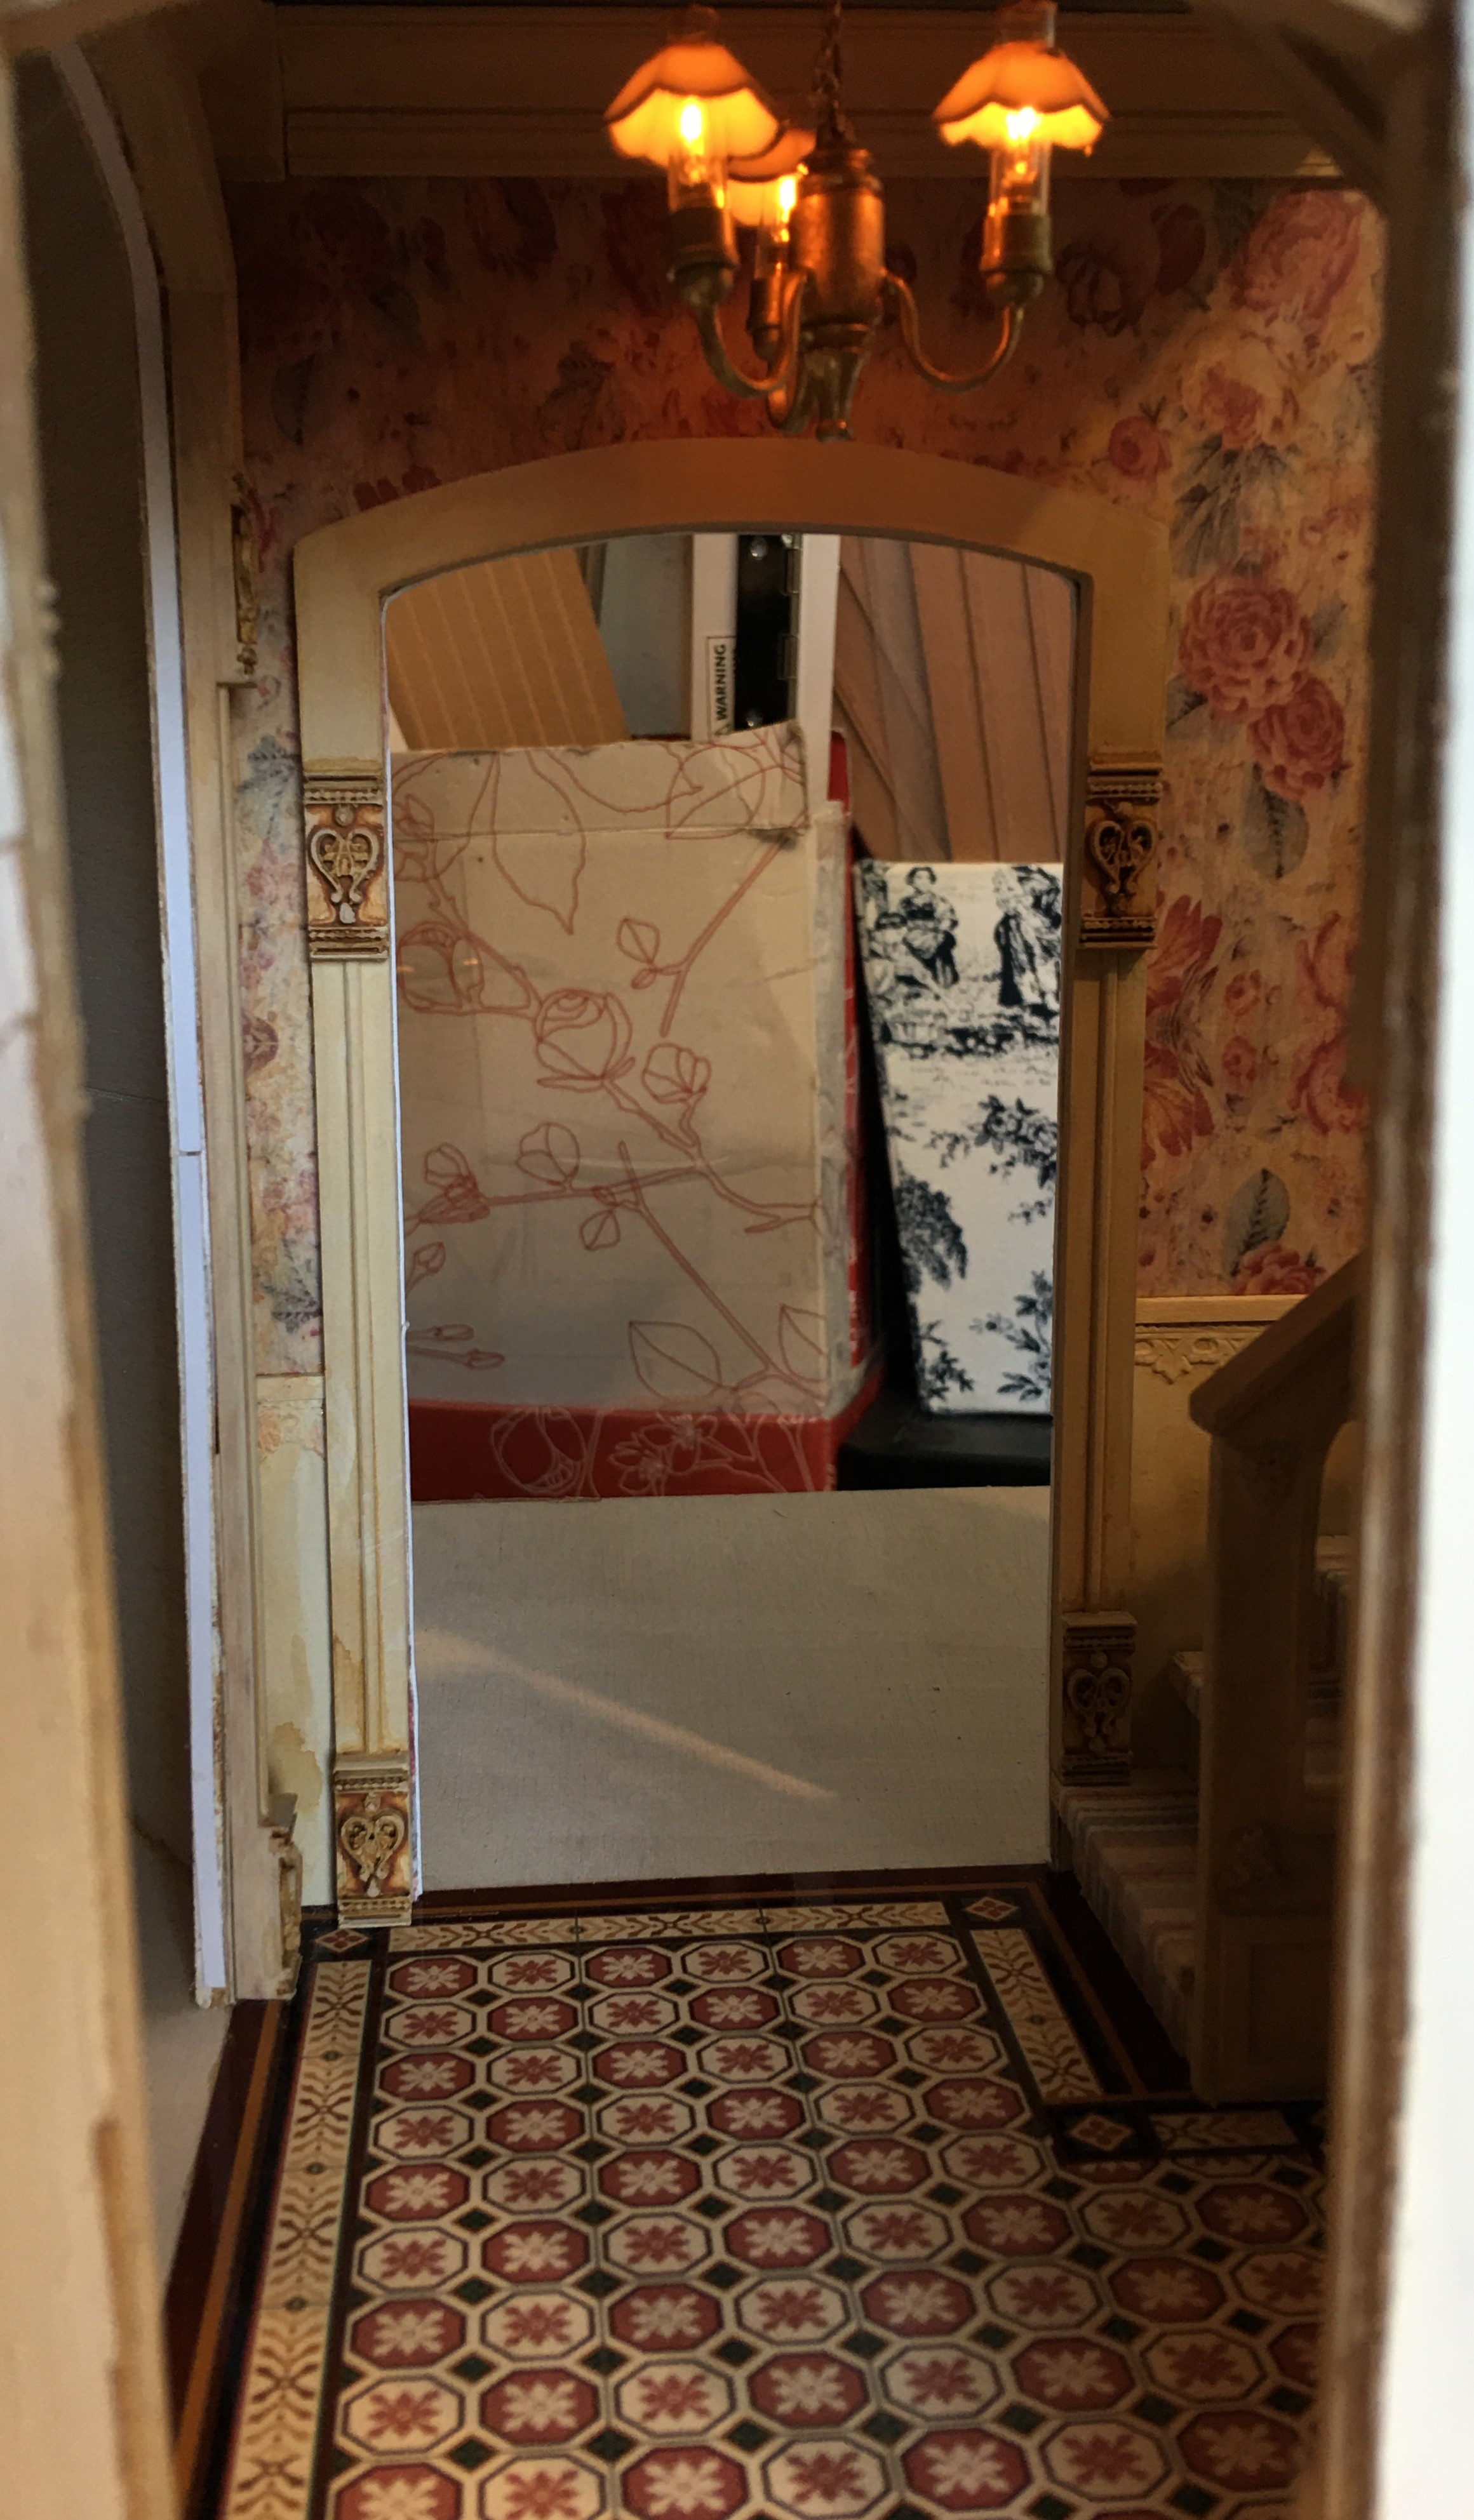
And the entry with the stairs and wall attached as seen from the living room doorway. Once the side wall for the living room goes in, it will be difficult to get this view again....

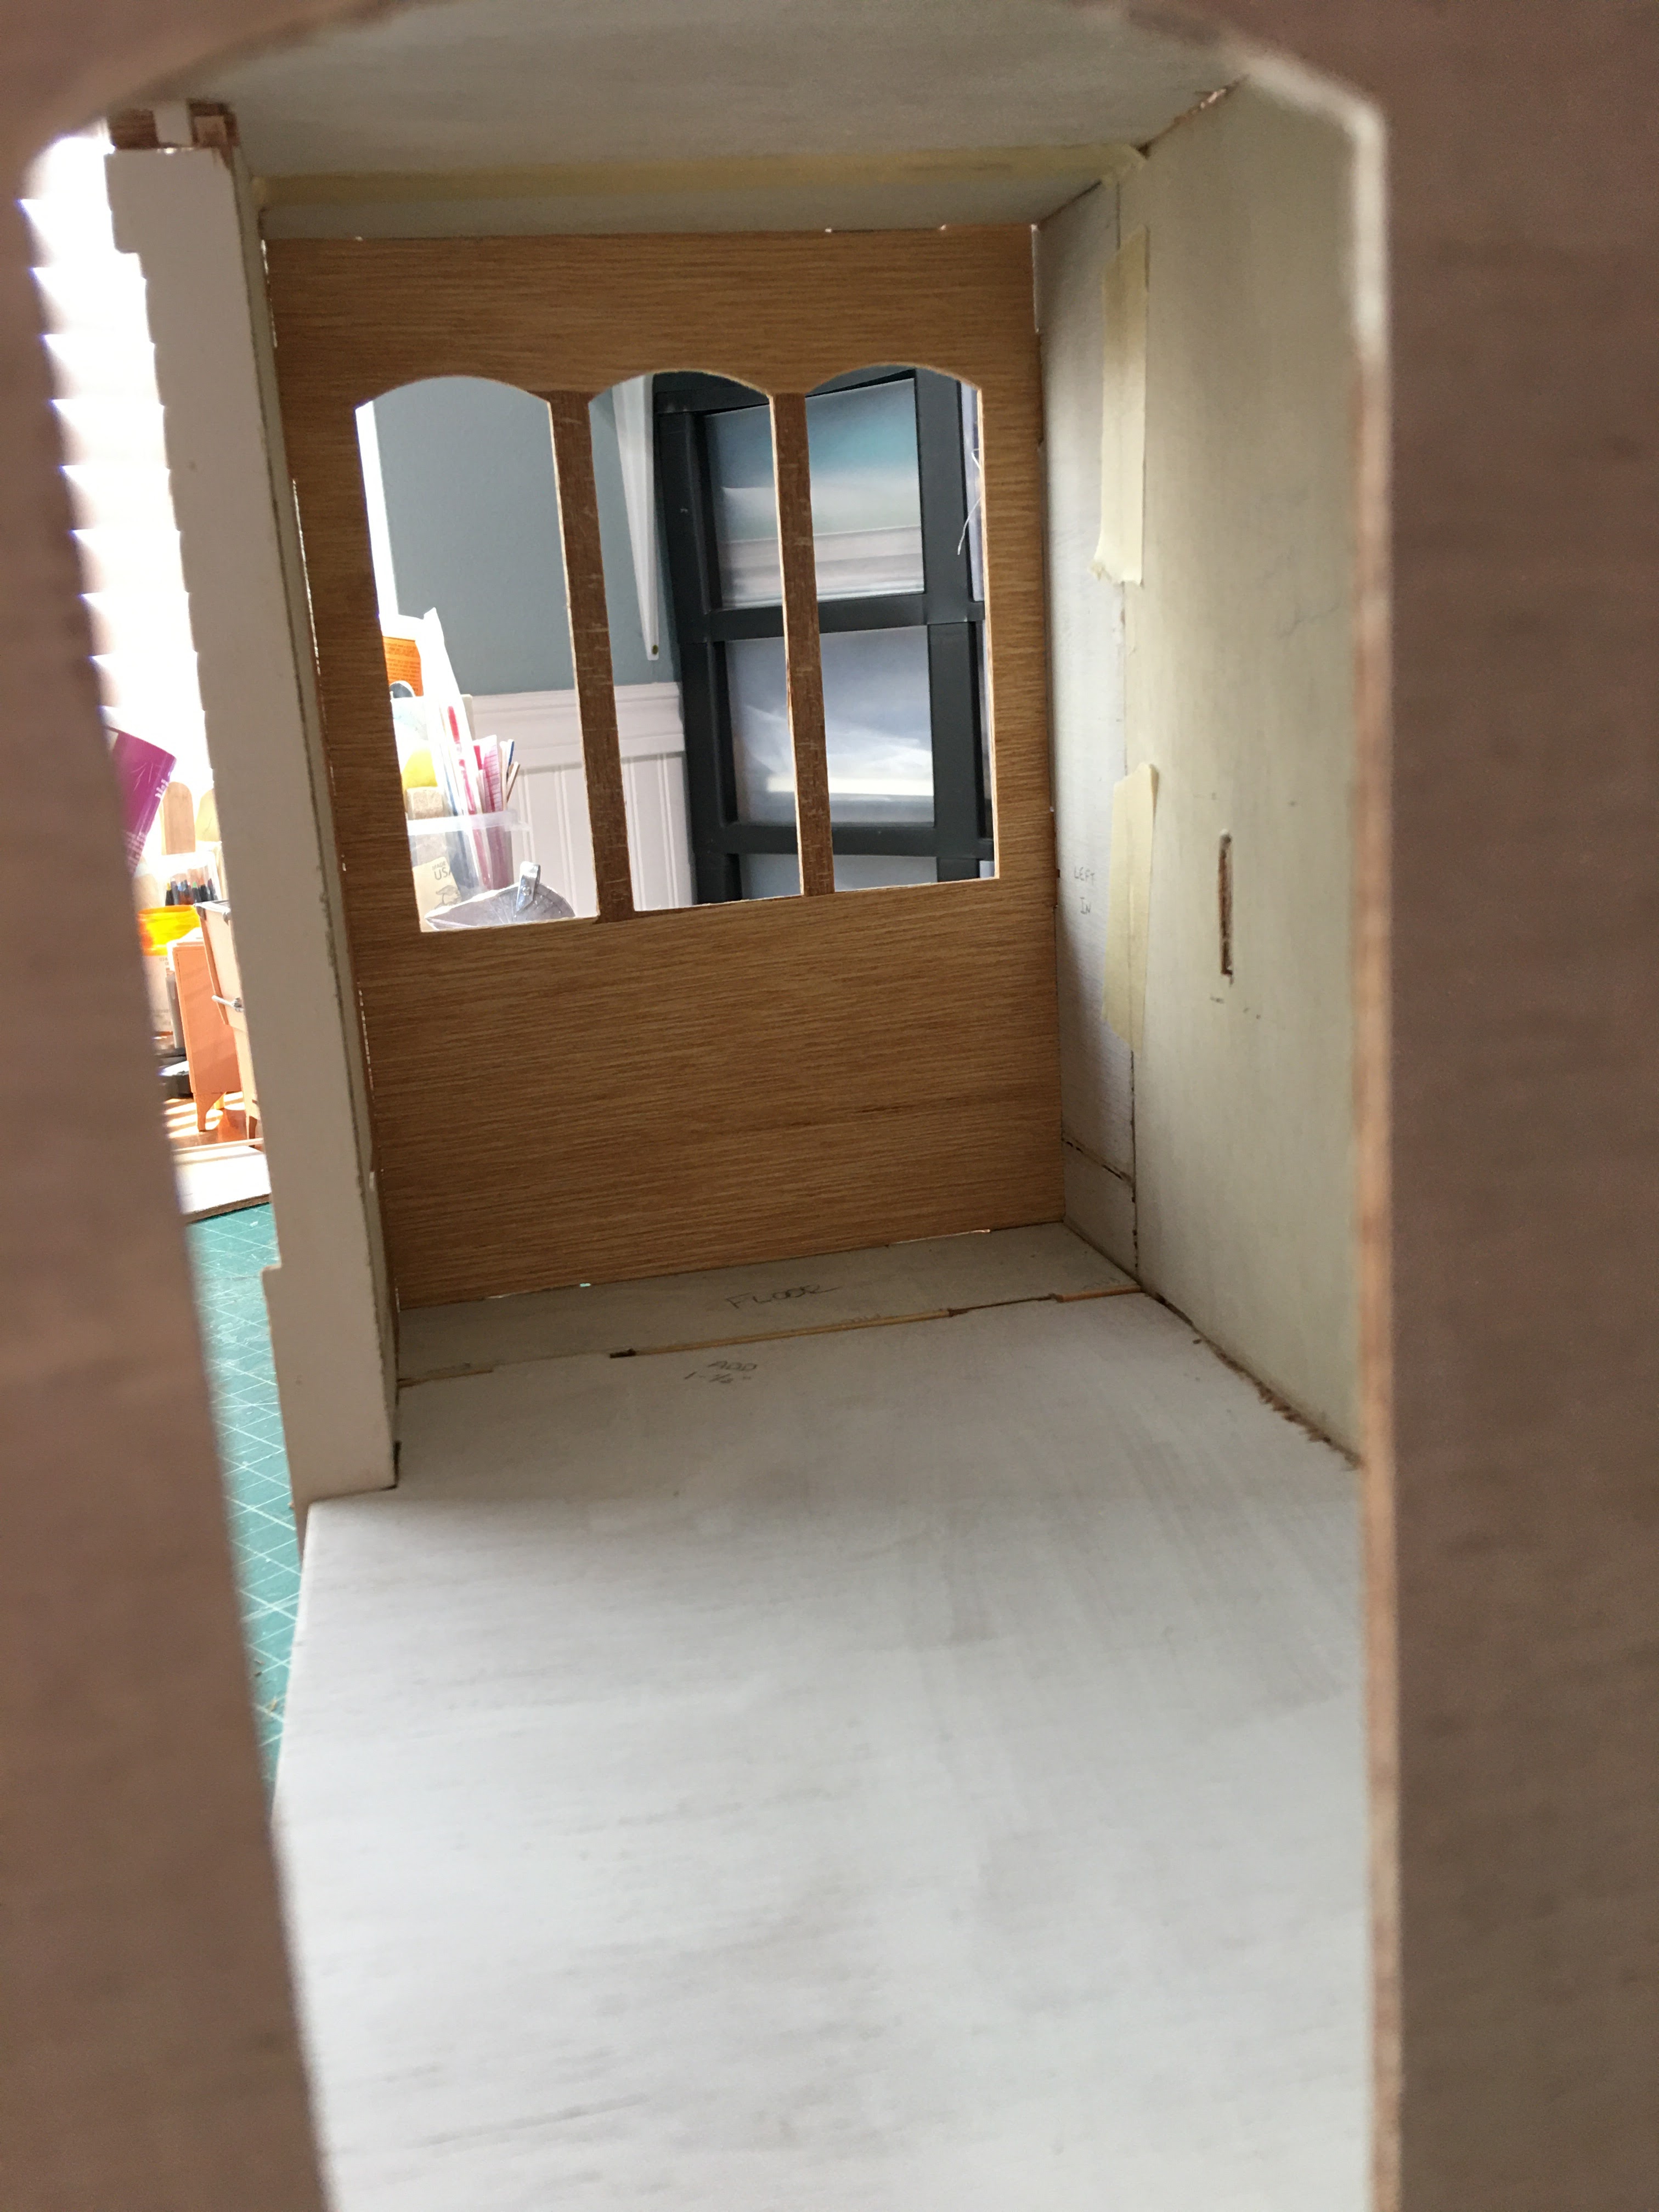
You may have noticed that there's an archway cut into part of the stairwell wall. This is the bathroom's original exterior wall, but I took advantage of the extended kitchen bay to add a little arched tub alcove to the bathroom.

Here's what the bathroom space feels like with the alcove extension...
 |
| View without the bathroom/bedroom wall in place. |
 |
| Just the bathroom's floorspace. |
With the bathroom/bedroom wall in place...
 |
| "Efficient" but functional. |
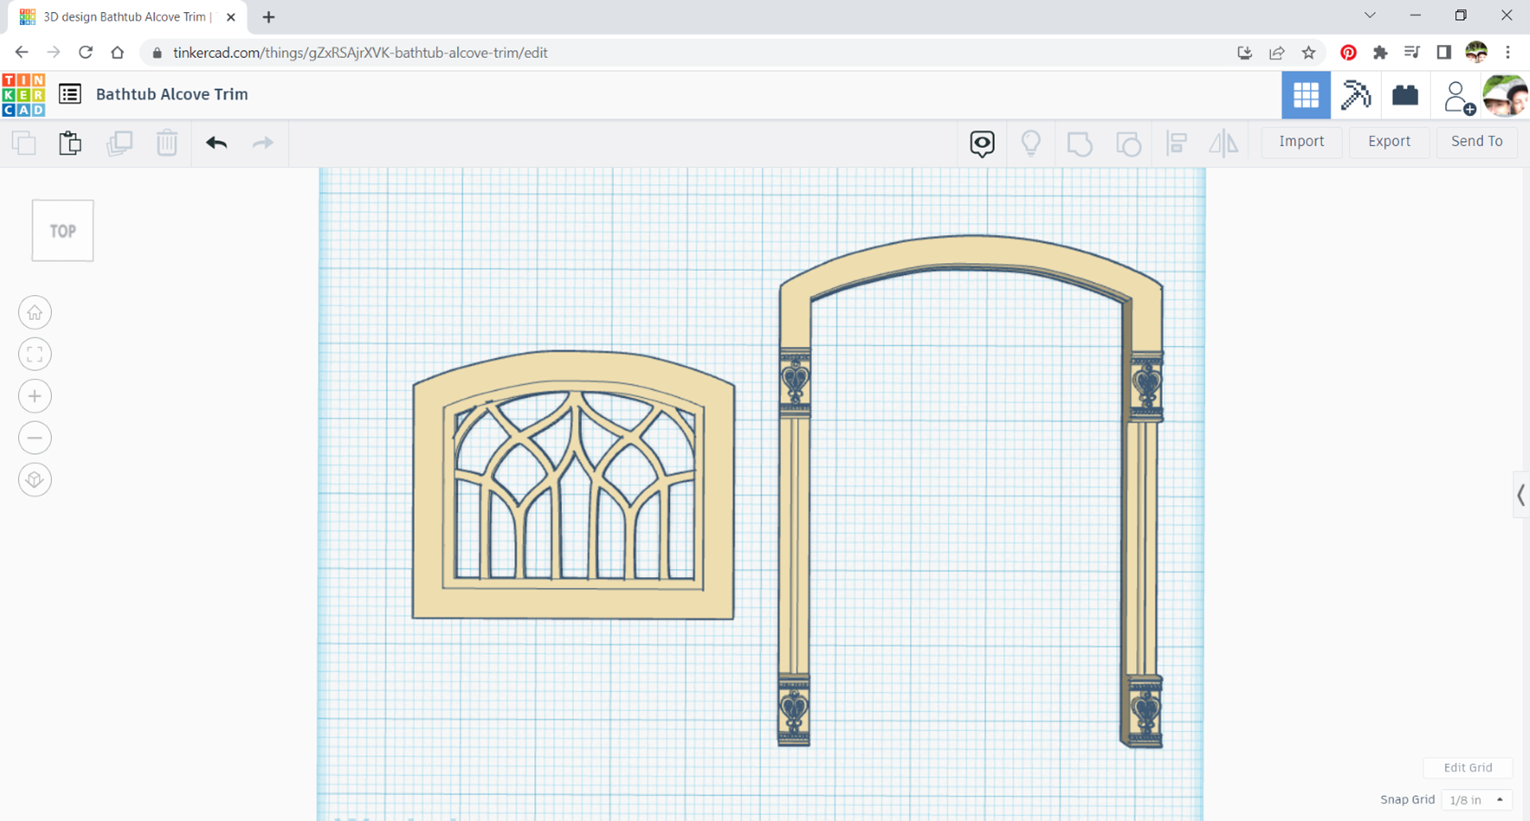
The tub alcove arch's frame will match the rest of the window and door frames in the house. With the exterior window, I am hoping to experiment with a stained glass or leadlight window using 3D printed leading. We'll see how it goes...
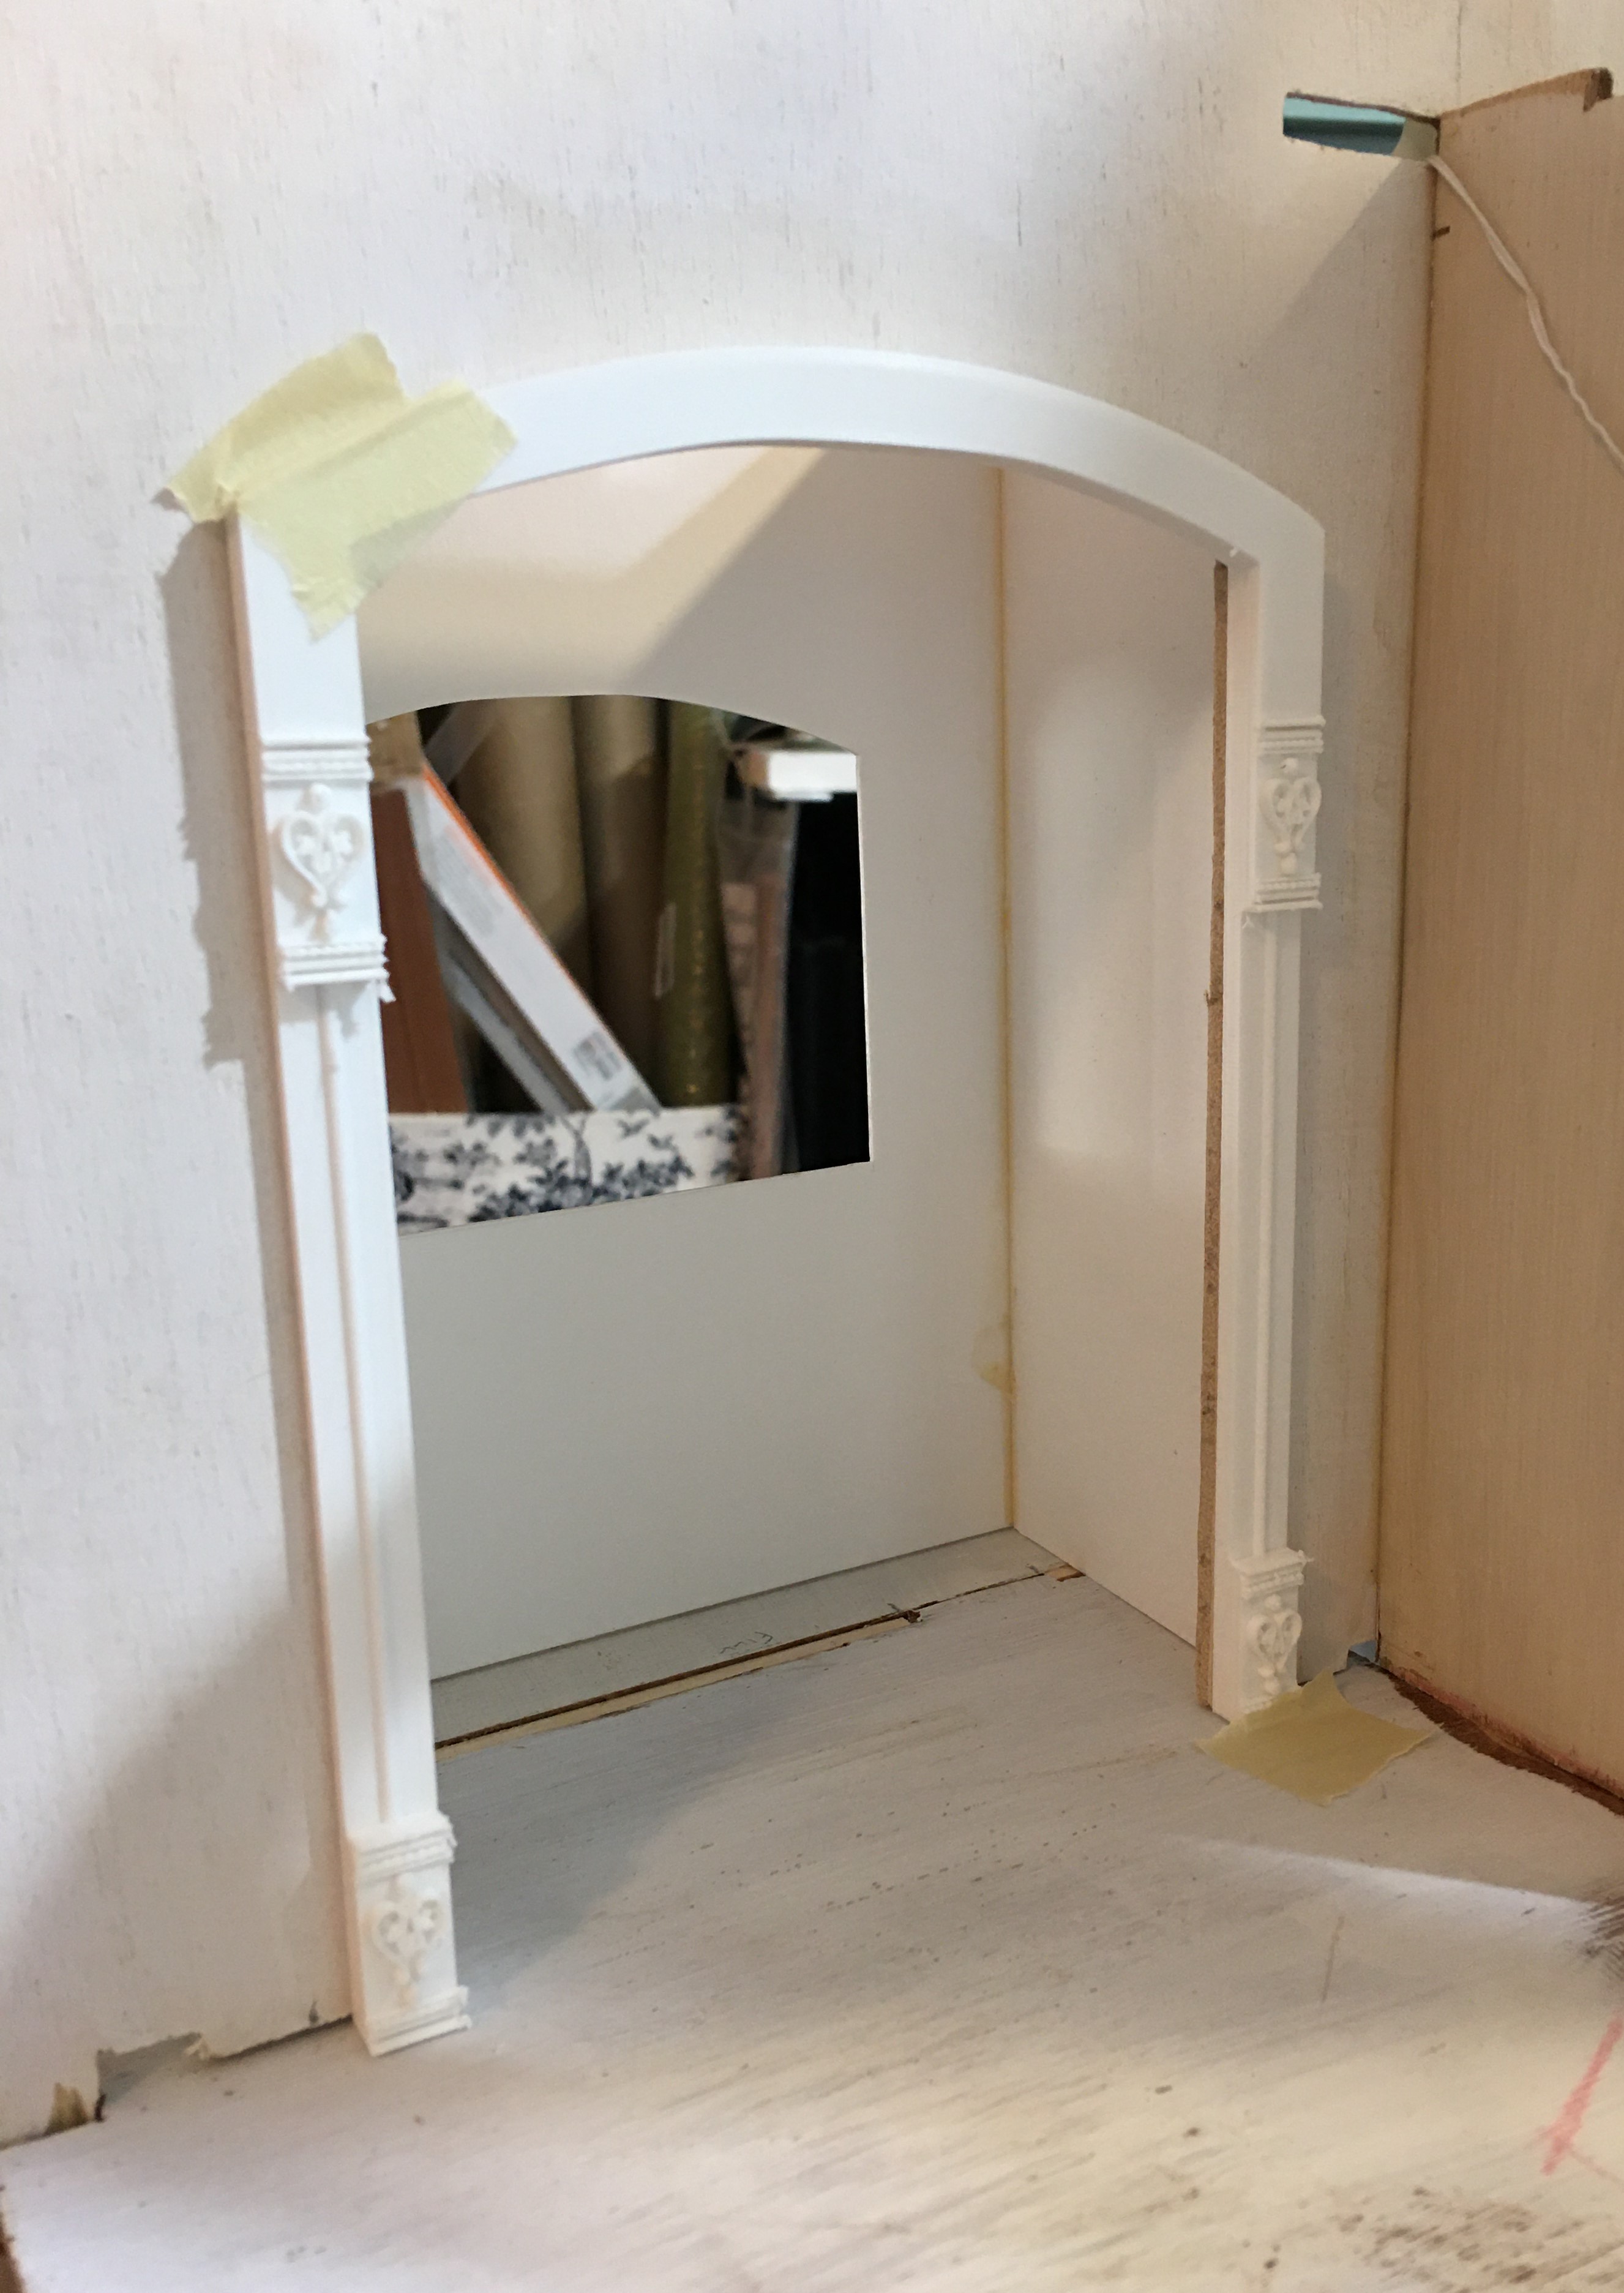 |
| It should be large enough to fit a Chrysnbon sized bathtub. |
 |
| If the leadlight works out, it will provide a little privacy for the bathers. |
 |
| Toilet and sink placement are still being mulled over. |
And here is a glimpse of what the exterior facade is shaping up to look like with the bay extension and the alcove...

 |
| I don't think it feels too obtrusive, but what do you think? |
Next on the To-Do list is to make wall, floor and ceiling templates for the kitchen and bath. Would you believe I still have not settled on colors/papers/tiles/era or overall style yet? It's been so stinkin' hot here, though, I may just lie down in front of the fan and think about it until cooler weather returns!

I hope all my northern hemisphere readers are finding ways to stay cool! And that everyone is making project progress in spite of all the challenges they are facing. No matter what is going on in real life, doing minis just makes you feel good!
xo xo,
Jodi