Picking back up where I left off on the Beachside Bungalow's kitchen, it was time to make countertops. Instead of the polished natural stone look counters I made for the upstairs bathroom, I opted instead for something a little less pretentious: Butcher Block.
 |
I wanted a subtle contrast, not as much as the butcher block counters in Natasha's Kitchen. I ordered bundles of 1/8" x 1/8" in maple and oak from Bill & Walt's. I was hoping they would tie in with the other wood tones in the project.

I had to make counters for three cabinets: The drawer units on either side of the stove, and the center island.
 |
| Units needing countertops. |
The drawer units were each under 4", and the island was just under 7", so I figured out how many 1/8" pieces I'd need, divided that number in half for each of the wood species, then cut them into 8" lengths.
 |
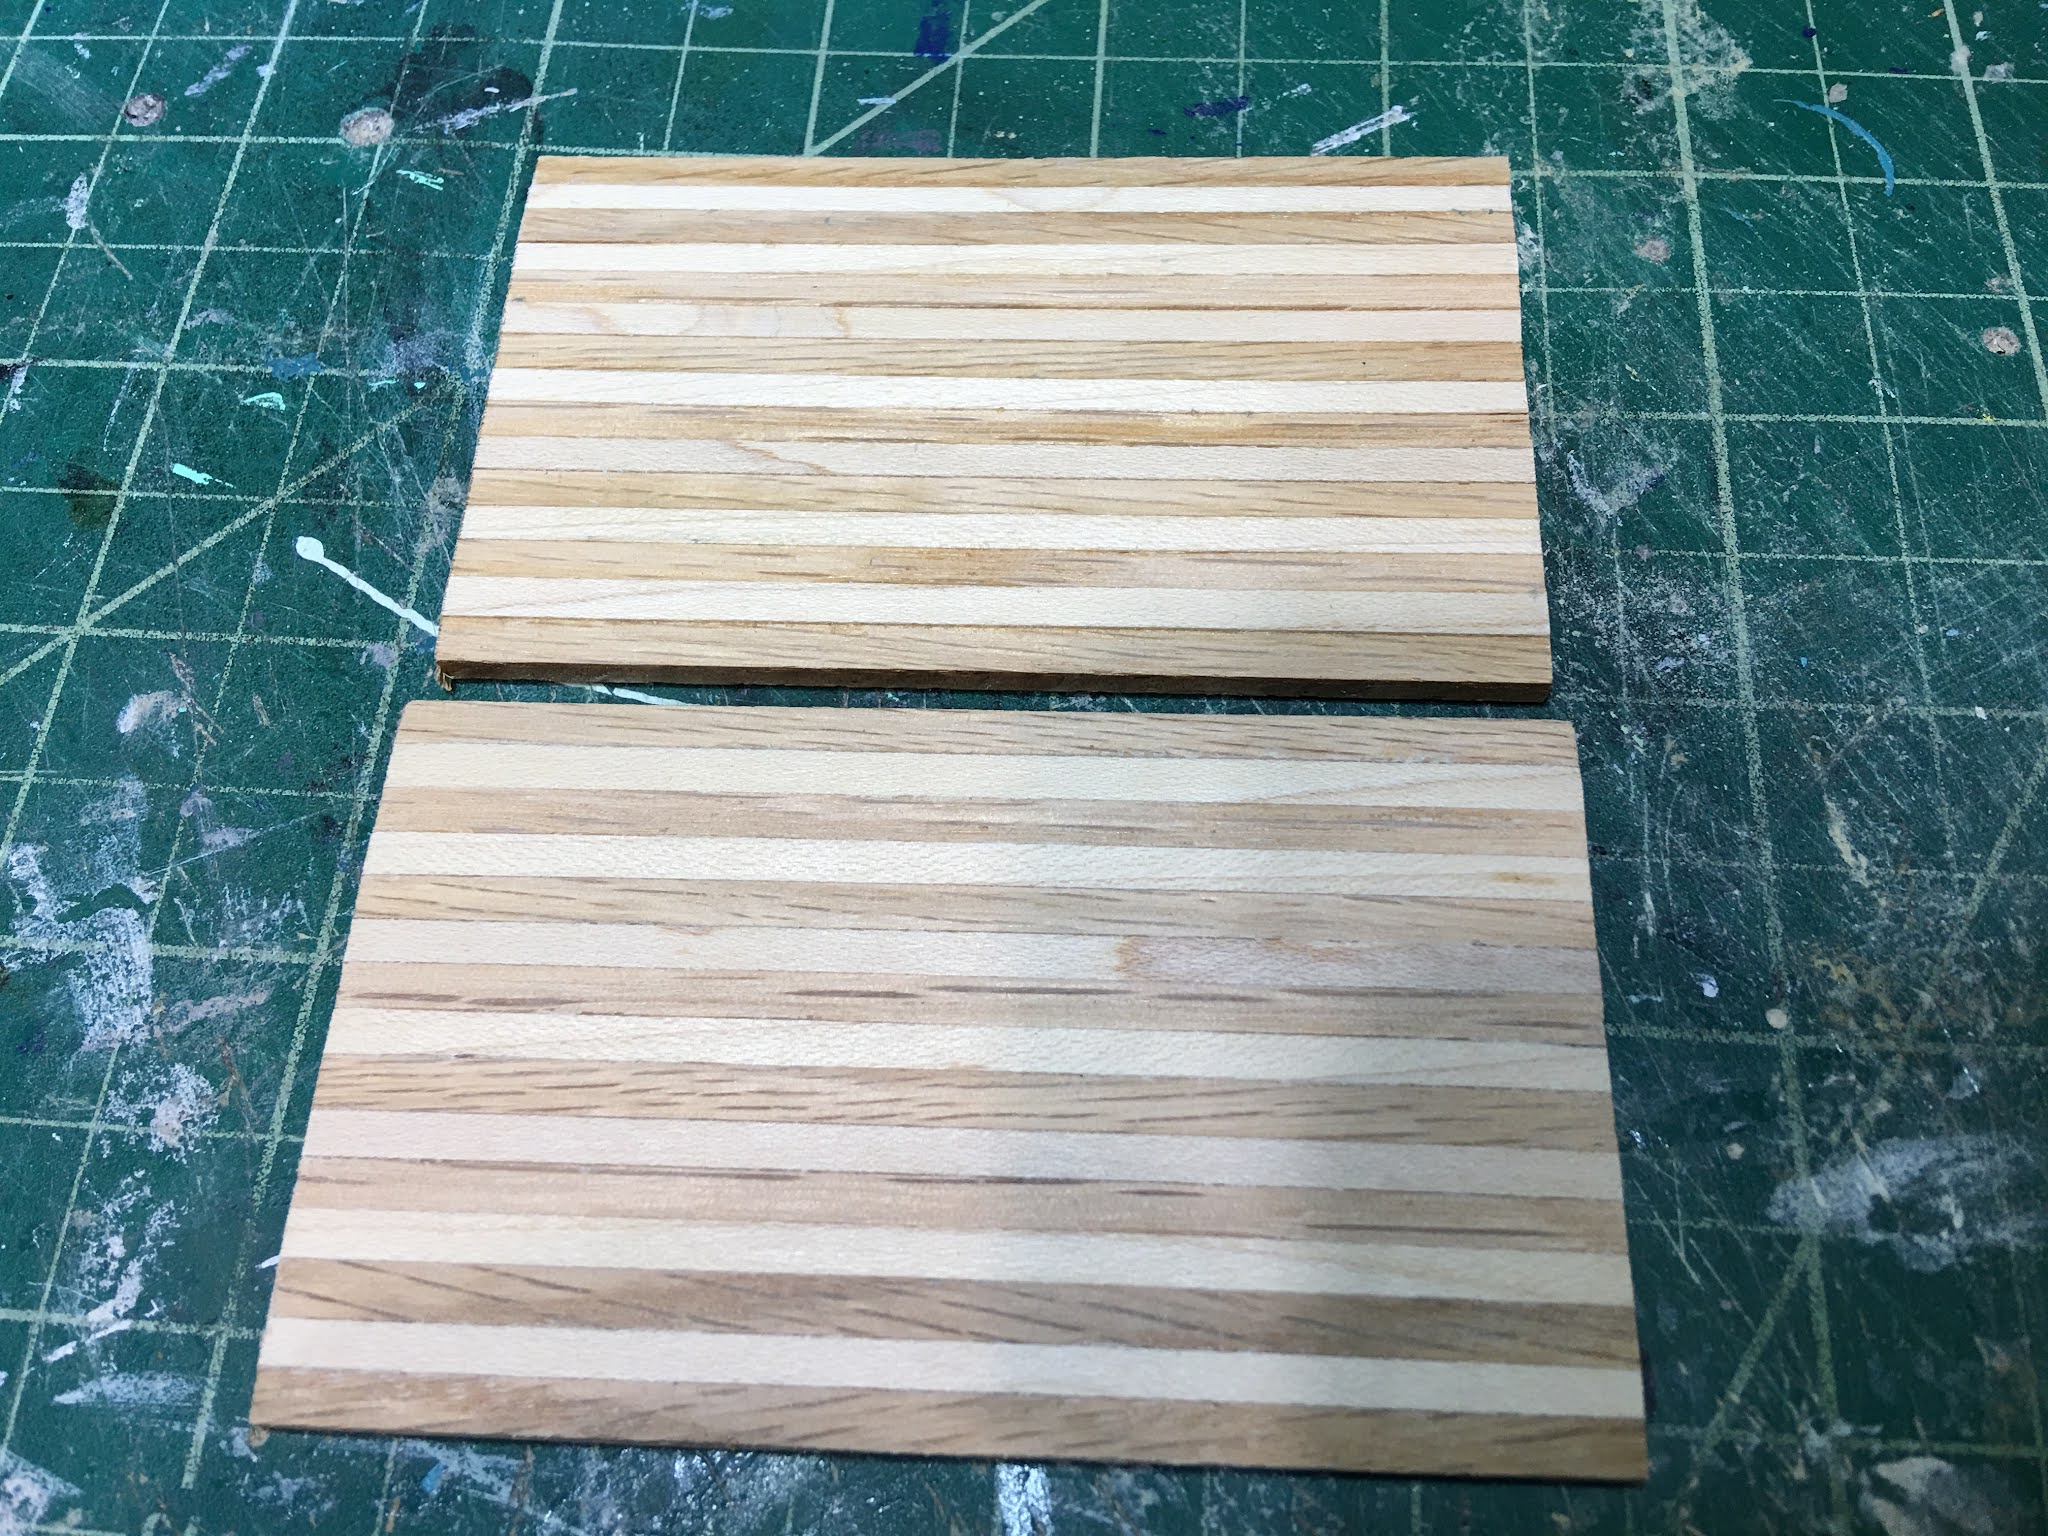
| Maple left, oak right. |
The next step, gluing them, was relatively straightforward. I like to glue one of each species at a time to one another, clamp, and then let dry. Some tricks I have learned in doing these is:
- Use wood glue.
- Apply with a small nozzle bottle applicator.
- Use glue sparingly, but cover every millimeter.
- Apply glue to both pieces of wood.
- Spread glue thin and even with a toothpick.
- Clean up any oozing, excess glue immediately.
- Use plenty of clamps.
 |
| Gluing in pairs of maple and oak. |
Once the pairs were dry, I begin to glue sets of pairs to one another, clamp and let dry. I repeated the process until I had the depth of counters I needed. For the drawer units the depth was 2" and for the island top it was 3-3/4".

Once my pieces were glued and dried, I cut them down to the widths I needed. I marked my lines with an architectural square to get exactly 90 degrees, then cut them with my mini table saw.

Here I am testing the fit to be sure everything looks good. I made extra boards in various sizes.
 |
This wood came really rough and raw, unlike basswood that comes pre-sanded from brands like Houseworks that you purchase through dollhouse retailers. It requires extra work, but it's worth it.
I started with 100 grit sandpaper to remove the really rough finish. This abrasive grit also helps to remove any glue I may have missed that oozed out during clamping. Then I moved through sanding sponges in progressively finer grits, ending with a completely smooth surface. If anyone is aware of any mini sized electric planers and belt sanders like in real sized woodshops, let me know!

 |
| Top board is raw, bottom board is after the 100 grit sandpaper |
Once all of the pieces were smooth, I applied Howard Paste Wax. It gave the wood a nice sheen and brought the natural wood colors to life. It also smells fantastic, like lemon oil. The piece on the left is right after sanding, and the piece on the right is after one application of the wax. I applied three coats, buffing in between with a soft cotton cloth. The more you buff, the shiner it becomes. I don't want my counters too shiny. After a couple hours, there is no residue, just a hard surface.

 |
| Raw wood left, waxed right. |
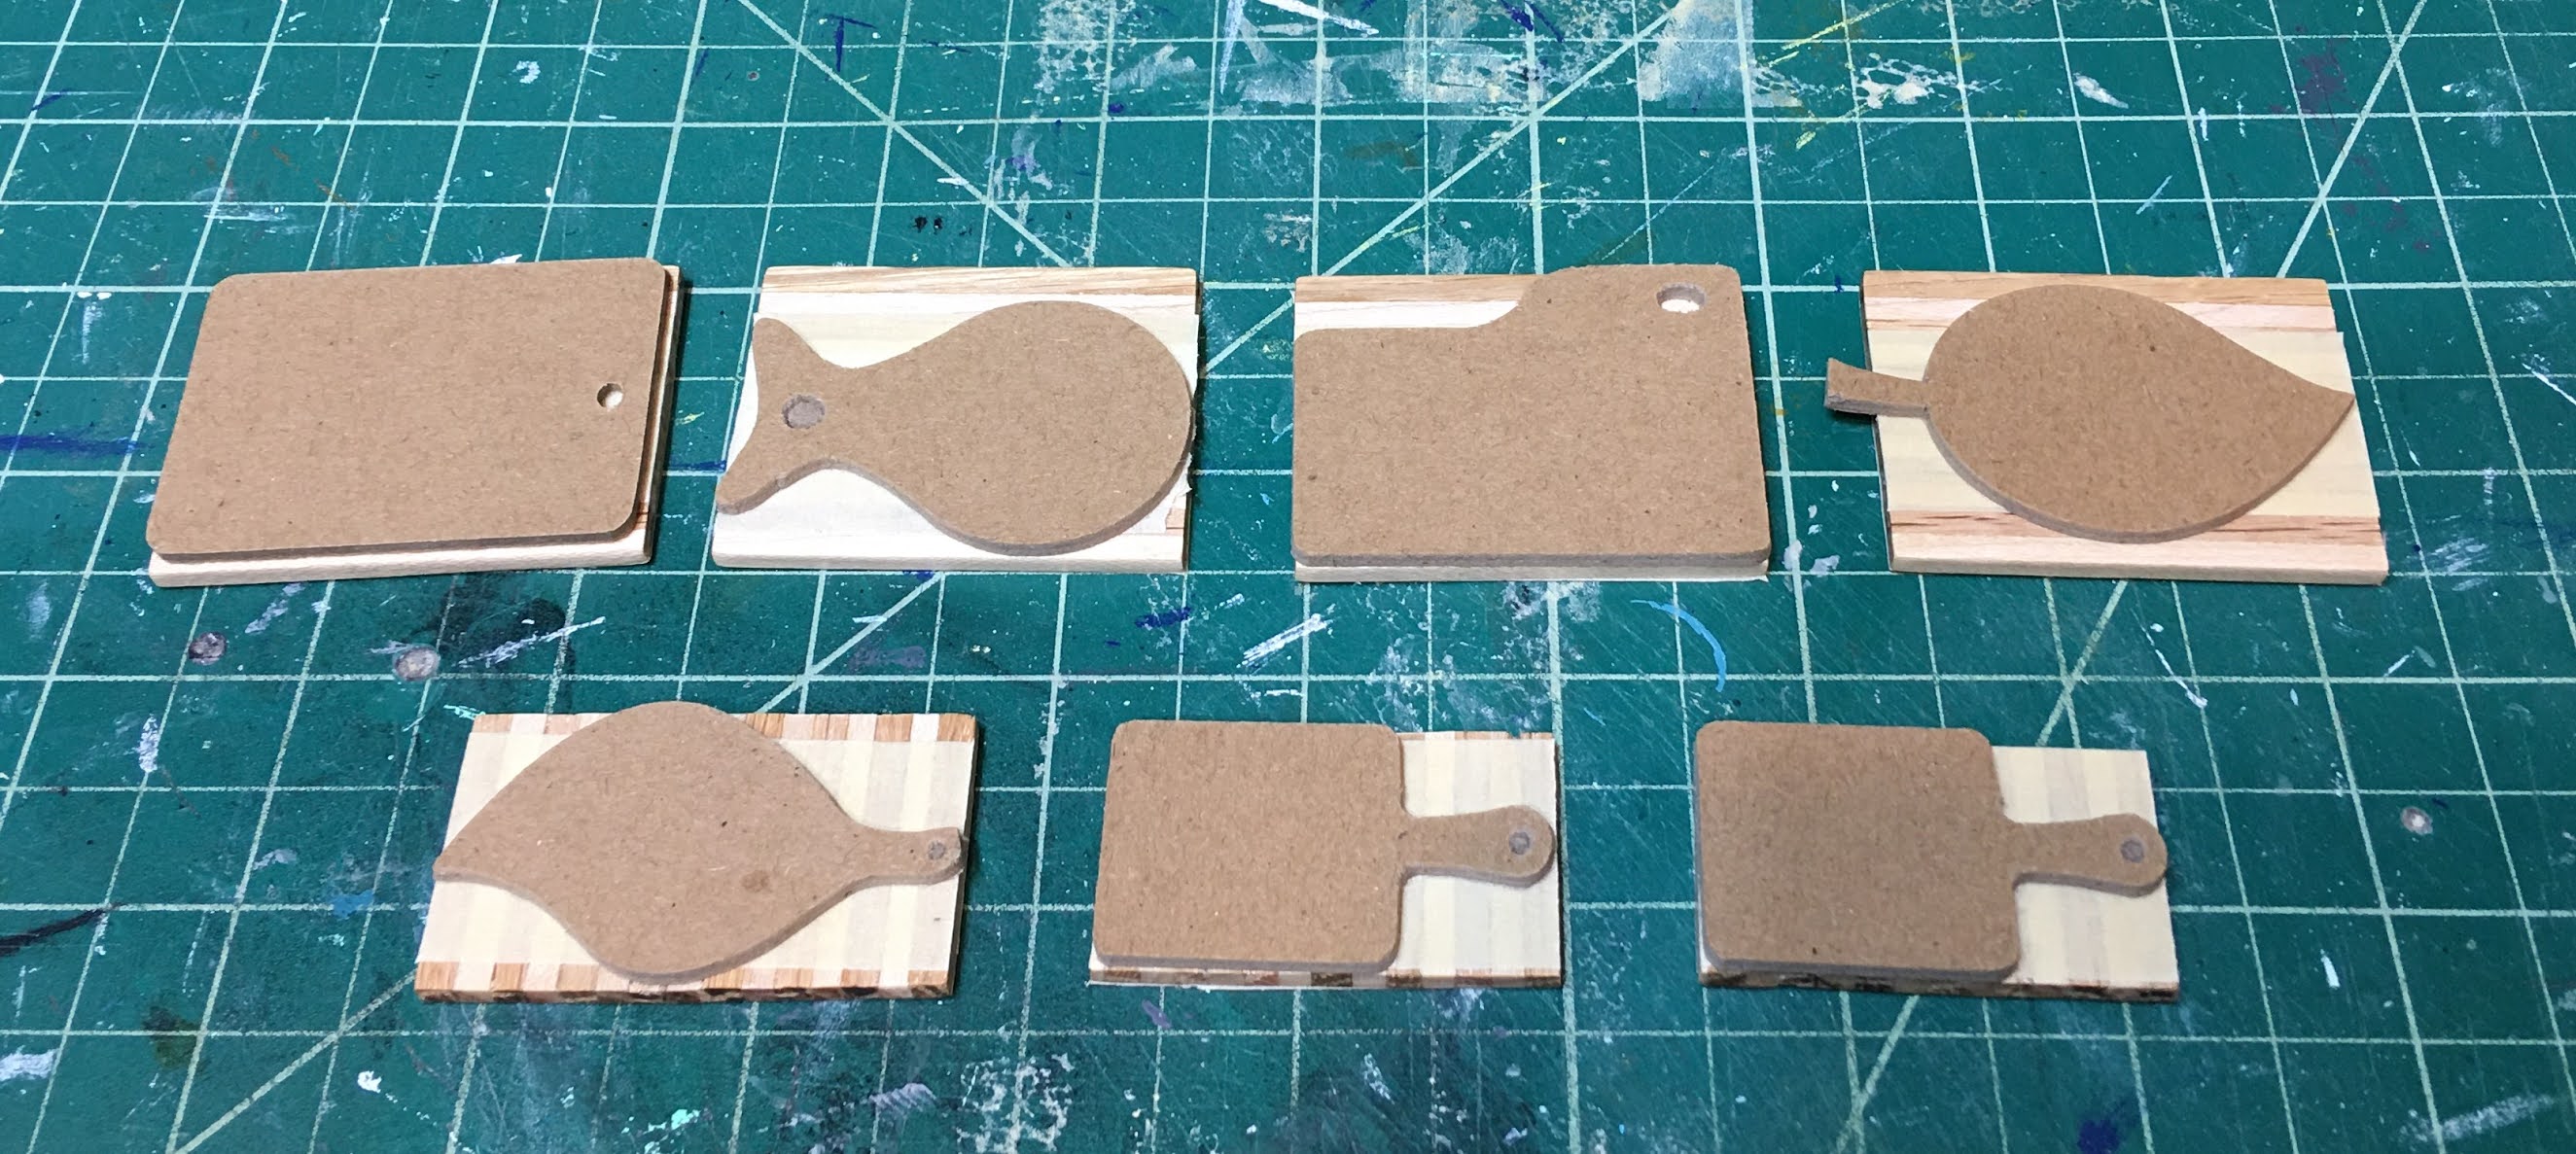
Here I have all of the pieces cut, waxed, buffed and ready for the next steps. You can also see that I have cut to size, sanded and waxed some cherry for the drawer unit backsplashes. Why the seven extra pieces of butcher block? I'm glad you asked!


 |
| Resized to fit the cutting boards. |


 |
| Shapes cut and paired with their cutting boards. |

 |
| Tiny dots of CA glue on the masking tape. |
 |
| Jigs attached to butcher block boards. |


I found that there was a significant difference in cutting basswood and acrylic vs. the hardwood. The saw blade definitely wanted to grab into the harder wood and yank it out of my fingers. And a little force was required to pivot into the blade for the curves. Once I realized it was a fight, I was ready! After all, I have wrestled alligators a time or two! Overall, the cutting went pretty well on the saw. But how did they look once I got the tape off?


I peeled off the chipboard jigs and all the protective tape and was pretty happy with my first attempt at cutting wee hardwood butcher block cutting boards with a power tool. They definitely needed sanding and shaping, but I was pretty pleased with the results! Like most things, practice will make perfect.

 |
| After sanding and rewaxing. I am still deciding whether to add holes to some of them so that I have the option to hang them. |


The drawer units with their countertops and backsplashes affixed and ready for installation.

And the in their places...

In the interest of keeping this post from becoming a novella, I'll just tease you and say you'll have to come back to see the full kitchen install in next week's post. ;O)
xo xo,
Jodi