
The work continues in all my spare time on the Breakfast At Tiffany's facade project. In fact, so much work has been required, that I haven't had a moment to think about the Beachside Bungalow. I hope it's not worried that I have forgotten it!
The next step in the BAT project was to start the 3D printing. Most of the files took an entire day or longer to print, so it was a long process. I also had a four day conference to attend, so time has flown since my last post! I don't have a true step by step to share, so I'll just share some info about the process that I hope you'll find interesting.
For the pediment piece to the doorway entry, it took just under 14 hours to print. I did not get to bed until long after midnight that night. Luckily, the print went perfectly so the only hard part was staying awake!
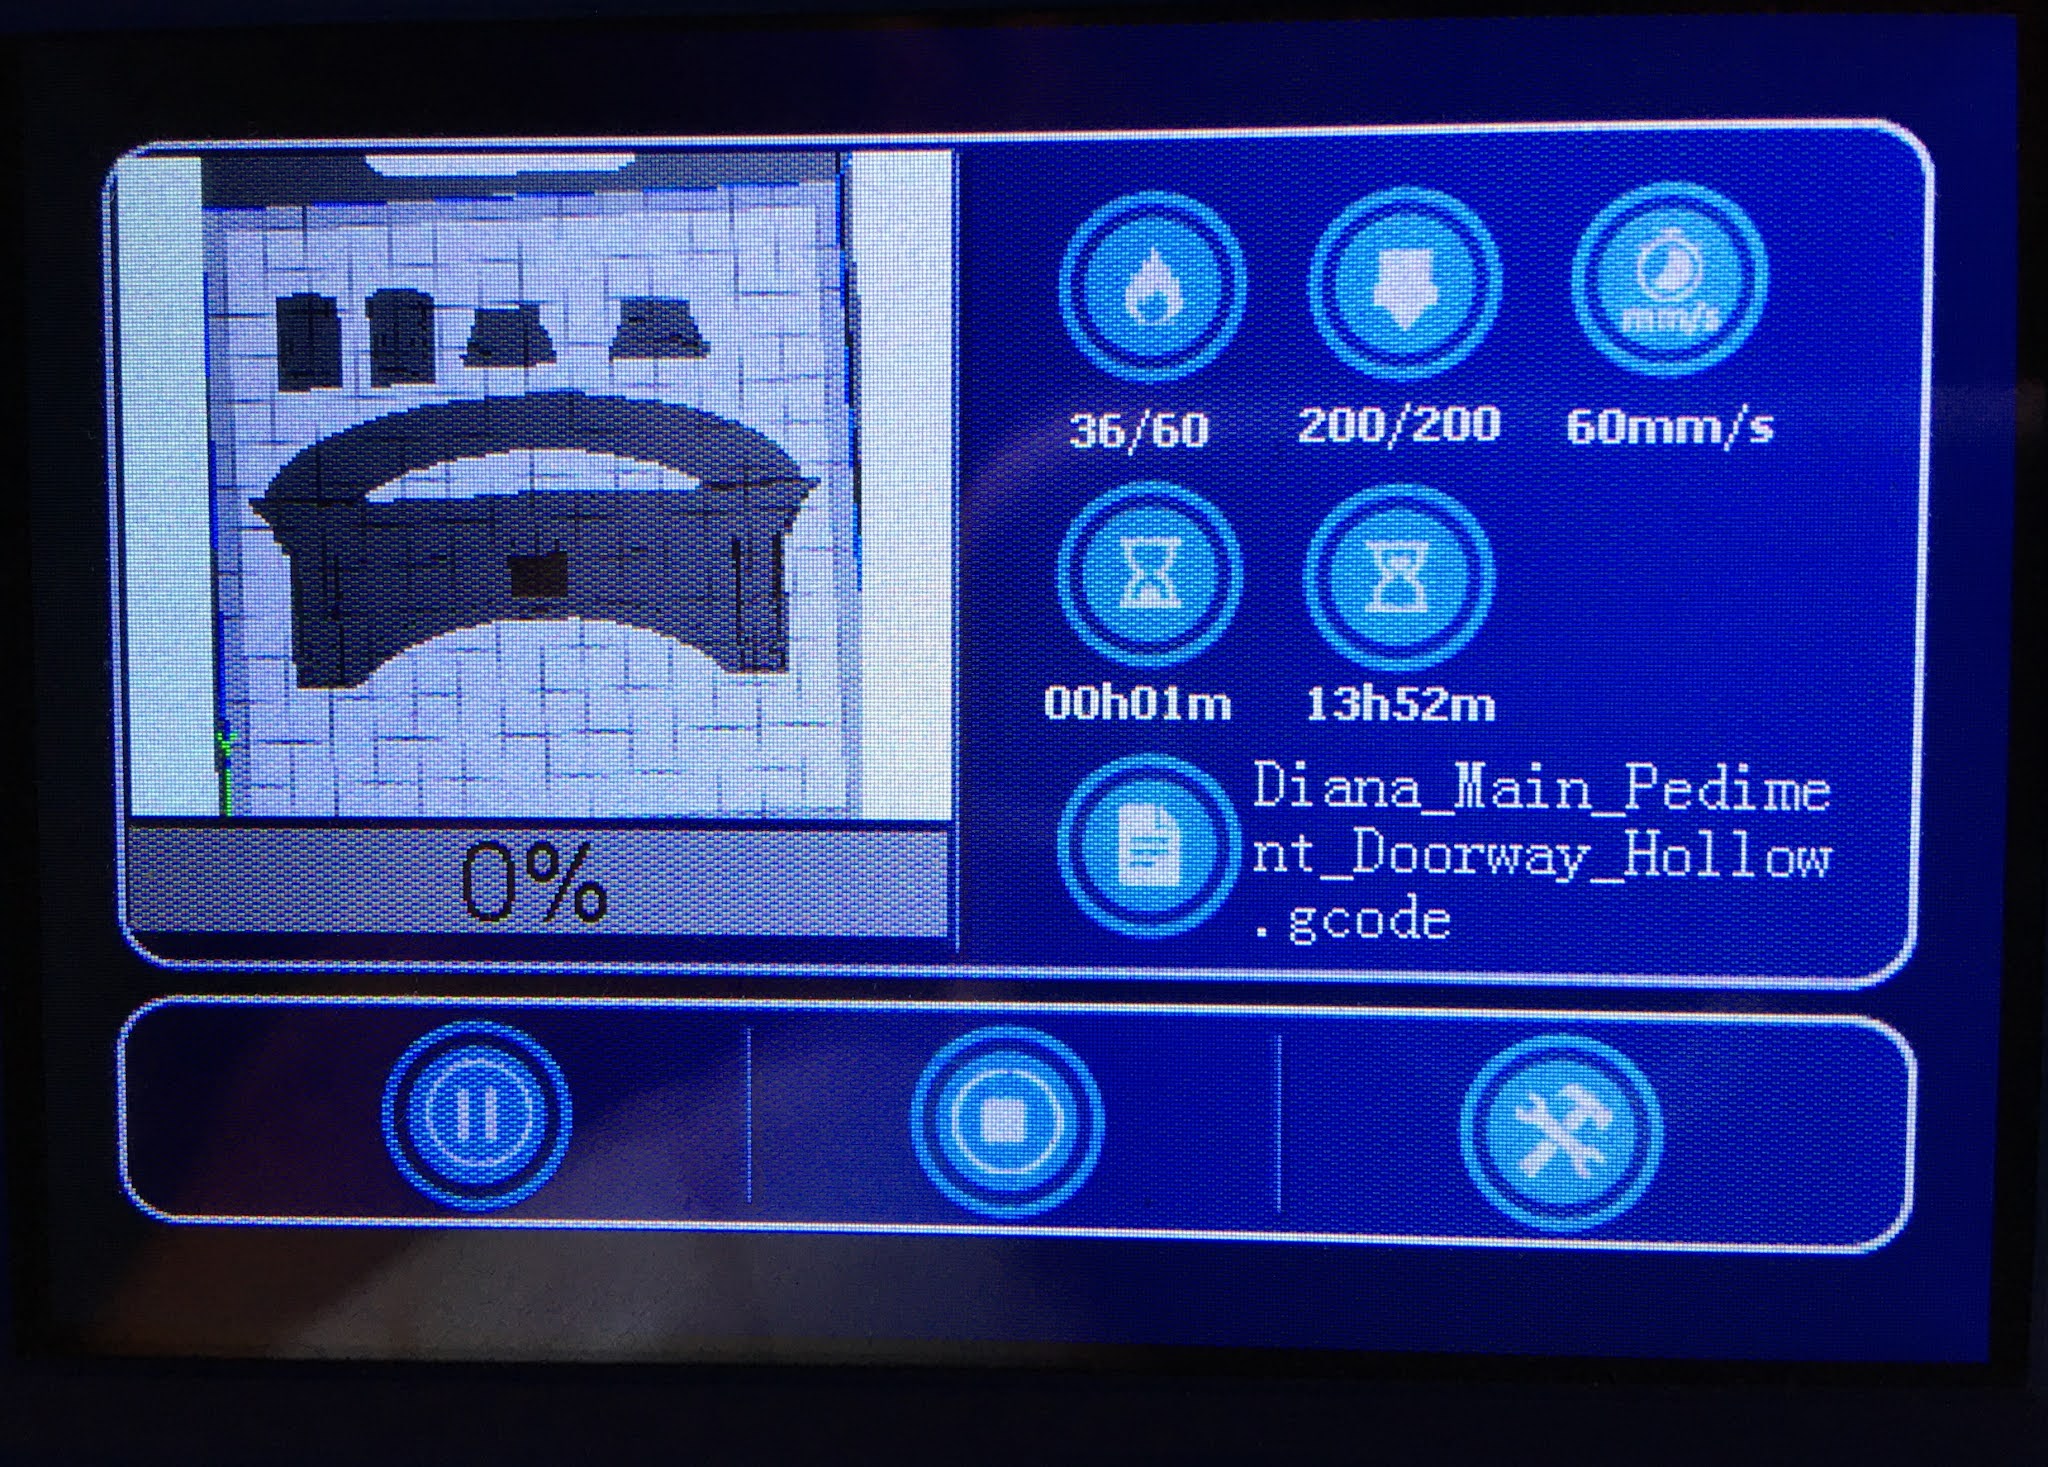
The hour glass on the left represents how much time has elapsed and the one on the right tells you how long you have left to go. After four hours and fifteen minutes, it seems like very little progress.

 |
| After 4 hours and 15 minutes. |
This is what you see if you sit mesmerized in front of the printer, as I often do.

A long while later...

And finally finished...

Once the main piece and the side trim and detail pieces were printed, I could see my design in the physical world. I really like it! This is going to be one grand entryway!


The other pieces went really well, too, and will require only minor finishing! Here are the corbels. I printed the file two times to make a total of twelve of them. The customer only needs eleven, but you can always use an extra fancy bracket somewhere in a house like the BAT house.

For the large window and all seven small ones, after printing, I had to test out my design. The cornice supports were easily pulled off with pliers and fit over the window frames perfectly.


I removed the wooden sills and trim and replaced them with the new 3D printed sill with attached corbels. I also added a strip of 1/16" x 1/4" basswood to each side of the frames to add an extra layer of detail. It mimics the BAT windows much better, now.


With all of the printing in progress, I concentrated on designing the front and basement doors. Here's a refresher of what the BAT doors look like:

To construct these, I will be cutting them in three layers of 2 mm chipboard: An inner core and a carved interior and exterior layer to sandwich it. The basement door will be solid, while the front door will have a panel of glass at the top like the original door.


Hopefully, for the customer's sake and the Beachside Bungalow's, too, I'll be shipping this project out in a couple weeks!
Until next time, my friends!
xo xo,
Jodi
You are learning so much. Do you wonder--or worry--that you are generating more business for yourself? The BAT will be amazing. I find your ability to figure things out, design them then create them astonishing whileI'm struggling with an entertainment center with a built-in fireplace.
ReplyDeleteThanks Ann! I really am learning a lot! It's kind of like taking a gulp of air, shutting your eyes very tight, then jumping. I never know where I'm going to land, but the journey is an exciting one!
DeleteAs for more orders, I don't know how so many talented and creative folks turn this into a business. I like working on my own projects so much that it is hard to focus on a paying job for so many weeks! I think I'm going to have to keep my day job and just dabble in special projects once in a while.
Your fireplace/entertainment center sounds awesome! I can't wait to see your ingenious ideas!
Fascinating as always Jodi. I am sure your customer will be thrilled.(((hugs))
ReplyDeleteThanks Carrie! I aim to please! :O) I am so excited to get her order finished and sent off to her! Hopefully, she loves the physical pieces as much as she does the renderings and photos!
Deleteun gran trabajo!
ReplyDelete¡Gracias Carmen!
DeleteThese look incredible, Jodi. The learning curve to do something like this is probably far too large for someone of my age to start this late in life so, if I find myself in need of such special things, I think I will defer to the experts and open my wallet! *smile* That will leave me more time to work on the parts that I can do easily and well myself. It's a win-win in my opinion! - Marilyn D.
ReplyDeleteThanks Marilyn! Honestly, you could have it all figured out pretty quick! If I can do it, anyone can! But there are just some things that are easier to purchase, and supporting artisans is important! You are so right - We all have things we want to try or like to do, and others (like sewing and sculpting in my case) that are best left for others!
DeleteWhat magic is this! Just fabulous what can be done these days with a smart person in control. Really lovely work, Jodi. I can just imagine the joy they will bring to your customer. I got a kick just from watching them evolve - owning them would be massive icing on the cake.
ReplyDeleteThanks Marilyn! I am so grateful to have been given this opportunity and a little push! I have learned so much just in the past few weeks, and now I'm dreaming of other ways to utilize these tools! Onward and upward!
DeleteYOu're a GENIUS Jodi, your customer is going to be Thrilled with your results AND you might have a new fledgling business raring to go as a result!
ReplyDeleteThanks Elizabeth! You are so kind! I really hope she is thrilled, and what an opportunity this has been to push me into new directions with this technology! I have no aspirations for making it a business, as I fear that my joy would become my work and I'd have no time for selfish indulgence. Better to fulfill a challenging request only every so often. :O)
DeleteIt's mind blowing how beautiful the printed items look. You are so brave and clever to manage the 3D printer. I can imagine the time it consumes to plan and prepare the designs. The satisfaction that it was successful is worth it.
ReplyDeleteHugs, Drora
Thanks Drora! It does take time, and a good deal of figuring out. But the time is so looked forward to and so thoroughly enjoyable! I find myself getting excited each time I think of a better revision! This request has truly been a blessing!
Delete¡Impresionate! Me encanta como ha quedado todos los elementos que has creado.
ReplyDelete¡Gracias Isabel! ¡Estoy muy contento de haber descubierto que este programa simple y gratuito puede hacer algo tan hermoso! ¡Estoy emocionado de seguir adelante y utilizarlo para más proyectos futuros!
DeleteThis is another inspirational blog post. Your step-by-step explanation makes it seem so achievable; if I had another week in the month, I would give it a go. So far I have loaded TinkerCad and run through a half dozen tutorials.
ReplyDeleteThanks Sherrill! I am so excited that you decided to investigate the program! I predict that it won't be long until you have a 3D printer and are designing and printing all sorts of amazing things! For now, exporting things as .svg and then uploading to Design Space should be pretty handy for you! You're an inspiration!
DeleteI'm amazed how nicely this works, beautiful!
ReplyDeleteVery nice that you can choose how you want it, super cool.
But you have to have a lot of patience I see.
Thanks Gonda! It is so great that just about anything can be made if you are willing to learn! And when you see progress being made, the patience comes easy!
DeleteLo que consigues con esa impresora es impresionante, la puerta es espectacular !!!
ReplyDeleteMi hijo compró hace meses una impresora 3D y todavía no la ha estrenado 😒
Delete¡Gracias Eloisa! ¡Continuamente me sorprende lo excelente que funciona incluso esta impresora de gama baja! Una vez que su hijo se entusiasme por hacer algo, ¡estoy seguro de que lo abrirá y comenzará! ¡A veces, empezar es la parte más difícil!
Wow! I'm amazed. The windows are going to look so great. And I know the door will be awesome! Your client is going to love them.
ReplyDeleteThanks Sheila! It was so much fun to discover a few new "tricks" with the 3D printer and Tinkercad! I'm so glad the customer gave me the opportunity!
DeleteHi Jodi! WOW, those printed pieces look absolutely Fabulous!!! What incredible detail!!! I am very impressed, especially at the amount of dedication this project requires! I know it's the excitement of the challenge and your skills clearly are up to the task! I sure hope we will get to see pictures of the completed facade at some point! I am sure your client must be over the moon with these results! Keep up the great work! You are an inspiration to us all! :):)
ReplyDeleteThanks Betsy! It really was an exciting challenge, and such a great opportunity to force myself to see what is possible if I just learn, try and am willing to fail in the process. I am happy to say the client is thrilled, and her package goes out in the mail today! I have asked "pretty please" for photos, and I'll definitely share them when I get them!
DeleteEsas piezas son maravillosas.
ReplyDeleteMe encanta como has encajado cada cornisa y borde. Queda muy lujoso.
Un saludo
¡Gracias Marian! Fue muy interesante ver qué tan exacto podía llegar con las medidas. ¡Ahora sé que la tolerancia está dentro de 1/64 de pulgada!
DeleteYour printed pieces look amazing and very detailed. I like the 3D printer more and more.
ReplyDeleteThanks Faby! It is really coming in handy, and making all kinds of things possible!
DeleteEs espectacular el dominio que has cogido con la impresión 3D, que maravillosos resultados!!!
ReplyDeleteBesos.
¡Gracias Pilar! ¡Estoy sorprendido de lo que puedes hacer con las formas si puedes encontrar un momento de tranquilidad para deconstruir una característica en tu mente! Nosotros, los perros viejos, realmente podemos aprender nuevos trucos, ¡jajaja!
Delete