The Latin word "opus" means "A work", so it is fitting then that the tile flooring pattern I decided to use for the great room of the Beachside Bungalow is called the Opus Roman pattern. It was certainly work to learn it and to lay it, but in the end, feels like a real work of art! This week I'll show you how I got here and share the pattern cheat sheet that I created to make this work a little easier.
I began by making floor patterns for every room in the house. It is a lot easier for me to work on a template outside of the house as opposed to reaching into a small, tight space all while trying to see. This is especially true when I am laying any type of flooring that is a one piece at a time procedure, such as tile or herringbone floors. As many of you know, it is much more involved than laying one large sheet of wood or paper flooring.
Here's a simple tutorial by Jessica Cloe on how to make a paper pattern for your floor with nice photos.
 |
| Several sheets of graph paper due to the size of the room. |
Because I'll be laying tiles, I transferred my patterns onto matboard. This provides a strong but thin substrate for tile work.
 |
| These 8.5 x 11 inch mat board sheets come in handy for so many things! |
You may have to tape several sheets together, depending on the size of your room. I used masking tape to connect enough sheets to fit the size of my pattern. Once taped, I turned it so the tape was on the back, then cut my pattern from the mat board sheets.
 |
| Make sure to check the fit and adjust before you go farther. |
 |
| Sheets are taped together on the bottom. |
For the actual tiles, I like to use Illustration Art Board. These are nice for painted tiles as they are meant to get wet. They may curl up a bit but will settle back down again as they dry. The combined thickness of the mat board (substrate) and the art board (tiles) is 3/16", which should work well in any dollhouse project. That brought my floors in perfect height to my door thresholds.
To achieve the natural stone look for the tiles, I used my tried and true method of acrylic craft paint, glazing medium, a piece of kitchen sponge and water.
I painted a base layer of ivory white first...
Then wet the sponge, removed excess water, dipped it in paint, dipped it in glaze, then began to pounce and blend until I liked the look.
This was my inspiration photo. I was close, but still needed a little something.
I added a couple more colors and more pouncing...
 |
| Right side before the extra colors, Left side after. |
 |
| That should be more interesting! |
The Opus Roman pattern consists of four different sizes. I created a cheat sheet with all of the details:
Now it was time to cut the tiles. I like to lay my
transparent ruler on top of the art board, lining up the measurement on the right edge, then pushing my straight edge up to it for cutting. To cut, make sure your Xacto blade is perfectly straight up and down, then make several light passes. This works great if you're right handed. If you're a leftie, just reverse it. This method gets me the straightest edge I can achieve when cutting by hand, though it's still never perfect. With this tough art board, you'll need to sharpen or change out your blade often.
I wasn't sure how tight I'd be able to get the grout lines, so I painted my edges, just in case.
After a little practice without the glue, I began laying the pattern. Once I felt like I had the idea, I brought out the glue. I still wasn't sure about the grout lines, so I painted them, just in case.
After a good bit of time working (and while listening to works by Mark Twain on audiobook), I was getting a feel for it. It was actually fun and relaxing!
In spite of my great efforts to make straight cuts and lay the tiles perfectly, I still had a few gaps that were more than I could stand. Instead of attempting to grout with spackle, I opted to try my
Plastic Wood wood filler instead. The Natural already has a warm tone, and is much less messy. If you look closely you can see where I filled in some cracks.
To help the Plastic Wood blend in better once dry, I applied a wash using one of the tile colors. I brushed a bit on the discolored area, let it soak in a moment, then wiped away the excess. It was a success!
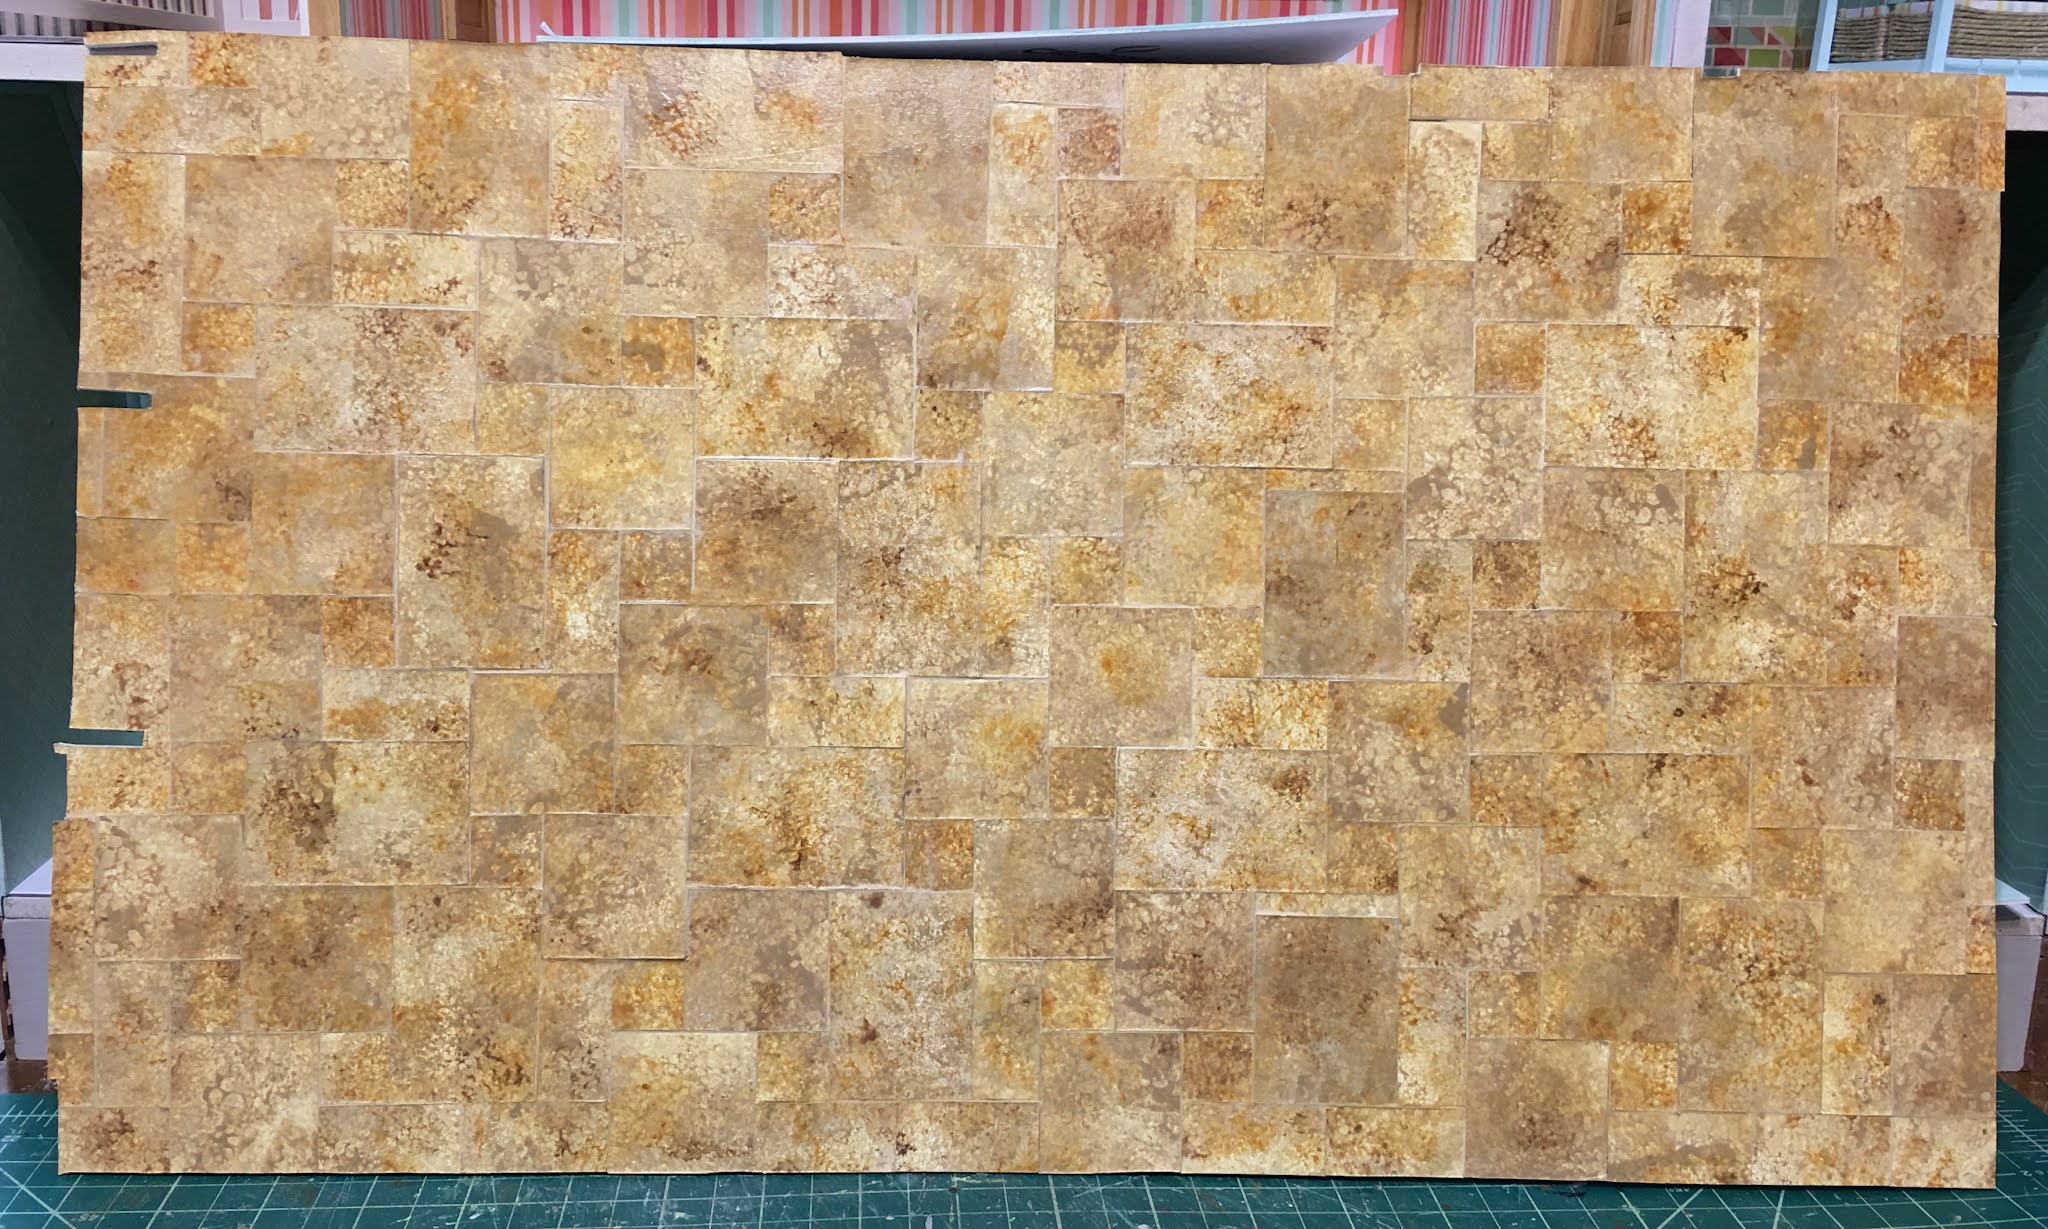
Once finished I gave it a few coats of satin spray varnish.
And here is the finished Opus Roman tiled floor! It's so much fun to try something new and challenging!
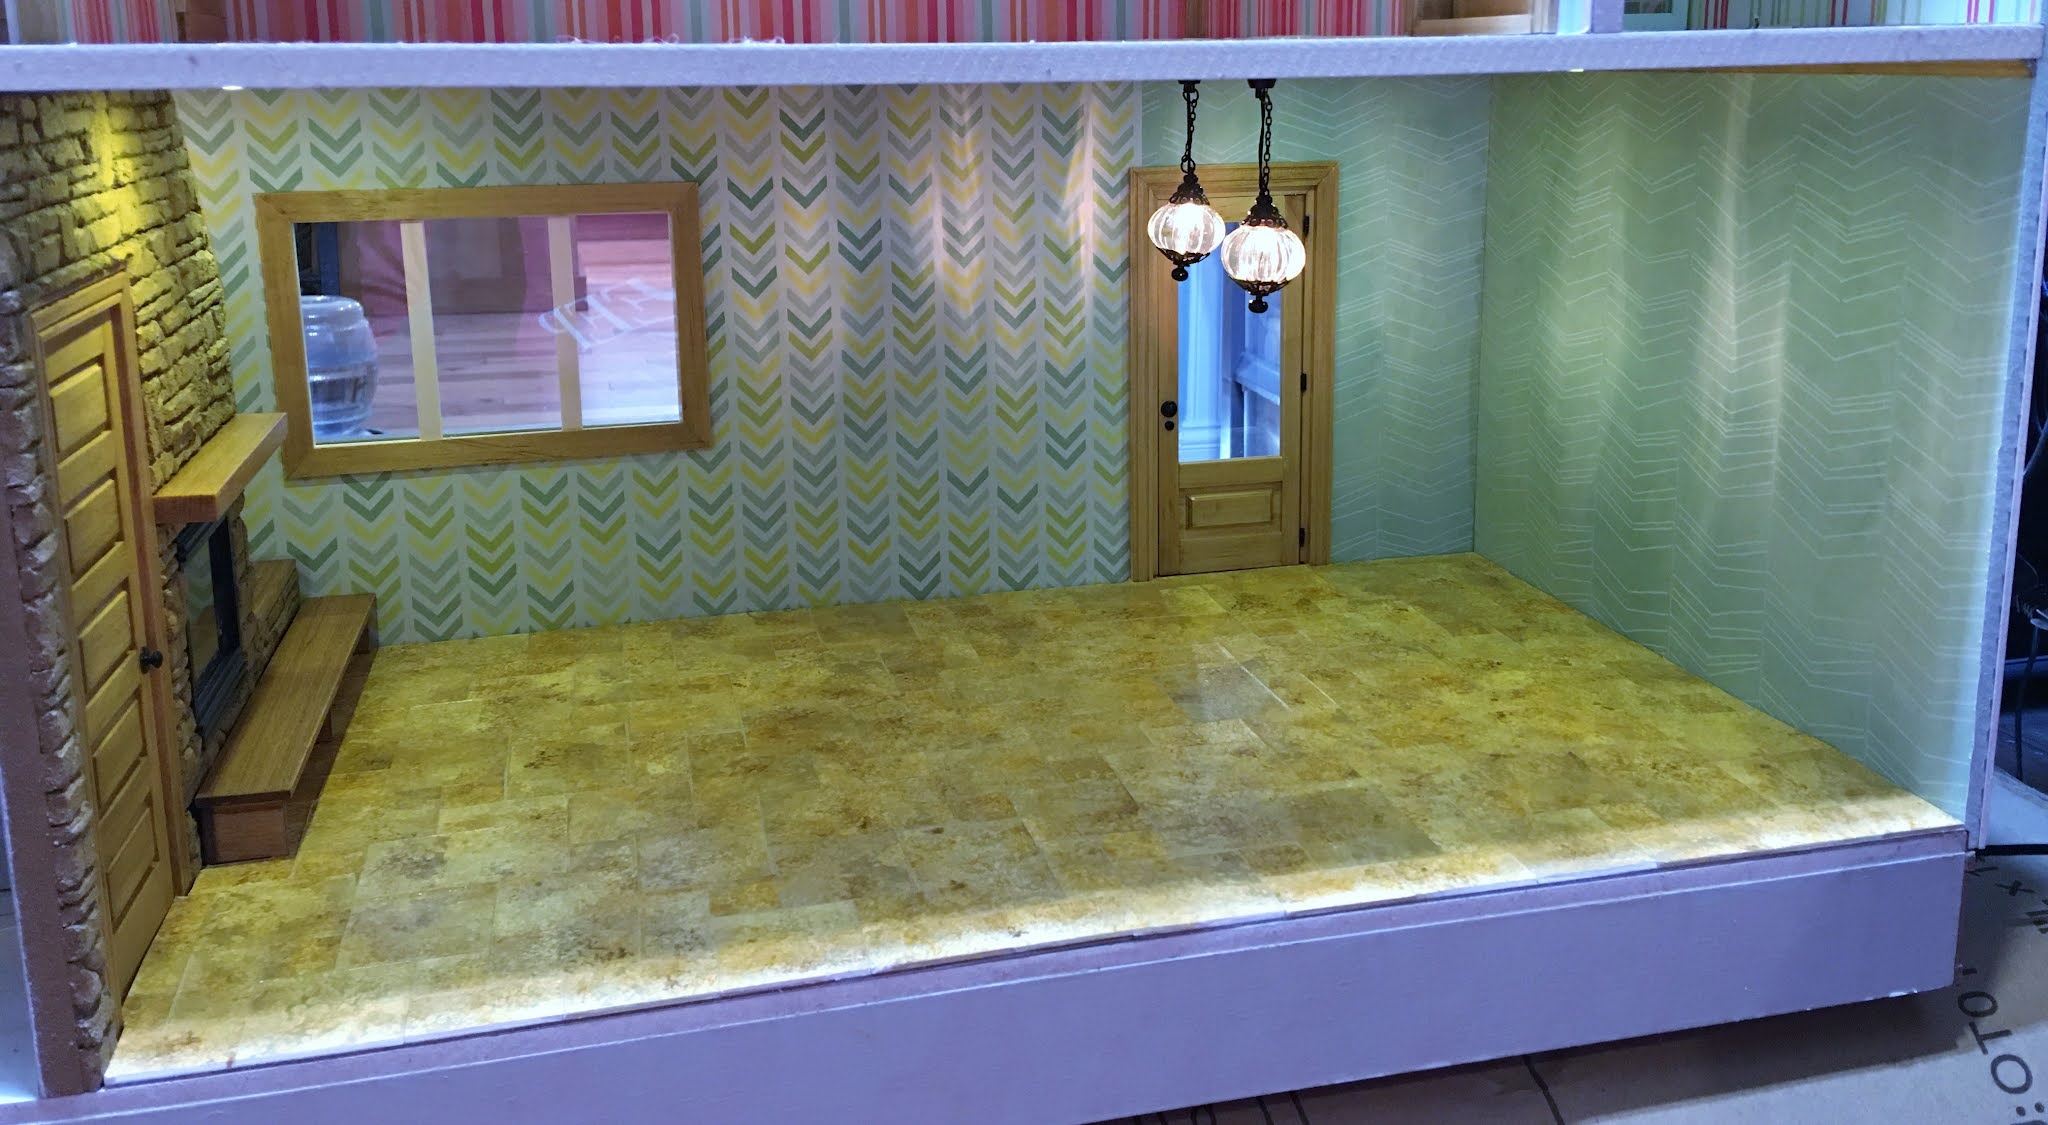
And installed in the great room. I think once all of the kitchen cabinets and island, sofa and area rug go in it will look great! I'll need to add baseboards, too.
I hope you get a chance to try these fun tiles for yourselves, one day! I have added this post to the
Tutorials page for easy future reference.
Next week, I'll share the very different tiles I made for the rest of the house, along with the shingling.
Stay safe and make minis, my friends!
xo xo,
Jodi


Once again you help us improve our building skills. I'm working on a wood floor for the Manchester, using wood that came in the old San Franciscan kit. I've glued it to card stock, but I like mat board because it heavier. Your floor is lovely and authentic. Thank you for such a great tutorial.
ReplyDeleteThanks Ann! I'm glad it was helpful (or will be some day) and best of success with your floors!
DeleteOh that looks wonderful! I'm definitely going to keep this in mind for flooring!
ReplyDeleteThanks Sheila! I'm glad you're going to try it and I know you'll find it fun!
DeleteYOur creative ingenuity knows No Bounds!
ReplyDeleteThe look you've been able to achieve with you tile floor is entirely realistic and I'm LOVING the way you've applied the colour as well as impressed by the complex pattern you laid- WOW!
Your talents are Extraordinary and YOU are Fearless!
elizabeth
Thanks Elizabeth! It is always great when an idea works well enough that I can share it with you! I hope you'll try the "stoning" method!
DeleteYou never disappoint us Jodi! Thanks for sharing another great flooring idea.
ReplyDeleteThanks Carrie! I hope you get the chance to try the ideas here! They are a lot of fun!
DeleteOh wow! Some years ago we installed travertine tile in an entryway. Except that we did not use the Roman Opus pattern, yours looks exactly like our real life tile. I already saved your instruction sheet for when I try that pattern; thanks so much for that.
ReplyDeleteThanks Sherrill! I know you'll bring these tiles and painting techniques to perfection! Can't wait to see your results!
DeleteThe finished floor looks amazing Jodi a real Opus Artis!
ReplyDeleteI am yet to do tiles somewhere some day and you make it look so easy. I love the warm tones of the tiles and the solution of filling and staining any tiny gaps is perfect.
Anna X
PS The trick of piecing smaller pieces of paper to make a template is so simple and fabulous - thanks for the link.
Thanks Anna! It's so much fun to try something new and to have it come out successfully! Then I can share it and spread the joy! I hope you do try these because you will find freedom and artistry in them, and you'll love your very own unique results! Glad you found the link helpful, too!
DeleteOh, Jodi, what a fabulous piece of work and so well thought out and planned as well as the meticulous execution. An almost thro away remark of yours made me want to give myself a good talking to. I have spent years and six builds hating the thresholds on the dollhouse doors and have tried all sorts, unsuccessfully, to remove them. Never once did it occur to me to raise the floor height 🤨. The other cross making thing is seeing how you figured out the pattern and how good it looks done right. We had a large patio laid in Indian sandstone which was made up of several packs of slabs each pack being that pattern, the useless contractor just took then out and laid them randomly you can not imagine how many odd shapes and sizes were cut to fill weird spaces. I look at it every day and flinch. I needed Jodi here to supervise. Thank you for sharing the how to so clearly as always.
ReplyDeleteThanks Marilyn! I am so glad you got the comment error sorted!
DeleteThe thresholds! Yes! This was such a pleasant added bonus to have the flooring solve that issue! I hope you can find the like materials near you so that you can try these - they are so much fun all the way through the process!
There are a lot of contractors out there who act like they know or have experience but really do not. Russ sees it every day. I am just like you - I can't help but to keep noticing the flaws in things until I drive myself crazy. Most people don't notice, though. I bet the tiles themselves are lovely!
Es admirable tu capacidad para conseguir siempre, todo lo que te propones.
ReplyDeleteFantástico !!!!!
¡Gracias Eloisa! La mayoría de las veces lo sigo haciendo hasta que resuelvo los problemas o simplemente tengo mucha suerte, ¡jajaja!
DeleteMore fantastic lessons. stunning floor tiles and wallpaper. Thank you again for sharing the methods.
ReplyDeleteHugs, Drora
Thank you, Drora, for the always kind and supportive comments! 💗
DeleteReally cool technique Jodi! You have more ambition than I do, and apparently a better steady and careful hand at cutting things square! In a Whitledge Burgess workshop many years ago, the tile we made by gluing on a marbleized wallpaper and then cut it into 1 1/2" squares. When I installed it, I came to see how not all pieces were 1 1/2". Love the finished effect!
ReplyDeleteHeidi
Thanks Heidi! It is nearly impossible to get perfect cuts, but luckily we have tricks to make the imperfections less noticeable!
DeleteExcelente creación!!!
ReplyDelete¡Gracias Isabel!
DeleteWhat an absolutely impressive job you did on those tiles! And all the work creating that layout! Your attention to detail and your meticulous work are always an inspiration to me!
ReplyDeleteThanks Deb! I think you'd really enjoy making this floor - though you'll have to half all the measurements! 😊
DeleteYour floor is amazing and looks real.
ReplyDeleteThanks Faby! Hope you'll try it - it's a lot of fun!
DeleteWhat a wonderful post! ;O) And what a wonderful floor!!! It turned out as awesome as it is beautiful. I really like the warm shades of colours, you and your sponge made a fantastic paint job. And the opus pattern you've chosen was for sure a challenge but the result is a true triumph. The floor is just perfect for your room, so warm and friendly.
ReplyDeleteAnd of course thanks for sharing your how-to's including the link to the tutorial about how to make a floor pattern. It was very interesting to see the floor developing step by step (btw a good occasion to point out how well made your photos are). And what a relief that even a skilled and focused miniaturist who always has a plan and a tidy workspace had to deal with a few gaps in the end. Would you like to hear a little secret? Come closer... *whisper*... when I made the tiled floor for the Beary House's kitchen I used a punch for the tiles - and still managed to have crooked lines... and gaps! *LOL* And now I'm already curious to see what kind of tiles you've chosen for the other rooms.
Hugs
Birgit
Thanks Birgit! Perfection being so overrated, why must we always chase it?!? Ah well, we are learning to love our own flaws through the experience, right? :O)
DeleteIt was a fun challenge to lay the floor, and I am happy I took the risk and played with the sizes. Turns out it was really fun! I hope you'll try it!
Hi Jodi! What a fascinating pattern that is! I really like the way the colors turned out and the way they randomly appear on the finished floor! So very impossible to "control" where the variable hues land! I think it looks great in the Beach House... almost like a "sandy" surface... and you won't be able to tell if it is needing a sweep out! LOL! Your careful demonstrations of every step, as usual, is a great help to all who want to learn more about making mini tile floors! Thank you for your constant sharing of techniques and materials!!! We all learn so much from you! :):)
ReplyDeleteThanks Betsy! Usually, when I am going to introduce something so "busy" into a room, I go with new bottles of paint in a specific color range. This time, I decided to use what I had rather than risk going out to a store. At first I was becoming very concerned with the flatness of the colors, so added in the additions. Then, I could not decide if I loved it or hated it. But I continued. Once cut, I liked that the individual tiles looked so authentic to what I was seeing online, but in the room, it was awfully overwhelming! In the end I decided to just love it, and so that is what I am going to do. 💗
Deleteme encanta hacer baldosas,mosaicos,suelos en general y tu forma de hacerlos me ha inspirado mucho Jodi!! Volver de las vacaciones y ver tus progresos es todo un aliciente! Voy ahora mismo a ver como sigue este maravilloso bungalow!!
ReplyDeleteMuchas gracias por tus tutoriales!
Besos.
¡Gracias Pilar y bienvenido de nuevo! ¡Te he echado de menos a ti y a tus ingeniosos y creativos proyectos este verano! Estoy muy feliz de que te gusten los mosaicos y espero que tengas la oportunidad de intentar colocar este patrón: ¡fue un desafío para la mente y, por lo tanto, muy divertido!
DeleteSuch a lot of work, but what a magnificent result!! LOVE, love, love everything about it!
ReplyDeleteBig hugs,
X
Thanks X! It was a lot of thinking and initially, getting confused! But after the first few blocks it became fun, and seeing the floor come along and actually look like the big tiles was encouraging! I hope you get the chance to try them - the bigger the challenge the more satisfying the reward!!!
DeleteAn impressive and detailed tutorial. Well done - it looks great.
ReplyDeleteThanks Irene! I hope you get a chance to use the design, maybe with a slate tile to be accurate with the era you work in!
Delete