
My mini time since summer began has been very chopped up and disjointed. Getting our Covid vaccinations, my parent's visit, family gatherings and Russ working on an out of town project have all contributed to the wonderful chaos. However, having only tiny stretches of mini time here or there, I have been working on a vast array of side projects for the Beachside Bungalow and in a disorganized order. Hopefully, you won't find this post too jumbled or long as I try to get you caught up to where I am.
 |
| Front door stained and installed. Peek-A-Boo to fireplace and staircase through front window. |
 |
| Cutting thin strips of masking tape makes it easier to apply to oddly shaped fixtures. Just keep adding strips until everything is covered. |
 |
| Taping scrap cardboard over plug ends and wires keeps the overspray away. |
 |
| All the brass/gold is gone in favor of black satin. Be sure to follow up the spray paint with a spray varnish. |
 |
| I sprayed the hinges, knobs, door plates and locks, too. Double sided tape works great to hold tiny bits in place while spray painting. Be sure to varnish these, too! |
Another small side project I worked on was the stairs. I painted the treads with acrylic paint to look as if they were the same wood stain as the stair landing and fireplace mantle. The stairs are made of MDF so traditional wood stain would not work. I also painted the risers in colors to match the green chevron shades on the living room wallpaper. You will only be able to see the stairs by looking through the front window on the porch, but when you do see them, it will be a fun and funky detail. The last two stairs are covered by the landing so did not need painting.

At one point I began working on the gas fire insert for the fireplace. I had collected some great sticks on one of our forest walks. I just loved the look of the bark for these fake gas fire logs. They look very much like my gas fireplace logs. I used a fire kit from Evan Designs. The 5-12 volt can be included with all of the other 12 volt lights in my project so there is no need to run a separate transformer. I printed the log grate with my 3D printer a few weeks ago when I was building the fire box.

I threaded the three bulbs around and through the grate and made sure they would sit flat beneath the logs. I glued the logs to the grate and each other with Tacky Glue. Once completely set, I added a coating of matte Mod Podge to the logs to ensure none of the neat bark would flake away with time.

 |
| View from the bottom of the grate. |
The wires for the fireplace bulbs will exit the fire box out the back and then be threaded down through the floor of the house where I can run an extension to the power source. The back of the stairs lie on the part of the fire box that is missing. Luckily, you barely notice the funky adaptation in the completed fireplace! The prayers worked!!!


This is how the log rack sits inside the fire box. Notice how the powder room door has been stained, installed in the wall and had it's hardware added? That was another small side project that I fit in when I had a few mini minutes. Betsy - I added the hinges just because I love the look of them. They are for looks only and do not add any contribution to the functionality of the door.


Here is the back of the fireplace wall. You can see the tiny powder room this way and where the back of the fire box will be hidden behind it and under the stairs.


With the gas fire ready, it was time to add a "glass" (Lexan) panel to the front and then the frame. The fill pattern that is a natural side effect of 3D printing adds a neat detail to the frame.


Here it is after the glue has dried.

And in the room with the mantle added and the flames on...


And the video. Sorry for the loud audio in the background - I was listening to a Sasquatch encounter story!!! Yikes!!!
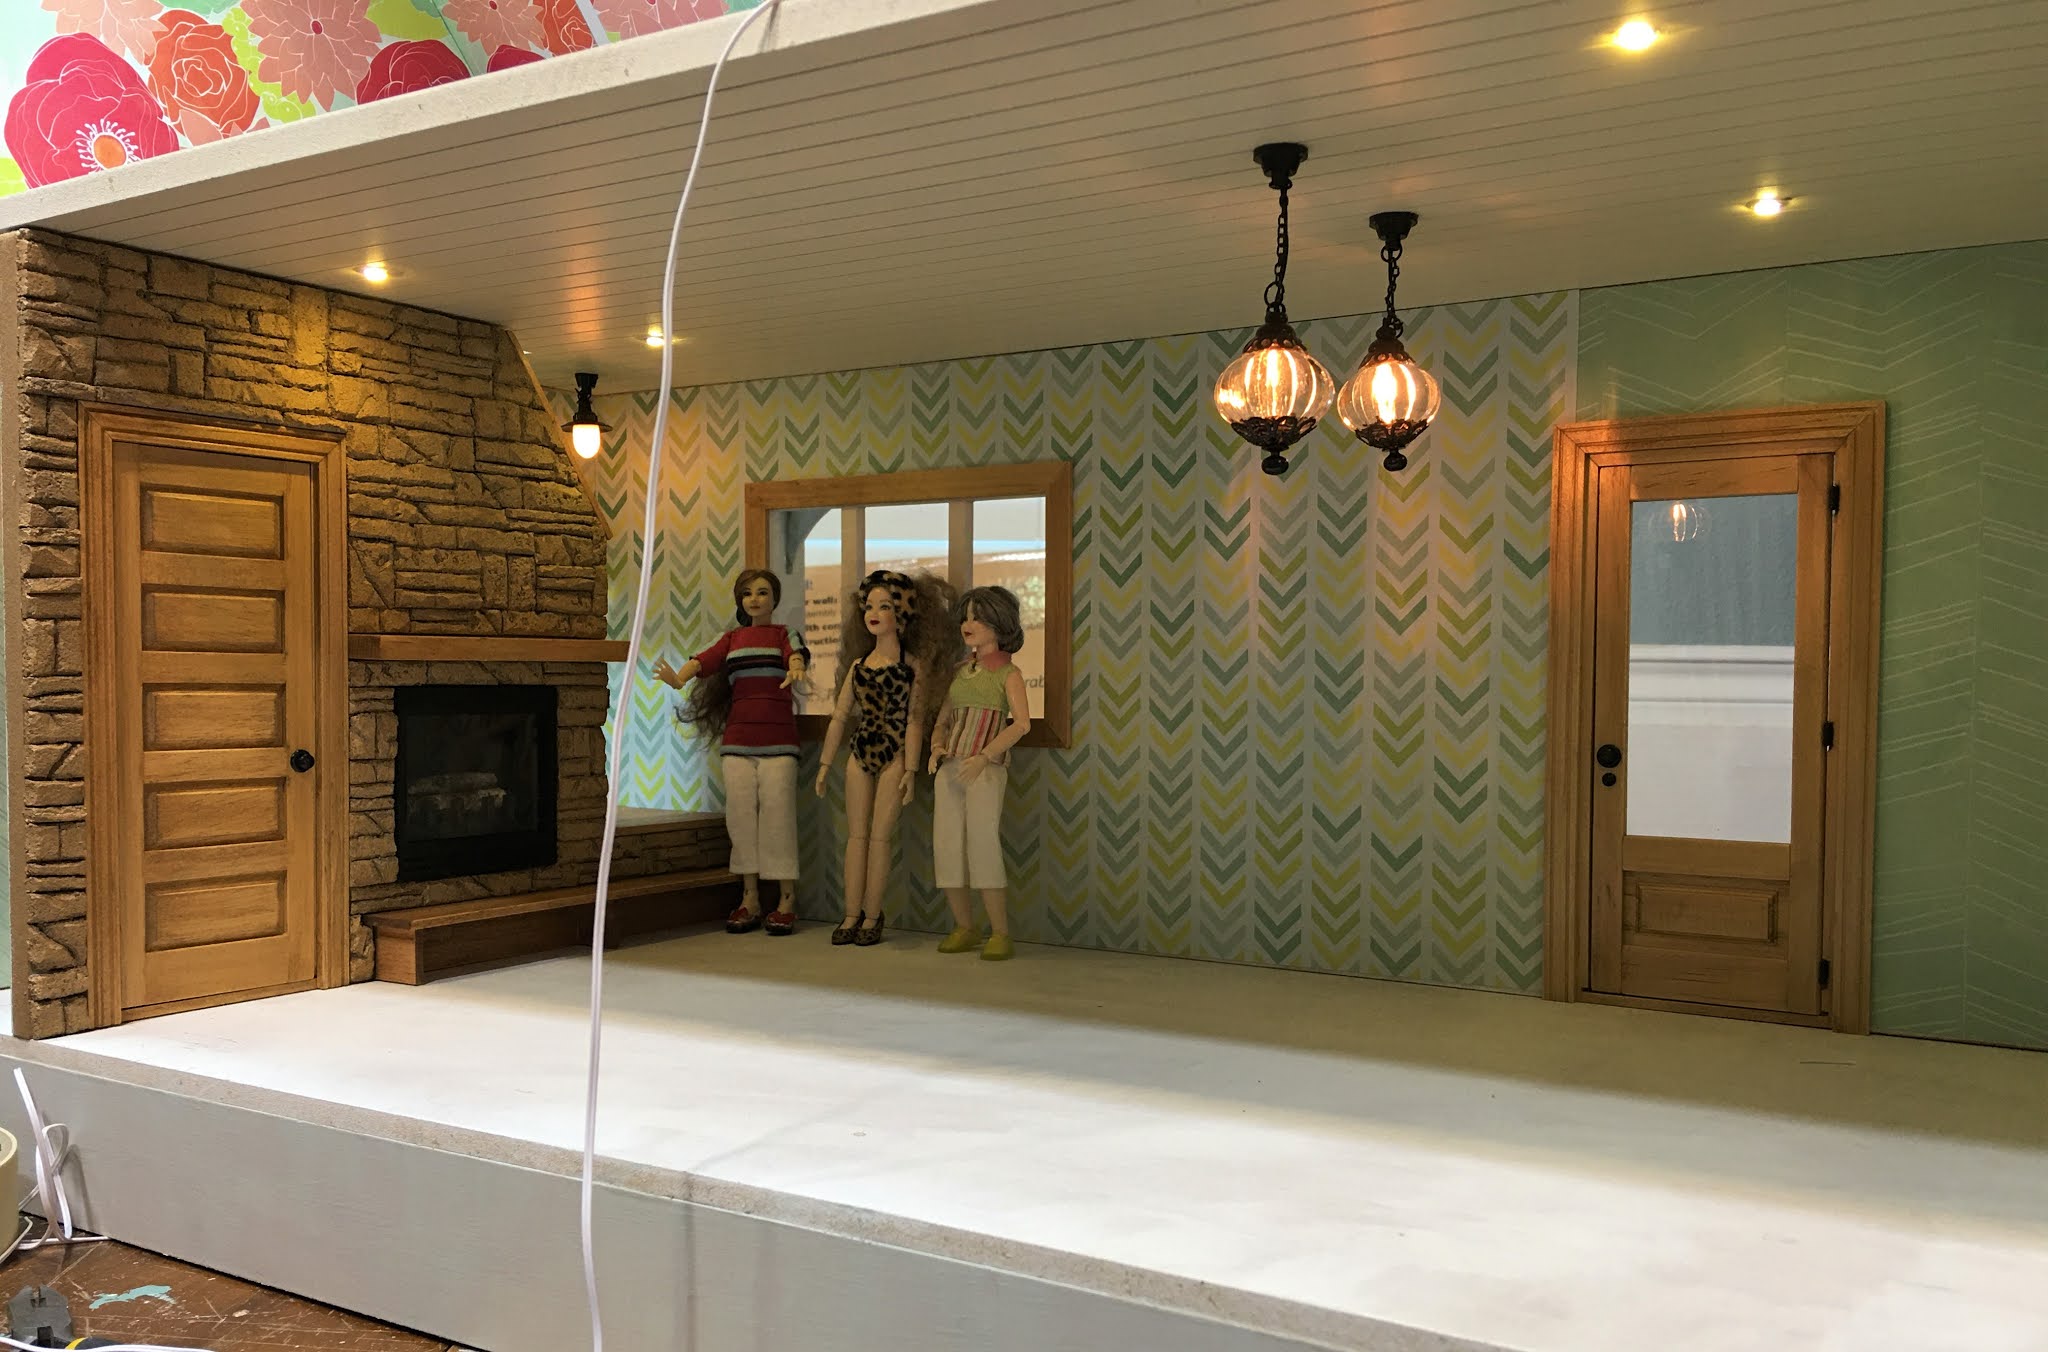
The keen observers out there may have noticed a light fixture installed in the stair landing. Also notice that the front door and window trim are stained and installed.

Yep - another chunk of mini time was dedicated to starting on the lighting fixtures for the first floor. I showed you in last week's post about the four "can" lights for this "open concept" first floor greatroom, but in addition, I added the stair landing fixture, the powder room fixture and two funky retro pendant light fixtures that will hang above the kitchen island. The girls even came by for a look at the progress!
Kairi, the lady in the red striped top, has been the planned occupant for the Beachside Bungalow project since 2016. She has patiently waited A LONG TIME for her home and is naturally beside herself that I am finally making progress!


xo xo,
Jodi
Oh Jodi, I am so loving this project. As always, your impeccable vision is only surpassed by your talent and awesome ability to execute your vision to perfection. I know I am older than you but I want to be just like you when I grow up. What fabulous work! - Marilyn D.
ReplyDeleteThanks so much for the high praise, Marilyn! I am so glad you like how this project is coming along! You already have so much talent and so many good ideas that you never need to grow up - Like all of us, you just need more time! 💗
DeleteWow! A bunch of small mini times have added up to a lot of progress!
ReplyDeleteI love the stairs, such a fun feature for a beach house. And the fireplace came out so wonderfully!
Can't wait to see more!
You've got me wanting to take mine apart and mess with it again.
Thanks Sheila! Oh a remodel could be loads of fun!!! Never really tried a remodel or a rehab on an already completed project but have seen some gorgeous results from others!
DeleteTus recursos son ilimitados, igual que tus fantásticas ideas !!!!!
ReplyDelete¡Gracias Eloisa! ¡Es muy divertido cuando un proyecto te sigue aportando ideas! ¡Soy muy obediente!
DeleteBonito resultado para las lamparas. Quedan geniales todas del mismo color.
ReplyDeleteUn saludo
¡Gracias Marian! Realmente moderniza el aspecto de ellos, ¿no? ¡Es bueno tener la opción y no tener que trabajar con el oro todo el tiempo!
DeleteGreat progress, for limited time. I will be referencing the fireplace build since I will be using the Evans kit, too, so now I know a bit more about it. Love the lights. Black certainly changes the mood, style, and look. That wall is certainly taking shape, nicely. Sasquatch ! We watch those adventures, too. The one show is coming to our area this month. Can't wait to see those shows. Anyway. Karie must be ecstatic; 5 years is long wait.
ReplyDeleteThanks Ann! It is nice to know what we'll be working with ahead of time isn't it? Helps us to strategize! I am glad you like the lights - it is nice to have another option besides gold!
DeleteWe have seen and heard many thigs on our forest adventures that make us wonder. It is great fun to hear others tell of similar experiences, and know their fear and amazement!
How do you eat an elephant? One bite at a time. You are a master at the one bite at a time method; I need to work in that technique. The Beach Bungalow is coming along beautifully.
ReplyDeleteThanks Sherrill! I think they say "Needs Must" across the pond! It is so hard to be bursting with ideas and excitement so even an hour or two of stolen mini time soothes the soul! Glad you like the progress!
DeleteHi Jodi, so much progress again. (even if a bit jumbled, your posts are never too long).
ReplyDeleteIt is great to see all the steps taken with the bungalow since last post. It really is coming together really nice. The future inhabitant is naturaly pleased to see the rapid developments around her beach bungalow.
The fireplace looks great, the little lines on the printed parts of the fireplace work realy well as a decorative feature on them! And the fire looks great with those logs.
And black satin is an improvement to the shiny new brass look on many 1:12 light fixtures. A great way to match those different lights together into one theme.
Huibrecht
Thanks Hubrecht! It is fun to make progress and begin to see the ideas solidify! This is such a nice house to reach into to work - some are very low, deep and difficult! I created the raised grates in the cover design, but the manufacturing marks in between are so uniform and tiny that they look as if they were on purpose! I love when something works to your favor! Glad you like the black fixtures, too! Black has a way of fading into the background instead of being an attention stealer like the gold!
DeleteFrancamente fantástica la chimenea, has logrado un efecto perfecto. Tu trabajo de forrar todos los pequeños elemento para lograr el mimo color te ha salido genial.
ReplyDeleteEstoy deseosa de ver lo de la próxima semana genial , buen fin de semana
Delete¡Gracias Rosa Maria! ¡Estoy tan contenta de que a ti también te guste la chimenea! ¡Fue divertido crear una versión moderna en esta construcción! ¡Espero que disfruten del progreso de la próxima semana en el piso de arriba! ¡Espero tener buenos ratos de mini tiempo este fin de semana!
Hi Jodi! You have made tons of progress in all those "little" moments that disappear if we don't grab them! The painted stairs are a treat! And the fire looks fantastic! I am going to have to get the LED flickering units for the fires in my Lovely Old Dollhouse... in fact the whole house needs the electrics brought "up to code" since it was my first attempt to wire a dollhouse! :) (Half the lights are not working for a number of reasons!) And the beautiful "sticks" you made into the fireplace logs are wonderfully to scale in their size and coloring. Well done to find such a good branch! I am always thrilled to see "little people" in other doll houses... so often they are believed to spoil the effect... but I think they bring life to the project! :) I am really glad to meet "Kairi" and her girlfriends!!! And I can see them planning their own "retreats" as they admire the work you have done! :):) This is really exciting!! Keep up the great work.... even though RL parties are sure to claim your attention too! :):)
ReplyDeleteThanks Betsy! I have found that if I just obey the urge instead of spending the time trying to talk myself out of it I actually accomplish things! Then, I seem to be happier doing real life's chores and in a much better mood, lol!
DeleteWorking fireplaces in The Lovely Old Dollhouse would add such a wonderful ambiance! You will find the gumption to dive into the electrics one day, just as you have the castle fortification, and then you must seize upon the instinct! You'll have the task accomplished in no time and wonder why you put it off because it was easier than you thought! :O)
I have found such treasures on our walks and the feeling of using and seeing them in my mini projects is so satisfying! Nature is a trove of treasures, and I have a whole drawer dedicated to them!
I love the dolls, too! They become alive to me and I really do feel guilty about them not living in a nice place! I have had "the new girl" for a couple years now and need to come up with a name for her and provide more than the leopard swim suit and shoes for her to wear. Maybe I should ask for ideas on the blog?
Have a fun mini weekend with lots of inspiring progress! I am excited to see where your inspiration landed!
So much progress. I love how the fireplace looks with the logs and "fire". Kairi will be fully compensated for having such a long wait. The stair too look great.
ReplyDeleteThank you again for sharing how things were done.
Hugs, Drora
Thanks Drora! I am glad you like the progress! I may have to make the sofa a sofa bed so that Kairi's friends will have a place to sleep when they are visiting!
DeleteGenial la chimenea!!!
ReplyDelete¡Gracias Isabel! ¡Me alegra que te guste!
DeleteHi Jodi! Me again! :) I had to add that putting hinges on the door purely for "cosmetic effect" is probably appropriate for such a charming "powder room" after all! :) It truly does add to the looks!
ReplyDeleteAnd as for the "new girl" she looks to me like a "Roxanne" or a "Sandy"... and with all that wild hair she is either a hair-dresser or a free spirit Bohemian.... just in my humble opinion.... but you asked.... (sort of)! :):):) I can see her in a Gypsy hippie skirt.... Bandana... fringy shawl........ :) Not that I don't have a few Undressed unnamed characters in my world too.... :)
It's the tiny details that may not even make it to the consciousness that really bring minis to life, huh? I love the name Roxanne for her! It's perfect and ever it shall be! I had a growing up friend with that name and she was fun, fierce and loyal! And of course, now that she is named, she'll need a house, too! I'll start letting my mind imagine which kit, lol!
DeleteHello Jodi! I cannot wait to see this finished. I love the fireplace and the bricks. Again I love those bricks!! Am glad to see people will be occupying the beach-side retreat. I look forward to seeing the progress on this house.
ReplyDeleteMini huggs,
Conny
Thanks Conny! I am really excited to finish up the bones on this one, too, as I have so many of the furnishings and décor that I have been holding on to for 5 years now!!!
DeleteOh what a wonderful post! ;O) And so much wonderful progress - I'm always in awe how well you're using your limited mini time. Step by step everything comes together, every detail matches the next one and in the end a very harmonic, inviting and friendly place is created. I feel so very happy for Kairi - she had to wait VERY long (Made me just think of Rosey who had also been so patiently waiting for me to build Flower Cottage for her *smile*) But what we see so far already proves that it was worth to wait since 2016 for this dreamhouse being built. And I am convinced Kairi is a clever young lady knowing well that back then you would not have been able to build such a stunning modern fireplace all by yourself with just the help of your trusted 3D-printer. Oh, and not to forget - back then this very special branch would not have been there waiting to be collected by you... yes, no doubt... waiting so patiently for so many years really paid off for her. ;O)
ReplyDeleteSpraying the hardware and the lamps black was a brilliant detail - and you had me with the reference to Betsy about the fake hinges. *LOL* I also like the colourful stairs very much, a great idea... and now as always I'm looking forward to see what you're going to do next.
Hugs
Birgit
I am so glad that once again it has been proven that patience is rewarded, and there is a right time and place for everything! Kairi at least had good company while she waited, and hopefully time passes much more quickly when you are that small!
DeleteNext, there is a lot to choose from! Hopefully I can make the most of my evenings while Russ is away working on someone's vacation house!!!
Great progress! The modern fireplace is fantastic and the lamps look perfect. I really like the colorful stairs.
ReplyDeleteThanks Faby! It is such a departure from the original ideas for this kit but I am definitely being lead by the nose! :O)
DeleteI love what you have done with your lights Jodi, they look so good, and the logs are a great idea, that’s two ideas I will remember for my next project. The finished fireplace looks fantastic. Fabulous work.
ReplyDeleteThanks Polly! The best thing about us sharing our projects with each other is the way it stirs our imaginations! I am so happy that you have gotten ideas and that you are already planning another mini project!
DeleteAll through the first paragraphs of your post all I could think was, show us the fire! It is freaking awesome!!!
ReplyDeleteI like the staircase too, and painting the fittings black was a brilliant idea.
Thanks Megan! 💗
Delete