
Once the foundation was good to go, I was able to get the house pieces into dry fit. This way, I could begin to formulate ideas as to the layout and the things I want to include. The kit comes with a divider wall for the first floor, as well as two that can be used upstairs. This leaves the potential for 5 rooms.
 |
| Kit Box Interior Photo |
My original renderings for the project back in 2016 left the first floor open concept with the kitchen on the left side and separating the living room with a large island. That's about as far is I got back then in terms of layout, but I still like the open concept idea. This time around, though, I decided to flip the arrangement. The kitchen is on the right side, and will be the room you walk into upon entering the front door.
I wanted to create a stairwell with the first floor divider wall. And I wanted to create a more realistic stair opening in the second floor.
 |
| Looking at what will be the front of the house. |
 |
| Notes bringing the stairs forward about 3/4" and increasing the opening 2". |
Some Real Good Toys kits provide floor pieces with wood floors pre-scribed into the MDF. There is also a shiny paper product laminated over the surface to simulate wood grain. I don't particularly think the wood grain looks in scale, so I have opted, like many do with this kit, to use the scribed side as the first floor ceiling, This lends itself nicely to the ship deck/nautical feel.


I had the primer out so decided it was a good time to get all the pieces primed. Following the instructions here, I applied a light coat of primer and then sanded it back until it barely showed any longer.

I spray painted the ceiling piece with several coats of off white after adjusting the stairwell opening per my notes.

The grooves on kits are often overlooked in our rush to make progress. Surprisingly, even a tiny amount of dried paint and primer can have a profound effect on how the kit pieces fit together. Taking some time to sand them smooth and clean now can be very helpful in avoiding problems with tight joints or misalignments later on.

 |
| Before Sanding & Cleaning |
 |
| After Sanding & Cleaning |
Be sure to clean up the ends of the pieces going into the channels, too. Then pre-fit them all again before you get glue anywhere near them. Sliding the piece back and forth in the track also helps to flatten any fuzzy MDF and ensures a perfect fit at glue time.


Once the primer was finished it was time for a second dry fit. This is my opportunity to mark for wallpaper, plan my lighting, audition wall positions and all the things that are easiest to do before anything is permanent.

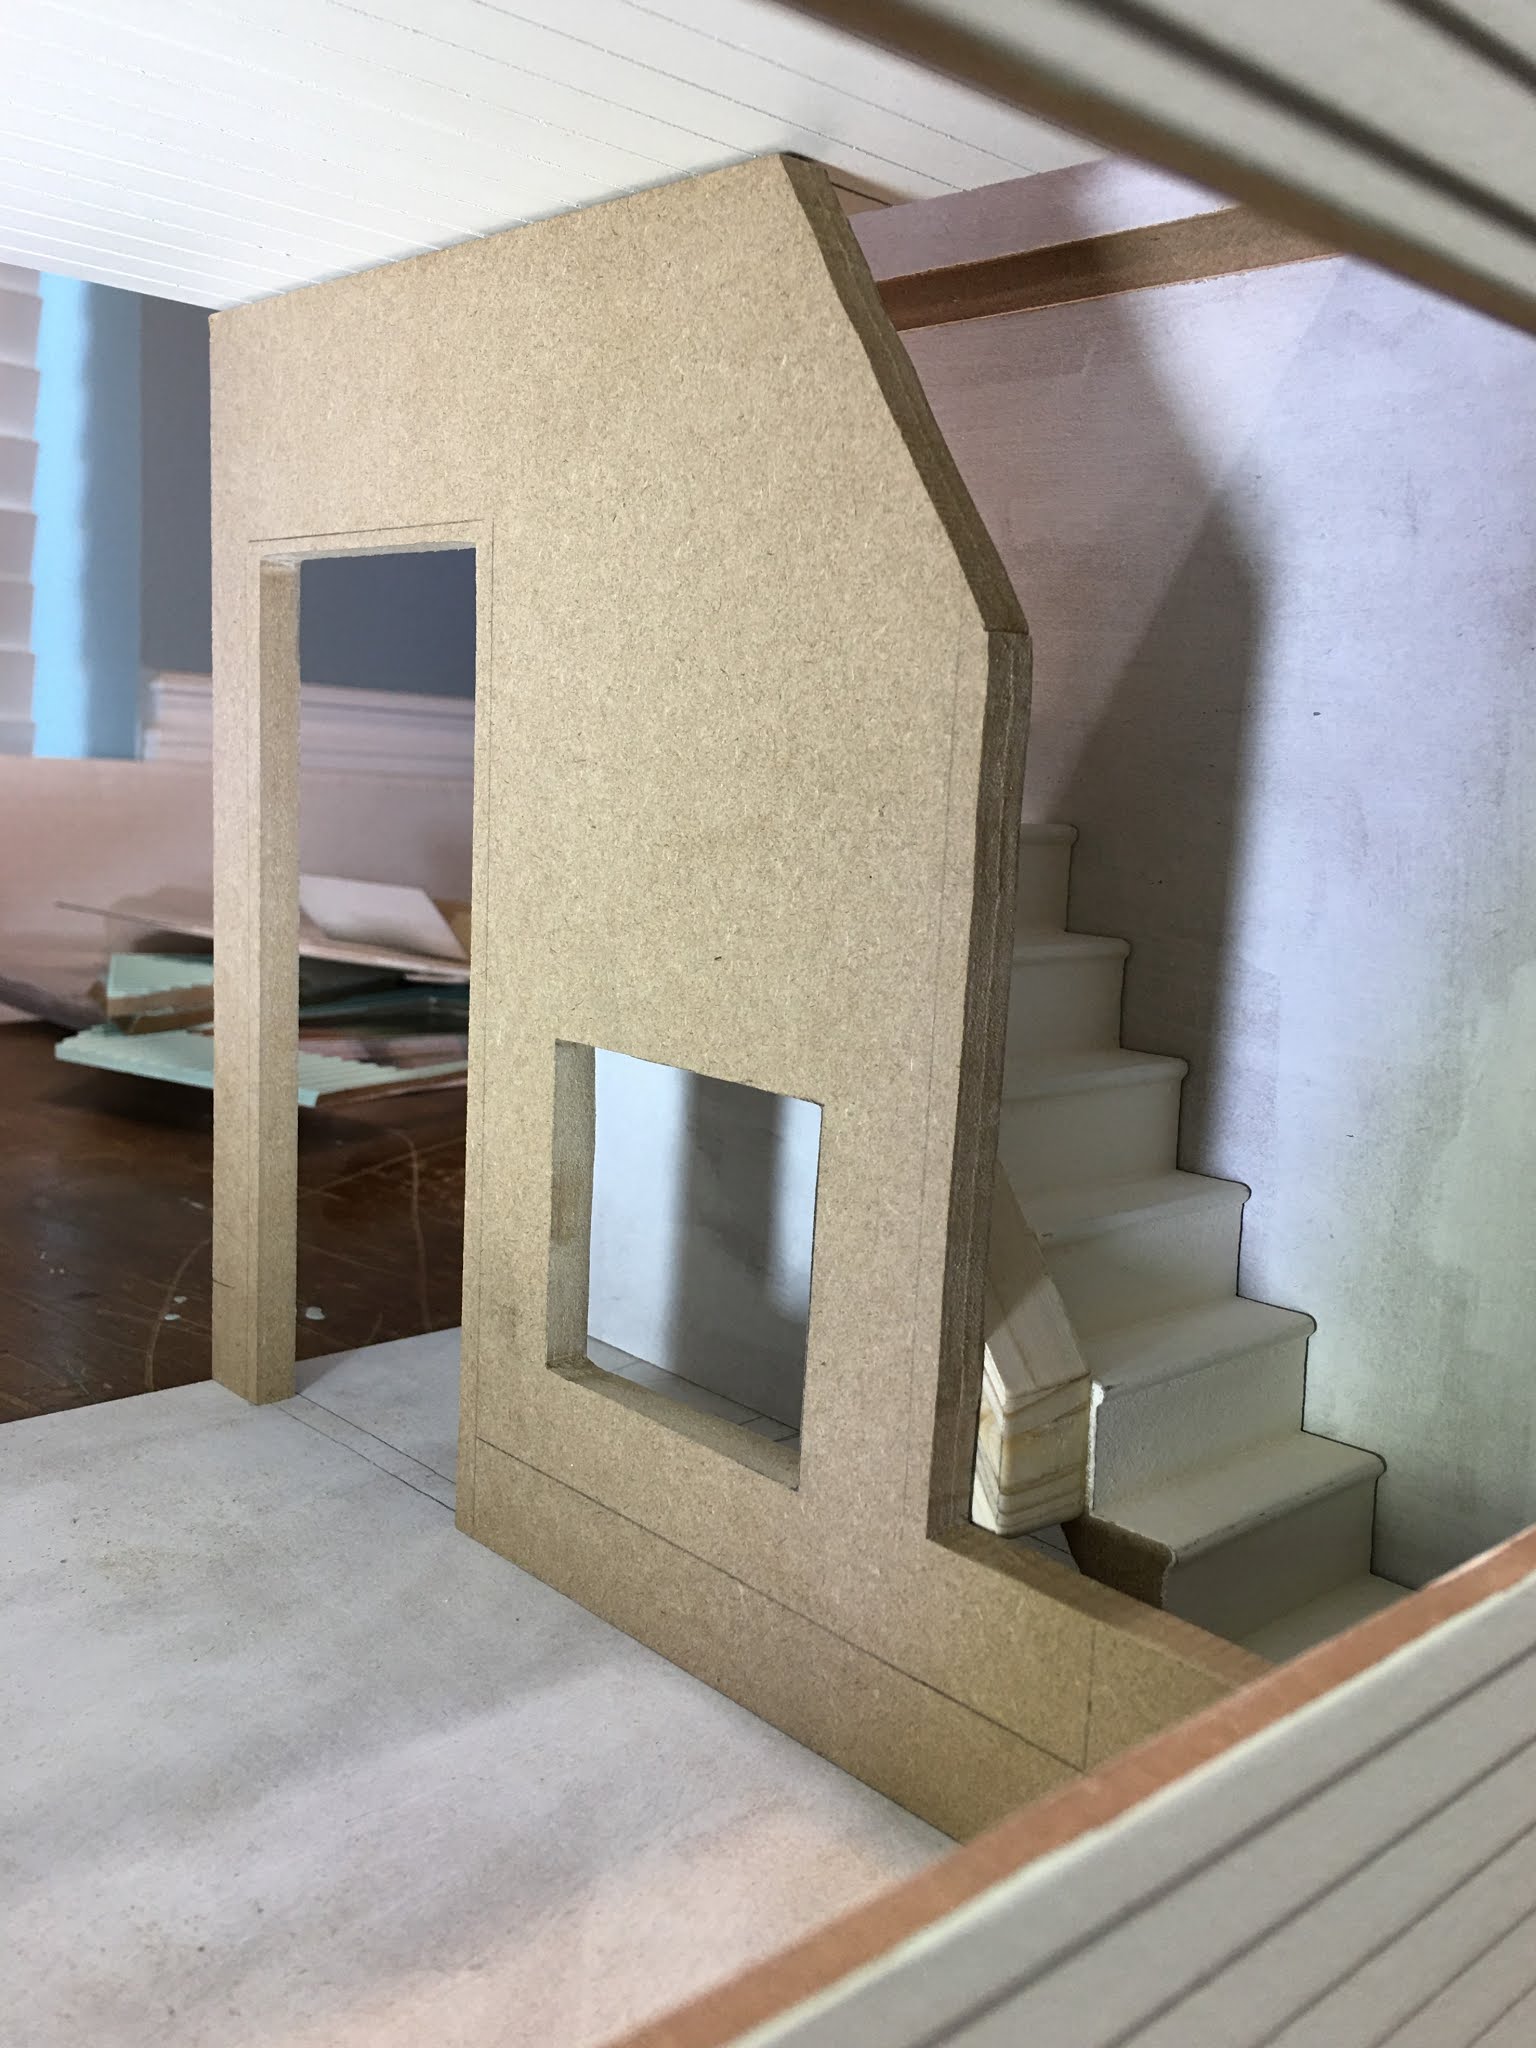
I made a mock up return to look at the space and see if I liked it. I did! And by taking this step I determined that I would have room for a powder room under the stairs. I have seen one or two Beachside Bungalows with a powder room under the stairs and I love the idea. But because the kit stairs are only 2-1/4" wide, it leaves the power room looking way too dysfunctional and unrealistic, in my humble opinion. I had an idea about how to improve the realism and function, while still using the kit's stairs. But first...


I needed to cut the divider wall to accommodate the stair return. I marked the angle of the stairs on the wall, then transferred that angle to create a wall bannister which is three inches above the stairs. That's standard code of 36" in 1:1 scale. I left a wall support piece at the base for the landing support.


Because 2-1/4" is just not wide enough for a functioning powder room, I added a 3/4" x 5/8" piece of scrap trim, cut at the stair angles top and bottom, to the side of the stairs. This will bring the divider wall out to leave 3" for the width of my powder room. At 4-5/8" long x 3" deep, it will still be a compact space, but a more realistic one. I will have to be creative with the sink and toilet placement, maybe having to create a custom set on my 3D printer. The door will definitely have to swing outward. I considered a pocket door, but that will interfere with other plans for the wall.


Something I have not seen done on a Beachside Bungalow kit yet is a powder room AND a fireplace under the stairs. This was an exciting prospect! I marked the fireplace opening, then drilled pilot holes in the corners to allow my scroll saw blade to slip in for the interior cut.


Not to worry, I chipped it away from the opening, and once the firebox is painted and has grates and glass on the front it'll disappear, if not look intentional. At least I hope! ;O)

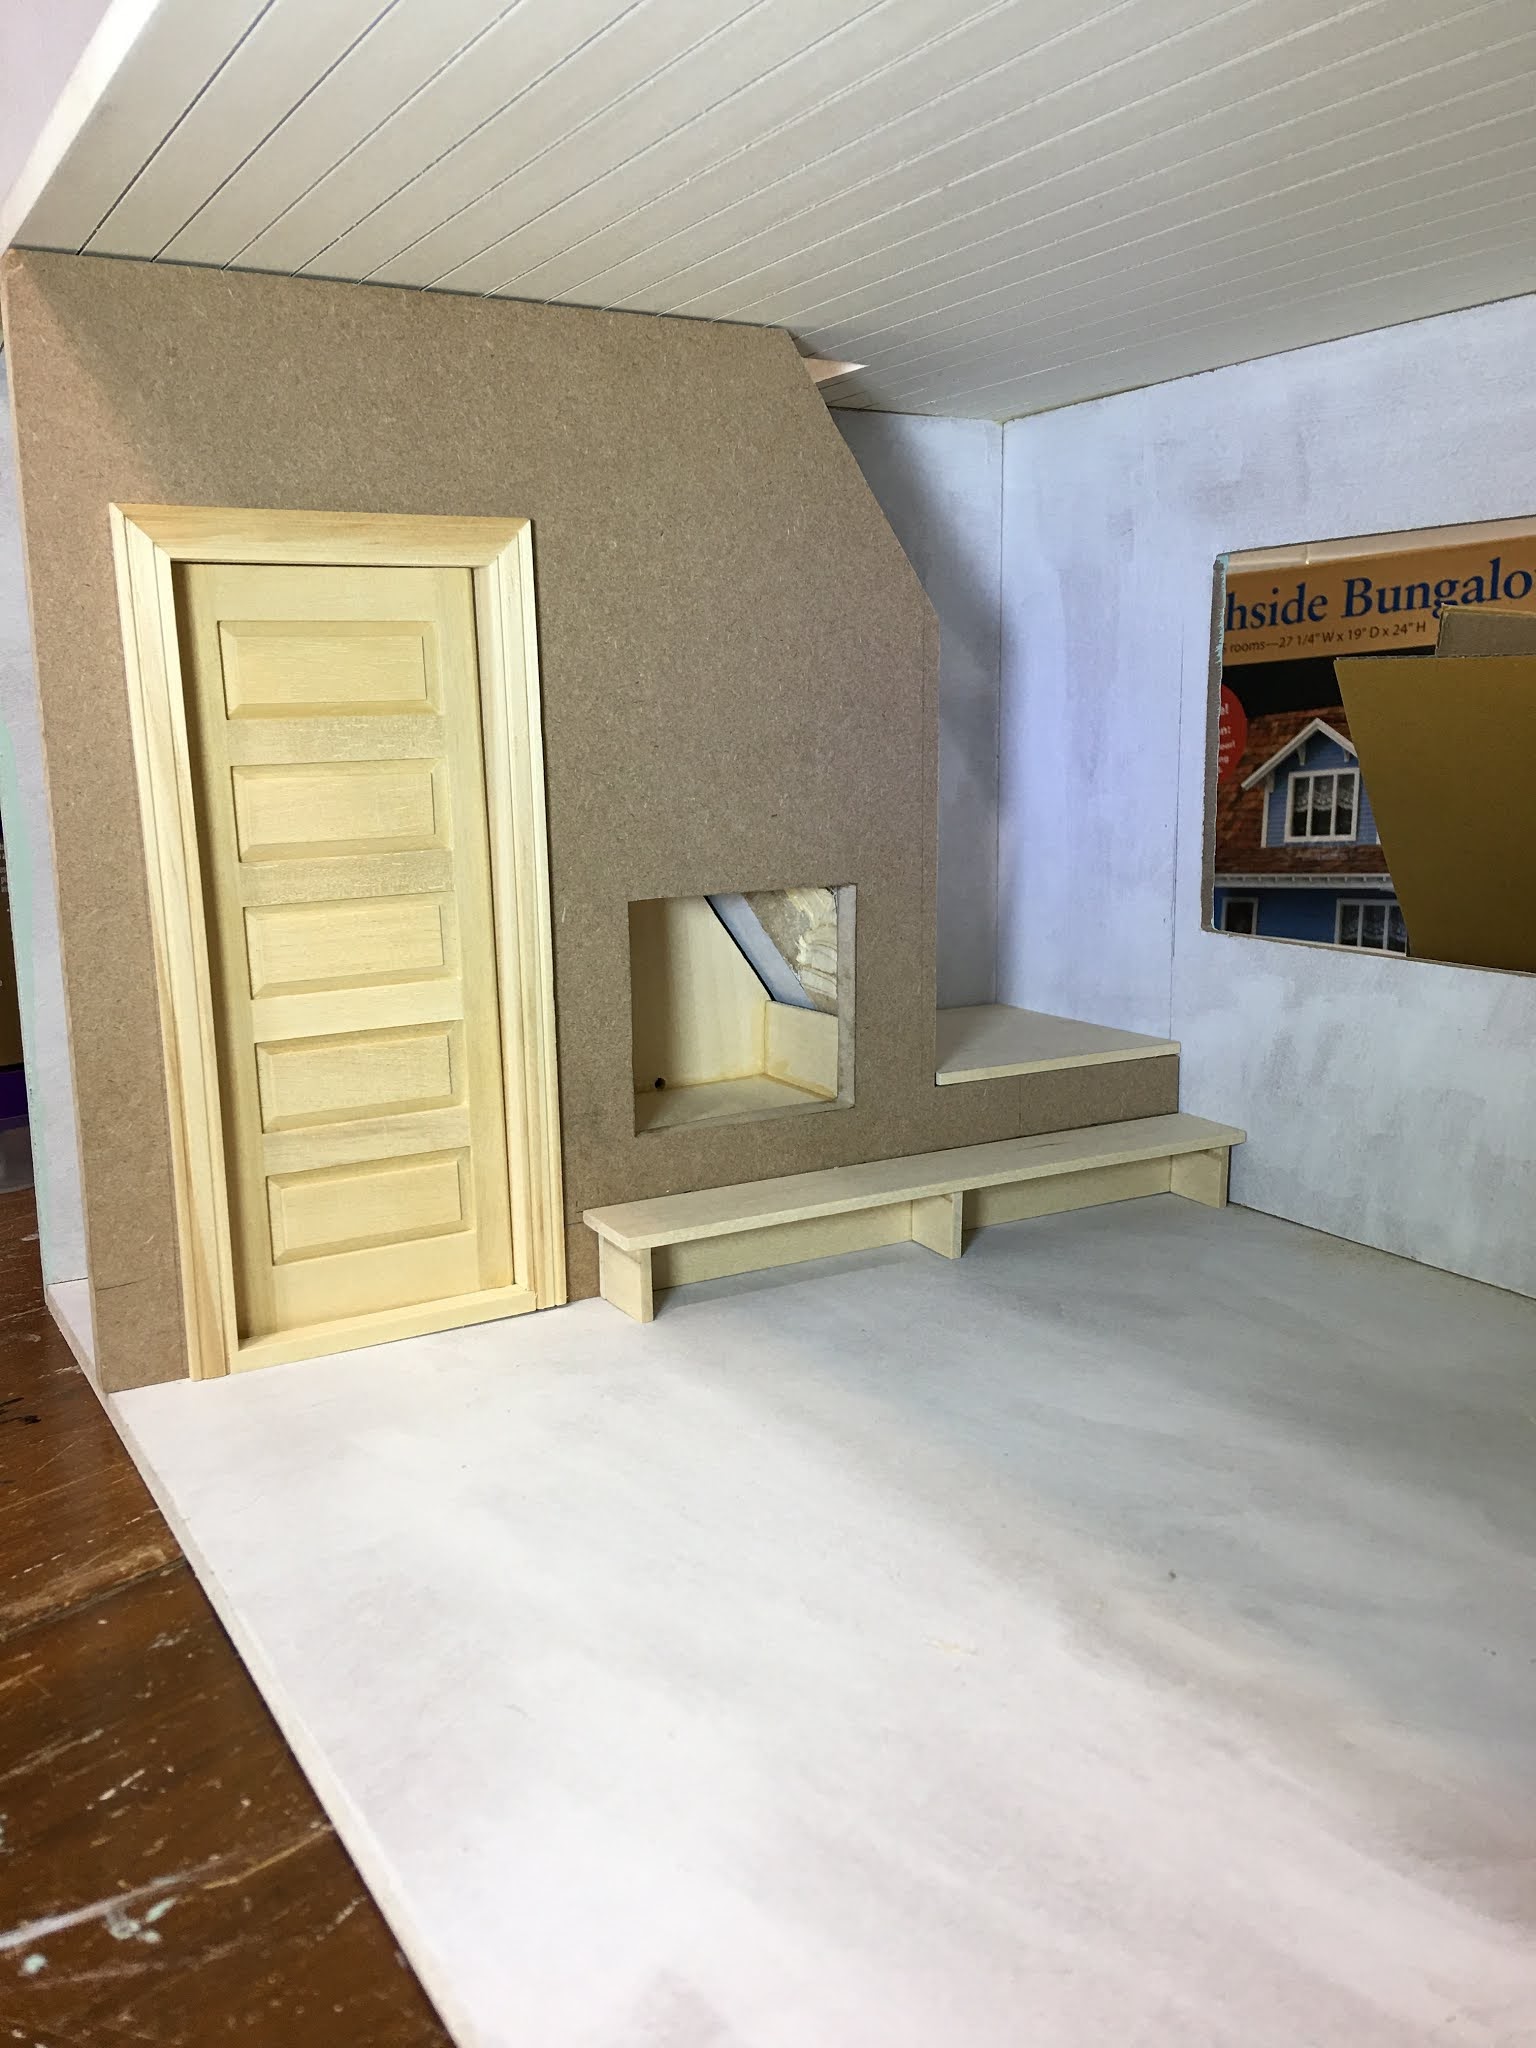
Here's what it looks like so far from the front porch window. I just love a good peek-a-boo staircase!

Here we have the firebox installed.


Here I have cut the wall separating the powder room from the fireplace area. I love a room where you see the stair's angle at the ceiling! So charming! There's no denying that it will be a tight little room. But when you have to go, and the other bathroom is occupied, you won't mind a bit! :O)


Now I needed a brace for the landing. Part of the landing platform will sit on the second stair, part will sit on this brace which I cut from MDF scrap.


Now, how about a final step that is also a seat to sit on by the fire? Beach nights can get chilly! The wall is going to look much nicer with the stack stone installed.

I wanted to have a quick check to be sure there was room for a fridge and cabinets on the opposite wall. I was happy to see that it is more than ample! I just love proof of concept!

It's never too early to start the lighting plan. I will be using a combination of warm white 12 volt LEDs mixed with 12 volt dollhouse lights from my stash. The LED can lights will add supplemental lighting to the decorative and traditional 12 volt dollhouse fixtures that I'll use. Some of the dollhouse fixtures are vintage and are wonderfully funky! I am so glad that I have finally found the perfect project to use them in!


Next time, I hope to have the second floor layout settled upon. Then I can make channels for wiring, prep some walls and move into the gluing phase! It's so wonderful to be excited about an old idea again!
xo xo,
Jodi
Que bien!!
ReplyDeleteHas comenzado el montaje y con ideas geniales.
Un saludo
¡Gracias Marian! Fue un espacio desafiante, ¡pero aún más divertido!
DeleteMe encanta Jodi como transformas los kit y les das un toque ten personal ; me parece increíble como ganas espacio.
ReplyDeleteBesos
¡Gracias Rosa Maria! ¡El problema es saber cuándo dejarlo lo suficientemente bien! ¡Me alegro de que vengas en el viaje!
DeleteAunque no esté terminada, ya se vé lo fantástica que va a quedar.
ReplyDeleteSiempre me asombra tu capacidad de creación.
¡Gracias Eloisa! Simplemente no puedo dejar estos kits como estaba previsto, ¡pero realmente estoy tratando de contenerme en este! El kit ya es tan lindo, ¿por qué no puedo dejarlo solo?!?
DeleteQue buena distribución del primer piso Jodi! Me ha gustado mucho la idea del aseo pequeño y aprovechar el hueco pequeño para instalar una chimenea, además de aprovechar el primer escalón como asiento cálido y confortable!
ReplyDeleteDeseando ver como desarrollas el espacio en el segundo piso!
Besos.
¡Gracias Pilar! Me encanta cuando ves una casa antigua que ha maximizado su espacio a lo largo de los años, ¡pero es difícil saber cuándo parar! A veces, menos es más, ¡y eso me resulta difícil de aprender!
DeleteOMG. I am so excited about this build. I have struggled and struggled to get a powder room under the stairs. I even played with moving the stairs when you put yours--after I had cut the opening for the addition and I considered narrowing up that opening to move the stairs. . . but I had already glued the main house together. Now that I see you have actually extended the side of the stairs to create enough room for the powder room. That's another reason I gave up on the idea because it was too narrow. I haven't built the stairs since I am waiting for stair supplies to arrive--today then I will build the stairs and maybe rethink the powder room, since I had abandoned the idea of walling off under the stairs and will leave it open. I just don't know enough to measure and cut to get pieces to fit accurately--that's what I admire so much about you. I will enjoy watching you work.
ReplyDeleteThanks Ann! I know what you mean about knowing that there is something there that could be unique and fun but not quite knowing how to achieve it within the confines of the kit. I hope the perfect solution comes to you and I wish I lived closer so that we could put our heads and hands together and come up with a plan! If you decide to use a filler stair angle as I did, just tape it to the stairs and use that to draw the angles that you need to cut for the floor and ceiling. You could even use cardboard and then disguise it as wood if your cutting tools are limited. Even with the house glued, you can still cut and cover openings. They may look a mess to begin with but spackle and glue will do wonders to hide the attempts. A hand held Keyhole Saw or an motorized Oscillating Multi-Tool type saw will work to create new plunge cuts for doors or stair holes. I hope you find the solution that makes this house all you dream it can be!
DeleteThat stair wall is a real work horse. It not only provides a railing for the stairs, it encloses a powder room and supports a fireplace! Great work!
ReplyDeleteThanks Sherrill! Where there's a will there's a way!
DeleteI love the direction this is heading in Jodi. What a fun but also realistic layout and ingenious way of making the stairs/powder room wider! And yes, with a stone facade, you will be able to disguise your mini trickery!
ReplyDeleteThanks Shannon! I am enjoying the challenge and just hope I still like the decisions in the end!
DeleteThis is the Jodi magic you can do so well, genius to make a sort all in one unit of the toilet, stairs and fireplace! It's a wonderful solution for realising all in one your wishes and plans. Your find of a fireplace under the stairs, in combination with the first step of the stairs as a bench, is a true gem, Jodi, I love it.
ReplyDeleteHugs, Ilona
Thanks Ilona! I am having fun and just wish I could get lost in the project! Having to stop for real life things is really cramping my creativity, lol! I am so happy you are liking the prospects, so far!
DeleteI love your way of assembling dollhouse kits. There's always room for changes resulting in stunning and, amazingly different from the original, dollhouses. This is what I call "Jodi's touch".
ReplyDeleteI missed your previous posts and will have a look at them later.
Hugs, Drora
Thanks Drora! It's so much fun to put a little spin on the kits and let yourself explore ideas! Hope all is going well for you and in Israel! You continue to be in my prayers! Hugs!
DeleteJodi: I have been away from the mini world for a few weeks and am now getting back into the swing of things. What a treat to see your newest project. All of your ideas for this kit are fantastic, as usual. I thank you so much for sharing such detailed posts as I always learn so much from each and every one of your posts. You inspire me and make me a better miniaturist all at the same time! Bug hugs, Jodi! - Marilyn D.
ReplyDeleteThanks for you kind sentiments, Marilyn! I am so happy you are back on your feet and getting creative again! Can't wait to read your new post later today!
DeleteI can only agree with our dear Drora - this kit already got a very good dose of Jodi's touch! I've enjoyed very much discovering with you the possibilities this kit offers when being in the hands of a talented miniaturist. I'm always in awe with your stairs having a landing... but this time you've outdone yourself. The idea of a bench being at the same time a step for the stairs is brilliant. And I also like how you've managed to find space for a powder room - which also taught me a new English expression. In German we call this type of small or tiny toilet rooms (literally translated) guest toilets.
ReplyDeleteAs always I'm looking forward to see more! ;O)
Hugs
Birgit
Thanks Birgit! I feel like if you had been a teacher a whole generation of kids would have grown up believing that they were awesome and could do anything! 💗
DeleteA guest bath is a perfect way to describe the powder room (extra room with a sink and toilet)! It is just simply known in every house that you better never do your #2's in there, and it better stay in pristine cleanliness in case any unexpected guests should come by! 😊
Siempre encontrando la manera de sacar los mejor de las cosas!!!
ReplyDelete¡Gracias Isabel! ¡Disfruto de un buen desafío cuando se trata de aprovechar al máximo el espacio de un kit de casa de muñecas!
DeleteA good start and creative.
ReplyDeleteThanks Stephanie!
DeleteHello Jodi, I have been following your blog with great interest for a while now. You are so generous with sharing your journey in mini land and I am learning a lot. I love that you can 3d print items to meet special needs. I am envious. I ma retired now and am getting ready to build my first ever dollhouse.
ReplyDeleteThanks Aina! I am so glad to know you are here on the journey with me! I am also very excited to hear about you embarking on your first mini build yourself! That is such an exciting time, and I wish you every ounce of joy!
DeleteI simply adore your architectural improvements to the Beach Bungalow! Instead of just another dollhouse, it is starting to have real character and it's going to be so cozy to live in.
ReplyDeleteI'm in awe of the speed at which you are progressing. Very soon, the entire structure will be there and you can get down to the fun of decorating.
Thank you also for the tips about preparing the pieces for assembly. When I finally get around to building Beacon Hill, I will have no excuses for the mistakes I make.
Thanks Megan! I am so happy that you are enjoying the progress so far! My work has come to a screeching halt: parents are coming from Arizona and getting the house ready takes all the free time. They will stay with my brother, as well, and are not sure how long they'll visit for. So I'll just pick back up on the kit again as time allows. It's going to be so great to squeeze them and celebrate that all of us made it through Covid in one piece!
DeleteI can't wait until you start on the Beacon Hill! It looks like such a fun kit with so much character! And the tab and slot houses are so much fun to customize! You'll turn it in to a show stopper!!!
It is a blessing that you can be physically together with your family again, Jodi. One of the things that really bothers me about this pandemic is the impact on older people. My 83/4 year old father in law has been trapped in his house in Germany for 18 months now. Normally, he would come and visit us for a few months during the European winter and be involved with all his clubs and societies at home in between. At that age, I can understand his frustration. One feels that your time is running out. We Skype with him every day but it is not enough.
DeleteEnjoy the visit and make the most of the time with your parents!
I can't wait to hear that you and Henning are with his dad again! It has been so hard on our older folks and being together again is the only remedy!
DeleteDear Jodi, I LOVE that new kit excitement! (Even if it is an "old" new kit!) LOL! The new ideas you have going are looking promising indeed! The enclosed stair is a great example... added bonus powder room space! And a fireplace too! It is amazing how much can be fit into a small space. And the care you take with things like the paint in the grooves... don't we all know the times we didn't? I am really looking forward to seeing this beach house develop! :) (And I'm so late to comment here... I already have a clue! LOL!)
ReplyDeleteThanks Betsy! I am super late, too! Parents visiting was wonderful but it had a way of stopping time for all "normal" activities!
DeleteNew kit excitement is the best and why we must all start so many of them so often! 😁
I hope this project comes together in a good way but in any case I am so glad to have you along on the adventure with me! Can't wait to catch up on your posts about the doll maker's studio!
It's a fantastic project. I really like the structure.
ReplyDeleteThanks Faby! I hope you find some things to inspire your creativity for your next project!
DeleteJOdi, I just read this blog and thought I should throw it to your side for when you start adding finishing touches.
ReplyDeletehttps://ameblo.jp/tsplace/entry-12682642523.html
This is such an amazing blog, Megan! Thanks so much for sharing it with me! I am adding it to my blog roll and look forward to combing through all of the creative ideas! 💗
Delete