
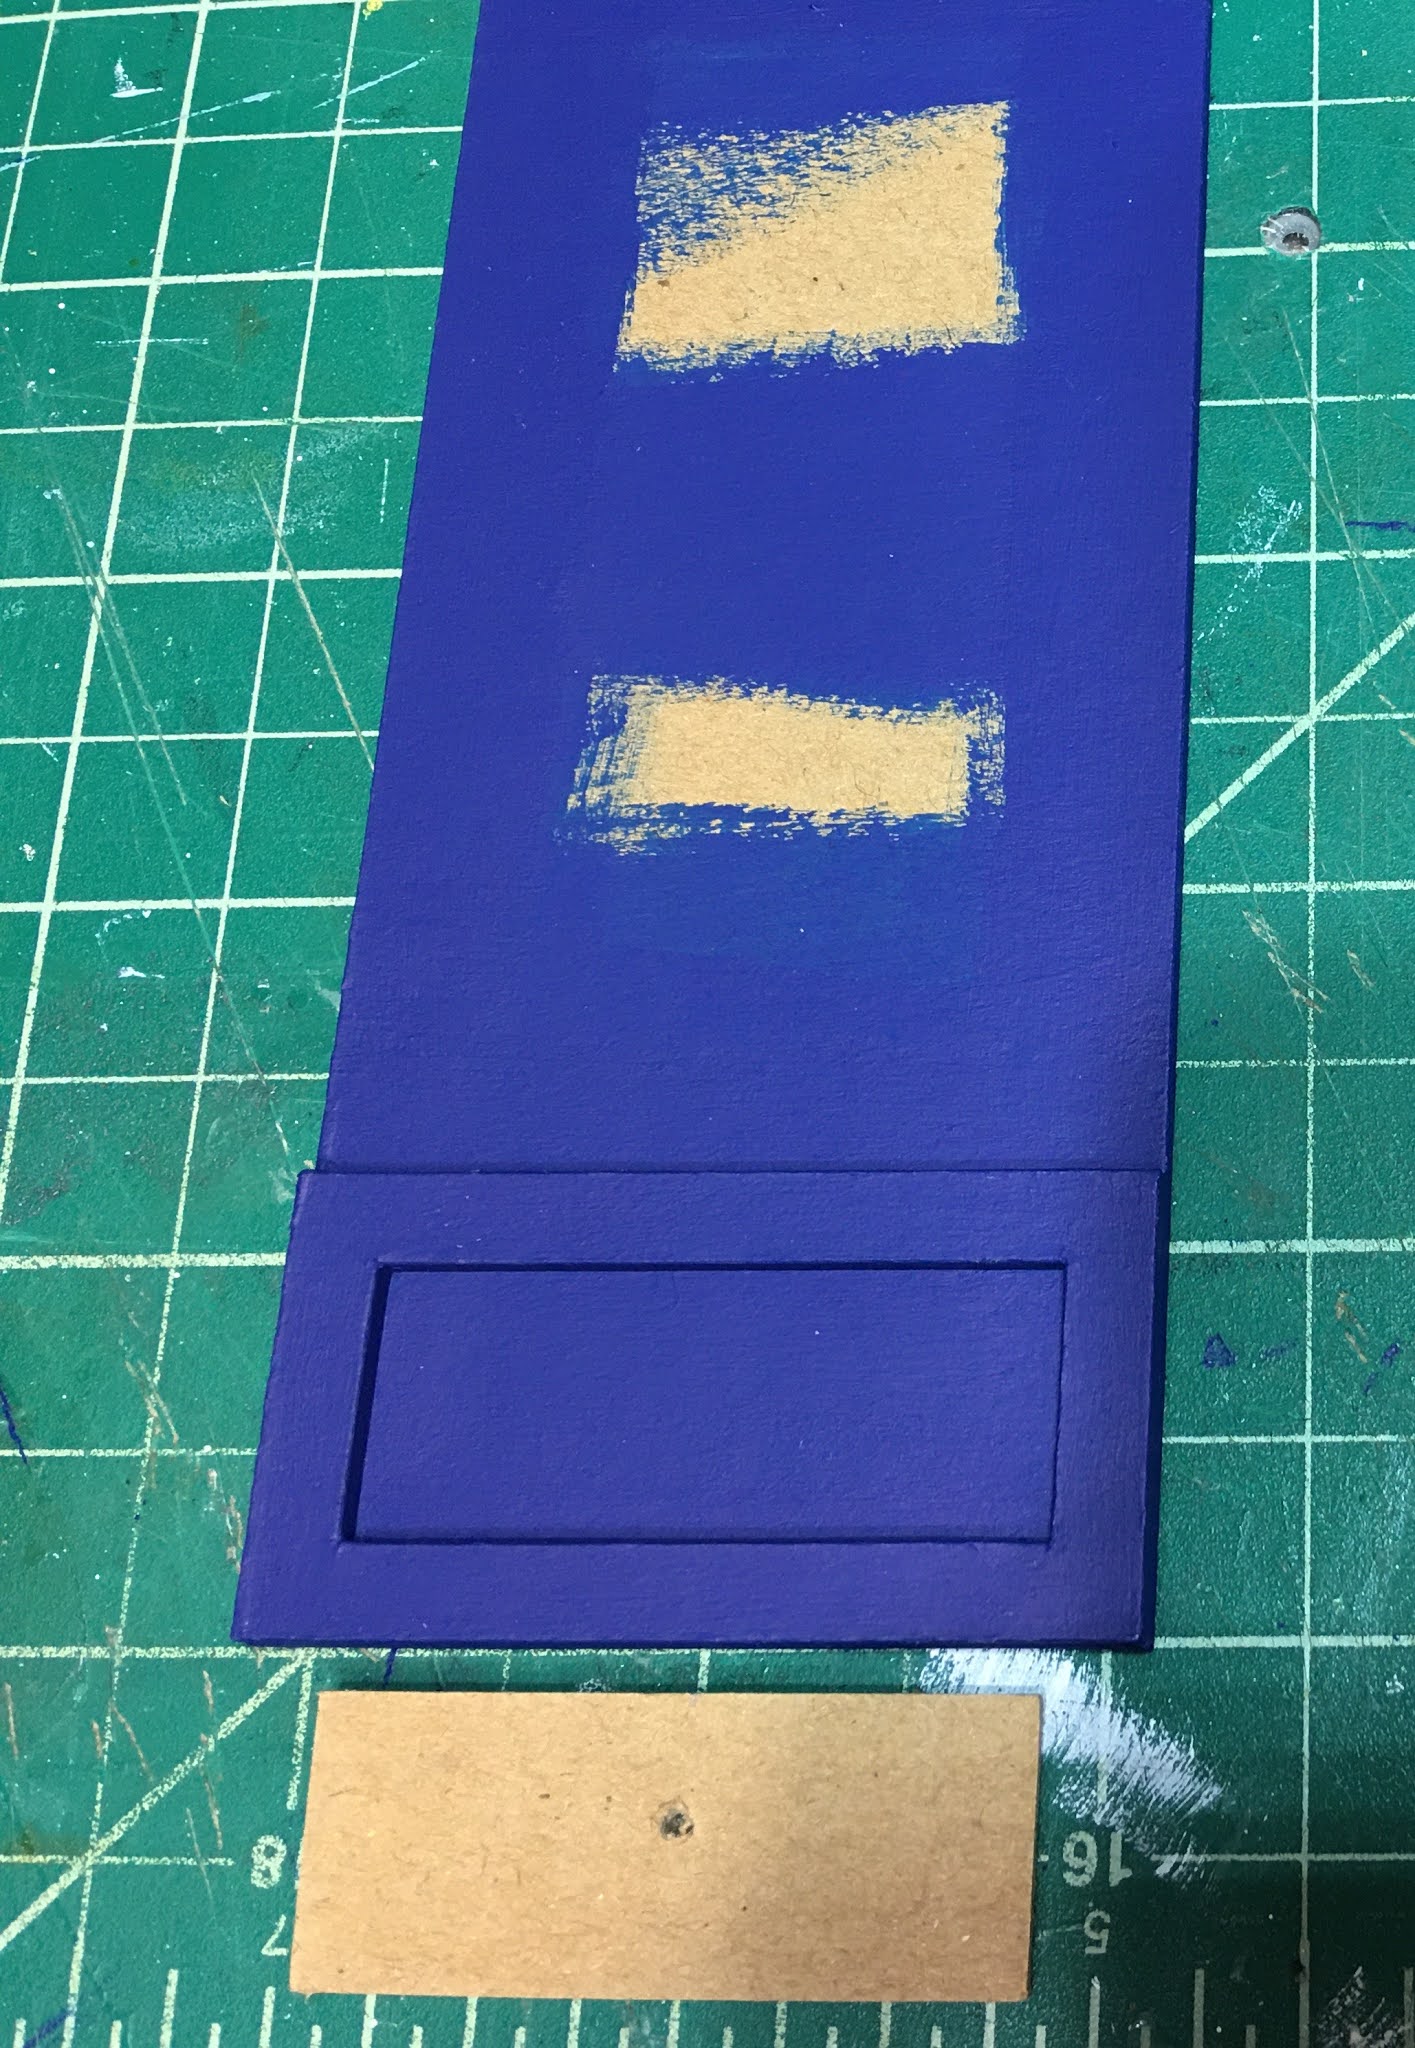
For the cupboard doors, I took a piece of scrap wood which is the same width as the shaker frame - 1/4". I drilled a hole the distance from the top that I wanted the knobs to be placed and made sure it was centered.

Then by placing the jig flush at the top of each cupboard door, I could use my pilot hole punch to mark the door where the hole needed to be drilled.

Nearly perfect every time! I really like these knobs from Elf Miniatures. They are really heavy, have a lovely ball detail on the end and since they are quality metal, they are very shiny!

For the drawers, I had jigs at the ready. They were the inside cut outs from the Cricut cut cabinets. I just had to measure where I wanted the handles and then make the pilot holes in the chipboard. Some of the drawers have one knob and others have two depending on the width. There are more photos with the knobs later in the post.
The rendering below demonstrates many hardware configurations both for upper and lower cabinets. Pretty much anything goes. You are free to be creative and do what you like best when placing your handles.

The next task was to add lighting to a few of the cabinets - the ones with "glass" doors. I'm using Evan Designs LED products exclusively in this room box, including the transformer. This is a first for me because though I have used LEDs in the past, they are usually sprinkled among traditional 12 volt lights. I wanted all of the bulbs to last as long for Tasha as possible. For the cabinets, I am using the pico sized lights. I didn't want to use warm white LEDs because I'd like to achieve a more modern vibe with this project. The yellowish hue that the warm white lights give off works great for other settings, but here I wanted just bright white. I found that the cool lights were reading a bit too lavender.


To mitigate the color and tone down the brightness a bit, I combined a 50/50 mix of white acrylic paint and Mod Podge to apply lightly over the bulb. It worked beautifully! It's subtle, ambient light with no more purple hue!

In order to finish the "glass" front cabinets, I had to fill them with their display items. Luckily, I had a bunch of blue and white kitchen stuff left over from the New Orleans kitchen. I am saving the more contemporary and everyday kitchen items for future open shelving. I thought it would be nice for Tasha to have the "family heirloom" type pieces in the china cabinet. None of us gets to escape the stuff our family forces on us, whether we want it or not, lol! I hope she doesn't mind a little homage to the past with "grandma's china" in her modern kitchen.

Because this will be her first dollhouse as an adult, I didn't want to overwhelm Tasha with a bunch of items that come loose and have to be set up again and again. For this reason, I am limiting the loose miniatures to things she can easily change out seasonally or when she's in the mood to create a cooking scene to photograph alongside her real life culinary creations. She posts a lot of her delicious looking meal photos on Facebook and Instagram. She did not get her cooking talent from me!
Once the cabinet items were glued in ( hopefully forever due to the combination of Fast Grab Tacky and Gorilla Super Glue) I affixed the doors. They will not open. Then I installed the double oven appliance front kits and the dishwasher front kit from Elf Miniatures. It's beginning to look like a kitchen that I think Tasha will be excited about!

Time to start on the wet bar. I made an upper and lower unit using the Maker, with part of the lower unit dedicated to a wine chiller. I had not planned for a chiller last fall, but became excited about it when Tasha mentioned how great having one would be. Luckily, I just happened to have sheets of aluminum in my stash so I could make one. This will be my first wine chiller.


I cut the aluminum to line the inside of the box and the bottoms of the "pull out" drawers. I made walnut rails for the fronts to tie in with the walnut stained wine rack in the upper unit. Last weekend's bottle making spree gave me all I needed to fill up the chiller and the upper cabinets. I added some glassware, a little lighting, and viola!

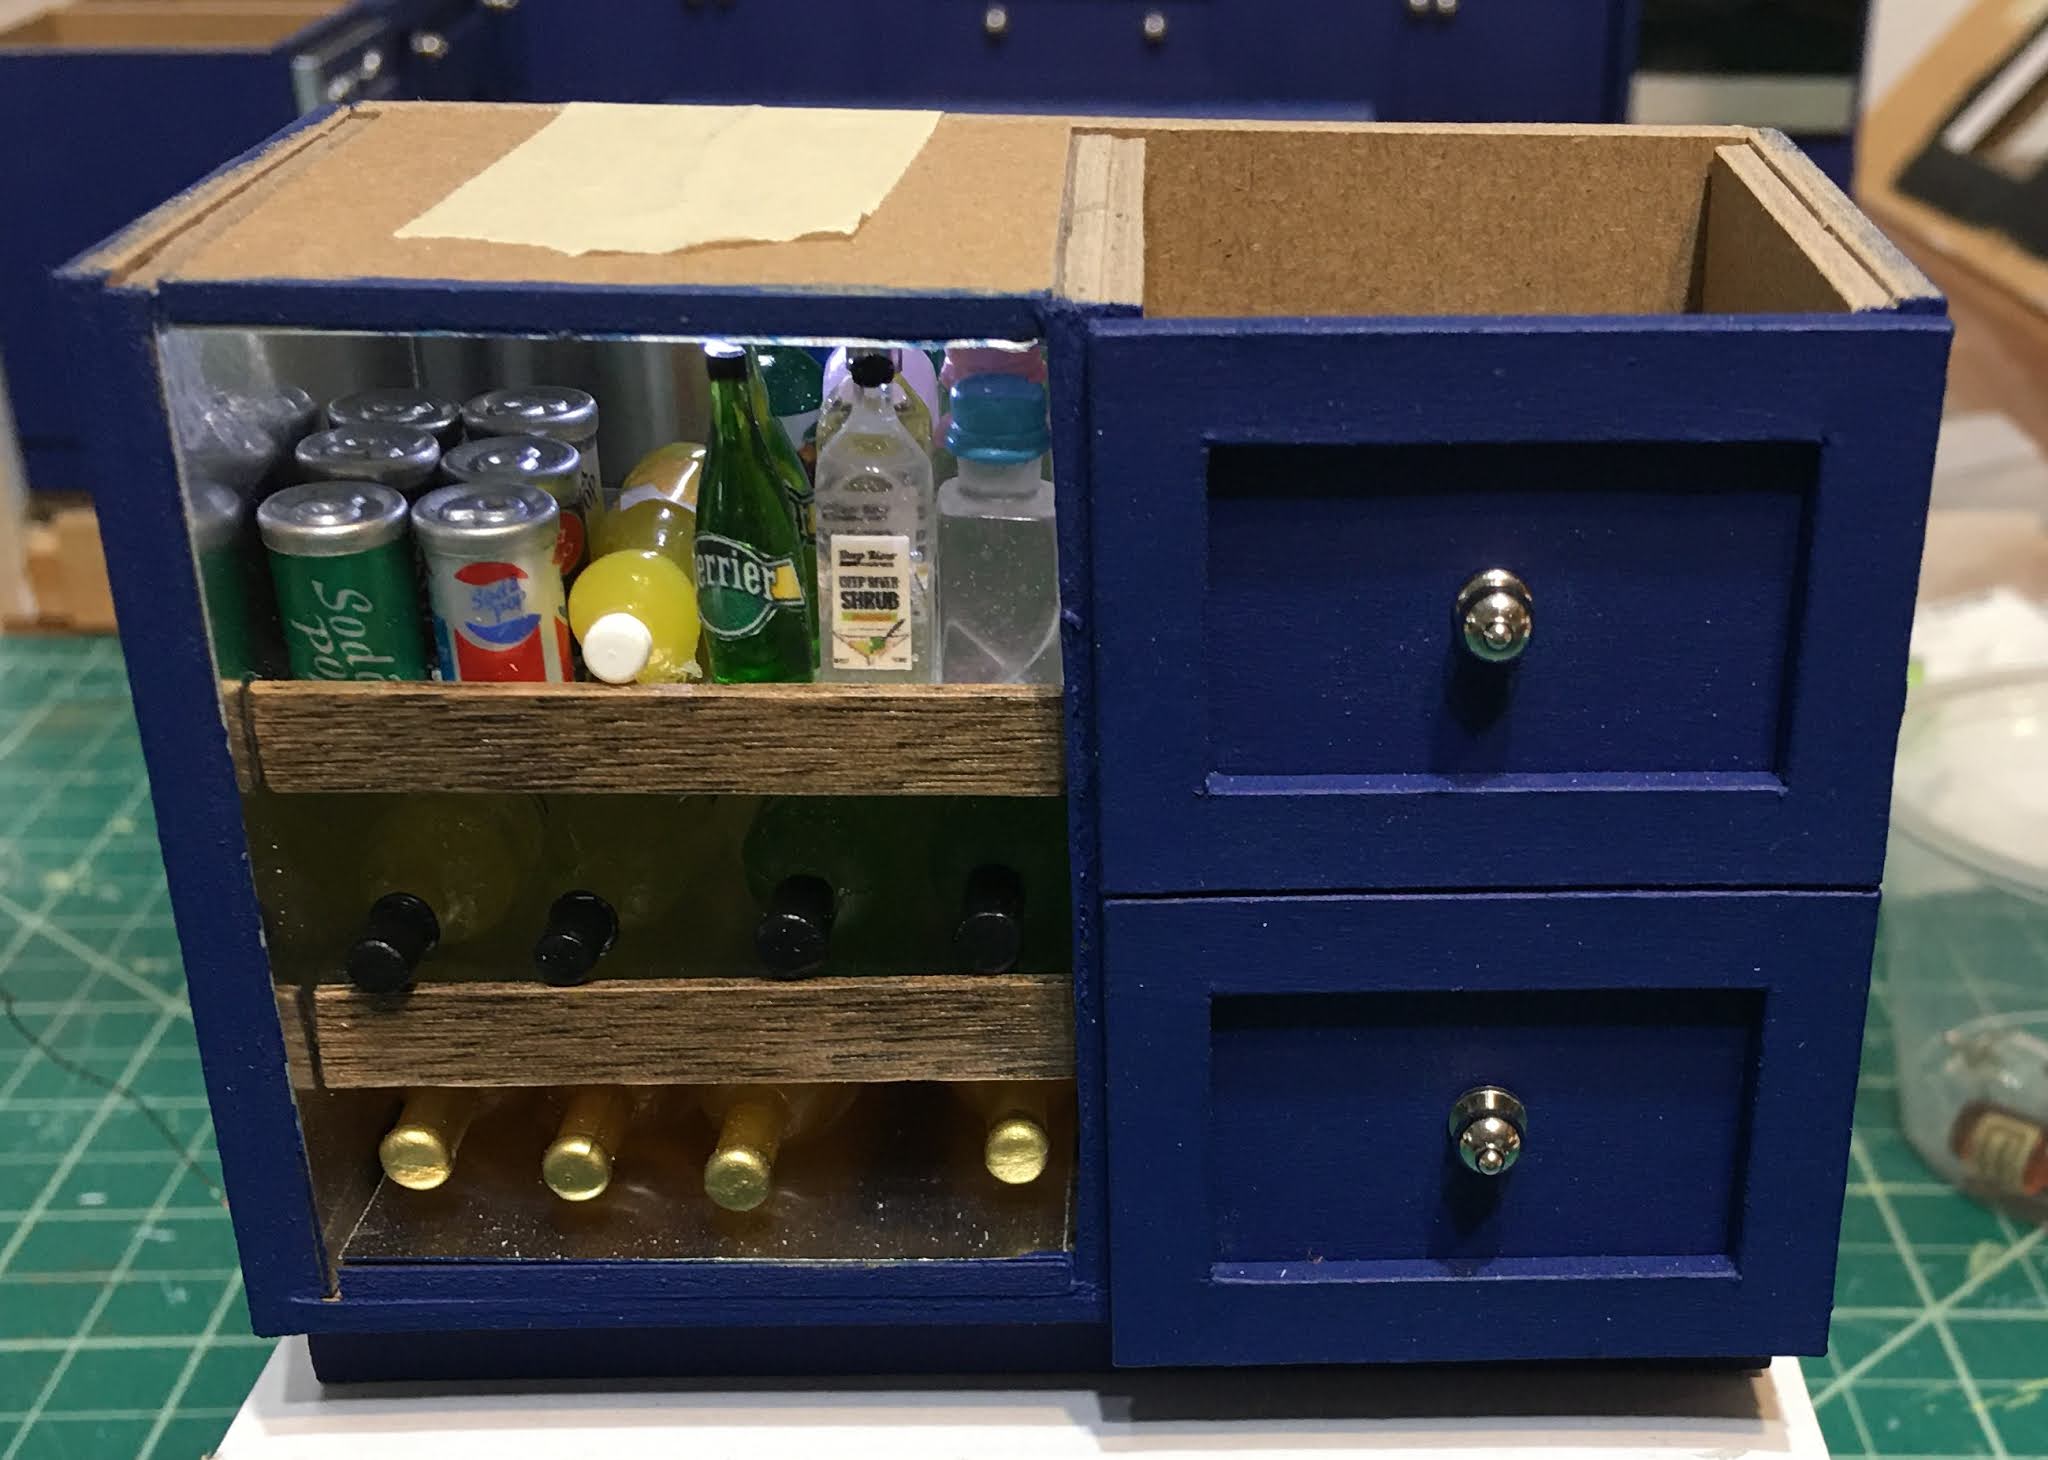


Here it is in the kitchen. The upper cabinet will be mounted on the wall, the same height as the other tall cabinets. Between the top and bottom cabinets will be a subway tile backsplash and the same white counters.


Oh! That reminds me! You don't know about the counters yet! There's still so much more to tell! Sorry for the long winded post AGAIN!
Let's touch on the backsplash quickly... I am using the same type of brick patterned MDF stuff that I used in the New Orleans kitchen. You can see that here. Why? because it looks good and it's easy. There is a bit of prep work to make it look nice, but I'll go more in depth on that in my next post. I'm mentioning this because you will see it in the photo below being tested out with the contertops.

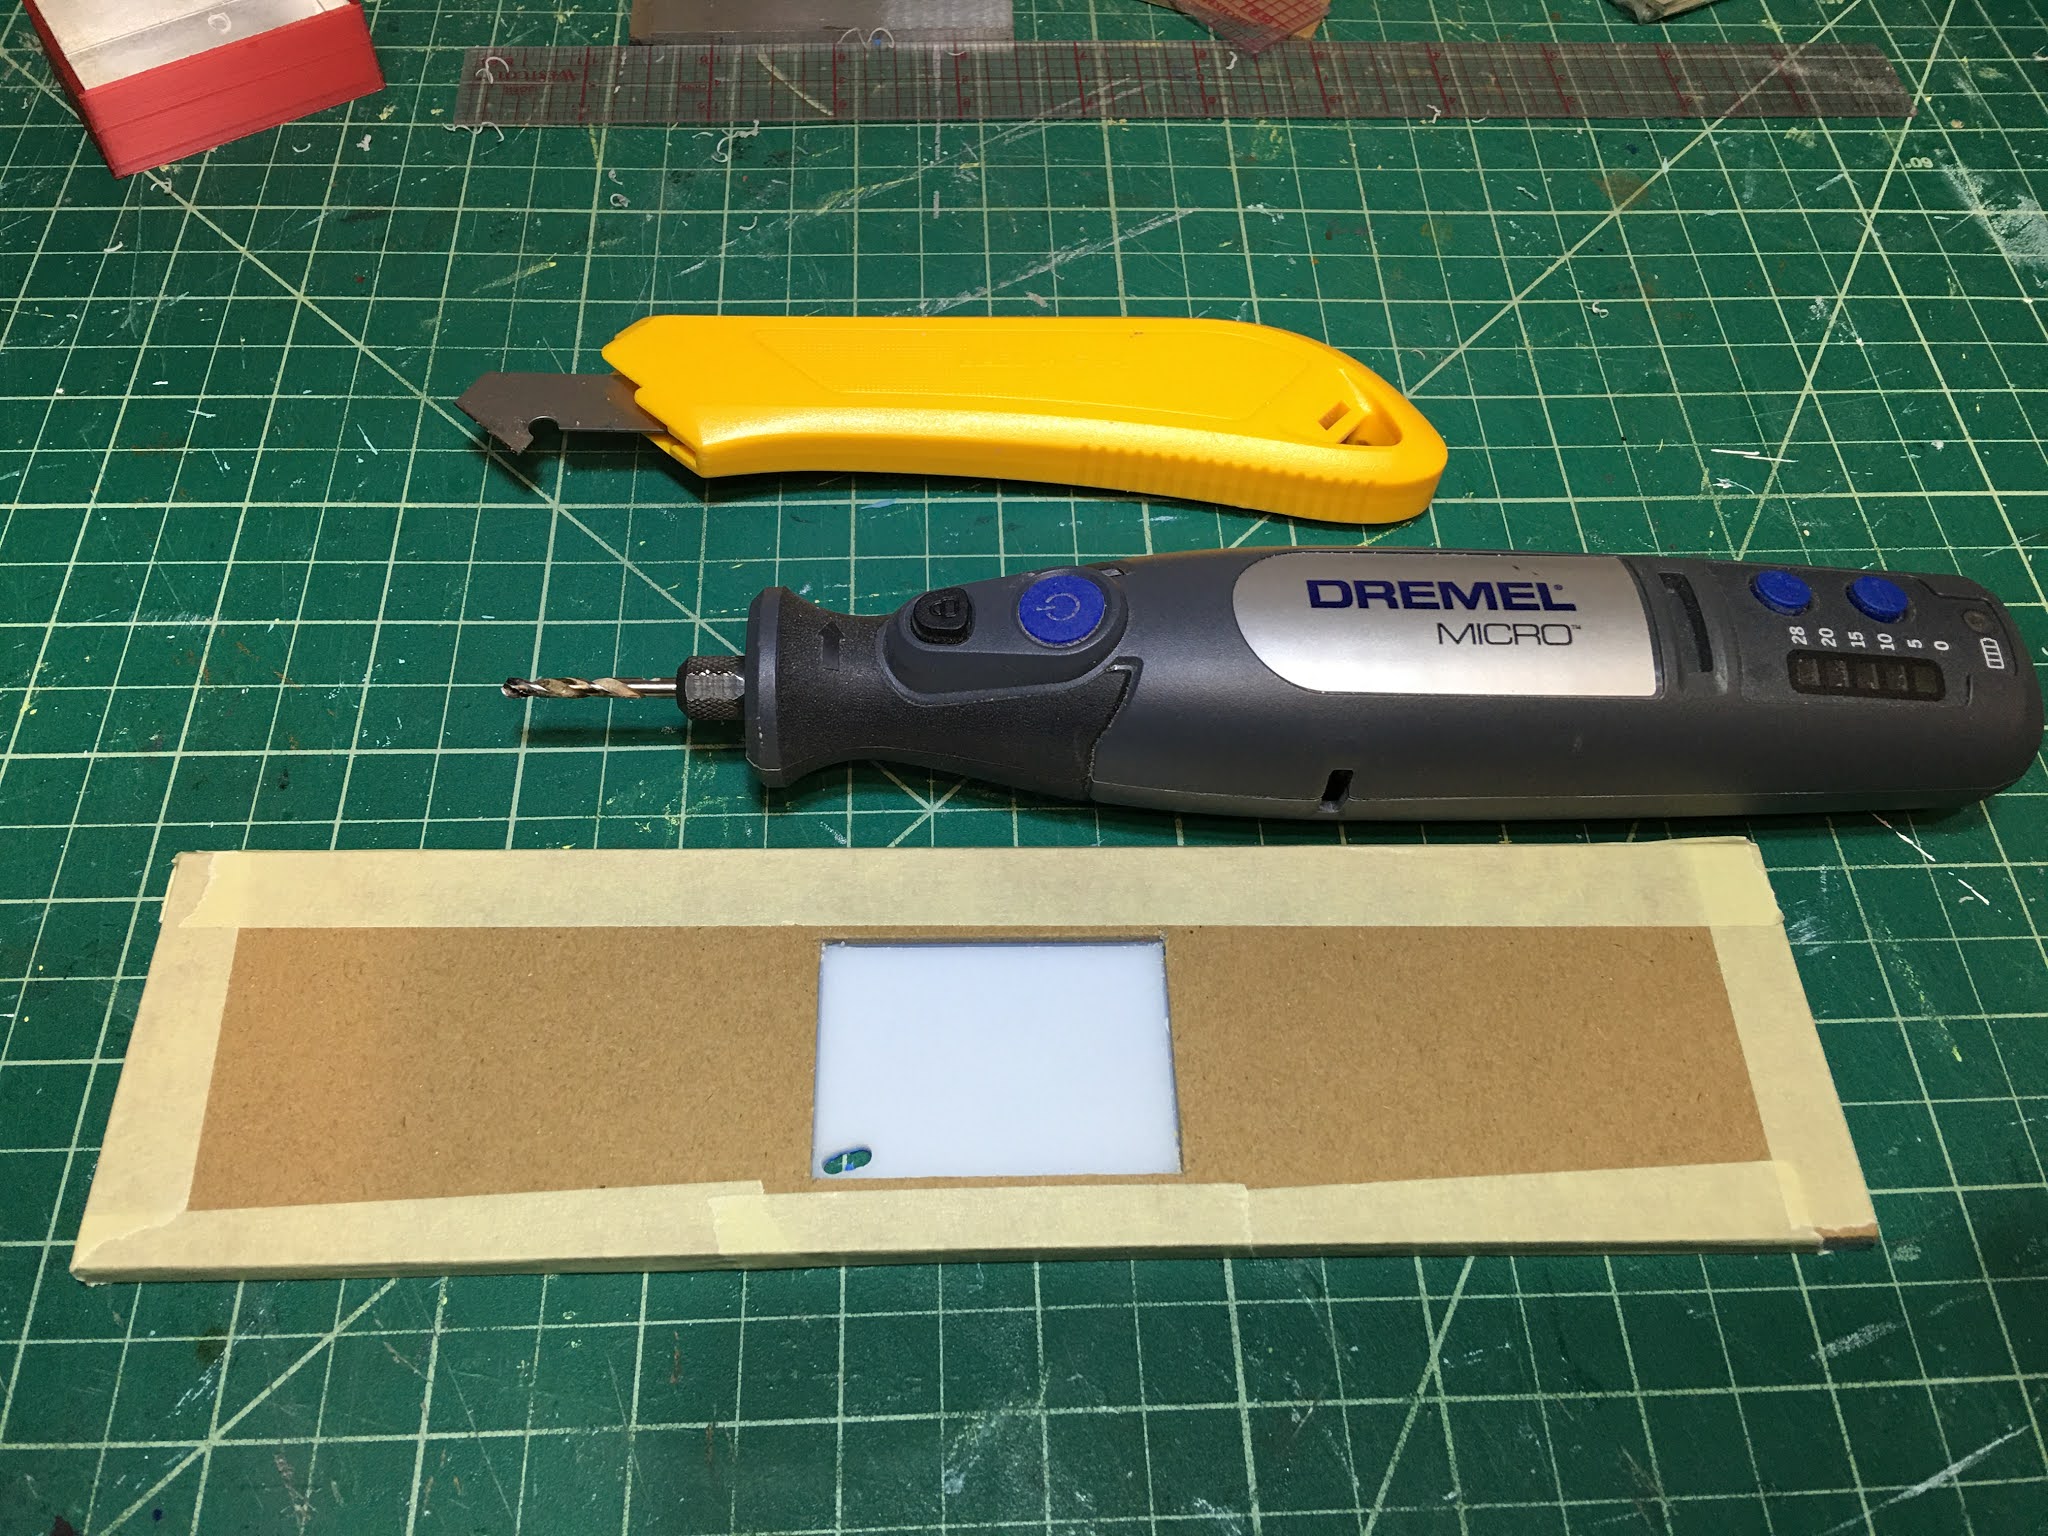
The countertops are made from a sheet of white Lucite and will look a lot like real life solid surface countertops. It's fairly easy to cut if you have a mini table saw with a guide edge, or a really helpful husband with nice tools. Cutting them to width and length is easy enough, but what if you need to make a rectangle hole in the middle for an undermounted sink? This was going to be another first for me, too. After watching a few videos on how they do this for 1:1 scale sinks, I adapted it for miniatures using the tools I have. Here's what I did.
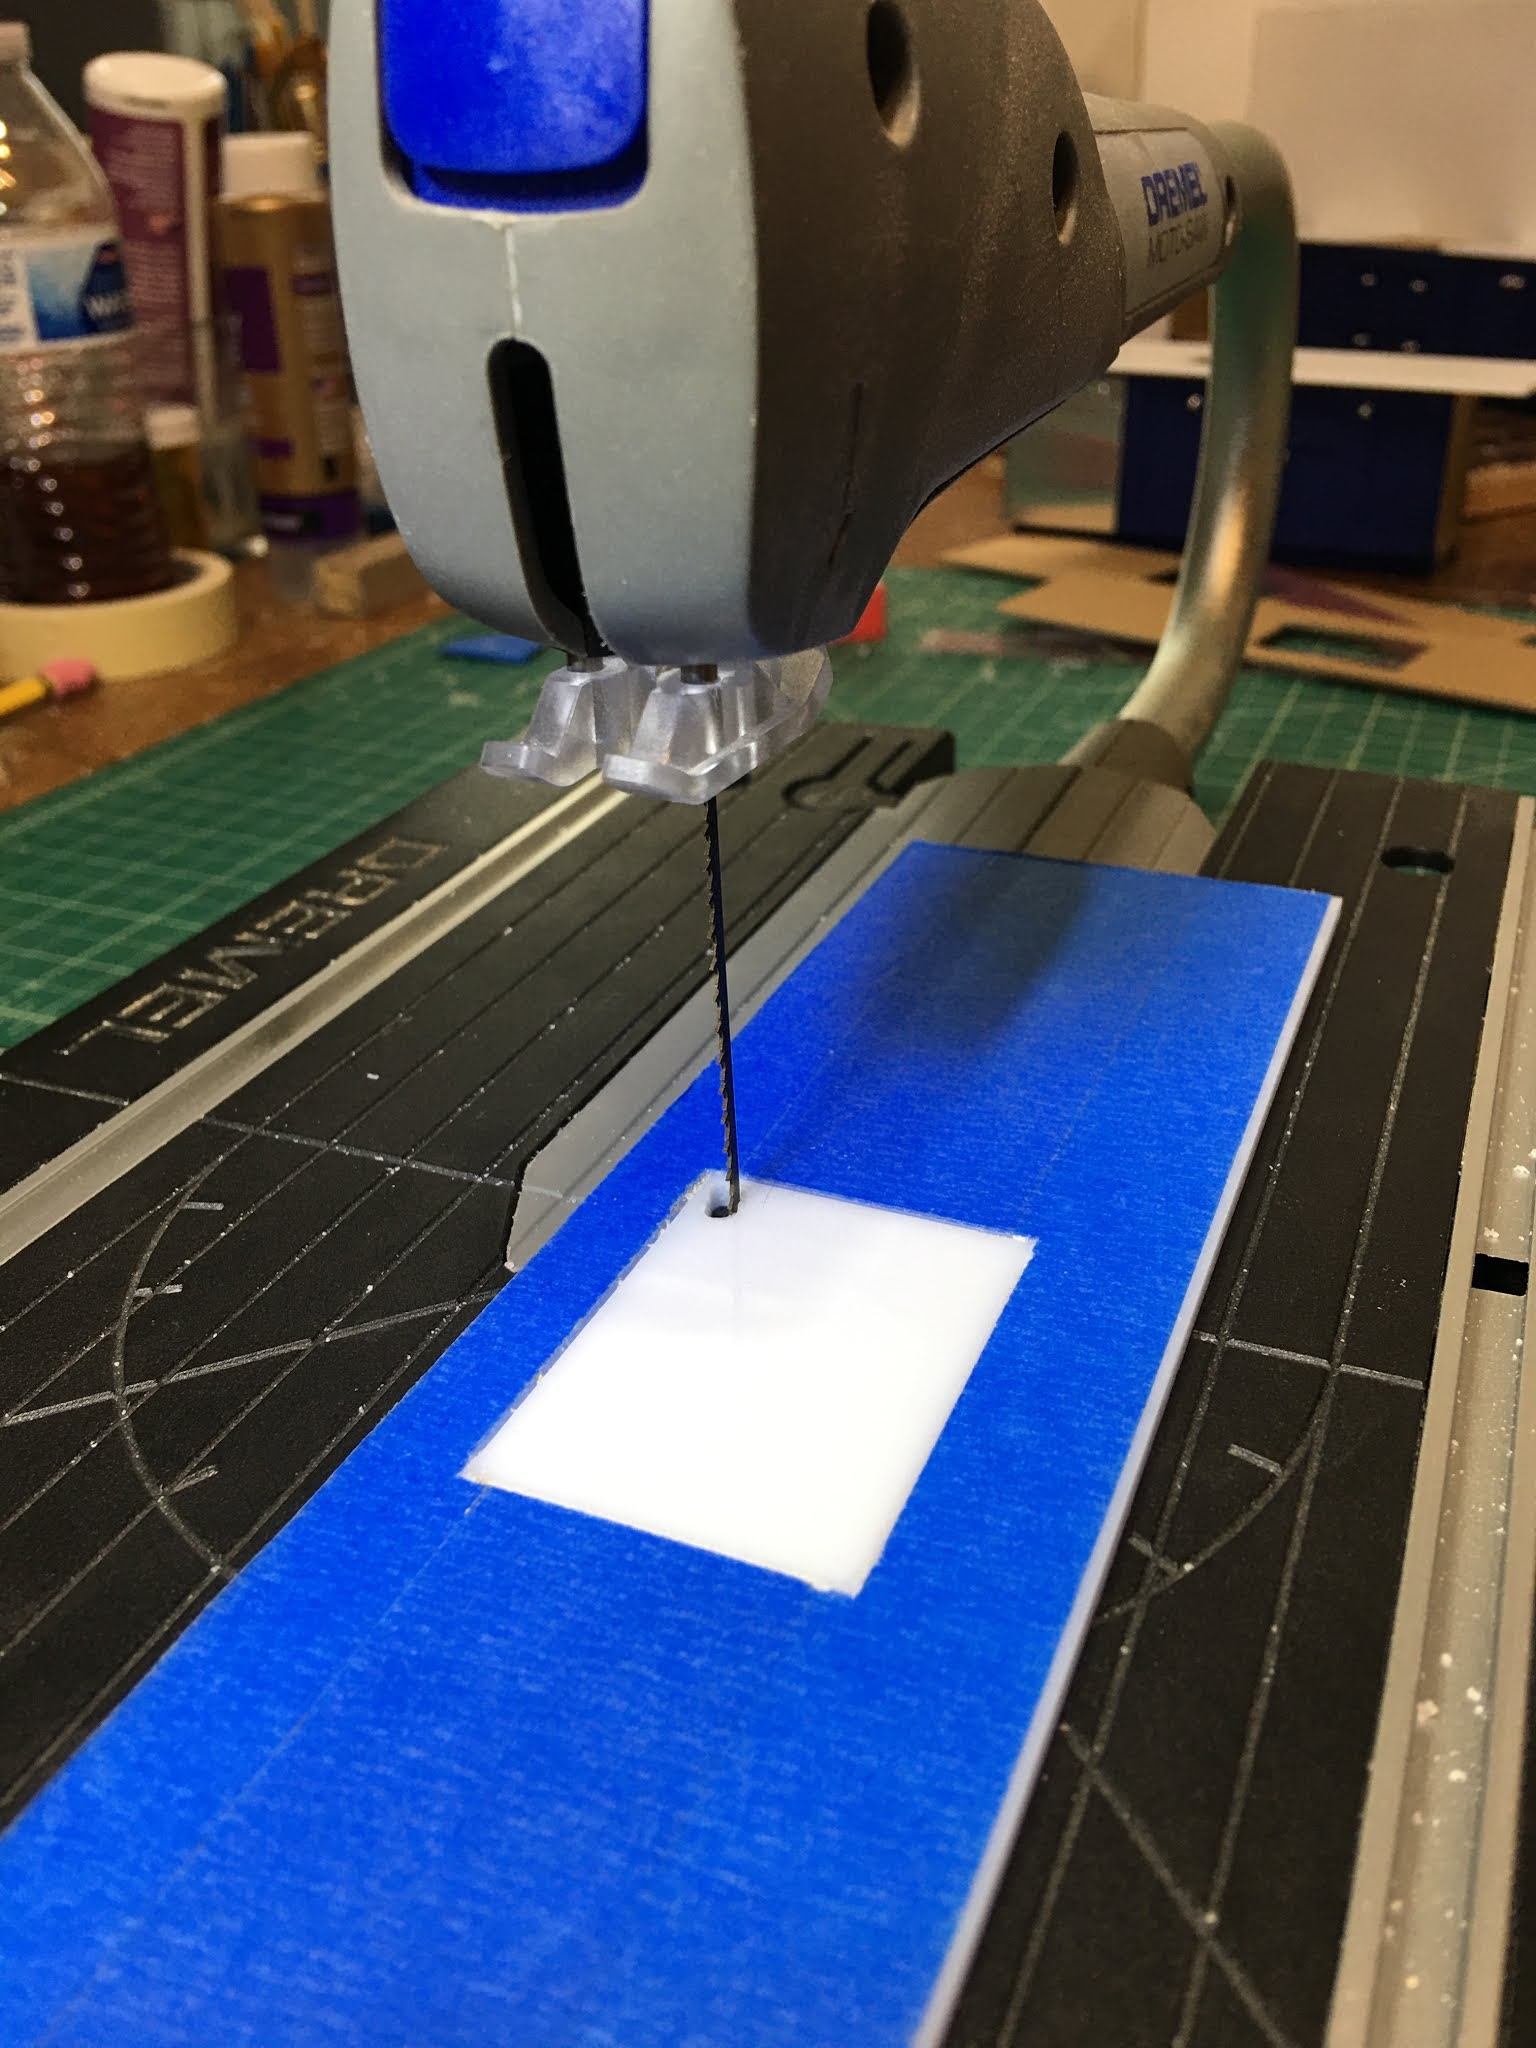
If the cling film that is supposed to protect the surface of the Lucite is compromised, cover with masking tape before you cut it to the length and width you need. This will keep it from getting scratched.

Measure precisely and carefully exactly where you need your rectangle to be. Check and double check important things like remembering to account for the thickness of your backsplash, the overhang on the front of your cabinets, the width and depth of your sink and any recess allowance. Make sure you have enough room for the faucet to mount behind the sink while still leaving knuckle room to your backsplash. If you have a Cricut, take these measurements and transfer them into Design Space to make a template. Cut and overlay the template securing with more masking tape. If you are working by hand carefully mark your measurements on top of the masking tape.


Using an Xacto knife, carefully cut away the masking tape from your rectangle to expose the surface.
Using a Laminate Cutter score each of the four sides of the rectangle 20 times.
Note: This material is 1/8" thick so you have to be really dedicated and patient if you plan to cut it all the way through by hand. Or, just do what I did - finish the cut with your scroll saw.

Using your rotary tool, drill two or three connecting holes into your rectangle, slightly away from the corner. Make it large enough to pass your scroll saw blade through.
Disconnect your scroll saw blade and reinstall it after you have passed the blade through your access hole.

Using the scored lines as your guidelines, cut the rectangle, then remove/reinstall the blade once again.

And that's how you cut a hole in the middle of something! Not too shabby for my first time! The material is sand-able, so you can perfect the edge once the major cutting is completed.
Now for the sink. I had purchased an Elf Miniatures Underslung Sink Kit that comes with a monobloc tap. I found it to be a good size for a second sink, such as one for washing vegetables or in a wet bar, or in a compact kitchen. But, for a real working kitchen, it's a little small and very shallow (1/2" deep or 6" in real life). So instead of using the kit, I took my experimental 3D printed sink, which was wider and deeper (the equivalent of 9" in real life), and cut aluminum panels to glue to the inside. You'll need to use contact cement for the aluminum to adhere to anything. I used Aleene's The Ultimate glue.


For the faucet, to make the monobloc tap look a little more gourmet~kitchen~y, I took a silver earring back, a small spacer bead and a spring from a ball point pen to beef it up. I recommend using 5 minute epoxy for this, as most other adhesives will fail over time. Where the base goes into the countertop, I added a silver washer. It's the same as the one I used for the sink drain, 1/4" round with a 1/16" hole.


During my next "Mini Time Opportunity", I'll begin to fabricate some kind of stovetop using components from the Elf Gas Hob Top Kit that I have on hand or I'll see about using my 3D printer to make one. It's been so much fun getting to try new challenges and to learn a few things this week, I'll try to keep the momentum going!

Thanks for making it to the end of another long post with me! I hope you are inspired to try new challenges and to make good things better, too!
xo xo,
Jodi
P.S. I finally dusted off the 3D printer to have a try at a gas cooktop. I posted a sneak peek on Instagram with a mention that details would be here for this post. I got carried away trying to make improvements and have printed six attempts now! The design is getting a little better each time. I do have the one for Tasha's kitchen completed, but wanted to present the whole process in one post in the hope that it would be helpful for anyone trying to make a gas cooktop. Please forgive my misleading you - I will have the goods in next week's post!

I love long posts with text and photos. Nice way to start my day. Thanks for the inspiration.
ReplyDeleteOh yippee! That makes my day! Thank you, Pat!
DeleteAs usual, Jodi, if you didn't know better, you would swear this is the construction of a RL kitchen. It is so perfectly done. I love the colour, I love the wallpaper, I love the amount of detail you have given which makes me feel that I might actually be able to tackle something this complicated at some point in the future. You give me hope! Thanks so much for such a wonderful post. - Marilyn D., New Brunswick, Canada
ReplyDeleteHa! Thanks Marilyn! You definitely have all the skill and creativity you need to make exactly this sort of project and it would be so much fun to follow! You always blow me away with your ingenious way of thinking!
DeleteAnother fab post! Long or short-it's interesting and informative. Kitchen is coming along beautifully. :)
ReplyDeleteThank you! It's so much more fun to know fellow mini nuts are enjoying the project along with me! 😊
DeleteI love your posts!
ReplyDeleteThe kitchen is beautiful.
Thanks Carrie! I'm so happy you like it and thanks for your encouragement!
DeleteWow Jodi, what an industrious week for you! Very impressive. I really love the wet bar cabinets, they look fantastic, and the other stainless parts - the dishwasher, stove and sink. And the 3d drawing/printing are addictive for sure! What are you drawing your parts in?
ReplyDeleteThanks Shannon! It is habit forming once you have an idea that you are trying to perfect! I am still just using TinkerCad to create and Qidi Print's slicer program to prep. I have less flexibility with my printer with overhanging parts than I used to with Shapeways printing abilities, but it's great to have the immediate ability to print and assess. fix and print again! I just have to roll the idea of flat parts or multiple components into my thinking.
DeleteEstá quedando genial. Los tiradores son un acierto y los electrodomésticos también. La forma de realizar los ladrillos es mucho más fácil que usando los cartones de huevos.
ReplyDelete¡Gracias Isabel! Sí, el protector contra salpicaduras es mucho, mucho menos laborioso que los ladrillos de cartón de huevos, y con este método puedo eliminar por completo el proceso de lechada que siempre es tan complicado y rara vez tan exitoso como quiero que sea. ¡La parte más difícil con estas baldosas es esperar días y días para que se cure el acabado de alto brillo!
DeleteIt looks so cool! I can't wait to see your stovetop. And I love your cabinets and the bar area.
ReplyDeleteThanks Sheila! I think I have one pretty near perfected and am excited to share! Having to make a modern kitchen where everything has to be as close to perfect as possible is so much nerve wracking worry, though! If I had a swear word jar, it would be getting filled up with dollar bills quickly!
DeleteJodi: this is my 2nd comment on this post because I was rereading it to see all the wonderful things you did with hose cupboards when I stopped at your 2nd to last picture. It looks like, on the wall above your sink, you have a wonderful modern oil painting of a group of paintbrushes with colours that blend well with the cupboards. I know it's actually a cut out for a window but it sure does look like an oil painting or large photograph! Nice touch - even if it was accidental! - Marilyn
ReplyDeleteSee Marilyn... That is why you are so good at this hobby - you see things that most do not. That Outside The Box thinking is an amazing skill! You have the rare ability to see everyday things as art! Maybe a Modern Art Gallery project is in your mini future. You could use images from everyone's blogs to help us "see" what you do!
DeleteLol! I too, saw the jar of paintbrushes framed by the window cut out and thought it would make beautiful art.
DeleteIt just says a lot about how optimistic the two of you are! Having the ability to see past my messy and distracting background and turn it into art! 😊💗
DeleteOh Jodi! Has vuelto a hacer magia con esta cocina!! el aspecto de los muebles azules, con los electrodomésticos en metal y esa encimera blanca..es absolutamente maravilloso, más real es imposible!
ReplyDeleteQue gran idea pintar la bombilla, ahora su luz es genial. Vi en pinterest el adelanto de los quemadores de la cocina y estoy deseando verlos puestos.
Es un guiño fantástico mantener la "cerámica de la abuela" también en la cocina miniatura, seguro que le gustará a Tasha.
Me gustan tus post largos y con gran cantidad de fotos!
Besos.
¡Gracias Pilar! ¡Estoy tan feliz de que te guste el esquema de color y diseño de la cocina! Realmente espero que Tasha también lo haga, aunque estoy llegando a un punto en el que al estar tan inmerso en algo, ¡empiezas a perder la perspectiva y empiezas a dudar de tus ideas! ¡Apegarse al plan!
Delete¡No puedo esperar para compartir la estufa de gas! ¡Ha sido una aventura secundaria que lo consume todo y totalmente divertido!
That is gonna to be a very fine kitchen
ReplyDeleteBritt
Thanks Britt! I hope Tasha will be excited with all of the little details!
DeleteOMG, Jodi, you've had a very productive and educational week, and I must say I loved reading it all, yes, till the end ;O)!! You have so much to show to us and for me in person very much to learn too (and I am always eager to learn as you probably know by now...). This kitchen is going to be a perfect one, it looks just like a real one.
ReplyDeleteNow I can't wait to see what will be next you'll learn and show us.
Stay safe, take care, dear Jodi.
Have a lovely weekend.
Hugs, Ilona
Thanks Ilona! It's always a great mini week when you have a focus and a goal and you know what the next steps are (and what you'll try to do to get there)! I love that part so much and it is why we all get so addicted to this hobby. I'm so glad that you like where this kitchen is going - I always prefer doing the old and love worn ones because mistakes aren't so glaring. But the challenge of this one is fun, too. Hope you have a great and productive weekend, too! Hugs!
DeleteWow! Thanks for taking us along on this trip beyond the horizon. The cabinetry and appliances look so appropriate yet so very special. I too, like to experiment with lighting and love the versatility that the tiny LEDs bring, and you know any post demonstrating power tools excites me 🤗.
ReplyDeleteI'm glad you enjoyed the post, Sherrill, and the power tools! 😁 It feels great when you are able to do something that prior to having the tools seemed impossible. Each little success brings with it a little more confidence and willingness to go farther! But you know this tale very well! 🤗
DeleteComo siempre, tus trabajos son perfectos y espectaculares !!!!!
ReplyDelete¡Gracias Eloisa! ¡Tu confianza me da la valentía para seguir intentándolo!
DeleteAwesome, Jodi. You keep raising the bar with the new products that you introduce us to. I love the lucite counter top, but I'm not sure that I'd use. I do have a saw and a husband who could make the cut. Are the LEDs battery? I received my Elf order, so now I can design my kitchen. I learned so much this time around. Thank you for the great tutorial.
ReplyDeleteThank you so much for the praise and encouragement, Ann! I'm so excited that you got your Elf kits! If you have any questions or want any tips, just shoot me an email! The Lucite comes in many colors, so if ever you want to have color countertops, they are a great and inexpensive material.
DeleteThese LEDs will be hooked up to one of the transformers that Evan Designs sells. They are 3 volt so are the perfect mates to these particular bulbs.
Have a blast with the kitchen! I can't wait to see your layout!!!
That is fantastic - I love the blue colour and the mini fridge is great!
ReplyDeleteThanks Janice! I'm so glad that Tasha likes this style because it's been a lot of fun to play with!
DeleteOh my word Jodi, it’s looking great and your wet bar is fantastic. I love the counter tops and sink.
ReplyDeleteThanks Polly! The wet bar was really fun to make and working with the sheet aluminum has given me the confidence to branch out to make many other appliances from scratch. I hope you'll give it a try sometime, too!
DeleteAs always, It's so good to read your posts and learn something new. The kitchen is already stunning. I know it's a very special project for you. Tasha will be proud to have this fantastic heirloom.
ReplyDeleteThank you for the very detailed explanations.
Hugs, Drora
Thank you, Drora! It is so much fun to have "what would delight Tasha?" in mind as I work on this kitchen, and anticipating the moment when I get to give it to her and show her all the little features. It's like investing in future happiness!
DeleteJodi, la magia sale de tus manos una y otra vez.
ReplyDeleteCada detalle de esta cocina esta pensado y elaborado con tanto cariño que tu hija tendrá un tesoro.
Un saludo
¡Muchas gracias, Marian! Es maravilloso tener el amor como motivación para trabajar en un proyecto. En este caso, ¡es tanto el amor por las miniaturas como el amor que tengo por mi increíble hija!
DeleteDesde principio a fin es increíble lo que nos enseñas, es muy instructivo y por supuesto que estoy aprendiendo muchísimo contigo, muchas gracias. Tasha jugará y guardará esta casa como un tesoro. Feliz fin de semana, besos
ReplyDelete¡Gracias, Rosa María! ¡Es maravilloso saber que lo que comparto es útil para ti! ¡Realmente aprecio sus amables palabras y su apoyo!
DeleteGood Grief ..... I managed to get through.
ReplyDeleteWonderful post Jodi, full of information on sources and new techniques and ideas.
Obviously you are so much younger than I am as I still have not got my head around the mechanics of 3D printing and using a Circut.
All is progressing wonderfully. Laughed at the idea of your daughter reluctantly receiving a collection of family china. I note you are not taking any chances as you glued the door shut!
The blog is such a great way of relaying so much information and pics. Thank you for posting at length.
Regards Janine
Hi Janine! Hooray for your tenacity! I am so happy to see a comment with your smiling face attached to it! 😊
DeleteI am not sure that I am that much younger - I am 52 now and feeling every bit of it, lol! But the best motivation for my trying out new technology is the fervent will that compels me to attempt to make the kinds of minis that I want to. So, grudgingly, this old dog will try to learn new tricks.😁
Thanks so much for reading and supporting my endeavors with your kind words! Sharing this amazing passion with one another is so much more fun, and I am glad that you are posting and inspiring us again, too!
I really don't think there will ever come a day when I'll sigh and think "My, this time Jodi's post was a bit too long..." *LOL* As always I've enjoyed to see your newest progress aka the newest miracles you created to the fullest. Everything turned out awesome, gorgeous, realistic and of course drop-dead-beautiful. Tasha will be totally overwhelmed and I already imagine the faces of her friends/visitors when she tells them "My Mom made this for me". It's a special project in every way.
ReplyDeleteAnd as always I did not only have fun because of your beautiful results but I also learned a lot. These appliances from Elf Miniatures are awesome! What a great thing to have just these super realistic fronts. And I loved your idea to use this white lucite for the counter tops, it fits so well with the wonderful blue. However it made me wonder - would I want something like this in my RL kitchen? Shiny white? Okay, means using a good cutting board EVERY TIME. *grin* So don't forget to add one... ;O)
Hugs
Birgit
That is good to know, Dear Birgit! Thank you! 😁 Sometimes I think I might chase all of you away with my incessant blogging! And I thank you for giving me confidence that this kitchen will be something that Tasha will be proud to show her friends. 💗
DeleteI will be sure to include a few cutting boards, and am even considering an entire butcher block for the top of the island. I know mini Tasha will appreciate that! My real life counters here are not solid surface, either, and having that to worry about is not such a treat. I almost went for the Silestone when we had the house built, but the practical side of me got the better and I decided to invest that money into an air conditioner, instead. Every summer when the temperature reaches the 90's I am so happy that I did! I will encourage Tasha, with all of her gourmet prowess and the amount of cooking she does, to invest in the solid surface stuff for her real life kitchen when she buys her first house. Luckily, the Silestone stuff is supposed to be stainproof so if she's still in love with white, she'll be A-OK! 😊
Yes I am 3 to 4 months behind, but ooh, what a great beautiful kitchen you make. I took a good look at all the details, it looks great. And all the bottles you make and all the stuff in the fridge, BEAUTIFUL!
ReplyDeleteThanks you Gonda! I was really behind there for a while, too, and it was such a big job to catch up with everyone's projects! But I am so glad you got caught up on Tasha's kitchen and so happy that you like the progress! I hope you are finding time for creative pursuits too!
DeleteI LOVE your daughter's kitchen and I also wish I had one like it in real life. She has very good taste!
ReplyDeleteYour innovations are realistic and pleasing to the eye, Jodi. This is going to be one of those room boxes one could just sit and stare at.
When I need to cut a square hole in a solid piece of wood, I usually drill holes near all four corners. That way, I have more room to maneuver and don't need to reposition the piece so many times to get into the corners. The idea for scoring before you start cutting with the saw is a good one, I'm going to try that next time because I'm sure it will significantly reduce the risk of the edges splintering.
Thanks Megan! I am so glad to know that you like the kitchen design and color scheme! Colored cabinets can be polarizing, but I think what Tasha likes best about the navy is that it is colorful and yet still classic. And it is easy to change out the accent color to keep it looking fresh as often as you like!
DeleteRuss also told me that he drills in all four corners in his real life kitchen projects so now I have it from two crafts people I trust! Thank you! . He also puts masking tape on both the top and bottom of the piece he is cutting to prevent splitting out, mainly on wood projects. I guess if we adopt many of the real life tricks in our mini construction, we'll get better results, too!