Search My Blog!

Use the Search box below to find keywords that you're looking for quickly and easily!

Search Feature

Monday, April 22, 2019

Black, White and Gold


Just to refresh you, this was the furniture from my last post. After many coats of paint... I achieved the unifying black color I was hoping for.


I decided to do the faux marble treatment on the sink's countertop, painting the base with white chalk paint in several layers, sanding smooth in-between, then drawing on the marbling with artists chalk. I sealed and gave it it's shiny marble effect with several layers of sprayed on Krylon Triple Thick. Since gold was the metal finish of choice, I used the Krylon Gold Leafing pen to change the Falcon faucets from silver to gold, along with other elements of the accessories to tie everything together. I didn't have Iris, the French national flower, so instead I made white lilacs in a vase with water for the vanity. The candles can be found in my Tutorials tab.


Funny story with the bottom drawer being a basket now... I had finished the painting, let the dresser sit to cure for DAYS, then finally got to put the handles back on and reassemble. I had marked the drawers so I'd know exactly which slot they belonged in. Drawer #2 just didn't want to slide in, no matter how I coaxed it. I was a little wary of sanding, in case I ruined the finish. It almost fit, so I thought just forcing it in would work. It Didn't! After several moments of shock, because neither could I pull it out or push it in, I made the decision I would have to pull it out. No way to not damage it getting it out. So, drawer #3 became drawer #2, #4 became #3, and poor #2 got sanded raw and flush, painted black, and a "basket" cover was glued on. All is well that ends well, and I think I even like it better!


The side cabinets got filled with shampoo/conditioner/lotion bottles, glass jars with "bath beads", rolled towels, tissue, pottery, and various other decorative items. I adhered them to the glass shelves with Quick Grip (Elizabeth!) before inserting them through the back of the cabinets and re-gluing the mirrored backs. I did not have the patience to light the cabinets, as Elizabeth so smartly suggested. I also added legs to the bottoms to elevate them and help them coordinate with the sink cabinet. All were painted gold.


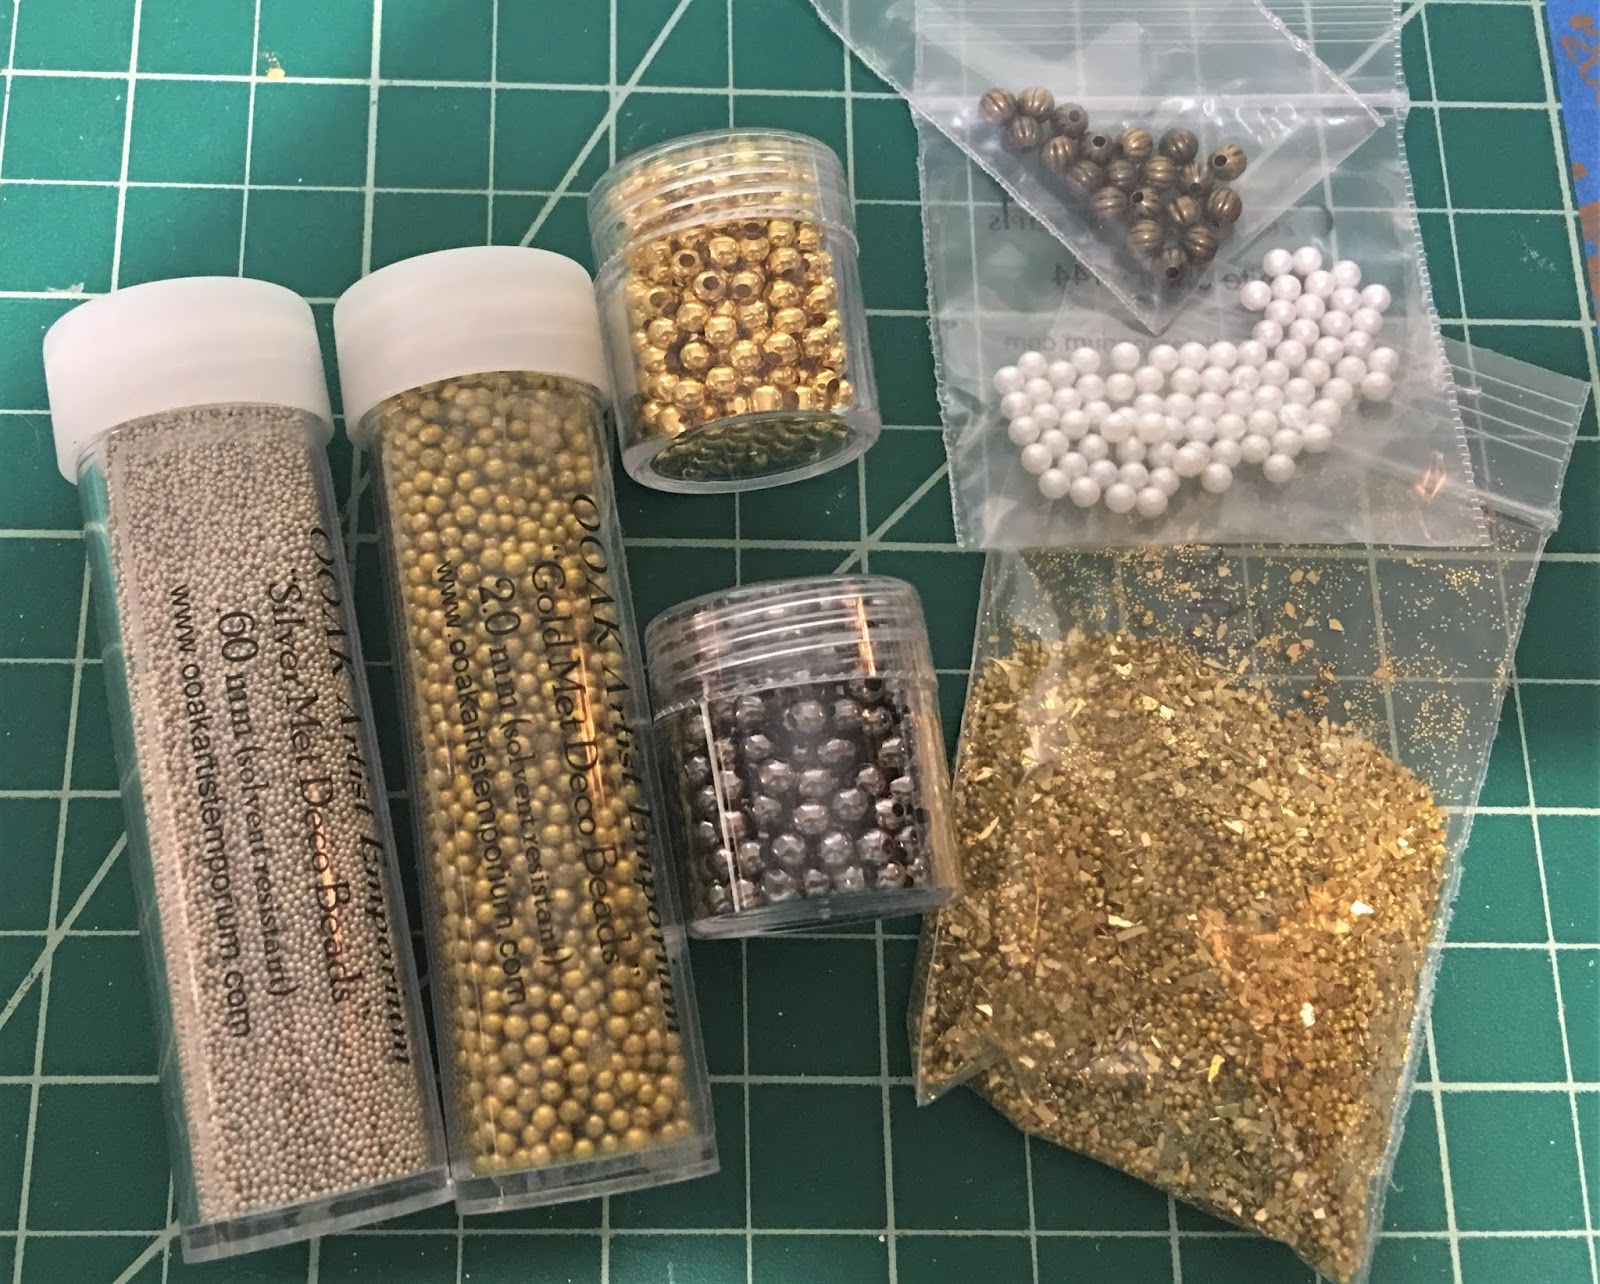
"Bath Beads" are tiny metallic micro beads and pearls.


Since there is no windows on the walls of the bathroom, I thought making the mirror out of a chipboard window frame would give it a more open feeling.


For the tub wall, I thought a collage of black and white bathroom photos and art would be fun. I bought about six vintage graphics through FrenchPaperMoon on Etsy. LOVE her graphics and am happy to pay for them periodically. Since I made them black and white for this bathroom, you are likely to see the full color versions in future builds! :O) The other ones I found with a Google search.

I like to use my cutting mat to tape off the wall space I am working with so I can play with the arrangement. Once I am happy, I take a photo so that while I am removing them to hang on the wall I have a reference of what goes where. I used all pot metal frames and sprayed them with the same black satin as the cabinets.


Getting them hung straight is another story altogether! The peek through the bedroom door into the bathroom is lovely, though!


I modified an Avalon toilet that I purchased on closeout by shortening the tall pipe from the tank to the toilet bowl and making the flusher gold. It looks a little more modern, now.


I love how the tub came out with it's black and gold, and the separate taps and spray wand. If only the tub was just slightly larger to match the scale of the other fixtures.


There's a little more accessorizing to do, but I'll finish that for the final dressing of the house once it's done. I am also still playing with the idea of a French style roof window to let the light in. It will have to play nice with the ceiling trims and chandelier, so we'll see if I can work out a plan. For now, though, my attention will turn to finishing the bedroom and stairwell hall.


Thanks for stopping by and sharing this fun and fulfilling (and sometimes frustrating) project with me!

xo xo,
Jodi

Thursday, April 11, 2019

New Orleans Walls + Floors + Fixtures

The next chapter for this ol' New Orleans kit was preparing the interior divider walls for installation. I needed to come up with some wainscoting for the bedroom walls. I wanted something a little more detailed than the simple bead board I used in the stairway hall. What material do I have? How thick and wide should the trim be? Is this going to impact the next steps and if so what adjustments to the design or materials do I need to make? How will this meet the next wall and will the trims work nicely together? Luckily, I was able to find suitable materials, and even more luckily, I didn’t make a mistake and leave myself short like the stairwell boards, which hopefully, have been camouflaged enough that it won't be noticeable.


Once I had the basic design and confirmed I had enough materials, the rest was pretty straightforward and methodical. I made panels for each section of the bedroom walls from 1/16" basswood, then made a frame overlay using 1/16" x 1/4" wood strips. The bottoms got 1/16" x 1/2" so they'll make perfect sized bases for the baseboards, which will be installed last. To the centers I added fancy Greenleaf door popout panels (leftover from the flower shop projects) and more Unique Miniatures embellishments.


I constructed the basic boxes for the built ins on either side of the balcony door, then gave the right one "doors" using Houseworks wainscot panels and the left one faux drawers with more UM embellishment frames.


Here's the test fit with tops made on the built ins. I am still debating about shelves for the left side, and have since painted what will be inside the built in recess the teal wall color (in a later photo). I also installed the hardware, gold to match the chandelier to be installed later, and the door handles. I won't install the wainscot top cap or the doors until after the walls have been installed.


Once the bedroom walls had been finished as far as I could go I switched my attention to the bathroom walls. I cut the faux brick subway tile wall panels and wainscot trim, then set up the back wall and side wall on my cutting mat to test the fit. Once I was happy, I hand painted the tile panels with white chalk paint three times, sanding really smooth in between. Then, on three consecutive days, I layered on the triple thick spray glaze to get a nice tile shine. I won't install the panels to the walls until they've had several more days to cure.


I've been saving an idea for the cabinets and sink for a long time, and am excited to finally be getting to work on it. I have a Town Square dining room hutch set and I'll be using the two side pieces from that for the cupboards, one on each side. The Bespaq dresser will be turned into the vanity sink.


They all need to be painted and customized, so against all common sense, I took them apart. What we won't do for an idea!!! On the cupboards, I removed the mirrored backs, glass door inserts and the glass shelves, loosening the glue with my hair dryer. For such nice pieces, the glue job was truly sloppy. It took a long, patient while to carefully remove the glue from everything and sand smooth again.


For the vanity sink, I removed all the drawers and doors, then loosened the top with more heat and a gentle force. Because the piece's countertop is already at 3", I decided on an undermount sink. I cut and sanded the hole, checking all along the way for fit and center. I am going to attempt a faux marble top like I did on some of the vanities I experimented with last year. The sink, a bisque bowl, will be painted white and then get the triple thick glaze sprayed on in several layers. I'll add the drain as I did with last year's vanities, too.


For the bathtub, I am using yet another Chrysnbon bathroom kit, though I have a different toilet to use this time. I have not found a suitable alternative bathtub in style, authenticity or price since I began collecting for this project in 2016. I played with the idea of a shower, but every mock up made the bathroom close in on itself, and to place a tub/shower in the back meant losing the closet and the vanity impact - viewing it from the side just would't look as lovely. So I will place the Chrysnbon tub in for now, and keep replacement options open in the future. Kristine - please design and offer a fabulous tub in your Shapeways shop, will you? My little TinkerCad program is way too limited for something that curvy!


All of the bathroom pieces are getting sprayed with black satin. I have the first couple coats finished and drying, but this time of year have to take things slowly. It's been a cold and wet week!


The last big project for the second story is the flooring. I made the template for the areas getting Houseworks walnut wood flooring, same as what I used on the first floor, and then got that installed with the stinky Quick Grip. I like using that better than E6000 for the flooring because you only need to apply it to one side, which makes it easier to adjust if your first lay down attempt isn't perfectly aligned.


I'm adding tiles to the bathroom floor as I get a few minutes to work on it, but I can tell you my tile job is not going to be perfect. I guess since it's my first time with this stuff I'll give myself a break and hope the really noticeable mistakes will be under the fixtures!


Some experienced mini builders may have noticed or wondered why there will be wood floors under the walls. I'll have the answer, and hopefully, an ingenious  alternative to those annoying and unrealistically out of scale thresholds on dollhouse doors in my next post.

Hope you have a wonderfully fulfilling week!

xo xo,
Jodi

Thursday, April 4, 2019

Chipping Away

This week's post is going to be a day or two earlier than usual. I don't have anything that is finished to share, just some in progress stuff. Russ will be home for the next couple days, so where I'm at is about all I will get done on the New Orleans this week. But I do have an exciting discovery to share! It's exciting to me, anyway! More on that in a minute. First...


I had purchased some outfits from PaolaeSaraMiniature Etsy Shop right after I got my first ball jointed doll. They are really lovely, unfortunately, not all of them fit or looked good on the Zjakazumi doll. But fortunately, they worked perfectly to hang on hangers for the closet! And there were just enough that with the reflection, I think it will create a reasonable impression of a full wardrobe! I think the concept is going to work, though I still have to finalize the optimal placement of all that's inside.


A peek in from the outside dormer window

A peek in from the bedroom

A glimpse with the wall up and the door propped open
And now for the exciting discovery... A couple years back, I discovered Bespaq Direct on eBay. They sold scratch~n~dent Bespaq furniture, sometimes for as little as $4.00! If you were planning on painting or recovering anyway, you could find some beautiful pieces at affordable prices. As of this writing, they have sold off all their inventory and are no longer offering items on eBay. Bummer, but at least I got some good stuff put away for future projects! I had purchased four chairs and a table for the dining room, only to discover later, that with the room so small, it would look better with just two or three. So, since I wanted a small chair for inside the closet, I pulled one out.


The chair is New Walnut with ivory silk fabric. The reason the set was discounted is because the glue joins where the fabric panels and the wood met were poorly done. I was going to recover them anyway, so this was not a problem. I pulled off the front and back panels and discovered I liked the chair even better without them!


I have always coveted the Bespaq Victorian Balloon chairs but never could justify shelling out $45 each for them. If I were a billionaire, I'd make Warren Buffet jealous of how thrifty I can be! Without the panels, they look surprisingly close! So what to do about the glue residue?


I sanded off the glue with a super fine sanding sponge, being careful not to take the finish off any place except for the very inside. A light sanding removed the glue and left enough of the walnut stain that I was able to match it to the rest of the chair's finish by applying a coat of clear nail polish.


But I wanted something fancier. Using my Krylon gold leafing pen, I carefully painted just the inside edge. I still didn't really think the ivory silk cushion was very interesting, so since I planned on recovering it anyway, I tried an experiment. With alcohol ink! This was the exciting part! Using a soft artists brush, I applied a little at first, and when it looked as though it would work, I applied more liberally. It dries super fast, so not much worry about over soaking. I just love the results!


So much so that I treated the other three chairs to the same makeover! I like them so much better, and what a quick and easy solution to a color problem.  The silk even retained it's shimmer! More experimentation will have to be done on different kinds of fabric, but who knew alcohol ink could be used as a fabric dye!


The rest of my progress was not as exciting. I received the replacement porch lights for either side of the balcony. I spent a couple days repainting them in aged bronze like the front porch light. Once I installed them I was able to apply the interior wallpaper over the wires.


I started on the built-ins and door install for the bedroom, and am deciding about the wainscoting design.


In the stairwell hall I finished the door and window trims and am currently working on the wainscoting and finish molding. There's a lot to do in this room with having to finish up the stairs and railing, but I.m chipping away at the To-Do list little by little.


So much to do and so little time! Hope you're all chipping away at your dreams, too!

xo xo
Jodi