Search My Blog!

Use the Search box below to find keywords that you're looking for quickly and easily!

Search Feature

Friday, March 13, 2020

Pound Cake: Second Floor Walls

I didn't realize as I was taking progress photos this week that I was taking so many! There were a lot of separate steps to raise the walls and separate the spaces, so I hope you'll stick with me here for the dreadfully long update post!

Sink/Restroom Side installed, touch up paint still required.

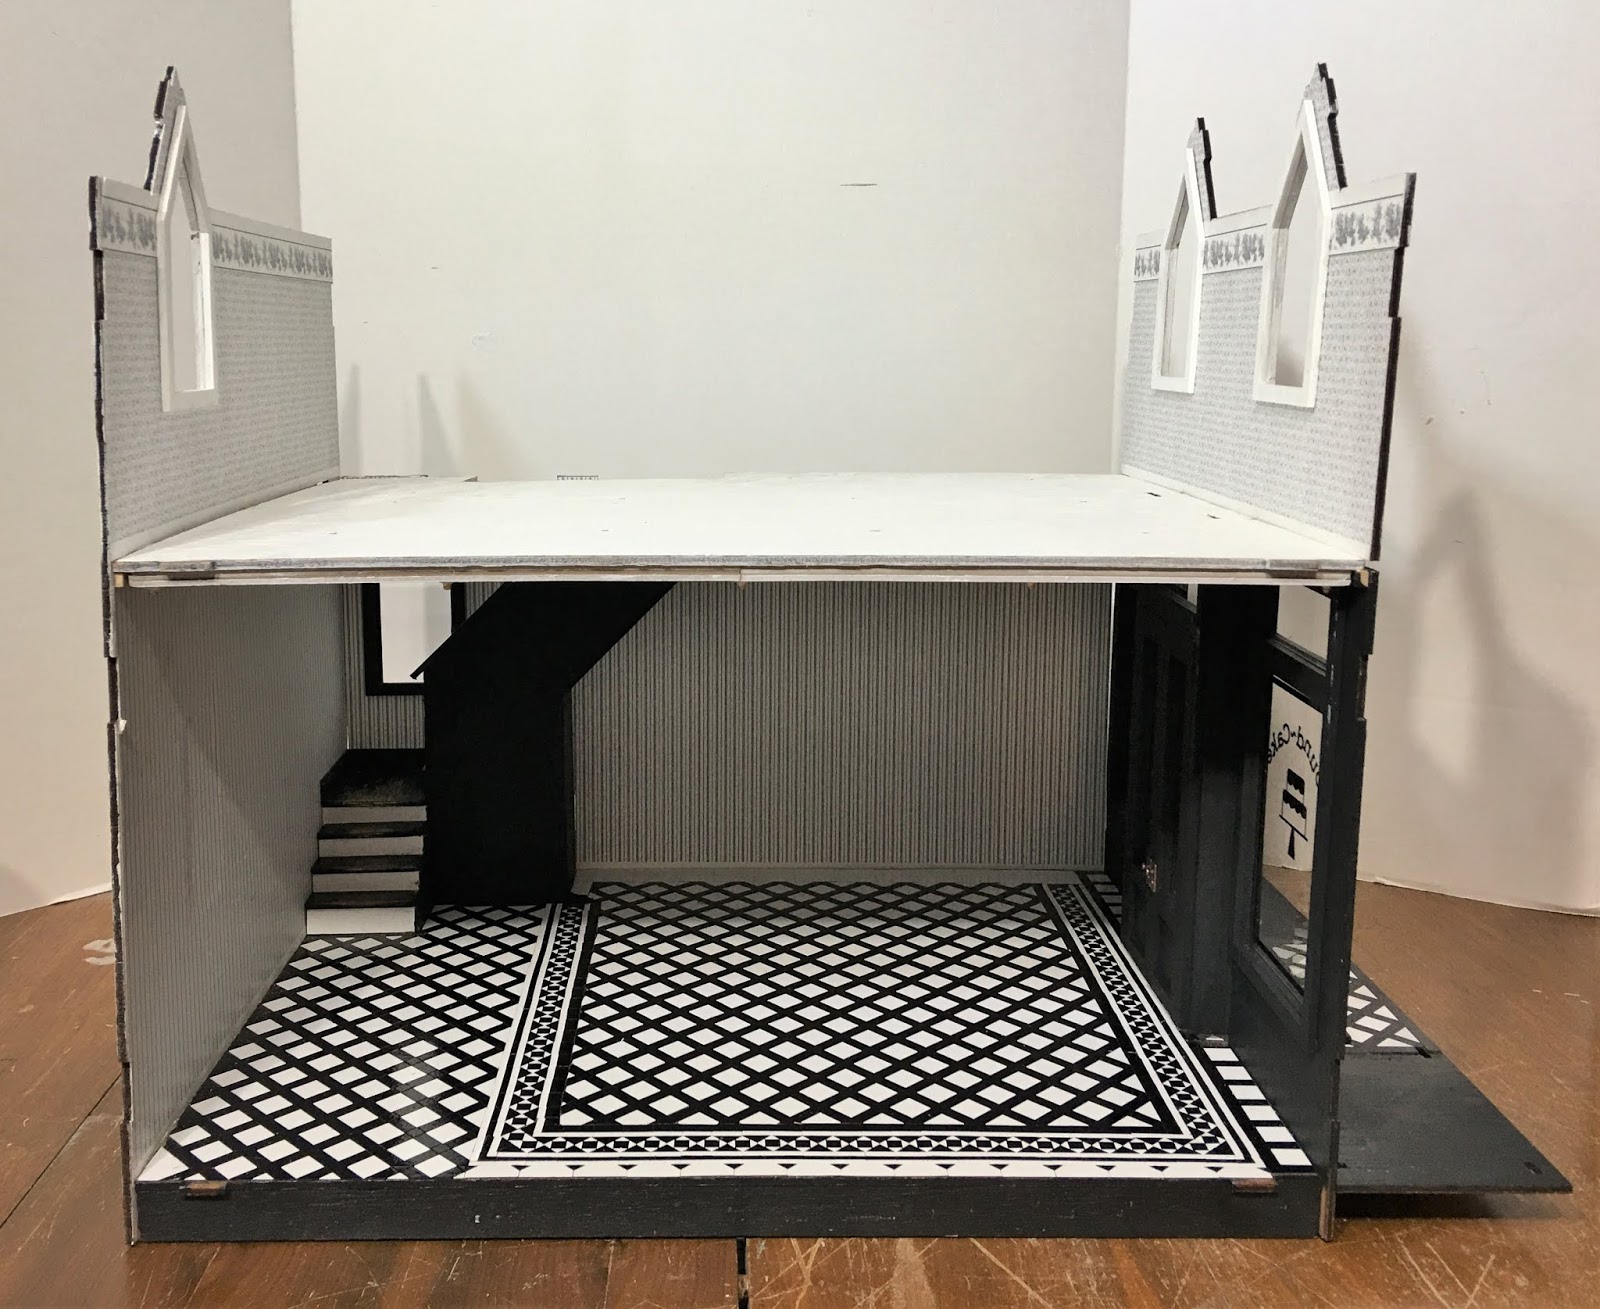
Top floor progress picture, still more trims and ceiling/roof to install.

It all began with foam core for the walls. The roof/ceiling piece can be relatively easily added or removed now, so getting a height measurement was easy enough. Then I just had to trim the foam core down to 9-3/8" tall.


The two restroom walls were a little more difficult in that I had to replicate the ceiling angle onto the foam core. I attempted a complicated "Rise and Run" calculation, but in the end just held the pieces up to the roof piece to confirm. All was well - at least well enough that trim would make me look like a genius! A quick test of the door frame to confirm the opening followed.

Sink, stairway and restroom walls being test fit.
For the stairwell side of the wall, I added textured ceiling paper above beaded wainscot. This area will only have a peek-a-boo view from one of the side dormer windows, but I wanted a clean, finished look. Wouldn't you know my paper wrinkled a little. Such is mini life...


The restroom side of the wall received pieces of my leftover wallpaper. I didn't need much, and because of where I had cut dormers out, there were funny angled gaps where I had to paste pieces over. Not to worry - this area will be behind the door and will never be seen. Why do I only ever buy three sheets of wallpaper when countless times I needed four?!?


Above the sink I thought a window would be nice. It would give some depth and interest in the room and would also let in additional light from the stairwell/dormer window. I cut a 2" x 3" piece of foam core and glued it, centered, in the space above the planned sink unit. This gave me something to hold my Xacto blade against to cut the window hole. This would not have been necessary if I had planned the window before I glued all of the walls together!


For the wall treatment in the sink and stove area, I tried out a new tip for the Cricut - the Debossing Tool. It is meant to imprint a design into several types of material. I made a subway brick tile pattern using my graphics software, then imported it into the Cricut Design Space program. From there, you can choose to deboss the pattern. I chose deboss and resized it to fit on pieces of wall squares that I'd already created for each foam core wall. The material I debossed was the Cricut Kraft board which is like stiff poster board. The pattern is subtle with this material, but in this application for the bakery walls, worked just fine. Besides, who can complain about no painting and no laying of hundreds of tiny tiles!


To give the tiles a shine, I brushed on gloss Mod Podge. My Mod Podge had a lot of lumps and partially dried bits, so I used a filter and a cup to get a nice clean batch to work with. You can buy these filters in large packs for a small price on Amazon. They work great for filtering old paint, too.


Once the tiles were dry I was able to frame the pass through window opening.


And check the fit of the sink cabinet I made with the Cricut for the space.


Window frame, cabinet, door frame and behind toilet plumbing cabinet painted...


I sprayed the countertop in white satin and then applied a couple coats of Krylon Triple Thick spray gloss. I had a faucet from Elf Miniatures that came with the sink I used in the New Orleans kitchen. By adding the spring from a fountain pen to the spigot and a painted, tapered bead to the end, it looks more like an industrial bakery kitchen kind of faucet.


Now it was time to make sure my initial height measurement for the walls was accurate. I nervously installed the ceiling/roof and said some hopeful prayers...
Success! With a little molding, pre-cut before adding the ceiling permanently, the finished room should look like I knew what I was doing!


I confidently applied the glue and weighted the wall piece down. And waited for glue to dry...


Meanwhile cutting and painting trims. And painting/assembling the Chrysnbon bathroom kit pieces...


And here is the view down the stairs that you will never again see...


And the only view to this side of the sink window pass through, through the side dormer window...


And I made shelving and brackets with the Cricut...


Then installed the restroom fixtures and accessories...


Then the angled side wall and door frame with added transom window...


Frosted for privacy, but which I hope will let in extra light to the sink area...


And installed open shelving for all of the equipment and supplies that one would need to operate a successful bakery...


And other than touch up and trims, the bakery's kitchen is ready for living!


Now on to the ceiling and the lighting.

Back next week with more progress, I hope. Until then, I pray all of you are safe and well, and are making it through this uncharted territory that, together, as a world, are experiencing. God Bless!

xo xo,
Jodi

Thursday, March 5, 2020

Pound Cake: Paper Tile Flooring Finished!

In my last post I had cut and assembled the bakery's second floor paper tile flooring and left it to be sealed/varnished when I returned home from my mom's 70th birthday trip. Since this was my first paper tile floor, I didn't know what product or method I would use. I pondered my options on the trip, eliminating the option to brush anything on. I had a couple spray options, but some testing was going to be necessary.


As soon as I returned home, I got busy. I thought I'd better make a sample piece to fool with so I made one using left over scrap tiles and "grout".  I tried both Krylon Triple Thick and Liquitex Satin spray varnish. I liked the coverage and sheen of the Liquitex satin better (not too shiny), but my nozzle, in spite of repeated attempts to clean it, kept clogging. The Krylon definitely took several heavy coats (due to the absorption from several layers of paper), but it looks very nicely finished. It took three heavy coats over three days to allow for thorough drying time. Sorry I can't seem to get a better photo of the sheen.

Sample Tile

After Two Coats

Restroom Tile Floor
Before my daughter and I left for Arizona (by way of Las Vegas), I was able to get the bakery's kitchen windows on the second floor cut and installed. I replaced the kit's acetate windows with Lexan and installed them on the exterior window trim as I had for the windows in the first floor. I also had time to try out the first dry fit of the roof pieces.


The instructions and I are having a disagreement. They want me to put the dormer roofs in place, leave them loose, and then glue the roof on. I am going to do it my way by attaching the dormer roofs and then adjusting the roof piece to pop on and off. Having the dormers glued on and leaving the roof removable will make fitting the interior walls, and all of the trim, a much easier (and hopefully more successful) job. Once the interior is finished, I can permanently attach the roof, filling in any gaps and tab slots. This will require several fittings, but I have enlisted the help of my handy husband because four eyes and four hands are always better than two!


The glue bottle is so that you can get a feel for the size of the second floor space in the kit. It feels rather large inside now, and I hope that once I add walls and appliances, it will still feel like ample space.


Here are all the tile floors, dried, trimmed and attached to the sub floor. Where you see wood is where the 3/16" foam core walls will be installed. In the bathroom and in the back of the sink side (left) of the kitchen (where the gaps are wider), I have left extra room. The kitchen side will likely have a built in cabinet to cover the extra gap and the bathroom will have a built in plumbing cabinet behind the toilet.


One thing of note here is that the restroom floor has a bit of a yellowish tone. This is the floor that has the Liquitex varnish applied. The Liquitex is not as clear as the Krylon, and luckily, in this bathroom, won't have a negative impact. But every product is right for a different circumstance. If I wanted a more aged looking floor, the Liquatex would be good. For a crystal clear finish, the Krylon is preferable.

Once the subfloor with tile was installed, I was able to add the slim side walls to the opening side of the structure.


For now, until I actually start on the exterior, I have painted the side walls licorice. It just makes everything look less rugged and helps me to visualize the finished facade. I have also added a 1/8" x 3/4" piece of trim between the floors and underpainted the dormer roofs. Eventually, I hope to make them faux lead metal roofs.


All of the roof support pieces have been added. Once the roof is on permanently, only the underside of these will be seen. My next steps will be to fit the roof and make adjustments until it pretty easily slips on and off. Then I can take accurate measurements and begin cutting and fitting the interior walls.


Another thing to note about the tile floors; I used a total of twelve sheets of Cricut Kraft Board to make the floors. For what I paid in material, including the shipping, the entire second floor cost less than $8.00 to make. Pretty economical, though you also have to consider that they were pretty labor intensive. This information may help some of you who are still sitting on the fence about buying a Cricut Maker. If you like coming up with your own creative solutions (which cost next to nothing), and you enjoy a little tedious work, the Maker may just be the tool for you.

And if you're wondering how mom's birthday was, I will only show this picture and tell you that what happens in Vegas stays in Vegas! ;O)


Arizona was wonderful, and it was just so great having time with some of my favorite people! As you can see, my mom, even at 70, is fun loving and loves to have fun!

Hopefully, back next week with more bakery progress!

xo xo,
Jodi

Thursday, February 20, 2020

Pound Cake: Flooring Trials

My prediction last post of trial and error with the second floor flooring was pretty accurate. My first idea was a complete failure, but as these things often go, it was in the learning from that experience that I came up with a new idea to try. Let me state emphatically that the methods for achieving my goals here are probably not the smartest or best use of the technology, but only how I got around the challenges using my limited faculties and on hand supplies. Mostly, I just wanted to "Get 'Er Done" by any means necessary!


My first plan was to create a patterned tile floor in Design Space and use the Cricut to cut it. I was going to use chipboard in two thicknesses, a thinner one for the "grout" lines and the thicker for the actual tiles. I was planning to paint the tiles but did not know at that point whether or not I would actually grout the tiles in the traditional way, or just suggest grout with an offsetting color. But first, I had to design and cut the floor.

I found a tile design online that I thought would be nice for the small corner powder room and was also in keeping with the old time style of the building. It is made up of  honeycomb shaped tiles, so I found a similar clipart pattern online and imported it into Design Space. The grout lines of the image looked to be about the right thickness and proportion.

Powder Room Tile Inspiration
Honeycomb clipart

From there, I took careful measurements and created the shape of the bathroom floor using the shapes available in Design Space. Then I filled in the honeycomb pattern, incorporating a rectangle border which, hopefully, won't be completely covered by the baseboards. The powder room door's threshold will be on the diagonal line and will partially cover tiles here, too..


My first cutting attempt on .37 mm chipboard told me I'd have to rethink my plan. It takes so many passes with the knife blade to cut through the chipboard. Having the tiles so close together to create a 1/16" grout line causes a mess of delamination of the cardboard after only a few passes.


Back to the drawing board. What if I used a much thinner material that only required one or two passes, like kraft board? Would there be enough of a height difference from grout to tile to look authentic enough? I just happened to have an almost new pack of Cricut Kraft Board in a sample pack which contained 30 sheets of white, black and natural. This seemed worthy of a try, especially the prospect that with black grout and white tiles, I may not have to paint anything at all!.
The kraft board cut perfectly with only two passes, the default setting for Kraft Board in Design Space. It also calls for the standard fine point blade instead of the knife blade. I was able to cut the backer board in natural, the grout lines in black and then the tiles in white. I printed the white tiles twice so that I could double stack them to make the grout lines deeper.


Laying the tiles was like doing a fun puzzle. Because of the grout lines, each tile fit perfectly into place


Here's the floor sitting in it's place on the subfloor. To give you an idea of the size of the powder room, with square walls it would be 5" x 7". The tiles are 1/2".


Now that I knew the concept could work, I went ahead and created the tiles in the same way for the rest of the second floor. The way I have the space laid out, you come up the stairs into the stove and baking (right) side of the bakery. It is separated by an 8" long wall from the sink/dishwasher and cake decorating (left) side of the bakery.


Since the Cricut will only cut widths up to 11.5 inches, and because the areas of the bakery kitchen will be separated by a wall (made of 3/16" foam core), I divided the tile floors for the rest of the space in sections, though the tile design will be the same on both sides. For the sink/cake decorating side, I cut this shape:


For the Oven/Baking side, it is 15" deep so I had to create an additional narrow strip section and join them after cutting. I made extra whole white tiles to help camouflage the join in the back, but will use some type of threshold in the open doorway between the two sides of the kitchen where these tile pieces join.


I created the tiles in Design Space the same way as for the powder room, only this time I used a square diamond pattern and made the tiles 1" square. I again left the grout as a single layer, the white tiles double stacked, then printed 1/4" x 1/4" square black tiles to apply in all of the corners.


Here are how the floors look just laying on top of the subfloor. Where you see wood now are where the walls are planned. I will do some experimenting with shiny finishes for the tile floors on scrap tiles before I commit to applying anything to the real floors. Better safe than sorry, especially after all of the work to make them happen!


But first, while my daughter and I spend a long weekend celebrating my mom's 70th birthday with her in Arizona, these pieces will be under boards and weights to make them stay good and flat!

See you next week!

xo xo,
Jodi

Friday, February 7, 2020

Pound Cake: Challenges And Satisfactory Solutions

When I last left you it was time to wrangle the ceiling into submission. Considering I had added about 1/4" in chipboard thickness to frame the coffers, it went pretty easily. Thank you all for the Wishes of Good Luck! I made several dry fits, shaving down tabs and opening up slots. There were a few more rounds of adjustments around the front door recess, too. But compared to the normal amount of sweaty wrestling with these kits, it was surprisingly cooperative.


Once I had the glue applied, I clamped the walls to the center of the outside walls where the ceiling met them. I added heavy weights to the floor to help with the slight bow that still remained from pasting the ceiling paper with heavy gel paste. It seems to have settled with no more of a curve than the average old building has. Phew! That's a relief!


Next, I added crown molding and quarter round trim where the ceilings and walls met. I didn't manage to take a lot of in progress photos this week, so I won't be able to provide good before and after pictures. I apologize. You can see the trims in the later ceiling photo with the lights on.


The next task was to prep all of the lighting kits. If you remember, I was going to use Chrysolite Zenith Hanging Lamp kits, This meant that I had to prep all of the pieces and then come up with a system to paint them. I wanted simple black fixtures to match the furnishings in the shop.


In prepping them, I discovered a huge problem. Both the 2mm chain and the wires from the bulbs would have to be threaded through the crown. The problem? The opening in the crown is less than 2mm. Not only would the provided 2mm chain not go through the opening, there was no way you'd get both the chain and the wires through without damage.
I know what you're thinking - Just make the opening bigger, right? Unfortunately, the crown is not a solid piece. It has 5 perforations with a tiny strip of plastic separating one from another (sorry no photo). To make the opening larger would risk breaking the piece altogether, and would interfere with the way the globe seats into the crown.
How about using smaller gauge chain? Smaller links also mean even less room to thread the bulb wires through. And having normal gauge wires right next to very delicate chain would mess with the scale illusion. What a bummer!

I suspect that this is why Brae opted to run her bulb wiring up through a pipe. And maybe why the kits were discontinued?


I opted instead to use all of the pieces to build a single ceiling fixture and eliminate the hanging aspect. I would still end up with an old time feeling fixture, it just wouldn't swing. This seemed safer, anyway, knowing I would have to reach my hands in and out of the space numerous times to decorate.  It was not what I originally envisioned, but I do still like them and feel it was a satisfactory compromise. You never know what challenges you'll run into building a dollhouse, or what creative solutions or compromises you'll have to make to move forward. Being flexible is a requirement.


Problem solved, lights installed! Since these are all running off one nine volt battery for the testing, it will be interesting to see the amount of light given off when they are running on the transformer.


Another challenge to overcome was the first floor ceiling wiring, which by necessity, would be running across what will be the second floor. Even at less than 1/8" (the maximum thickness caused by bundles of wires which have been heat shrinked together), it will still cause a noticeably bumpy floor and interfere with future walls and furnishings if left unanswered.


Solution: Make a subfloor with 1/8" trim framing to bridge over the wiring. First, I made a pattern of the second floor using printer paper and tape, then transferred that onto a sheet of 1/32" plywood. I did not have a sheet deep enough, so had to laminate a strip onto the main sheet.


A little shave here and there and we have a perfect fit.


The next challenge might be a little harder than the ones I faced with the ceiling, lighting and floor. That's because the next challenge involves a decision, and those can be the hardest challenges to face! What kind of flooring do I want for the bakery's kitchen and what shall I make it from? That's going to require some thought and research. And probably a little trial and error.

Until next time, hope all your challenges are met with satisfactory solutions!

xo xo,
Jodi