Search My Blog!

Use the Search box below to find keywords that you're looking for quickly and easily!

Search Feature

Friday, January 25, 2019

It's Tea Time!


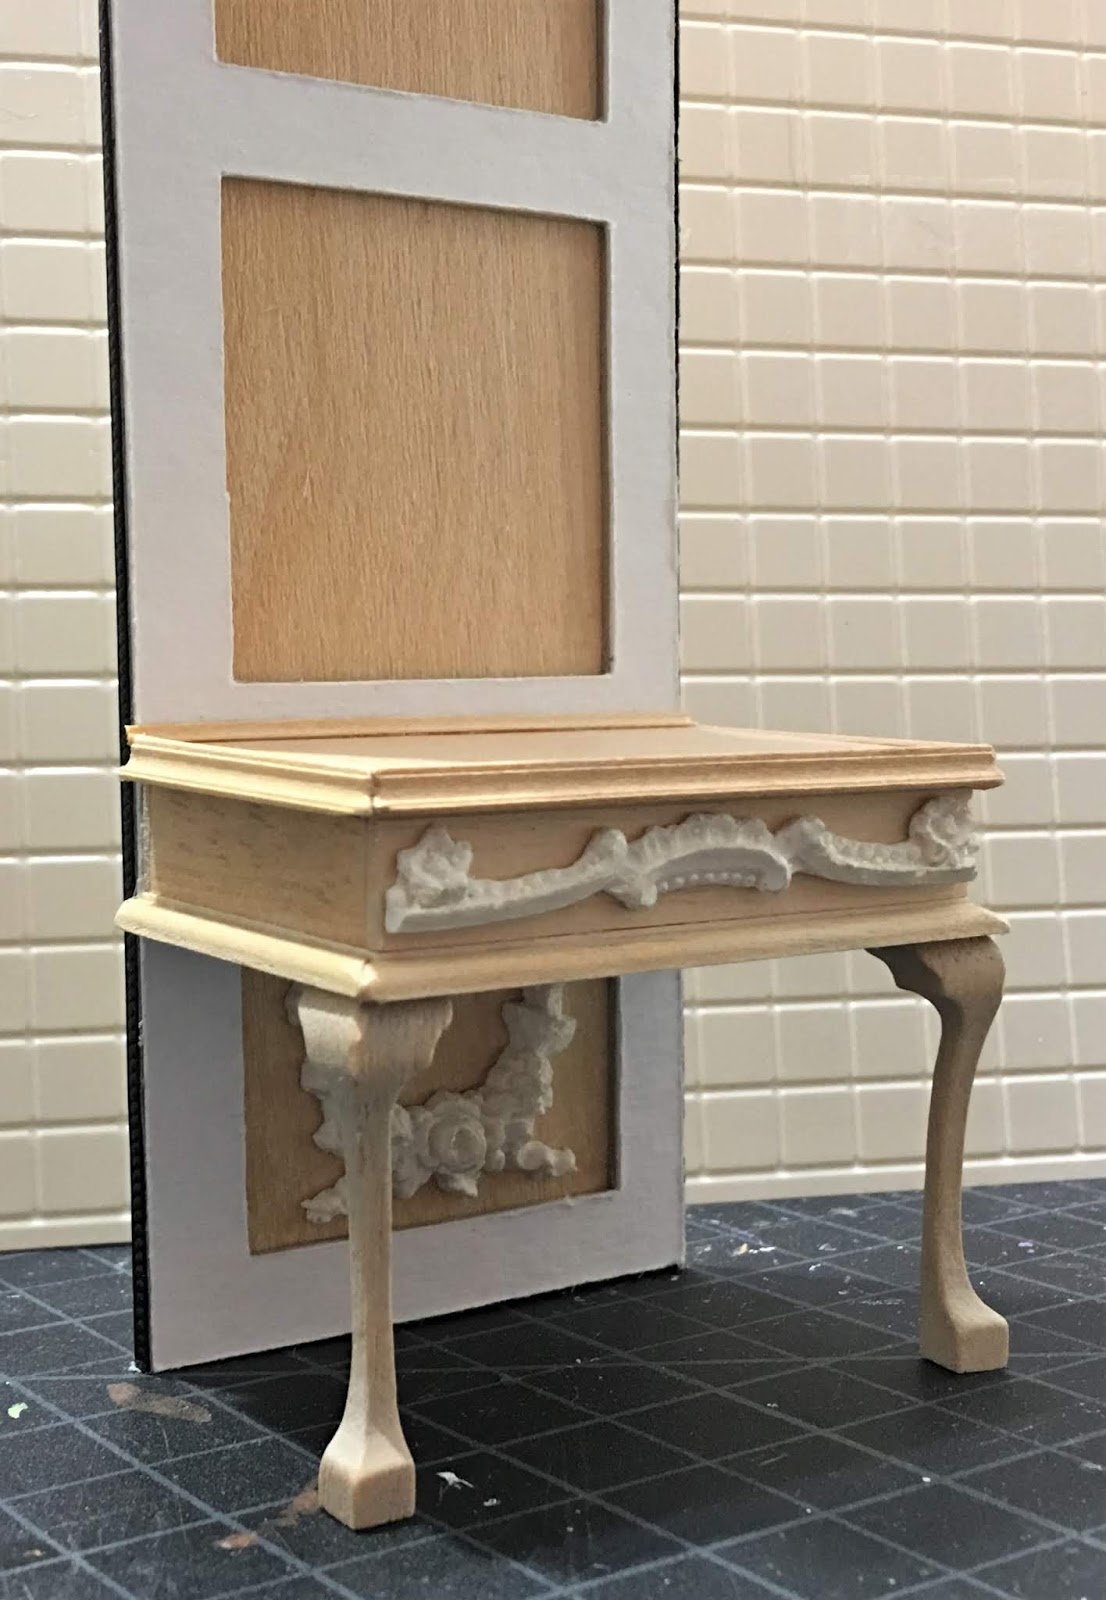
Before I share some photos of the Storybook Cottage's completed kitchen, I want to mention that I have an iPhone 6s Plus which is my only device for taking photos. It is over 6" tall and 3" wide. Some of my favorite shots are the ones I manage to take through the doorways. This has become much easier since our clever friend Keli recommended getting a Bluetooth Selfie Stick with a remote shutter control. This makes it so all you have to fit into the confined spaces of a dollhouse is the camera on the stick, and not your giant hand. I find it nearly impossible to hold the camera with one hand and somehow press the shutter button with a finger of that hand while still keeping the phone steady and seeing the display to know what you are shooting. This bluetooth device removes the need for that acrobatic feat. Having said that, I still find it difficult to get enough light into the rooms to take photos without creating annoying shadows. This gloomy time of year it is even more challenging. So please forgive me some of the photos - they are literally the best I can do. :O)

These shots are looking through the dining room door into the sink's bay window. I have added the herbs in their cute little pots and a few teapots and things. There's a copper overhead battery powered light, and you'll notice, no window coverings. I decided if I can't decide it's best to make no decision at all!  Though I do reserve the right to change my mind! :O)


Going around the kitchen counter clock wise...


Scattered around the room are various Valerie Casson tea pots. See if you can spot them!


Teresa Welch - The China Closet
Ina Williams Tea Set


Elizabeth of Studio E
Mike Sparrow Tea Strainer

Janice Crowley Tea Set

Veronique Cornish Tea Set

Victoria Fasken Tea Set
Mini Gio Pot Holders
Ann Giling Pot Holders
For the center island hanging pot rack, I took a common utensil hanger and added chain so that our little lady can reach the copper cookware (Jason Getzan).


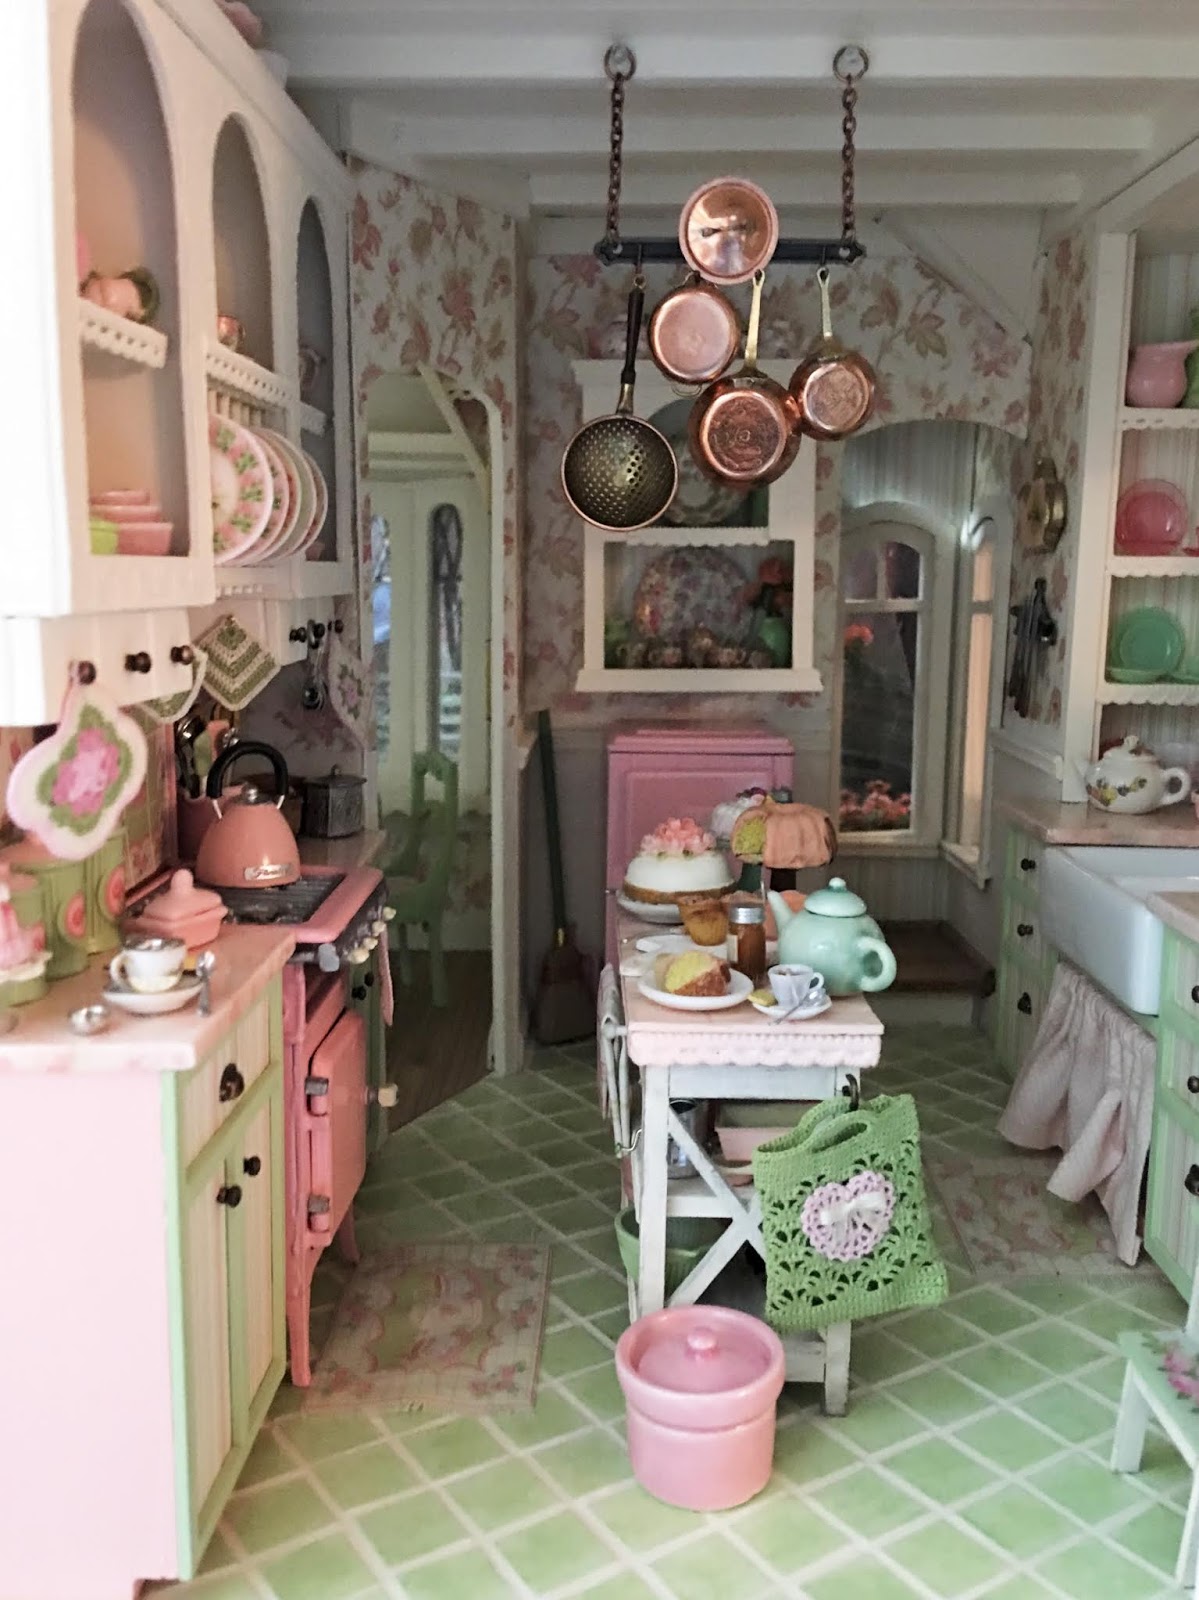
The little crochet market bag is made by Ann Giling. It's a small wonder! The crock is Alex Meiklejohn but I'll not mention where I bought it so as to save you from what would likely be a very bad experience.


In this photo I have added the hanging gadget chain. These were pot metal minis painted to match the kitchen's color scheme. Each one is hung on the chain with a tiny jump ring. With a small kitchen and an owner who loves to cook, space saving ideas are always welcomed!


Here I've added the copper battery powered hanging light fixture.


Here is the center prep table with the extra shelf I needed to add. There were just too many wonderful little things for the kitchen, and one bottom shelf wasn't enough!


As you can see, our little tea loving resident also has a sweet tooth! The cake in the back left is made by Elizabeth of Studio E and my photo simply does not do it justice! It looks delectable and is so well done I literally salivate every time I see it!


The frosted bundt cake, slices, frosting and muffins are made by Kim's Mini Bakery and the details are incredible!


Here's the little teacup shelf which is still waiting for it's apron. I have some little trims coming and I'm holding out until I have them. The two kind of largish cups and saucers are from Twelve Times More Tiny, The adorable pink mouse and strawberry teapots are made by Megan, the pink and green teacups and saucers on the middle shelf are the Chrysnbon ones I applied waterslide decals to, the bottom left is Keiser from Keli and the bottom right is Reutter. That gives you an idea of the range of sizes we encounter out there for 1/12th scale.


So that is the kitchen, and though I have left a few tiny spaces for future treasures, it is mostly done. I was a little hesitant at several points in this project about going shabby, girlie overload, but all I see now when I look at it is a fulfillment of my dreams and a place I plan to visit very often!


Now that I've got my mirror straight, and added the key into the lock as Marilyn so astutely suggested, here are a couple new photos of the hall tree/coat rack.


Lady figure by Kay Lewis
I hope you enjoyed your tour and that you'll stop by for some tea and treats any time you're in the neighborhood!

xo xo,
Jodi

Monday, January 21, 2019

Swept Away

Every once in a while an idea comes to me out of nowhere. I get excited, I start looking around to see if the concept has been done before, and if so, how'd they do it. Usually, it's a real life sized thing and I have to figure out how to do it in miniature. If I'm lucky, I get really inspired by photos I've seen on Pinterest etc, and a scheme begins to materialize. I remember parts and pieces I have in my mini supplies that I can harness, and a new project is born. I am sure every one of you shares this phenomenon with me, so you can relate when I tell you I got totally sidetracked this week. That's how it happened, and why I paused production on the kitchen to make a hall tree for the living room.


I knew long ago that I'd wanted a hall tree/coat rack/entry table type of thing by the Cottage's front door. Originally I had ideas for using shutters with shelves, hooks, photo frames etc. But then I saw some photos of how people were re-purposing doors as coat racks and my mind exploded. I had to get out the notepad and write things down before I forgot them. That's how this crude drawing with notes happened.


Once I had the idea, it marinated overnight, and then Saturday morning I started looking through my stash. I had some real dollhouse doors, but then I came across some leftover wood panels from the Greenleaf doors I used as trim on the Botanique shops I started (but never finished) in 2016. They were the perfect size, and using my Cricut, I could cut the door's raised panels and arched transom window frames for the top. I took all the pertinent measurements, drew up a quick scale drawing on graph paper, then got to work in the Cricut Design Space program,


I wanted a tabletop and drawer piece to be attached, so was thrilled when, in my stash of kits, I found a House Of Miniatures Queen Ann Tea Table kit. How perfect! It was exactly the width of the door blank and had lovely cabriole legs.


I decided to use only the front legs and have the back attach right to the door. I also wanted to make faux drawers on the sides like some of the real life historically accurate Queen Ann Tea tables have. The kit didn't have drawers or a bottom, so I cut a duplicate of the table top to make a bottom. I laid out all the pieces and began to assemble.


Once I started building and dry fitting, I decided to omit the arched top. It just made the piece too imposing in the small entry way and really didn't need the extra detail. I added some Unique Miniatures reliefs (that I borrowed from the New Orleans' project drawer), Dresden trim to the sides and shelf, and shelf brackets (stair trim from JMG Laser Works).


While I had the Cricut projects going, I decided to make the frame for the arched mantle mirror too. I added subtle Dresden detailing on it, as well.


I mixed up some of the Cameo Blush paint with some Vintage White and some Sandstone. It kept the color in the pallet, but warmed and softened it a bit. Once I had a couple coats on, I gave it a test in the space for color and size, and to see how the details looked in the natural light.


Now it was time to start adding some of the details. Instead of sanding down the edges or applying ink pad ink, I decided to tie into the gold framed Unique Miniatures mirror and use Inka Gold gilders paste instead. I rubbed my finger into the gilders paste, then rubbed my finger across edges, the reliefs and the Dresden to give it some added dimension.


I did the same for the mirror frame, then added the mirror card to the mirror frames.


The mantle mirror is just propped against the wall for now - I don't think I'm going to decorate the living room until I have the kitchen completed, but I just wanted to get an idea of how it would look. It's hard to get my hand and the camera in here, so the second photo is taken from outside looking through the bump out window seat window. The radiator is just stuck in the fireplace too for now.


I didn't remember until I was writing this post that I forgot to install the hardware for the side drawers. Oops! I promise they'll be there after I accessorize the hall tree and post finished photos. The space between the table top and the shelf gave me just enough room for the mirror, two coat hooks and the door knob. Looks like my tacky wax has let my mirror slide out of place too. Ah jeeze!


I just love the view from the kitchen door! The home spun hall tree is not too bad for something I whipped up from my own imagination and my supply drawers! Oh, and of course, a little inspiration from all the real life decorator geniuses on Pinterest!


I hope all of you are being surprised with inspiration that carries you away to unexpected places! It's awfully fun to be swept away, and far too rare!

xo xo,
Jodi

Wednesday, January 16, 2019

Storybook Cottage Kitchen Progress...

It feels like I worked on a lot of side projects this week, yet the Storybook Cottage's kitchen is still not finished. So I'll share my process and progress, and hopefully make it at least a little interesting!


I Started by making up some water slide decals using images I found online (and ones I collaged from several images). I had some blank white porcelain plates for the plate rack in the cupboard above the stove, so thought waterslide decals were a good way to help them coordinate with the kitchen's colors of pinks and greens. I had some plain white Chrysnbon cups and saucers that I wanted to try them on, a trivet, some canisters and some teapots, too.


I found that the ones I printed on the white background waterslide paper were more difficult to manage. Several of the decals stuck really well to themselves but not to the surface I wanted them to. I ended up printing them again, this time on the clear background waterslide paper, and that was so much better! After finishing the plates up, I was ready to finish the cupboard! The tea set on the left is made by Janice Crawley, the center is Victoria Fasken and the right is Veronique Cornish. They were purchased at various times and places over the past couple years. The pink and green pot holders are MiniGio and you'll find them in every one of my builds! The green and white ones are made by Ann Giling and her micro crochet is phenomenal!


I showed a sneak peek of the small cabinet that will go above the fridge in my last post, but the Ina Williams tea set and The China Closet bowl are definitely eye candy worth another look! The teapots on top are Veronique Cornish, Valerie Casson and Megan Wallace. I'll get a better photo of those for my next post.


I was unhappy with the tile backsplash on the stove, but was so afraid that if I started messing with it, I would just mess something else up. The problems were many. First, I made each tile as an individual. That meant I had to leave cut lines on the print, cut perfectly, then glue on completely straight. I didn't, and it was plain to see. In addition, I sealed and tried to give it a raised porcelain look with Triple Thick. In spite of sealing the image with spray sealer first, the Triple Thick bleached out the image making it several shades lighter than I'd printed it, and it remained slightly cloudy and yellowed (like Shannon's tub). I left it, but it gnawed at me all week.


Finally, I just couldn't take it any more, and I decided to just try and peel a corner up. It came right off! Phew! Now I could try again using another method, and hopefully, get a better result. This time, I made an overlay of the grout line grid over the image. I printed the image onto matte photo paper, increasing the ink intensity 10%. I let it dry overnight, then sealed it on both sides with Mod Podge. Once that was thoroughly dry, I laminated an additional layer of the matte photo paper onto the back. This was so that when I did the next step, embossing the grout lines with a ball stylus, there would be a noticeable depression. I gave it one last coat of Mod Podge and left it to dry overnight.


It looks soooo much better! I am going to think carefully before using Triple Thick again.

Triple Thick left, Mod Podge with embossed grout lines right.


I got to work deciding what little accessories I wanted where and what needed to be done with them. I had assorted cooking utensils and the little Alex Meiklejohn pitcher seemed like the perfect display vehicle. Some needed paint while others needed stain. The tiny Mini Fanaberia timer is absolutely perfect and precious! The turned wood salt & pepper shakers and mortar and pestle are also lovely, made by Alexandra and purchased through Small Scale Showcase.


The other stove side cabinet is adorned with a gorgeous cake made by our own Elizabeth of Studio E Miniatures. The cup and saucer are Kaiser and are part of the dinnerware set given to me by Keli of I See Cerulean. The tea strainer is an incredibly tiny sterling silver set by Mike Sparrow. The canisters are 3D printed from Lindblomska 3Designs Shapeways store and then painted. The paring knife is Jason Getzan. I am so excited to have these pieces, and it's been so satisfying to finally get them out of hiding and on display!


The next focus of concentration was the sink area. I almost have the shelves on either side figured out, but I turned my attention the the bay window shelf. I knew from the beginning when I expanded the bay by an inch and a half that I would have a shelf filled with herbs. I got out my cute little Braxton Payne pots and decided on a layout.


Then came the arduous duty of making up all the herbs, painting the pots, planting the pots and making labels for them.


Times like these call for many shades of green to color the leaves in these SDK herb kits! I used alcohol ink for all but the sage. That's just watered down Basil Green acrylic paint. Funny that it's definitely the color of sage and not at all basil.


I don't want to stick the pots onto the window shelf just yet - I am still contemplating window coverings. I'd like a little detail, but definitely don't want the arched windows covered. Maybe fabric roll shades with tassels? I could start them where the leaded windows meet the regular glass? Or just a cornice above the windows that repeats the arches? Opinions encouraged! I also need to install the magnet plate for the battery light in the bay.


The plant labels are so tiny and hard to see, but I didn't skimp on the details when I made them! The edges have been aged with Vintage Photo stamp ink. Here's what they look like in real life size. Printed size is 1/8" wide by 1/2" high.


I have two more major areas with accessories to address: The center prep table and the pot rack. For the center prep table, I have so much I'd like to include that I am thinking of adding an additional shelf. And, for the pot rack, the options I am considering are either having it like a traditional pot rack hanging above the prep table, or just something creative and home spun hung from the rafters. I think it all hinges on whether or not I have room to work around the hanging light fixture above the prep table. So, more work and decision making ahead...


Have a great week, and I hope all your decisions and contemplations are of the mini variety!

xo xo,
Jodi