Search My Blog!

Use the Search box below to find keywords that you're looking for quickly and easily!

Search Feature

Thursday, August 23, 2018

Age Old Storybook

How old is too old and when does "weathered" become decrepit? This week's focus has been an attempt to give some age and character to the Storybook Cottage. As I was adding each layer of grime, wear and evidence of the elements, I had keep asking myself these questions. I didn't really know where the aging process would take me, so I just kind of went with any idea that seemed like a good one. I think I like the way things are going. Time will tell.

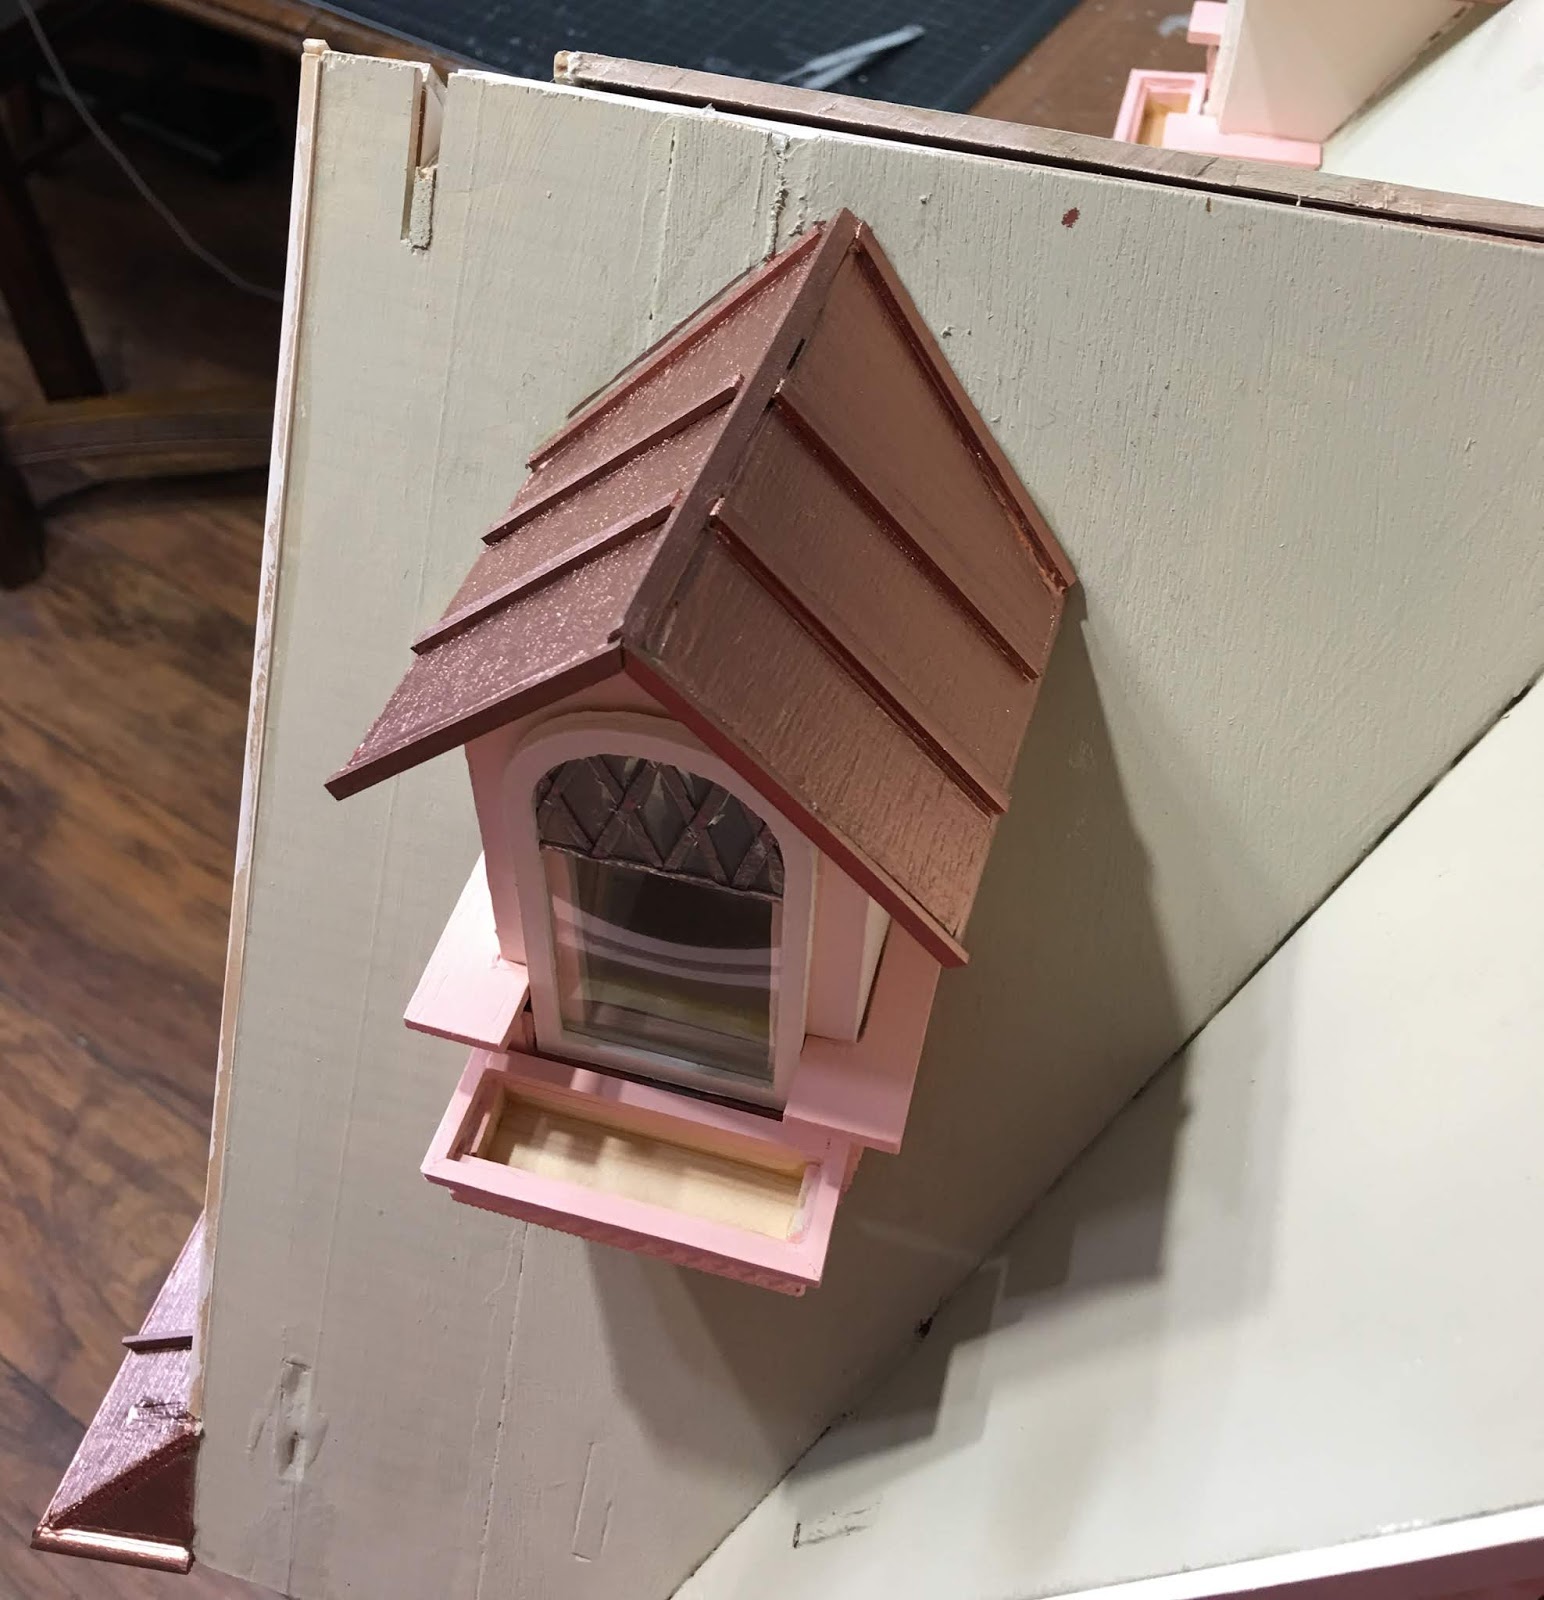
I wanted to age the copper roofs, but how much and how? I didn't want complete patina, but I wanted "well on it's way". I started by rubbing on Gilders Paste Wax in copper, then blended in some patina here and there.

The copper leafing pen layer was the base.
After first layer of copper gilders paste. Just a bit darker and richer.
After applying patina gilders paste.
You can also see in this photo that I added some fascia detail using the Dresden, and an apex decoration with a bee charm. The photos may be a bit out of order. I didn't always remember to take photos during every process. Please forgive...

I also felt that the shingles needed some work. In spite of using two different colored stain pens, it still felt kind of one dimensional and looked a little too oily for an old roof. So, I used some chalk pastels to highlight certain areas and knock down some of the shine.

The roof after only the stain pen application.

Chalk colors used to highlight the shingless.
After several layers of chalk.
I thought about how a lot of older shingle roofs accumulate moss over time, so I used more chalk to create some mossy-ness in certain areas.

I mixed the limited green chalks I had with yellow, teal and brown to create varied green shades.
After adding some chalk moss.

I got out my landscape/project board to decide on a layout. How large a footprint do I want this cottage to take up? I have a display table in mind, so not too large. While trying to figure this out, I noticed that my stonework needed something. If it's old, things have grown in the cracks. That's when I got out the MBS Fine Loose Grass I've had leftover since the Encounters project in 2012. It's got a really fine texture, and a nice variety of green shades.

I traced all the grout lines in glue, then sprinkled on the "moss". I had to lay the house down on each of the sides for the application so that the "moss" wouldn't fall off before the glue took hold. Once it did, I gently brushed away the excess, recovered all of the loose moss, and moved on to another side.


It was an impactful change to the look of the cottage, and I think makes it more "real". I think I like it, but only time and the addition of the next layers of detail will tell.


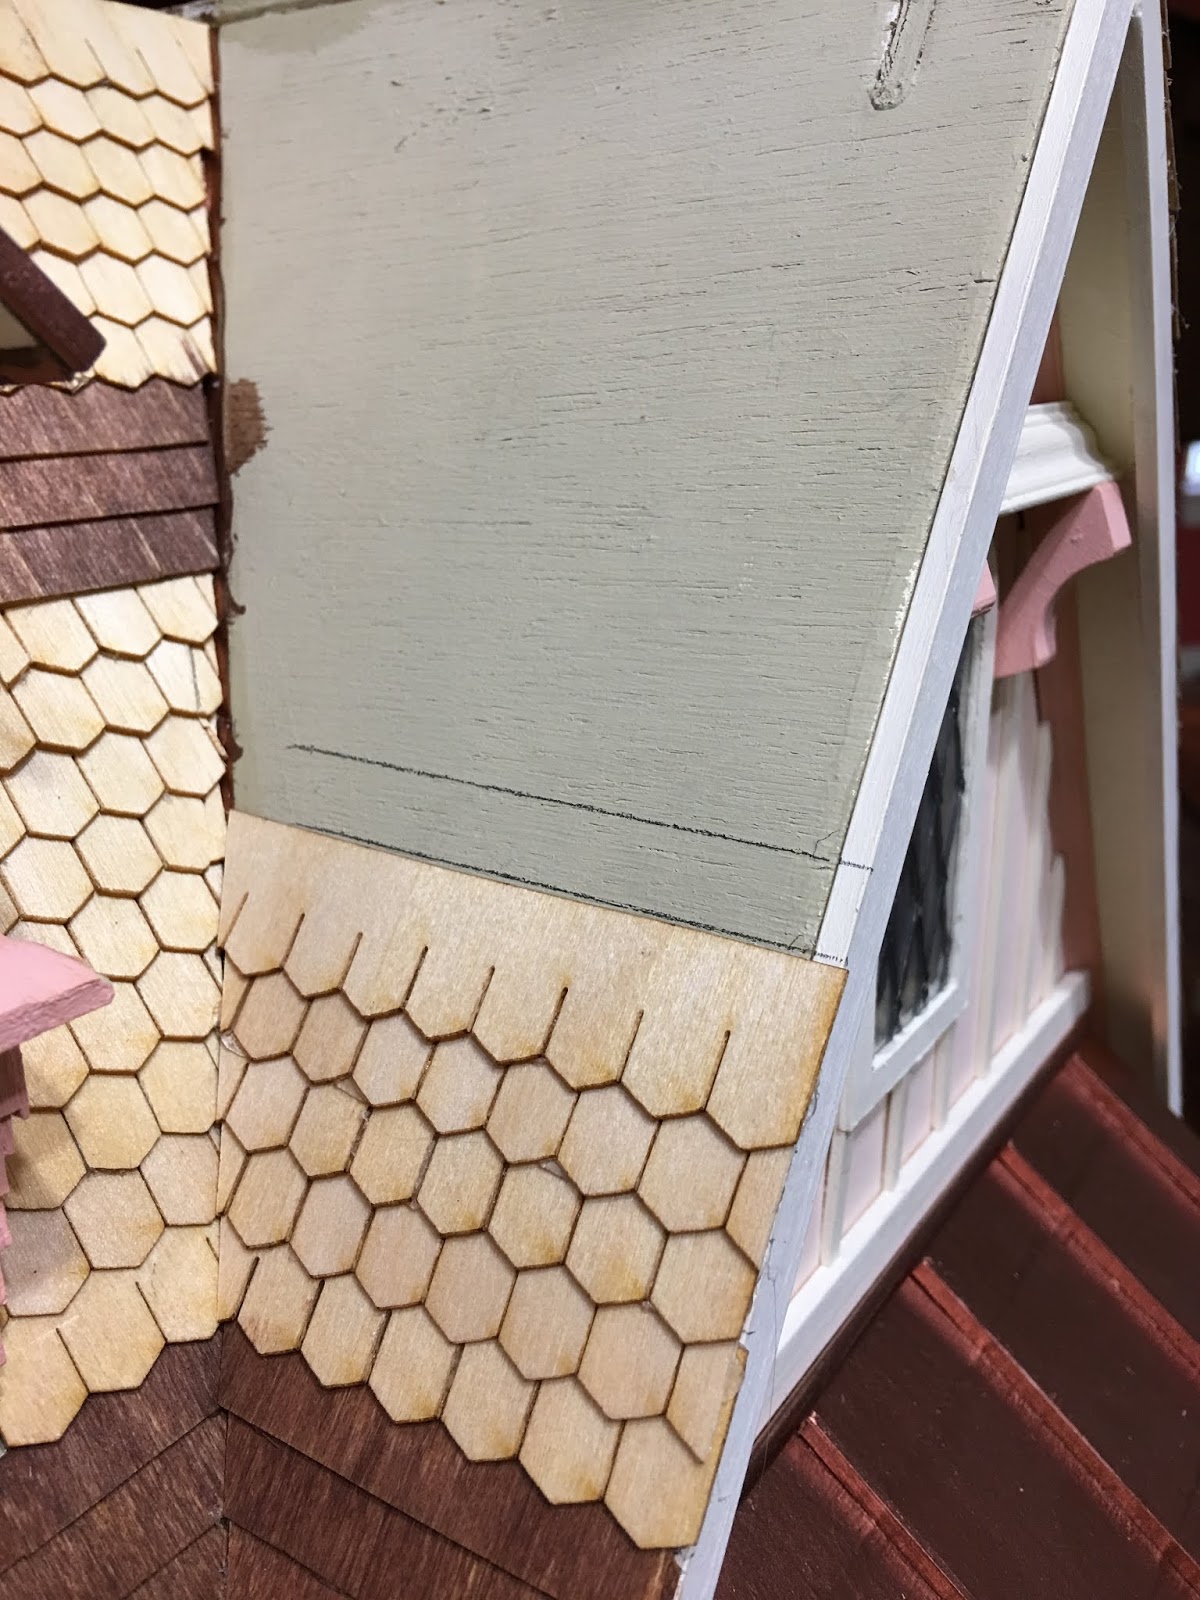
You may also have noticed that the exterior got a good aging. I diluted FolkArt Home Decor Wax in antique (which is dark brown) with clear wax to get a lighter shade of "antique". I used a brush and outlined or highlighted certain areas. There were places that looked a little too "antique", so I went over those with the white wax to tone it down.

I also added some three dimensional stickers to add interest to the plain sides of the dormers.


The roofs received a few clumps of moss here and there. Too much? Not enough?


So tell me what you think - Has the cottage aged well? I may still have to live with it for a while before I decide.

In the human sized home improvement department, I did my best to bring back some youth and vitality. I finished all but the final touch up painting in all of the areas where Russ needs to install the flooring. I also repainted a cabinet for the guest bath. I worked really hard for several days to get ahead of him, so I could enjoy the reward of some free time to work on the cottage. Once the flooring is laid, I'll have more homework. :o)

Hope your summer's been one for the ages!

xo xo,
Jodi

Thursday, August 16, 2018

Storybook Cottage Gets A Roof!

I had to look at the calendar three times until it sunk in that it's been three weeks since my last post! Boy time flies when you're ~B~U~S~Y~! Work on the human scale renovations is moving along, but things always take longer than I seem to realize. The two spare bedrooms have been cleared, spackled, primed, had carpeting (and carpet tack and staples) removed and ceiling, trim and wall paint completed. I'm supposed to be working on the hall, landing and guest bath, too, but I just really needed a mini fix!

First bedroom in mid-chaos!

The next step on the cottage to-do list was the roof shingles. I chose to go with Greenleaf half scale speed shingles, because they are faster and seem more in scale on a small structure. Though getting them applied seemed anything but speedy! I thought the hex shaped variety was fitting for a tea loving resident, because they look just like honeycomb!


There were many interesting angles to contend with, so I employed the use of a paper template. Remind me to make templates of the roof sections before I attach them next time, would you? Anyway, I'd draw the line for the top of the next row of speed shingles...


Transfer the mark to the paper template...


Draw a line across the template using the square...


Line up the speed shingle strip and position the ruler at the angle...


Then cut. It worked beautifully ALMOST every time! :O)


Every chance I got between coats of paint or scrubbing or reorganizing the linen closet or tupperware cupboard, I added a few rows...


And eventually, in spite of a few setbacks and mistakes, I was finished!!!


I used Minwax stain markers, Provincial and Cherry, to stain the shingles.


And eventually, I finished that, too. I'll likely keep adding additional coats until I get the depth I'm after, because the shingles seem to drink it up and lighten a bit after they dry.


Now the question was: How to cap the roof and tie in the back shed dormer to the shingled roof? I wonder how many of life's mysteries have been solved over a bowl of cereal? Mine was solved using a cereal box.

Two roof ridges and one shed dormer meet.

I measured how far down I wanted the roof cap to cover the shingles, doubled that (to cover each side) then added another quarter inch just for good measure. Then I cut a strip for the long main roof ridge and one for the shorter front roof ridge. Then I folded them in half lengthwise and creased 'em good with my bone folder.


I gave them a good dry fit and made cuts and adjustments for where the two ridges met and for the variance in angle caused by the gable and shed dormer. I also made notches for where the small dormer roofs met the ridge cap. I noticed that a lot of copper roofs have a strip of copper that is welded on top of where two pieces meet, so I cut 1/8" strips to provide this detail. Then everything got a first coat of copper leafing marker.


I used hot melt glue to attach it to the roof for instant grab and the ability to quickly mold it to the shape of the roof. It came out mostly good.


Using the cereal box cardboard again, I continued the strips from the ridge cap onto the shed dormer.


Everything's going to need several more coats and touch-ups, but I am happy that the roofing questions are answered, and the shingling is (mostly) done!


Russ will start the flooring install on the human sized rooms this weekend, then the ball is back in my court. More painting, more cleaning, more organizing, and loads of fun decor type stuff to make for one guest room. I'll share photos of that stuff as it gets more interesting.

Enjoy your last couple weeks of August, and I hope to see you again real soon!

xo xo,
Jodi

Thursday, July 26, 2018

Storybook's Story, Layer By Layer

I have less progress than I'd hoped for on the Storybook Cottage this week, but I'm going to have to get used to the idea. There is going to be some stiff competition for mini time in the coming weeks, but the competition is almost as exciting! Since Russ and I bought this home in January of 2008, we have only lived here alone for about a year of that time. Our daughter lived here at various points in between colleges and graduations, and has been really on her own since December of 2013. Our son Ande moved back in (again) September of 2014, but just moved on to start his new adventure the beginning of July. We decided it's a great opportunity for a refresh, and will install wood flooring upstairs, repaint, and do a little redecorating. We have family coming to visit from Texas in October, so the deadline is lighting a fire under our behinds. Getting to pick new decor for the real life house is almost as fun as doing it in miniature!

So here's what I was able to work on in the stolen mini moments this week...

Starting The Copper Roofs


All of the dormer roofs are going to be copper, so I started by adding an under layer of burnt sienna acrylic paint to the roofs. Then I used a Krylon Copper Leafing Pen to paint over the burnt sienna, and pre-painted sticks of 1/8" quarter round and 1/16" x 1/8" basswood for the edges and ridges. It seems to look better and better the more layers I add. Eventually, when I get to the exterior finishing details, I'll be adding verdigris, aging and vines, so the initial layers are only the base.


Details and Trim


I added the ridge cap molding over the shake shingle detail on the upper dormers. When it came time to trim the back opening of the cottage, I realized I'd need to make the long flower box that serves as the trim detail between the first and second floor before I could measure and cut trim.


So I took a little side adventure to make all of the flower boxes. Below is the raw wood structure of the long separator flower box. You have to imagine that if the fourth wall were there, the shed dormer would be all floor length windows.


There were seven other windows getting window boxes, and the two small stairwell windows needed pot shelves, so I set up an assembly line. I used half inch basswood and cut front, back, sides and bottoms using the MicroLux table saw. Cutting these with my miter box would have taken a LOT longer!


I added wainscot trim to the top front and sides to beef them up a bit, then used more of my go to White Dresden Borders as an accent around the bottoms. I've used a lot of these borders in this build and I LOVE them! It just seems to add such nice detail and texture to so many things. I also edged the pot shelves with it.


Once I had a few coats of Cameo Blush brushed on, it was time for their audition on the cottage.


Long flower box - now I can measure for and get to the back trims.


And temporarily attached under the rest of the windows. Being able to plant and arrange the future flowers prior to permanent installation just seems smart and way less dangerous to my window panes! You may also notice I've installed the fascia trim, though I have more border detail to add to them, as well.


And a few more photos of the copper roof progress. I am still debating with myself about whether to make the shed dormer copper, or shingle it along with the main roofs. Determining how the two shall meet is the question. And the flat copper roof on the bay needs a lot more detail, and maybe a couple downspouts.


So real life projects take precedence, and mini building will happen in stolen moments. Hopefully, I'll be back with more progress before too long!

xo xo,
Jodi