Search My Blog!

Use the Search box below to find keywords that you're looking for quickly and easily!

Search Feature

Thursday, August 3, 2017

Sweet Christmas Cottage - Kitchen Layout


Who is that glamorous woman in the kitchen? Why, that's Ellie! She;s here to demonstrate how a few small changes made to mass produced miniatures can make them just right for your space!


The kitchen furnishings are made up of some barewood hutch units, a Jane Harrop farm sink kit, and some scratch and dent appliances found on eBay. The layout works, but they need a little something...


20 seconds in the microwave, and I was able to carefully remove the the hutch pieces from the bases.


New counter tops and trim were cut from 1/16" basswood, then stained. These created a continual surface, turning individual pieces into one unit. More counter space is appreciated by everyone, even mini cooks!


Top molding was stained to match, new drawer fronts and hardware added, "tile" backsplash and old fashioned taps. Copper wire created the perfect plate rack.


The stand alone hutch now has more room for baking preparations.


A great fit for the room, lots of storage space, and the functionality that every busy Christmas kitchen needs.


The appliances were given a little silver paint in strategic places to add interest and realism.


Even Ellie was transformed to fit in better with her new surroundings. It's amazing what a new hairstyle and outfit can do for you.


 She loves her new look, and her new kitchen! It won't be long until this place will be filled with the sights and smells of Christmas!


With temperatures reaching 94 degrees today, I'm going to embrace that Christmas thought.


Hope you're keeping cool in the Northern Hemisphere, and warm thoughts in the Southern.

xo xo,
Jodi

Thursday, July 27, 2017

Sweet Christmas Cottage - The Backdrop


The idea for working on the Dura-Craft Columbian kit was to get the inside completely wired, floored, papered and trimmed out so I could work on little projects inside as I had the time or motivation. Same with the exterior - as inspiration strikes I'll work on texture, leaded windows and the like...


Just to prove I have nothing against tape wire systems (on non MDF structures), that's what I used to electrify this project. It was a pretty straightforward plan with ceiling fixtures, sconces and plenty of outlets for strings of Christmas lights.


 I made the modifications I mentioned in my last post: adding a kitchen window for above the future sink, expanding the kitchen by an inch, narrowing the staircase etc. I covered the low kitchen windows with a bead board panel to gain some much needed wall space. The windows will still be visible from the outside, likely "frosted in addition to the leading and some Christmas-sy color.


I went with a fun gingerbread cookie patterned wallpaper for the walls - apropos for a Christmas kitchen totally geared for making the stuff of sugarplum visions. The flooring paper gives a nice retro feeling, post war of course, because there is no sugar rationing happening here! I went with sheepskin chalk paint for the trims in here to keep it light and help balance all those patterns.


I managed to cobble together scraps of the tin ceiling I used in the New Orleans kitchen, covering seams with stripwood.


The living room might be a little on the small side, but I think the tree will fit nicely, taking up the front corner and window area, leaving just enough room for comfy chairs and an old time radio. Maybe even a little dollhouse if I'm lucky!


Cutting the stairs down to 2-1/4" gave me additional space in the living room, yet they still look wide enough for cottage standards. As I promised myself I would, I kept them simple. I used Houseworks random plank flooring and stained them with a Minwax Provincial stain marker. I think they turned out nice.


I used a House Of Miniatures fireplace kit as the basis for the fireplace, reducing the width, depth and adding some shelving for display. The log holder is improvised using WireForm Metal Mesh. There are a million ideas for this stuff... My fire lights need some adjusting still, and take no notice of my toothpick shim: the unit will remain removable for easier accessorizing. I see that I forgot my outlet covers, as well.


The bedroom should be just large enough for a double bed, a couple nightstands, a dresser and a chair. I have plans to make a custom bed. Need to finalize the design then dust off the old soldering iron and copper wire. I'll need to make that stairway opening a bit safer, and I see my trim has popped itself away from the wall. One step forward, one step back...


I forgot to mention that I'd swapped out the bedroom and bathrooms from the original kit design by relocating the divider wall to the other side of the stair opening. I thought it would be a shame to have a headboard practically covering up the dormer window.


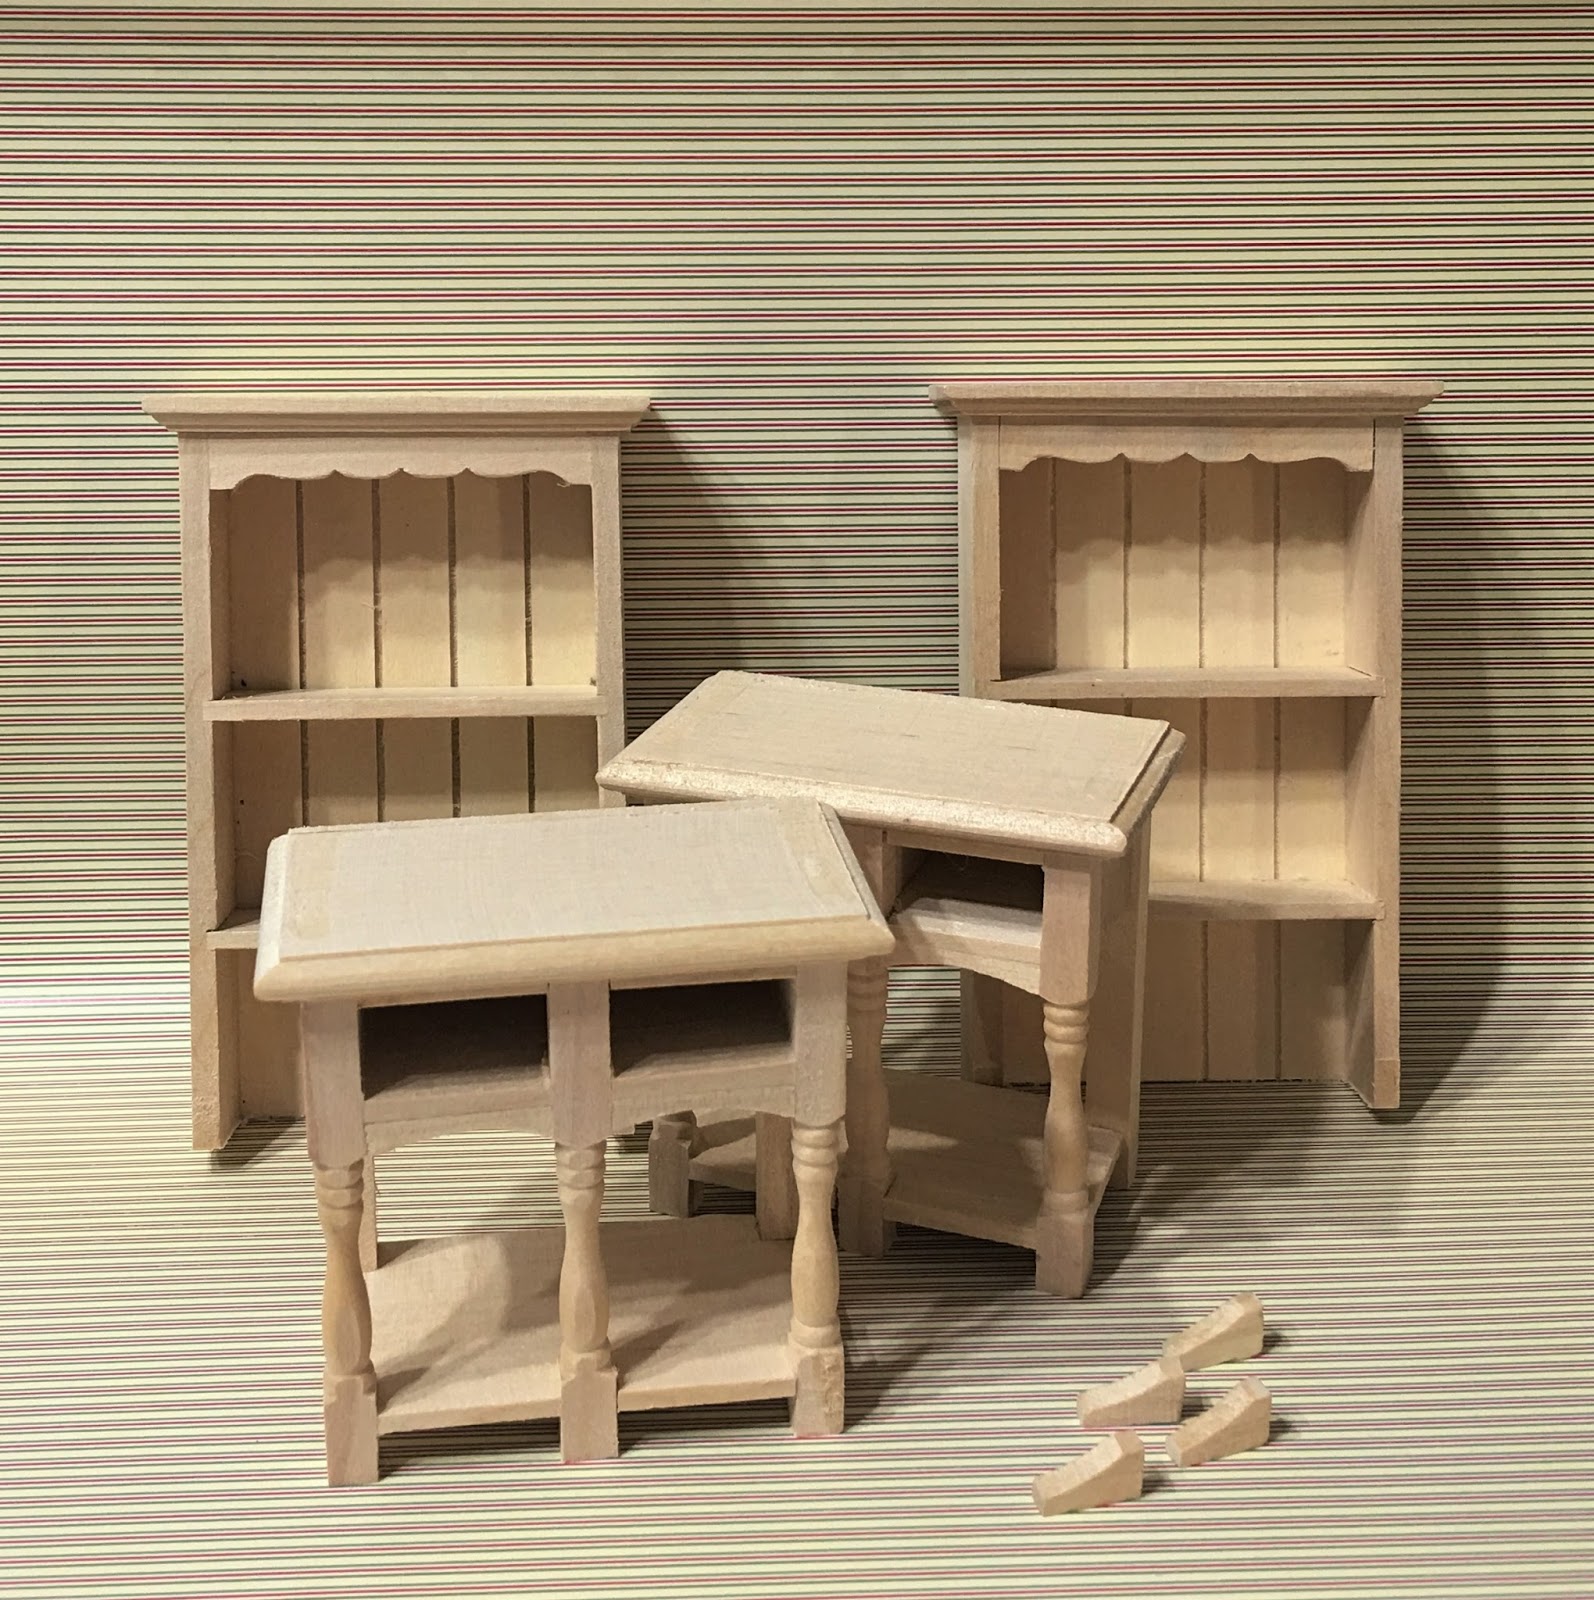
To indulge my love for making kits, I decided to use the Greenleaf Master Bathroom furniture kit. It's charming style fits right in to the Christmas cottage, but the scale seemed a little on the small side of 1/12th. The wainscoting is 3" tall, so the sink counter should match that.


Not to worry! They make the perfect foundation for a little sprucing up! I made up and cut some chipboard panels with the Cricut. Getting better...


Paint, knobs, faucets, legs, Triple Thick, some ingenuity and now they're just right for the old time-y vibe!


Now the debate begins... Start on the kitchen build out on this one, or the New Orleans? Or the New Orleans staircase rebuild? Or take a nap? Oh yes, my pillow is calling...

Until next time,
Jodi

xxx

Tuesday, July 11, 2017

The Duracraft Columbian - Sweet Christmas Cottage


Last fall I became aware of the existence of a great little arts and crafts supplier called AlphaStamps. Oh doggy! It spurred on many ideas for projects, including the two chipboard secret book projects I made during December and January. One was for my daughter, a retro kitchen baking scene, and was labeled Super Secret Mini because it was a surprise thank you gift for all her help with Thanksgiving. I just had to make one for myself, but the style was very different.


One of the chipboard kits that Alpha Stamps sold was for an advent calendar. I thought it would be great fun to fill the drawers up with mini Christmas ornaments, each day adding one to a mini tree displayed in the center, until finally the star (or gingerbread man in my case) was placed at the tree top the final day of advent. Soon I started collecting not just ornaments, but candy. Then I thought a little fireplace with stockings would be great, and then I picked up some lights to light the whole thing. Then I thought "if I could just make the display space a little larger"...Well, thanks to my miniature madness, I soon had too many ideas and too many over-the-top adorable Christmas themed minis and no good plan to increase the space of the advent calendar any larger. What now?


Enter the Dura-Craft Columbian. With it's adorable arched leaded glass windows and heart punched shutters it was a perfect Sweet Christmas Cottage! And large enough to accommodate a decent sized scene set up inside, and small enough to justify carving out some valuable real estate in the RL house. But best of all, after only a few months of daily emails as a result of very specific search criteria, I found a massive bargain for an unopened kit on eBay!


Now I realize that it is only July, but with all the things I want to make and include in this project, it feels like I better get a move on! I'd love to have it finished by Thanksgiving. Plus, I'm just so excited about doing my first ever Dura-Craft kit, and my first ever Christmas project! I have found inspiration for so many great ideas from the pool of incredibly talented and creative bloggers in our community. I just know this will be a blast to create! Now that the first floor lighting of The New Orleans is finished, and while I come to terms with the fact that I need to completely re-think the staircase, I'm going to start on the The Columbian!


I told myself again and again to keep it simple. No complicated bashing, no fancy trims and moldings. Essentially, just create a nice and basic shell and let all the amazing mini details inside be the star. Of course, I had to do some space planning and start with a basic layout in mind. To that end, I started spending time just looking at photos and imagining (and measuring) all of the larger furnishings and fixtures I want to include. If I left the kit as is, this would create some space and display issues. So after much thought, these are the only things I'm going to change about the kit itself:

1. Cover over the double front windows on the left (kitchen) side - interior only. They'll still be installed and visible from the outside - I'll just add curtains and other camouflage methods.
2. Utilize the interior trim from the covered up window to cut a new window into the left side wall, above where the sink will be.
3. Decrease the width of the stairs by aprox. 1". I am leaving them as open tread and though I'll finish them as nicely as I can, they will not be a major feature.
4. Use the space gained from the stairs to move the kitchen wall to the right to gain about 1".
5. Fill in the excess stairwell opening.
6. Move the upstairs interior wall to the right, on the opposite side of the stairwell opening. This will create the new smaller bathroom on the right, and a larger bedroom space on the left.

Sound reasonable? I thought so too!

Wallpapers
The first thing that has to happen is that I need to get my work space thoroughly cleaned and organized. I can't remember ever working on two full projects at a time, so finding space and functionality will be a challenge. One nice benefit will be the ability to move back and forth between pieces of each project as boredom, frustration or lack of inspiration rear their ugly heads.

Fabrics

I hope it will be interesting enough for all of you follow along, even if Christmas is not your thing. It is your thoughtful encouragement and comments that make me feel connected and truly adds to the excitement of each new mini dream. I love your like minds, excellent ideas, and hope you know that each one of you is so very much appreciated!

Jodi


Thursday, July 6, 2017

The Lights Are On, But Nobody's Home

I've learned a few things about dollhouse lighting... It's a process, and it's better if you expect it to take however long it takes...


As some of you may remember, I decided to go with a round wire and plug system on this structure because of my past frustrations with tapewire systems and MDF. I am glad I did. Like tapewire, you have to plan ahead of time so you'll know where your lights will be. Unlike tapewire, you need to plan for how you'll conceal the wires and where you'll run them to the hub. At least you won't be ripping into your pretty wallpaper trying to isolate a bad connection. On the RGT barn, I'd test, move forward and then things would just stop working. Seems the MDF does not like brads or eyelets and pushes them right back out when you're not looking.


To avoid having to deal with hiding wires behind wallpaper, I decided early on to avoid wall lighting. Instead, I opted for "can" lights and lamps. One exception are the fireplace sconces. They are mounted on the chimney breast which is removable and also serves to conceal the hub for all the wiring in the entire house.


The other exception is the porch light. I drilled through the wall, then fed the wire inside right behind one of the wall frames. I did my best to conceal the wire running down the wall by painting it to match the wall color. There will be an entry table there, so that should help. The wire was then fed through a tiny access hole in the floor, along with the lamp wire, then runs through the joists and up through the floor to the hub.


I plan on adding one or two more living room lamps, and those wires will also be run through "outlets" in the floor and lead back up through the access hole to the hub. I have to decide on furniture placement before I can tackle those.


For the "can" lights, I decided on placement, drilled holes, then made channels in the plywood leading to the hub. Once the lights were installed, I secured the wires into place in the channels using really good masking tape.


Here is the kitchen. The drop fixture is over where the future sink will be. I'll also add another light under the stove hood, but that will be easy. It's just the other side of the wall from the hub, so a little hole drilled into the wall and it's right there.


This is looking through the living room into the dining room.


Looking through the kitchen into the dining room.


Buffet lamp currently taped securely to the floor. Wiring also runs under the house to meet up with the hub.


And a couple shots of the dining room ceiling. Sadly, hardly any of this can be seen unless you are a tiny person and can walk into the room, or you have a small camera. Oh well, I know it's there.


The warm white lighting gives the house a nice homey feel, like peering in through the windows at night. I like the mood they create, and can't wait to see them when all of the furniture is in. But first:

Finishing the stairs


Keep the column bookshelf?


Oh yeah, and an Entire Kitchen which has to be built! Then there's the little matter of a Christmas project that I'd like to have finished by Christmas. Oh goodie! Looks like I'll have two projects going at once!

Hope you all have a wonderful and productive mini weekend!

Jodi