Search My Blog!

Use the Search box below to find keywords that you're looking for quickly and easily!

Search Feature

Showing posts sorted by relevance for query cricut. Sort by date Show all posts

Thursday, August 1, 2019

Autumn's Pantry: Fitting The Fittings

I thought that I'd be working on some new (to me) techniques for making stained glass this week, but the more research I did on ways to do stained glass on dollhouse acetate. the more options there were. I decided to order a few more supplies and jump eagerly into the experimental rabbit hole, but until the supplies came, I had to address other questions. Such as... How was I going to display all the neat fall/harvest stuff I was constantly brainstorming? How was I going to make, build, bash or remodel the fixtures and furnishings? What would be the best layout for this small shop? I had plenty to keep me busy! I'd like to get to the stained glass segment next week, and hopefully, have some fun and successful results to share!


I'd always envisioned a wall of shelves for the back wall, so like the Storybook Cottage kitchen cabinets, I employed the help of the Cricut Design Space program to help me. I love being able to draw precise measurements for things like the depth and height of shelf supports, and there is no cleaner way for me to cut through chipboard sheets like the deep cut blade does on the Cricut. I made the upper arched front shelf piece, a lower drawer front panel, drawers, top support, bottom support and side supports with the Cricut.


I usually have to run my Xacto blade through the cuts afterwards because the 1/16" chipboard material is just slightly more than the Cricut likes to handle. I only like to program one pass with the blade, as well, because more passes can sometimes lead to really rough results. The nice thing is that the chipboard can be gesso'd and sanded, so even sheets that come out looking like this can be salvaged.


The horizontal shelf boards themselves were made from 1/8" basswood sheet ripped down to a depth of 1-5/16" wide by the length of the wall space which is 9-7/8". A nice amount of shelving in spite of the small space!


Here, the lower drawer unit supports are going in.


Here I have added 3D sticker detail to the drawer fronts and am testing the fit of the first shelf. It is 1/4" wider than the other shelves because the upper shelf unit uses it as support.


Another test fit after the first coat of paint, then adding the handles (which are actually door knobs) using a paper jig to ensure identical placement of the handles.


Then shelf supports made of 1/8" x 1/8" basswood strip go in, then shelves, then a light bulb for each upper arched shelf opening, then the front panel and the top piece.


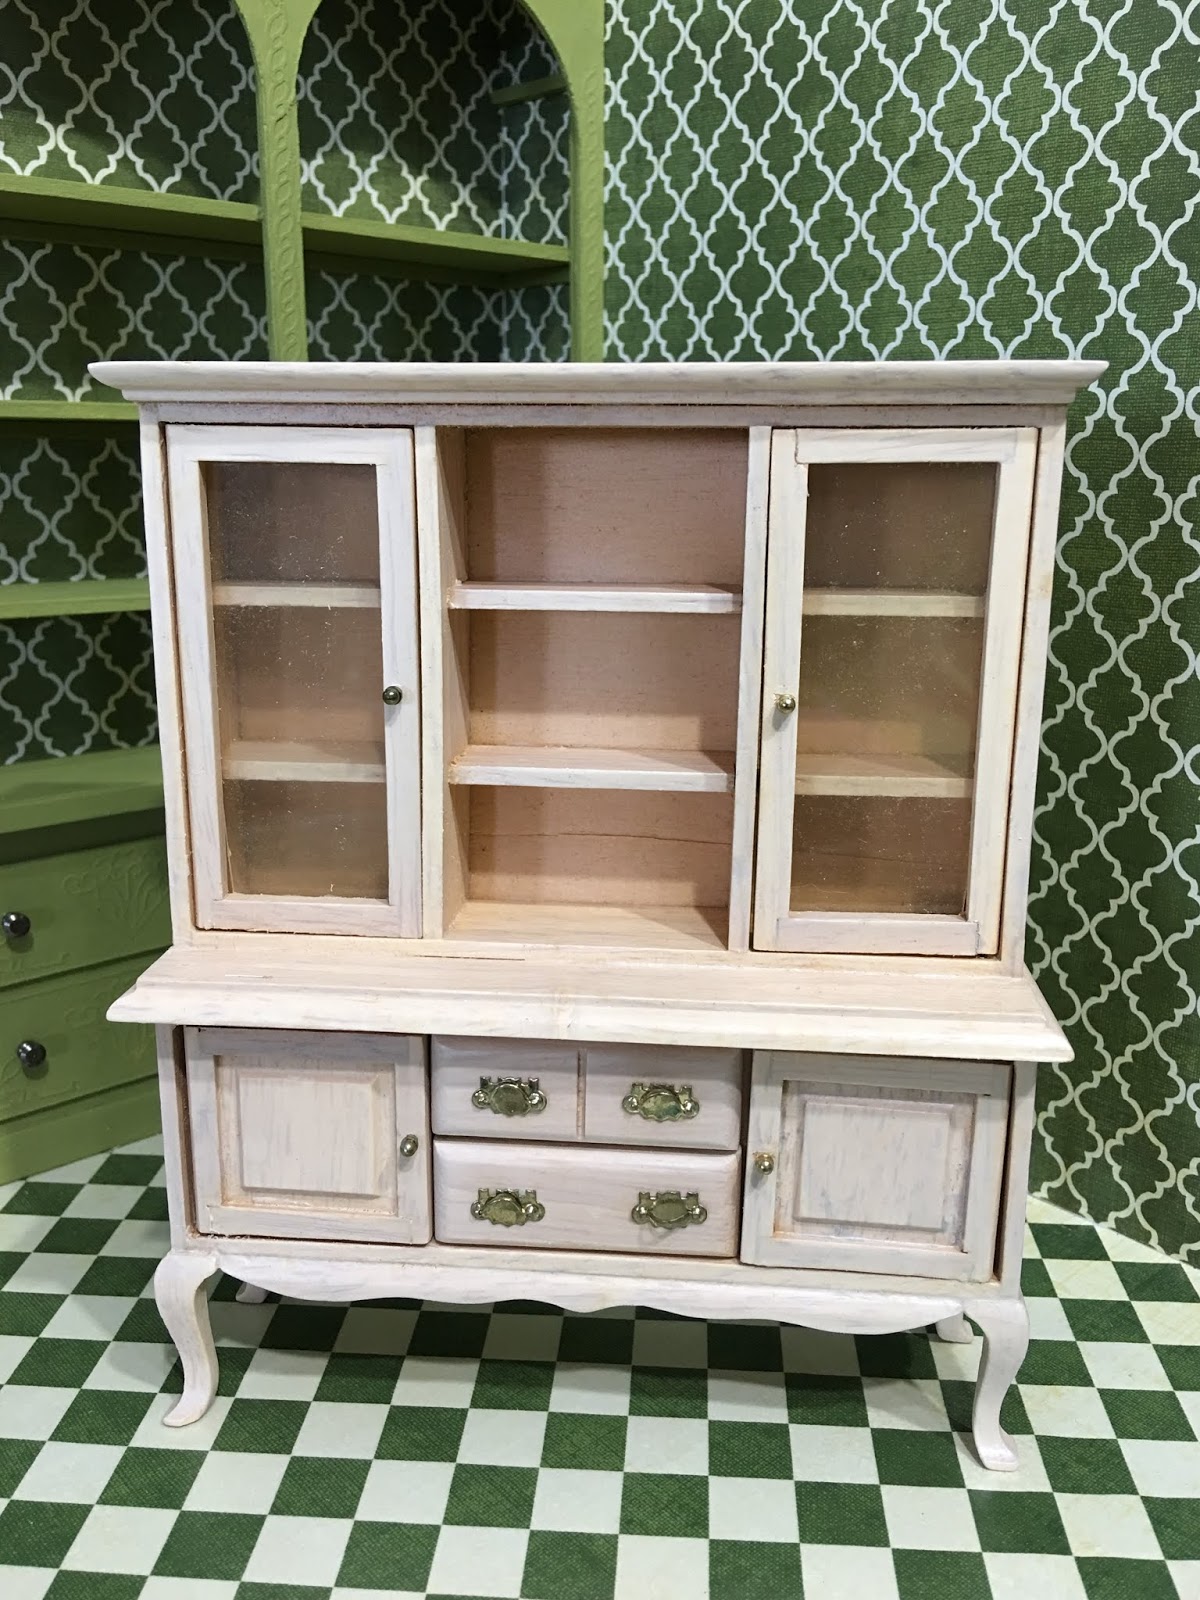
Next, I had to decide on furnishings. I had a Town Square Miniatures hutch that I bought in an eBay estate lot. I got a hutch, matching table and chairs for $20. It was all a bit rough, but nothing a little TLC, sanding, painting and remodeling couldn't fix. I removed the hardware and one of the center shelves from the upper portion to have a larger display area. I removed the gold hardware then painted it Georgia Clay, a burnt orange. I removed the yellowed "glass" and will replace it with some chicken wire after I'm finished giving it more wear and grunge in the form of some antiquing wax.


The next big fixture was the counter. I wanted this piece to be the central fixture in the store, and once I had the hutch space figured out I knew what floor space I had left to work with. I made an "L" shaped counter which is 4" x 4-1/8" out of 1/8" basswood sheet. It's got two shelves to store bags and gift wrap type stuff. The countertop is about 3/8" wider and overhangs all sides. I am still playing around with the orientation and position in the shop, and imagine that its final place will be determined by accessory placement later on.


For the countertop finish, I wanted a dyed concrete type of look. For this, I chose some warm complementary colors to the fall palette and used my typical paint and glaze sponge method. I used the Camel color as the base layer, then used the other three colors below mixed with glaze and dabbed it on with a slightly damp sponge. Once it was dry, I added a couple more glaze only top coats sponged on to keep the slight texture.


Once the large pieces were in place, I began making kits for crates, tiered plant tables, shelving and wall decor - whatever I had in my stash that looked useful. This gets me pretty close to knowing what fixtures I have to use as displays so that I'll have a better idea what I'm going to make to display in them. Hopefully, I have most of the supplies and materials I need on hand to make them. Some of the fixtures still need paint and aging, but if I'm not sure yet on the color or finish, I've left it unfinished in order to continue to contemplate.


Here are some photos to give you a feel for what the space will be like with the walls on. I definitely need to work on my lighting plan, as even with the open roof over the main part it's still really dark and shadowy. And I can't install the upper wall section that joins the main room to the bay area until the windows have been installed, so some things are still waiting on others which are waiting on others. You know - normal dollhouse construction operating procedure!


I've got a couple more drawers to go through to scout out useful stuff for the project, so things are still subject to change. The next major hurtles will be the windows, lighting and final structure details. Then, the fun filling up part can begin! I see a lot of food and flowers in store for this project, so I've got some challenges ahead. And if August goes by as quickly as July did, fall will be showing up fast! Maybe I should have started this project in May?

Here's to our remaining Lazy Days of Summer in the the Northern Hemisphere! Hope you're enjoying your days, wherever you are, too!

xo xo,
Jodi

Wednesday, January 29, 2020

Pound Cake Logo and Window Decals

The tardiness of this post is credited to the significant challenges I had in front of me this week. But, as you can see, they have met their match and Pound Cake's name is officially on the shop!


Getting the front wall installed on the Brimble's Merchantile kit became a little more complicated because of the fancy and much thicker coffered ceiling. I had to notch the side frames for the front door and dry fit them with the ceiling in place. Then, I could dry fit the door and window frames and begin the long process of installing them. This wall has to be completed before the ceiling can be glued in.


I sanded, painted then glued the interior window and door frames, deciding to go against the kit instructions and install the "glass" to the exterior of the shop rather than the interior. In fact, I decided to make my windows using 1/32" Lexan rather than the flimsy and very vulnerable acetate provided with the kit. How awful would it be to damage one of the weaker window panes after going through all the trouble to make them? Before I could get to that point, though, I had to make some decisions about front window decals...

I wanted to create an icon to use throughout the bakery on signs and packaging. Using Publisher, I combined shapes and lines to create a layer cake balanced on a tipping scale. The reason for the name "Pound Cake" will become much more obvious as the build moves forward.


I then imported that graphic into Cricut Design Space. I chose old fashioned lettering and viola -  Pound Cake's logo. These would be cut from vinyl and applied to the shop's front windows.


To see a great and simple tutorial on the entire vinyl process, click here:
Cricut Vinyl On Glass Tutorial

This photo shows the remaining vinyl after cutting and then "weeding" away the negative material. My little dots did not make it through the weeding process. They were so tiny and the backing paper so slippery that I had to finally, abandon them.


This photo shows what the vinyl looks like after the transfer tape has been applied on top. It's like packaging tape type material that picks up the vinyl. It comes on a roll so you can cut off the area that you need.


This is the decal applied with the transfer tape onto the pre-cut Lexan window pane. Trying to center it width wise and position it correctly vertically was a slow and steady process. I made sure to burnish it well with my finger to ensure the vinyl would stick well to the window.


When you carefully peal away the transfer tape it leaves the decal behind. This too was a slow and steady process.


To sum up my vinyl experience, I found that the Cricut cut these small and intricate letters perfectly. I did take the video tutorial's suggestion to select "more" pressure in the settings window for the cut. Even the tiny dots on the cake icon were cut well. They were just too delicate to remove cleanly from the backing paper. Trying to then reposition them by hand and keep them spaced right and level would have been almost impossible. Maybe with more practice I will learn a trick to make it easier.

Here is the window pane installed into the exterior frame and being glued to the kit's front wall. Because of the 1/32" thickness of the Lexan, the glue also acts as window glazing, filling in gaps which paint completely conceals in the end.


And in position. This whole "photographing black with a camera phone" thing is going to make me WORK!


Inside view of backwards lettering...


Here's one applied to the soda fountain back bar's mirror.


The entire vinyl procedure was delicate and fought with potential peril. BUT, as with most things in life, having a zen like focus and a surplus of patience made for a victorious ending! AND, isn't it fabulous that the Cricut has made lettering dollhouse windows a much realer possibility?!? Hooray for technology!

Now, with that same zen like focus, I intend to tackle that ceiling installation!
A little luck wouldn't hurt, either! Wish me some, will you?

xo xo,
Jodi


Thursday, August 18, 2022

Second Time's The Charm

I knew that I wasn't going to be able to live with the first attempt at my encaustic tile floor for the Willowcrest kitchen. I did such a poor job, and this project deserves better! My next attempt still isn't exactly perfect, but I think the second try is going to be the charm. The four year old is very happy!


My wood did not arrive as I'd hoped. In fact, it was supposed to be here by today (at the latest). It has a UPS label, but as far as I can tell from the tracking, at the time of this writing, it hasn't even left the seller's shop yet. So, Plan B was to cut the 3/4" x 3/4" main body tiles from illustration art board using the Cricut Maker. Unlike me and the mini table saw, it did an amazing job! I had room to cleanly cut 99 tiles from one 9" x 12" board. I took that as a sign that we were about to embark on a very pleasant journey. In our optimism, the four year old and I sang "99 Bottles Of Beer On The Wall" as we worked.


TIP: I like to use my old Cricut mats to cut heavier materials. Once they lose their stickiness, I use dots (every few inches) of Aleen's Tack It Over & Over to help hold the material in place. Any material that I have to use the knife blade for, I automatically use masking tape on the edges, as well. The Aleen's adhesive removes easily by simply rubbing your finger across it. It comes off like a sticky booger, so have something handy to wipe it onto. There is nothing worse, in the middle of a cut, than having the Cricut stop because the knife blade jammed. This step prevents that.

I learned from my mistakes with the first floor, and this time, used the proper method to set the first tile: Find the center of the floor by measuring the height and width of the floor template. Divide each of them by 2 and make a mark. Using those marks, draw a line down the center from the top to the bottom and one side to the other. Where the lines intersect is the center of the floor template. The first tile should be laid there, whether laying diagonal tiles or not. If laying a diagonal pattern, line each corner of the tile up with the center lines on the floor. If not laying a diagonal floor, align the middle of each side of the tile with the lines on the floor template.

First tile is set exactly in the middle of the floor template.


My tiles did wander a wee bit, but it was not because of uneven cuts this time. Whether by the user (me) or that the kitchen floor is not perfectly square, I do not know. But I can live with this degree of imperfection.

Main kitchen body tiles.

Here, I am beginning to lay the first border tile. I had the wood on hand for this part of the floor design. It is 1/16" x 1/8" basswood. On my first floor, I cut and laid each individual tile. This caused the tile line to wonder a bit. In this floor, after I had laid the strip, I scribed in a tile line, using my Xacto blade. I began in the center and scribed each consecutive line every 3/4". The next row of tiles were offset to the middle of the tile above it. It looks much more consistent and you can't tell the the tiles aren't individually laid. 


Here I have added a red border with the same 1/16" x 1/8" basswood, scribing the tiles in the same way.


And the final border tile is green but in 1/16" x 1/4" basswood. The area where the tile pattern is laid straight will be under the cabinets. You will see a bit of it under the stove, but I hoped, being different, it might add interest.


I had an idea to use wood floor paste wax to seal the floor. I thought it would be fun to do and would create a very shiny, smooth surface. Unfortunately, my test piece didn't turn out like I'd hoped. Warning bells were sounding, and unlike with the first floor, I listened to them. It may have turned out fine with many, many coats and much buffing, but I didn't want to take the chance, end up ruining it, then have to make a third floor. Ultimately, I used several coats of Krylon Colormaxx clear satin spray varnish.


Look ma! No gaps!


Finally, it was time for the finished floor's test fit. It is so exciting to reach this point, at last!


I had to load in some of the cabinets for a dress rehearsal. You can see the straight tiles under the stove. The border tiles and edges seem to be lining up pretty well...


How about the sink cabinets? Those seem good, too! By golly! I think it might be time to start installing all of the elements of this kitchen! 


A little wear and aging might be called for first, though I hate to do it! Here's where that little voice argues with me to leave well enough alone. Maybe I'll start very slowly and see where it leads. It would sure be nice if the first time was the charm this time!

xo xo,

Jodi