Search My Blog!

Use the Search box below to find keywords that you're looking for quickly and easily!

Search Feature

Thursday, August 8, 2024

Tardy Traveler

If there's anyone still coming by here, HELLO! I know, I know. It's been a long time and it seems as though I'd fallen off the face of the Earth. Nothing quite that dramatic, though many unexpected life changes left me not feeling much like making minis. I haven't got the heart to talk about all of it today, so I'll just keep this post about a new mini project that I started a few weeks ago...


A trailer?!? I know. When I last posted I was still working on the treehouse. What can I say? The long hiatus caused me to lose my inspiration for it. Seasoned miniaturists know that if you want to have fun with minis, you have to follow your inspiration. No matter how many unfinished projects you have giving you the evil eye. So yes... as the photos above suggest, I got down the dusty Travel Trailer Kit. It seemed bite sized enough to encourage me gently into my mini groove again.


As ever, I'm unable to leave well enough alone. Straight away I was cutting holes into the walls. Actually, all I did was make the concession window opening a bit longer in order to add a "slide out" feature. Gotta maximize the space, especially in a dinky travel trailer! Mine won't actually slide in and out, it just looks as though it can. I boxed in the cut out wall by adding 2" deep walls/floor/ceiling with 1/8" basswood sheet.

Added 2" deep side walls, floor and ceiling.

Affixed to the trailer.

The exterior looks a little more interesting, too!

The "slide out" was the perfect place to install a compact but cute kitchenette. Just enough space for a stove/oven, microwave, sink, mini fridge and a small bit of counter space.

Cabinets courtesy of chipboard cut with the Cricut Maker.

Finally! A use for all those leftover 3D printed knobs and burners!


The kitchenette installed in the "slide out".

With the kitchenette, dining table/seating and storage assigned to the "main cabin", all the trailer needed to be livable on the road was a bedroom and bathroom on either end. I cut a floor template out of graph paper in order to have a better visual and get the measurements just right. With those rooms figured out I could add the rest of the wallpapers.


I used scrapbook paper with a wood pattern to cover the trailer's floor piece. I was so careful to install the center of the design in the middle of the drawers in the kitchen. Then when I glued it to the wall I somehow managed to glue the trailer floor in the wrong direction! now it's off center. Out of practice, I guess. I am going to work hard to ignore my mistake so that it won't bother me, much.


Time to make the interior walls. To be able to have a decent sized bathroom I made the wall jog enough to fit a sink and shower on one side and a trailer sized toilet on the other.

Walls are 1/8" basswood.


Bird's eye view.

Bedroom

Bathroom

All the pretty wallpapers added...


The advantage to making all the furniture is that I can make it to fit exactly to my space. Everything below was designed and cut with the Cricut Maker using chipboard. 


Even the toilet is made from chipboard. It is 19 layers of 2 mm chipboard in graduating sizes, glued one on top of the other. I sanded the seams then filled in the really noticeable areas with joint compound. Then a final sanding and a couple coats of craft paint brushed on. It needs a final sanding and a good spray coat of Krylon Triple Thick. Then, being in the back of the viewing area, it will pass for a trailer toilet.


Peek-a-boo toilet, shower and a peek into the bathroom cabinet.

Built in cabinets and drawers make trailer living a little easier.

Banquet cushions and table coming soon...

Bird's eye view.

Progress!

Thanks for coming by in spite of my unexplained absence. I have missed you and being so inspired by your projects. I hope to catch up on blog posts and to keep making progress on the trailer as I have time.

xo xo,

Jodi

Thursday, February 29, 2024

An Unexpected Detour

Hi Guys! I hope you won't be disappointed that there's no update (other than the two photos below) on the Fairytale Treehouse's great room fireplace. I had fully expected it to be my sole focus this week. Until...

Cricut cut parts assembled, herringbone "brick" affixed to firebox.

Test fit in the great room. Goldie can't wait to roast marshmallows!

As I'm sure you've all experienced, life has a way of landing us into unexpected adventures. That's exactly what happened to Russ and me last weekend. What follows is not a post about miniatures, but is quite an exciting development for us in any case. So if you're up for something other than minis, read on...

Russ and I have both had trouble sleeping for a few years now. Sometimes the aches and pains of our aging bodies is the culprit. Sometimes it feels like we can't find the right pillow. Still other times it feels like our mattress is seeking revenge for all our tossing and turning. Whatever the plethora of causes, it's annoying! We finally came to the point where enough was enough!

Our solution and plan was to install our new, firmer mattress. After all, it's been in its box for a little over a year now!!! Then we would assemble a new frame (also a year old now) for the old mattress (which I love but Russ does not) and put it in the second guest bedroom (we seem to be finding more and more occasions for needing a second guest bedroom lately). So our plan to get a new mattress for our bedroom had additional motivating factors. 

To give more context, in 2018 we replaced the carpet with wood flooring in two of our four bedrooms. We set one up as a guest bedroom at the time. The other has been sitting empty since we finished. The last bedroom (other than ours) I'm ashamed to say is a catchall for all the stuff we don't know what to do with but can't yet decide to part with. It will stay as is until we find inspiring motivation.

As we began to tackle the mattress swap last weekend, our plans drastically expanded. At first we decided it wouldn't be that hard to empty the room so that we could install new flooring. It is long overdue. And, we thought, while we were already in DIY mode, it might be smart to go ahead and repaint, as well. One thing lead to another and soon, thanks in part to our income tax refund, we had a pretty great makeover in the works. 

Here are a few of the elements that will go into making up our new environment. It seems serene and lovely on paper, but if we still can't sleep in here after all this then there is no hope for either of us, lol! But we do hope. We hope by the end of March we'll be sleeping in our newly redecorated room. And we hope to have two guest bedrooms ready in time for Easter company. And we hope our aging bodies are up to the task!

The background color, Cream Puff, is the same color we painted in the other bedrooms.
The more I've lived with it, the more I really love it!

Under the guise of saving money, I'll be making new wall art for the room. That means I'll get to carve out some creative time. It's the next best thing to mini time! I hope you're up for expanded adventures and will enjoy the transformation with us, too!

xo xo,

Jodi

Thursday, February 22, 2024

First Things First

Sometimes I get working happily away and then suddenly realize, with shocking clarity, that I'm about to make a big problem for myself. I am so grateful for that little voice that screams inside my head! Here I was, totally engrossed, making furnishings and fillings for Wayne's apartment. Thanks to that little voice, I began pondering when I should glue his partition wall and where I would run the wiring for his lights. Then it hit me: you're going to have to attach the roof. That realization sent me into an existential crisis about what I had left to do, how those tasks would affect future tasks and exactly what order of operations was going to be the most beneficial/least problematic!

That's when I totally changed gears from Wayne's place to the great room. As a reminder, it became "great" when I cut big swaths out of the second and attic floors leaving behind only the balconies. A three story room is pretty great, right? God I LOVE dollhouses!!!


You see, I always wanted something really great and worthy of a great room. And that meant a fantastic fireplace. Last February (Valentines Day to be exact), while gathering ideas about what the treehouse wanted to look like, I came across this photo. OMG instant crush!!! Cupid's arrow hit me hard. I knew I had to try and achieve the vibe of this amazing fireplace, but how? I've spent the last year working out possibilities.


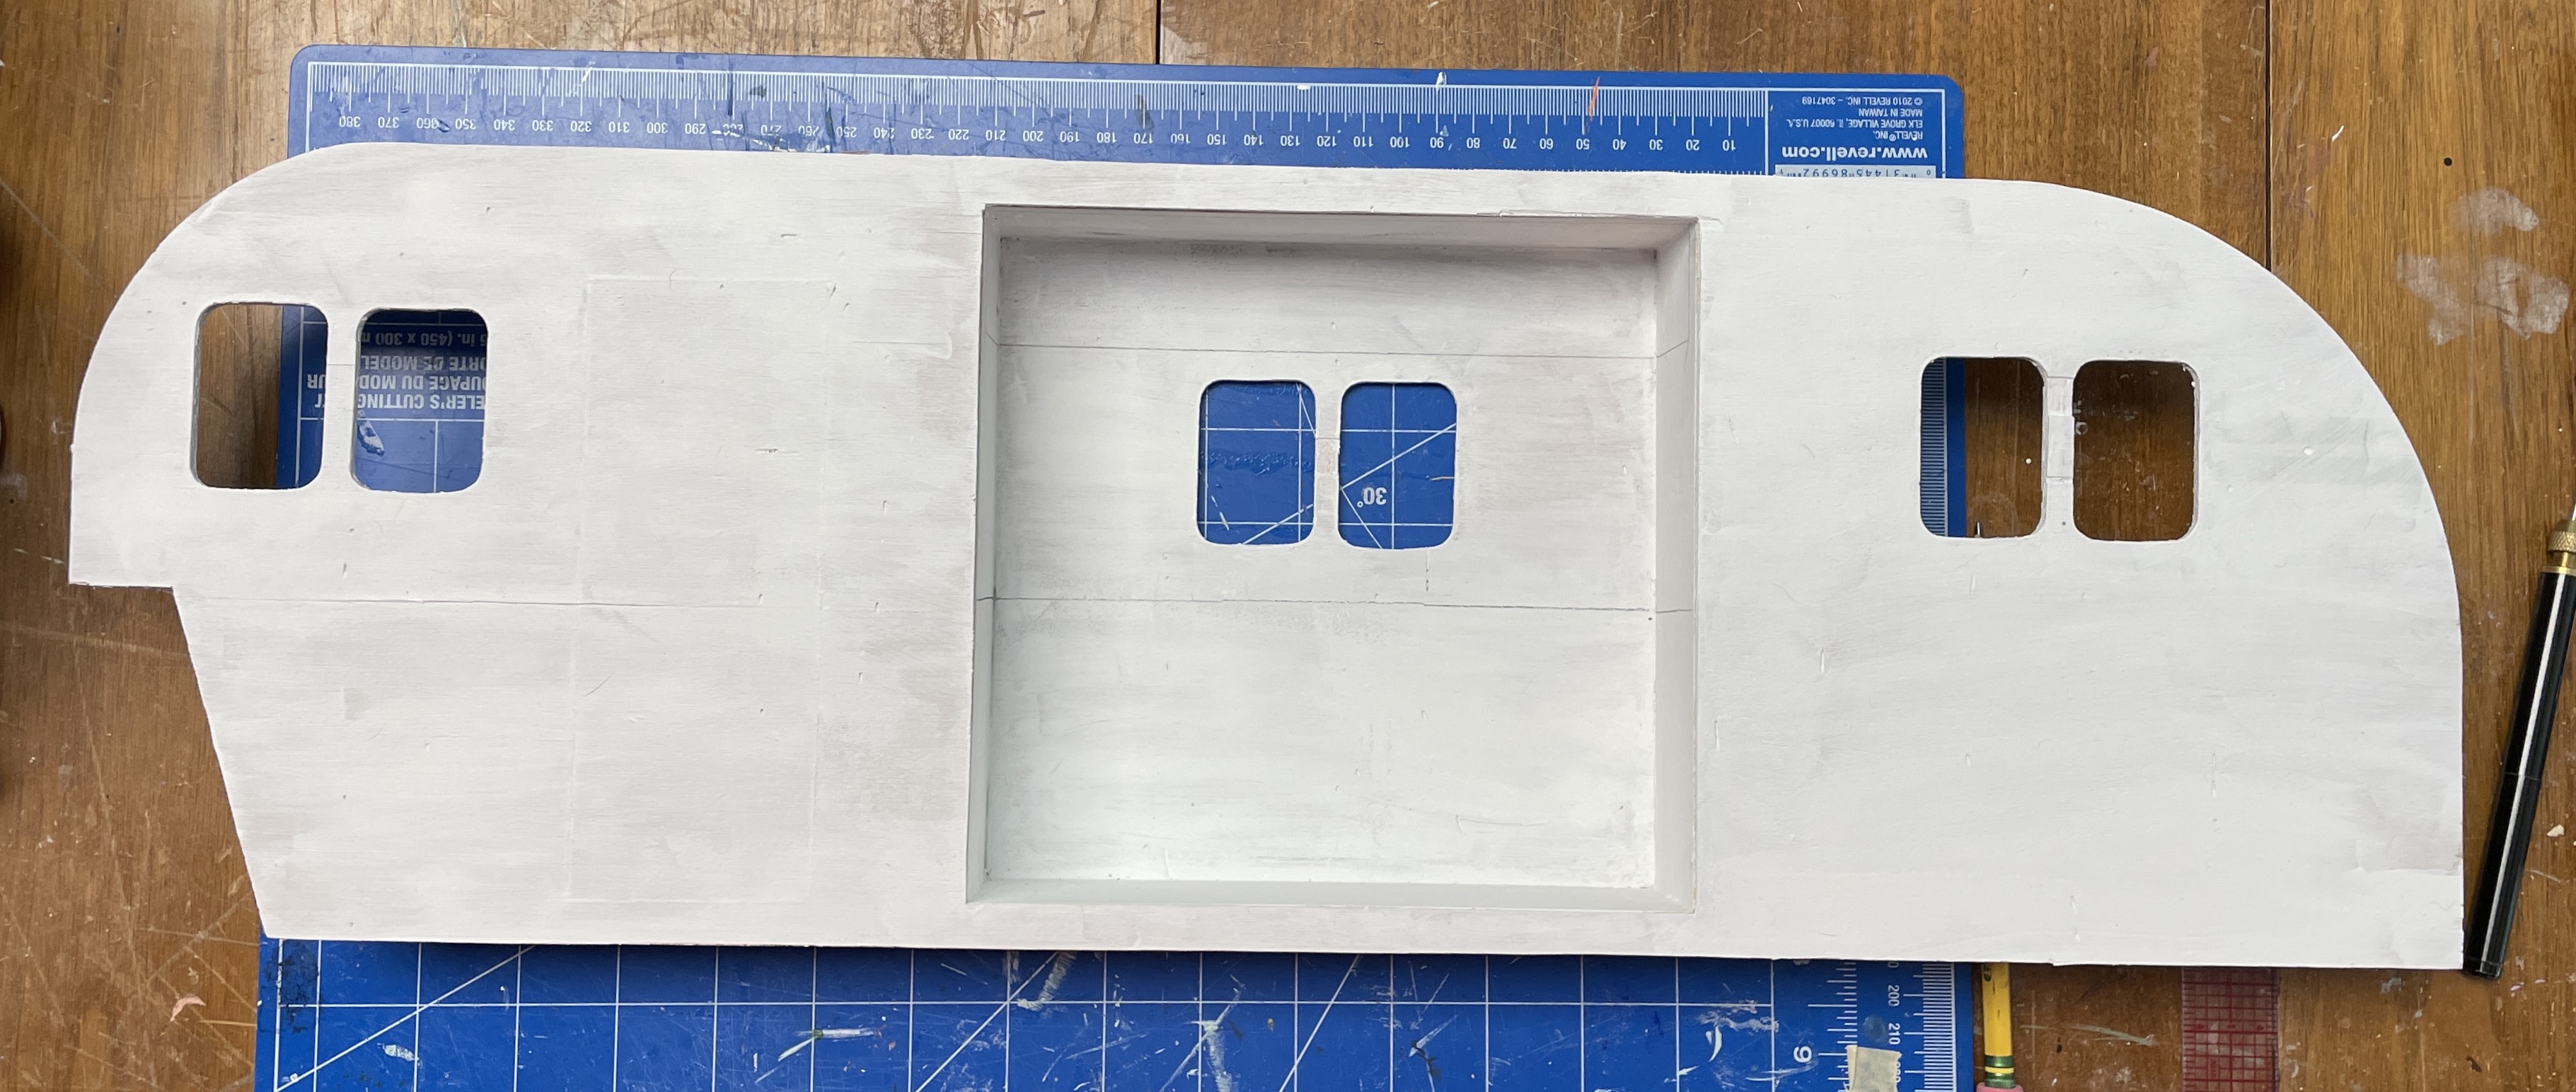
First, because a lot of the wiring had to run behind the fireplace down the center of the treehouse, I'd need a hollow wall. But not a thick wall because the floorspace in the great room, thanks to the balcony, was already pretty limited. So a wall thin enough to be passable to the eye and also allow for the wiring. Thank goodness I did not attach Wayne's wall because that provided my pattern for the gabled roof. And thank goodness I did not attach the roof because I might have had a dickens of a time getting this hulking fireplace installed afterwards. I created a gabled roof pattern on cardboard from Wayne's partition wall and with this, and a few more measurements, I created the great room fireplace wall.


As you can see I used art board for the wall and lined three sides with 1/4" x 1/4" basswood to create the hollow, also providing a nice gluing surface.


And then I had to come up with a substrate for the fireplace. The gnarled tree bark will get created from paperclay or paper mache but I needed something with the basic tree trunk shape to attach everything to and to lend stability. Hello Design Space. Hello chipboard.


I started off with a bottle shape then sliced and welded until I achieved roughly the shape and size I wanted. Because my Cricut Maker only cuts chipboard that is 10.5 x 10.5 inches, I had to make the substrate in two sections to achieve the 22 inch height. The front would have a cutout for the firebox and a niche high up the chimney. The back would be solid. I was able to replicate the shape of the openings in the balcony and staircase windows to tie the firebox opening/niche in with the fairytale theme of the treehouse.


I attached the bottom and top sections of the front and back fireplace pieces, gluing art board across the inside seams to lend strength. For the sides of the fireplace I used more art board scrap. It can easily be scored to make the gentle bends I needed but also makes for a sturdy substrate. 


Once I had the sides securely glued it was time to make the firebox and the framing for the niche.


And that is where I'll stop for today, my friends. Today is mine and Russ' 37th wedding anniversary and he's playing hooky from work. 😉 

A shotgun, Vegas wedding, no money for rings and no clue what was ahead. But here we are, 37 years later, still in love, still really liking each other and proving love truly does conquer all. 💘💗💘💗💘

February 22, 1987

One last thing before I go... I made a bunch of newspapers for Wayne's apartment and thought I'd share the printies. They are great for filler or to use as props under mini art projects, on attic walls or shop windows, crumpled in trash bins or stacked in messy rooms. 


xo xo,

Jodi