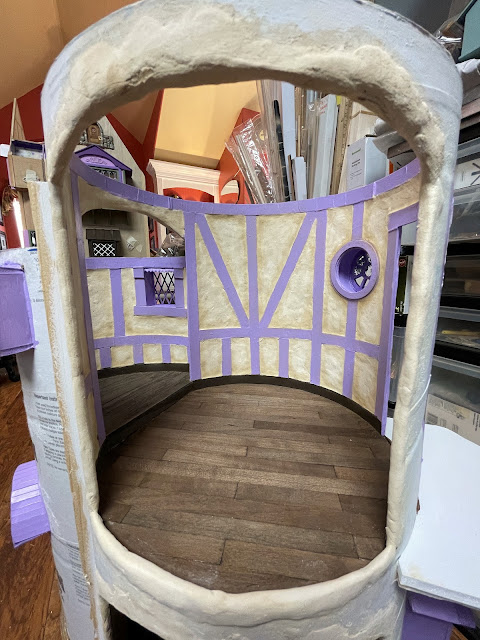
Hi Guys! There's lots to share this week and many photos, so grab a snack and settle in for a while.😊 To refresh your memory, the last room to prepare for future habitation was the top of the trunkhouse's tower: Roz's bedroom (which also includes Rozario's sleeping nook).
There were three final windows to install: two in the nook and the round window in the main bedroom. I also affixed the cardboard cereal box "timbers" to the walls, as well as cardboard trim to the windows.
Finally, after weeks of pondering, it was time for the "creative thinking" I had to come up with for the nook's ceiling. Heaven Help Me!!! 😵
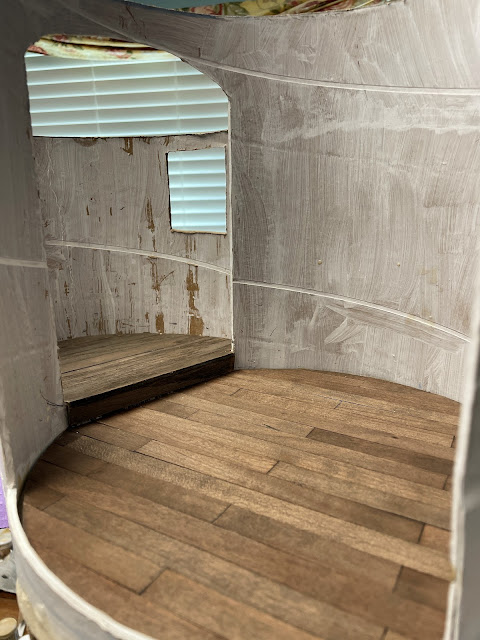
From the beginning, when I added the nook pop out, I'd had a specific look I wanted to achieve. It's been floating in the recesses of my mind, but I didn't have terms to describe it. Here's the nook's ceiling opening. It's a little tricky because the doorway and the top of the wall are at varying heights. What we won't put ourselves through to make our mini structures more interesting, right?!?
Thanks to several imaginative search phrases, Google found a few images for my vision! Turns out I needed to create a sort of Half Domed Arched Vaulted Ceiling! Oh boy! This was going to challenge me!!!
 |
| I needed elements from each of these types of structures. The photos guided my ideas for how to achieve the roof/ceiling I needed! |
I wasn't about to put myself through a bunch of mind bending math equations to make it happen, so I opted for good ol' hillbilly ingenuity. Luckily, it's only a trunkhouse, for Pete's sake. Not the Taj Mahal! And nobody who bleeds is actually going to live here. 😉 Having that in mind gave me the freedom to fail, if need be.
I cut a half circle strip contoured to the curve of the trunkhouse. From there, I could hold it against the wall and cut it down to a better, smaller half circle shape. I also cut a wide bottom structural base strip and some "ribs", all from cardboard.
I hot glued the base strip and the contoured half circle where they needed to be positioned on/over the nook's opening. Then, using wood glue and clamps, I affixed the cardboard ribs at intervals.
Once the ribs were dry, I loosened the hot glue and removed the roof piece to continue editing on my table. The shape of the "half circle" nook is not exactly symmetrical, but the half Sonotube addition was the boss of how it wanted to bend, no matter how I argued. Good thing I am working on an "organic" structure or the asymmetry might drive somebody nuts! Probably me!
Layers of support strips and Paperclay I added inside, building it up until I had something that looked ceiling-like. By the time I was ready for the Paperclay, I had a stiff, solid piece to work with. The paint helped to seal the cardboard.
Once dry, I could paint, age wash and add subtle chalk highlights to match the walls.
And finally, here it is installed over the nook.
The outside of the roof will remain like this until I begin the "bark" process on the exterior. It may end up looking like an actual roof or it may become a mushroom cap. We'll see where the ideas lead me then...
While all that was in the drying process, I made the "wood beams" for the main bedroom ceiling. I bought 1/2" x 1/2" x 12" balsa (super fast shipping, great product) for this purpose so that I could carve them up a bit. I cut the balsa in half, lengthwise, roughed up, added grain marks and took chunks out. I applied a black wash, then a brown wash, then installed onto the ceiling.
While the ceiling was being affixed with gobs of Tacky Glue and weights, I installed the light fixtures. There will be one ceiling fixture in the nook and two sconces framing the door of Roz'a bedroom. I will likely add a bedside lamp when I begin the interior furnishings.
Hopefully, once the lights are hooked up to a strong DC transformer, they'll give off much better light.
 |
| Looking through the future balcony door opening. |
I added the same beams to the living room, as well as a couple sconces above the windows. This room will get a lamp or two later, as needed.
Here's a look at the exterior of the trunkhouse now that the final ceilings/roofs have been added... The treehouse will sit on top with some sort of decking in between.
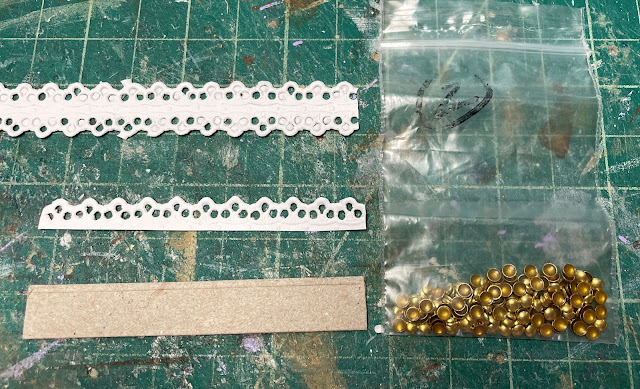
In order to call the interior "bones" finished, I only had to adorn and install the front and bedroom doors. For the front door, I made a kick plate using cardboard, Dresden "lace" (cut in half lengthwise) and metal domes to act as rivets.
Along with several other adornments, I gave them a rusty, rustic finish with layers of paint and glazing medium. I aged the doors to give them a more "forest-y" feeling. I still can't capture the contrast between the metallic trim and the main door body color. Somewhere in this post is a photo of the bedroom nook's "leaded" windows. That photo shows the contrast well.
Roz's bedroom balcony door had just the right amount of space in the exterior panel to subtly advertise her "wish granting" service's trademark.
The front door also subtly suggests that a person possessing a magic wand resides here.
While the interior is more understated, as well. The wavy but clear glass effect really adds to the mysterious feel of the door.
Roz is simply thrilled with the way everything is coming out and that makes me so happy! Having the doors installed will signal a big step closer to being able to move in, but I have more aging and refining to do before I can install them. She said not to worry about the drafts coming in through the door cracks. Her magic spells create a negative pressure effect, kind of like what they have at casino doorways.
It's up to me now to get the doors and doorways installed, junction all the wiring and begin the process of making all the fixtures and furnishings. Hopefully, next time we meet, I'll have exciting progress to share!
xo xo,
Jodi


