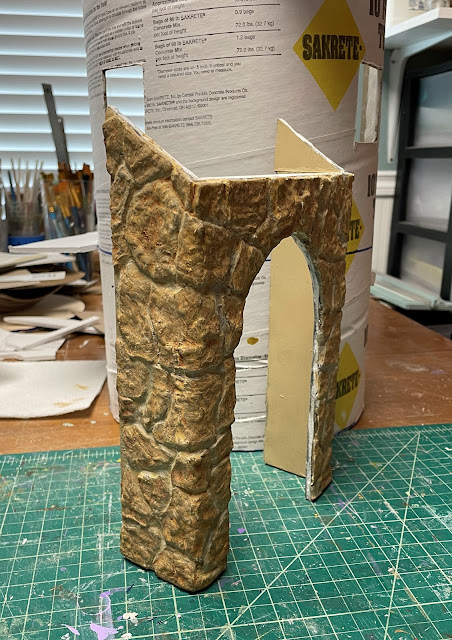
Last post I left off working on the trunkhouse's front door alcove. I thought I'd get that finished, but in my continuing habit of skipping around on this project, I moved on up to the kitchen. Before I delve into that adventure, here's a refresher of how the floors of the trunkhouse are laid out...
And here is where I left off in the parlor. I installed the ceiling, though I switched to the kitchen before I installed the ceiling beams. I might just wait until all the ceilings are in and do the beams all at once.
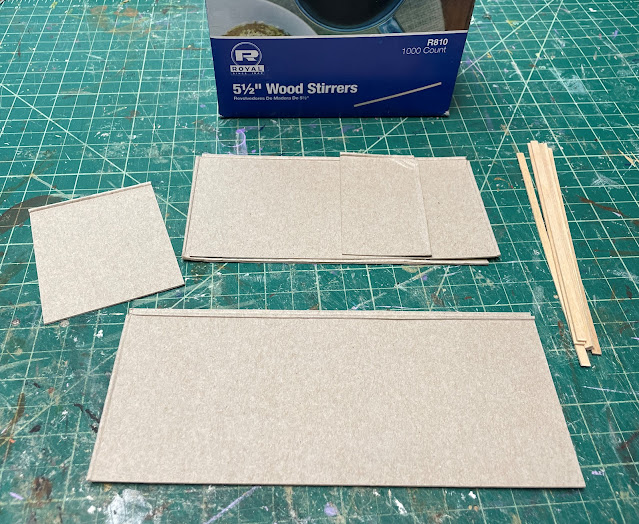
The inspiration that captivated me to work on the kitchen was wainscoting. You see, I have been thinking about what type of wall adornment I wanted for the kitchen and how I could achieve it with the rounded walls. Then it struck me... Why not continue with the accommodating cardboard where the round shaped walls wouldn't be a problem? I cut 3" cardboard wainscot panels and affixed coffee stirrers vertically at 3/4" intervals. I made 1/2" cereal box baseboards below it and 1/2" "carved wood" (Dresden) railings on top. The half oblong shaped breakfast nook received the same.
 |
| I utilized the natural fold line in the cereal box as a feature in the wainscot. |
I measured each uninterrupted run of wall space and cut the cardboard strip accordingly. Then I placed a wooden coffee stirrer in the center of each panel and added them every 3/4" to the ends.
Before I could begin the wainscoting installation, I had to create the floor for the breakfast nook. I traced the curve of the trunkhouse onto a piece of chipboard then cut it out. I was able to place it under the breakfast nook to trace the outer circular shape. I cut, fit, marked and trimmed until I liked it. I laminated three layers of chipboard for a sturdy floor. For the top layer, I left an overhang that protrudes through the arched opening to create the step. I made a "knee wall" piece to stretch across the curved underside of the step to make it straight. The floor and riser got covered in wood flooring and stained.
When the breakfast nook floor was finished, I painted and installed the baseboards. I base painted the wainscoting and then glued it in above the baseboard.
For the wainscot rails, I added a bit of Dresden to, hopefully, look like a carved wood detail.
At this point I installed the ceiling "rim joists". These are also made up of four layers of 1/2" cereal box cardboard strips. They will hold up the ceiling/bedroom floor and also provide the border for the Paperclay walls. The tricky part is marking the height every inch onto the walls, then connecting those marks so when I glue the strips in the floor/ceiling will be level. Luckily, my transparent ruler bends to the curve so it is easier to draw the line.
Once the "rim joists" were installed, I got to work on the Paperclay walls. The most challenging aspect to working on this trunkhouse is maneuvering it around while reaching into the openings to work.
While I waited for the Paperclay to dry, I installed the parlor's windows...
And I began prepping the light fixtures. I attached the fixtures to wooden craft circles. I like to have sconce plates on all the fixtures because it adds a nice detail and gives me extra gluing surface. I used Beacon Gem Tac to adhere the metal to the wood.
I primed the fixtures with Kilz 2 Primer, base painted in Lamp Black, then pounced on the rustic finish using Glazing Medium, Asphaltum and Burnt Sienna acrylic paint.
Once the Paperclay was dry, I glued in the kitchen and breakfast nook's windows.
 |
| Above sink window. |
 |
| Breakfast Nook windows. |
My next steps will be to blend in the window seams with more Paperclay, then paint and age the walls. Then I can make the ceiling template for the breakfast nook and move on up to the third floor bedroom. Lighting will have to be weaved in sometime, though I hesitate to do that while I'm still jostling the structure around so much. I'll go with my gut and hope I pick the perfect time.
Until next time, friends, hope you find the time you need to see your dreams progress!
xo xo,
Jodi


