This wall, the one that divides the kitchen from the living room, is one I added to the kit to create the separate rooms. The return is not very deep, and the angled door opening created some space challenges. When I drew out the plan for both the upper and lower cabinets, my measurements had to be spot on.
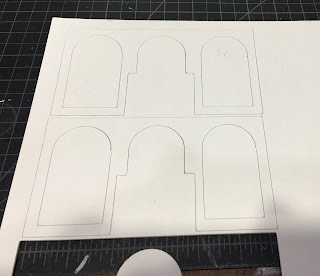
To make the arched cabinet fronts, I employed the Cricut. I transferred my upper cabinet measurements into the Design Space using a solid rectangle, then using smaller rectangles connected to circles, I sliced out the openings. I cut three sets out of 1/16" chipboard.
Making the box with the shelves was pretty straightforward. I carved a set of three drawers out of laminated 1/2" scrap wood for the bottom of the left and right cupboards. Then, using 1/8" x 1/8" basswood strip and fancy toothpicks, I made a plate rack for the lower center section.
I added beadboard, wallpaper, lace edging, textured vine stickers and crown molding to give them a real cottage feel. I did consider doors with glass, but quickly decided open cabinets were the way to go for this build.
Next were the lower cabinets. Like the built in sink cabinet, I did not want functioning drawers or doors. Just simple boxes with a toe kick, wallpaper fronts edged in 1/8" x 1/16" trim to suggest drawers/doors, aged bronze hardware, and the same "stone" countertops as the sink cabinet.
The end wall in the kitchen was a challenge as there is only 3-1/2" of usable space, and that is where the fridge will go. Since the fridge is 2" wide, only an upper cabinet was going to work. I modeled it after the other upper cabinet unit, but added crown molding to the bottom instead of more drawers.
I bought the Phoenix Models gas stove and fridge kits for another project, but thought they would be wonderful in the Storybook. They are compact and perfect for a kitchen where space is at a premium. Actually putting them together is going to be interesting. Apparently, you use quick set epoxy, and the stove has a million pieces! Figuring out what to paint in what colors and what to paint before and after assembly is certainly going to challenge my brain!
There are lots of decorating opportunities for such a small space, and with the large kitchen windows, being able to view them should be easy.
Here is the kitchen with cabinets in dry fit. I am loving the layout and the amount of floor space. I may even have room for a small prep table in the center!
Now that the foundation pieces for the kitchen are planned or finished, I have to decide whether to assemble the appliances or continue into the living and dining rooms with built ins. I have several days to mull it over, as Mother's Day weekend is FULL of family activities. Which, if I am lucky, may include a trip up to CJN Miniatures in Edmonds, WA. Fingers crossed!
And to every nurturer, whether you've give birth or not, whatever your chromosomes, ~Happy Mothers Day~! I hope the love you've given to anyone comes back to you seven fold!
xo xo,
Jodi


