Since I hadn't posted my regular weekly update on the Storybook Cottage build last week, this post was going to have a lot of photos. So, I consolidated some photos into groups and will just go over the less interesting stuff quickly...
First, I got all of the walls primed and another dry fit in to mark things for the wallpaper application.
Next was deciding on the paint colors I'd be using in the build. I made a color chart, compared them to the wallpaper and fabric I have, then narrowed them down to seven colors.
Then I made templates and applied the wallpaper. In case you are wondering, I like Wallpaper Mucilage the best of all I've tried, with Grandmother Stover's being my second favorite. I used nine sheets of wallpaper and a full jar of Wallpaper Mucilage.
Someone wondered why I put the wallpaper on the walls before I glue the structure. I don't always do this - it just depends on the particular challenges of the dollhouse. For this dollhouse, I need to make a lot of built ins. With the angles of the walls and ceiling, and the challenging spaces, it seemed simpler to have the bulk of the building completed before I actually assemble. And being able to use the walls and lay them flat for templates is a cheat that will help a lot! Getting a ruler in to measure for trim in a tight space is one thing. Being able to read the marks on the ruler while it is in the deep spaces is another! :O)
The first built in I decided to tackle was the kitchen's bay window sink. Last year while in Arizona with my mom, I bought a Reutter free standing double sink unit at Aunty Em's. I took it apart because I didn't want to use the stand in this build, just the sink and faucet. I used the sink and built the sink cabinet around it.
I wanted the cabinet to be a little wider and deeper than the space available in the bay, so I had to install the horizontal bead board first to know how deep to make the return. Somehow, with all the cabinet and sink depth measuring, how far I wanted the sink to protrude etc., I ended up with the sink being 1/8" off center. It really isn't all that noticeable in the grand scheme, so I chose not to start over. I also chose to make an open cabinet area under the sink (I love curtained openings in a sink) and faux drawer fronts. After all that vanity experimenting, I also just had to add drain pipes!
The counter top shape was a challenge with all those angles, built in shelves to meet up to, the sink cut out and the overhang for the returns. Luckily, I had made a floor and ceiling template, so transferring it onto wood made it easier.
I looked at several kinds of pink counter tops online. I saw great examples of Formica, granite and marble in pink hues. This gave me license to play around, and I love the results! I hope I can replicate them pretty closely when I get to the rest of the kitchen counter tops to come! Here's what I did:
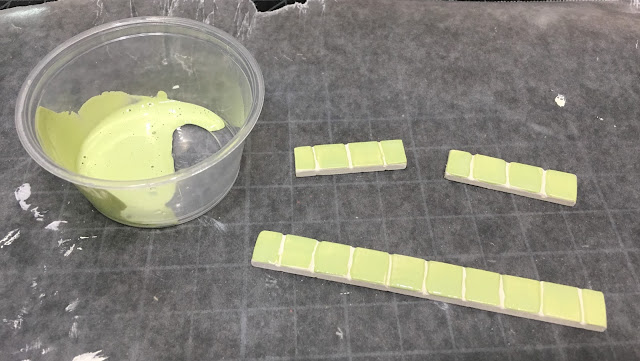
Now for the backsplash. The space between the counter top and the window frame bottoms was 3/8". So, using the same template from the floor/ceiling/counter top, I cut three pieces of 3/8" basswood. I measured every 3/8" and filed a groove into the wood to replicate tiles. I painted the entire tile strip with a couple coats of Vintage White, then when dry I mixed one part Green Tea with three parts glazing medium and painted the tiles.
Once they were dry I gave it all a good coat of Triple Thick along with the counter top. Here it is installed. I like the shabby glazed tile effect with the shiny countertop.
And here is the built in sink cabinet with it's curtain installed. Notice the chair rail, baseboard and corner trims, as well. The window sills will have to be installed at the same time as the exterior windows, so it will remain unfinished for a bit.
I started on the other two kitchen walls, installing the bead board and trims, then did another dry fit. I hope to find time to start on their built ins in the next couple of days.
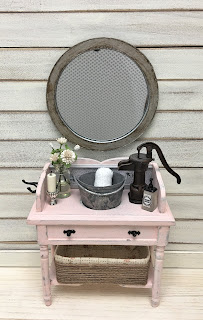
It looks like I'll also be sending five vanities on to their new homes next week - I have bids on all of them! They end Sunday, and I hope to list the next five then, as well. If you haven't seen the excitement, go take a look!
https://www.ebay.com/sch/m.html?item=123106991378&ssPageName=STRK%3AMESELX%3AIT&_ssn=tiny-little-smithy&_sop=1
Before I finish up I'd like to say ~Welcome!~ to the new followers! And to those of you who have stuck with me through the triumphs and epic fails, your friendship, comments and support mean the world to me!
xoxoxoxoxoxoxoxoxox,
Jodi


