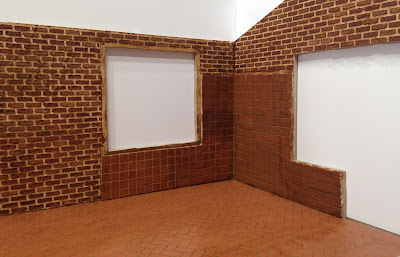
The type of "brick" I saw and wanted to use as flooring is a product by MBS, or Model Builders Supply. I linked to their web site so that you can take a look at all of the wonderful products they have, but many miniature stores and suppliers carry a variety of their products, as well. Mine is called Interlocking Stone, and comes in a brick red color. I purchased mine through an eBay seller. The great thing about this type of brick is that it comes in a 14" x 24" plastic sheet and can be grouted and painted. I will also likely use it on the patio (unless something more fun makes itself known).
It was so easy to cut it to size - I just scored the line and it snapped off perfectly! Grouting it was also a dream. I just used spackle and my finger to squish it in, let it set up overnight, then wiped away the excess.
It comes with a sheet of detailed instructions and gives great tips on painting and washes. I chose a brown wash and am still working on the layers to get the desired effect.
The next type of brick I wanted to throw into the mix is a Patio Brick Sheet by Houseworks. They are available from Miniatures.com and measure 6-1/8" x 12-1/8". Each little brick is 3/8" square and 3/32" thick. They come attached to a plastic mesh backing to make for faster and more accurate installation. Instead of using them as flooring, I thought they would make a great kitchen tile! I attached them using Tacky Glue and then used the spackle again as the grout. They were pretty easy to cut - just score several times and then use pliers next to the score and snap off. I applied the same wash on them as the floor.
That brings me to the next type of brick. I wanted something quicker for the inside walls. As long as it took to do the fireplace, I was afraid egg carton bricking the walls would take forever! There is a deadline, people! I tried Magic Systems Magic Masonry Brik on a project waaaayyyy back in 2002. I really enjoyed the stuff - and have since used the Slat and Ston versions (I have not misspelled them, they really are spelled that way on the packaging).
It comes with a roll (or two if you buy the larger kit) of stickers and dry grout/mortar mix in brick red or a gray-ish white. You can use the package as a mixing bowl for the dry mortar - just add water until it is akin to frosting. I like to mix mine in a Rubbermaid container because it stays moist for a long time. If it becomes too dry while you store it, no problem! Just add water and it reconstitutes!
The first step to the process is to paint your background color. This becomes the grout. I chose white because I knew I was adding washes later and this was a perfect starting color. I let my "grout" dry for a couple of days. The next step is to apply the sticker to the wall. I started at the base of the wall and worked my way up overlapping consecutive rows by one brick to maintain the pattern.
One note on the sticker roll. Because of my past experience with the stickers, I have found it less frustrating to remove the "waste" part of the sticker prior to attempting to peel it from the slippery backing and apply it to the walls. Why? Because not every "waste" brick wants to kindly peel away from the "good" sticker. It is difficult to stop in mid-stick to remove the pesky "waste" and it's even more difficult trying to remove them once you have the sticker applied nicely to the wall. Trust me - take a few minutes and remove them first!
For the mortar mix, I grabbed a few tools I thought I might need to do the job. I ended up really only using the large putty knife. You can give texture to the mortar if you wish, but on the small Brik it didn't seem necessary. If I was doing a Slat kit I would have definitely done some texturing. It does spread very much like frosting and is ready to have the sticker pulled away after about 5 minutes. I did mine all at once and it worked out very well. It is messy, though (or is it just me?), so have your trash receptacle handy.
The mortar does lighten up a bit when it is dry. The color might be perfect for those of you who are going for Brick Red, but you can see that it does not match the warm color pallet I'm going for here. No worries! I learned while using the Slat on the Tuscan Villa and the Ston on Encounters that it takes very well to paint and color washes. Tip: If your grout is dark, you don't even really need to be all that careful! My white grout called for a little patience. I put a little squirt of paint into the bottom of several dixie cups and added water. I dipped the tip of the paint brush into the paint/water mixture and by just touching the tip of the brush to the brick it gave me the color variation I was after.
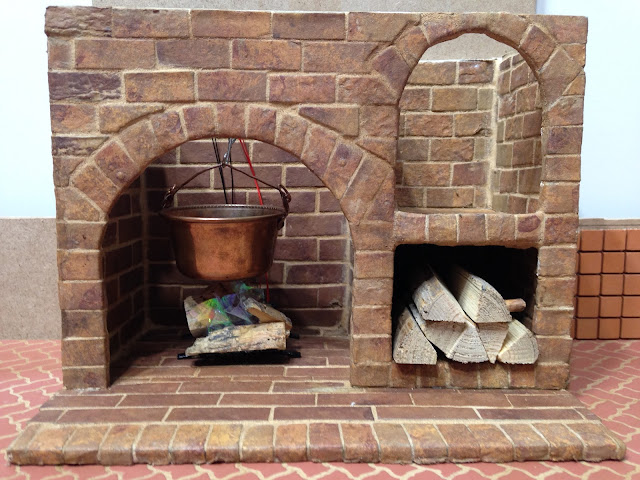
After that it was just a matter of applying the color wash. To keep the same tone, I used the Burnt Umber wash that I had used on the fireplace and the floor. I used it on the kitchen tile brick, too! Overall, I really like the way it turned out - subtle, textural and most important for Little Pigs trying to be protected from the Deadly Hot Air spewed by the lungs of Big Bad Wolves: Brick!
A couple more washes and I can move on to the next phase which involves a rip saw, a scroll saw, faux walls and lighting. Wish me luck!
For today, though, I will just bask in all of the juicy posts I missed the over the last few weeks of work! Yippee!


