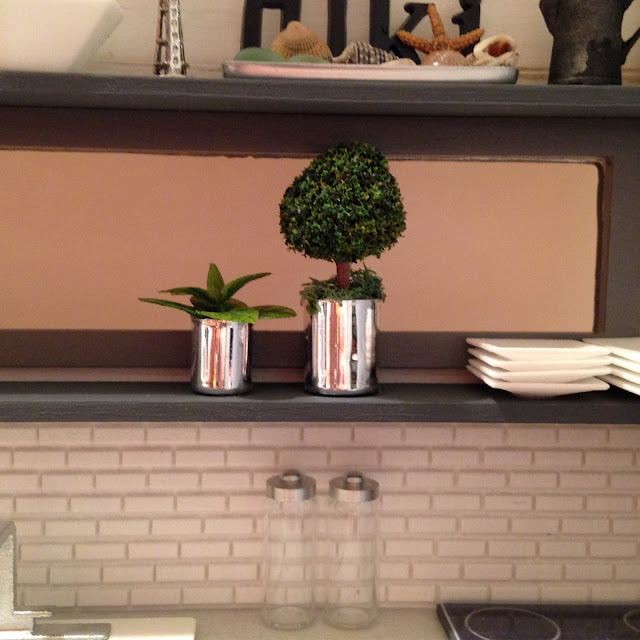
One of the fun little projects was making some little plants. I have a drawer full of silk and plastic plants and flowers. Some are left overs from the 90's when fake floral swags were cool, and I also pick up things from Joann's when they go on sale. They are in order of before materials used, and after completed below.
Search My Blog!
Use the Search box below to find keywords that you're looking for quickly and easily!
Search Feature
Monday, December 14, 2015
Just Do It Already!!!
Do you ever hesitate before you permanently attach fixtures or walls? Boy I do! I am always nervous that I have forgotten something, and that attaching it might be a big mistake! Today I decided that the only way to move forward on the Alki Point project was to just do it already!
Here is the bathroom. I permanently installed the toilet and the sink unit. I attached the last sheet of tile to the partition wall (no photo yet), but I won't install that just yet. I almost removed the protective sheeting from the shower wall, but decided to wait. I have painted the replacement Shapeways TP and towel holder etc... and need to install them after they dry. Chrome paint takes forever to dry!
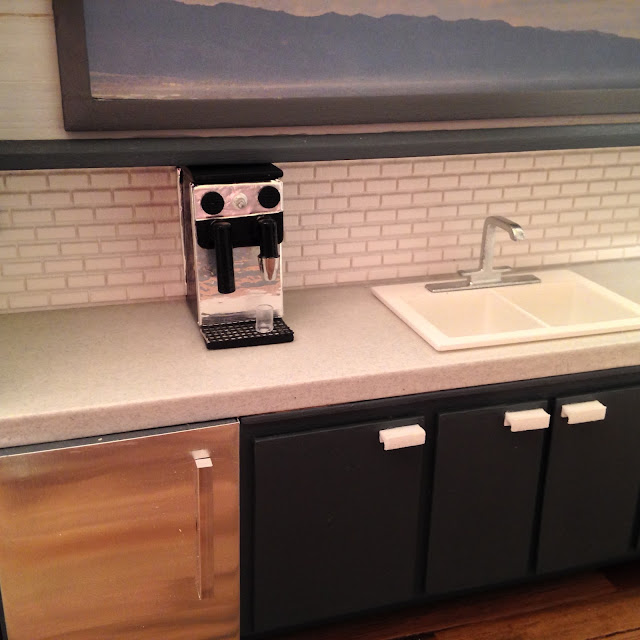
I glued most of the decor stuff to the kitchen shelves, let that dry while I made dinner, then attached the side wall after that. While I had that taped and glued, I took the opportunity to run more wood glue along all of the seems that cannot be seen. I want to make sure since these are two kits turned into one that there is plenty of points that help support any stress.
One of the fun little projects was making some little plants. I have a drawer full of silk and plastic plants and flowers. Some are left overs from the 90's when fake floral swags were cool, and I also pick up things from Joann's when they go on sale. They are in order of before materials used, and after completed below.
And these are for my giveaway Who!
One of the fun little projects was making some little plants. I have a drawer full of silk and plastic plants and flowers. Some are left overs from the 90's when fake floral swags were cool, and I also pick up things from Joann's when they go on sale. They are in order of before materials used, and after completed below.
Sunday, December 13, 2015
Making Beach Signs...
One of the details that I wanted to include on the kitchen shelves at Alki Point was a beach sign. I've seen several really cute signs for sale on Etsy and elsewhere, but I really enjoy making stuff so I thought I'd give it a whirl. Here's what I did.
Stuff You'll need:
- Color printed photo of the sign. I got ideas online, but ended up making my own in Publisher. I just sized my design then printed on regular paper.
- Wood scraps sanded and cut down to the size of the sign you'd like (I left a little room around the edges of the photo on mine). Mine are 2"x1"x1/16".
- Paint & paintbrushes. I used white to lighten up a turquoise I had, then a dark grey for aging washes.
- Mod Podge and old paintbrush.
- Small ball stylus.
- Ruler.
 Paint on the base color for your sign and let dry. I used a lighter than I wanted coat first. I also used a color similar to the printed design. This helps to make the print appear to be part of the actual sign.
If you want to go for a little color depth, apply a bit darker second coat and let dry. Make sure to cover all of the edges well. And if your sign will be seen from the other side (or you're just a victim of raging OCD) repeat the process to the back. You really only have to cover the edges here, but I like to paint and see the mottled finish. I get a sense of accomplishment from it! :O)
 Once the paint is dry on the wood, give the edges a light sanding. You're going for the look of an old sign with some of the paint worn down/off.
While your wood is drying, apply a coat of Mod Podge to your prints (the ink should be good and dry by now). I Mod Podge before I cut out the signs. I like to have a protective coating on them before I handle them too much. When dry, cut out your signs. You can give them rippled, curved, torn edges etc. depending on the finished look you are going for. I love the look of shabby sprinkled in with modern, so my signs got rounded edges and aging.

Once you're happy with the amount of wear, coat the back of your sign with Mod Podge and affix it to the wood piece. Let partially dry.

Decide how many "planks" of wood your sign will have. I tried 3 and 4 boards to see what I liked best. Once you've decided, lay your ruler across the sign, and using the edge of your ruler, run the stylus back and forth until you reach a depth you like. It is easier to do this with softer woods, and before the Mod Podge dries.
 Use the stylus to also make dents on the ends of the boards. These will be your nail holes. Dot the holes with the color you'd like for the "nails".
Now it is time for an aging wash! Just water down you dark color (can be black, brown, grey - whatever you have) and apply coats until you are happy. Don't forget the edges! If you have too much, you can wipe away or swish more water on it.

Spray with varnish if you like - I didn't because I like the finish just the way it is. I am not too happy with my nail holes. I think I'll tinker a bit more with these...
Saturday, December 12, 2015
One For Me, One For You
One for me...
One for you...
One for me...
One for who?
Post your comment on this post. You might me the Who!
Enjoy your weekend, all!
 |
| Bath Vanity Accessories For Me |
 |
| Chrome Shower Fixtures And Acrylic Wall Added (paper stays on for now) |
One for you...
 |
| Bath Accessories |
One for me...
 |
| Espresso Machine |
 |
| Based Loosely On This Model |
One for who?
 |
| Who's |
Post your comment on this post. You might me the Who!
Enjoy your weekend, all!
Subscribe to:
Comments (Atom)


