Search My Blog!

Use the Search box below to find keywords that you're looking for quickly and easily!

Search Feature

Thursday, July 23, 2015

Sasquatch Lamps and Other Victories!

It seems like this barn project has been full of difficult challenges to overcome ever since I opened the box. I'm not usually put off by them, and usually I look at them as an opportunity to learn something. I do have a whiny threshold, though, and today I think I crossed over it.

I may have mentioned before that the barn is not the usual 1:12th scale. I knew that would mean doing a lot of modifications, but I welcomed the challenge, and a chance to learn to use new tools. I've managed to conquer many of them, but it seems with every new stage of progress comes a new problem to solve.

Point of fact; most dollhouse ceiling heights are between 9 and 10 inches. Therefore, dollhouse stairs are made for that height and angle. The height from my first floor to the loft is 14 inches. Okay, so you just add more stairs, right? Well that only works if you have enough floor space to accommodate that many stairs, and I do not.

So after I put myself on time out, I awoke from my tantrum nap thinking of two possible solutions. 1. Cut the first floor walls down to 10 inches. The problem with that is I have already installed the tapewire and outlets - all along the top of the walls. I would have to run new tapewire and install another dozen or so outlets. That idea very quickly lost steam.

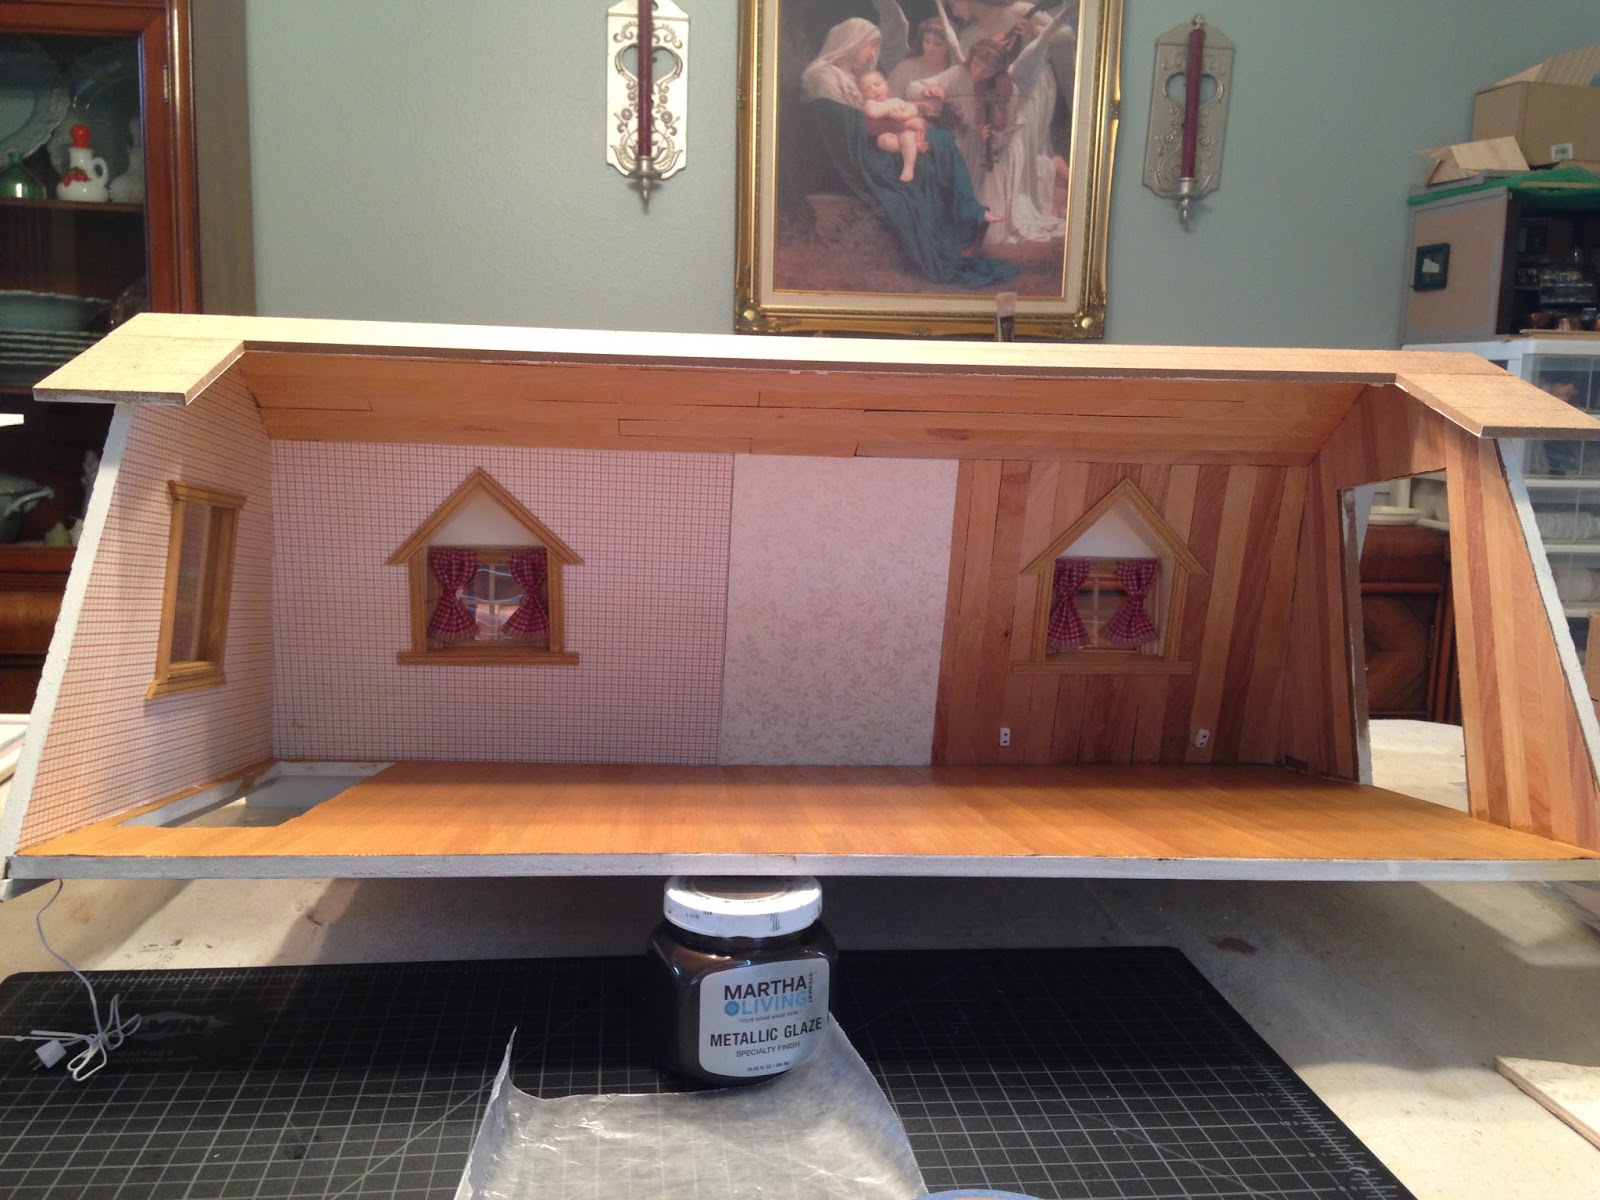
Okay, option number 2. Turn the barn entry into a split level sort of deal. You come in to the door on a landing, then you can either go up or down. This splits up the stairs and I still have a little room for a sofa. This means I create the landing, cut the stairs for the lower level, move the front door opening up, move the front window opening up, fill in and patch the old openings, and create a deck with stairs outside to get up to the front door. Why this option you ask? Because I am a glutton for victorious moments, and this one should be monumental!


Here is the mock up of the split level entry. The silver lining is that I got to use my rip saw and discovered it is fun and cuts exactly how I want it to!


Okay, now on to the fun part of the day! I knew I wanted to make lamps for the bedside tables, and when I came across little unfinished sasquatch figures an Amazon, the idea was solidified!


They came with a little base for the squatch to sit on, so now all I needed was a way to hide the lamp wires. I just happen to have some cakepop sticks that are perfect. The base had enough room for me to drill a hole into for the stick.


I cut the stick into 2 pieces, each about 2-1/4. I then crumpled up a piece of lunch bag and decoupaged it onto the stick. A couple coats of various brown and they look just like a Douglas Fir trunk.

I always seem to have extra electrical plugs with wire, and various lights I pick up when I see cheap auctions on ebay.


I painted the sasquatches in several different tones of brown, going lighter where you'd expect less hair cover such as the face, palms and bottoms of their feet. I gave them amber colored brown eyes.


I painted the lamp shades a forest green color, so that the effect would look like sasquatch was passing under a tree. After a couple coats of paint, I sealed everything with matte sealer.


Assembling the lamps was pretty easy. I am impatient so when I have to take things in steps and wait for glue to dry, I get myself into trouble imagining the next project and doing research on the web to source supplies.

The wire provided on the little bulb looked sufficiently long enough, so I just had to put plugs in the ends.


Here is one of the lamps getting its test fire. We have liftoff!


Here are the lamps plugged in where they'll eventually live in the bedroom. I think I'll make some sort of burl and twig night tables to match the log bed.

I'm so happy that there are little victories sprinkled throughout the projects. That's what makes my heart sing and what keeps me imagining more!


Tuesday, July 21, 2015

Next Steps...


Now that the front wall/roof piece has been installed, it's time to tale care of a little housekeeping. The mini kind, of course...

The barn kit came with 6 pre-cut window openings, you know, so the horses had places to look outside. I enlarged 2 of them; one for the french door in the bedroom that will eventually lead to the deck, and one for the slider door leading to outside Russ' shop. That leaves one in his shop and two where the staircase will go. I'll decide when I get to that point what to do with them. The final one is upstairs, where the staircase and kitchen meet.


I decided to just trim it out on the inside and outside and make a plastic window for it. I like the way it turned out. The inside having one style and the outside with opposite trim.


The next step was to connect the loft and the main floor electrical to make sure I had good connections from start to end of the tapewire runs. On the main floor, I installed a plug just above the floor, and on the loft under the staircase landing, I installed wires with a plug end. I also installed eyelets toward the top of the wall which the loft plug could also connect to. This way I have options when it comes to finishing and hiding the wiring.


After plugging the leadwire into the transformer, turning the power on, and poking the probe into several spots I had only one issue with a tapewire connection. Luckily, all I had to do was to replace the tiny brass brads with eyelets. This made a stronger connection, and then I had power all the way to the end of the run. Phew!


Next, I had to decide on a treatment for the ceiling. I settled on more thin wood veneer strips so that it would end up looking like an authentic barn roof. After the walls are installed I'll add some old looking beams to complete the look. In this photo the loft is upside down with boards and weights added to prevent the veneer from curling.


After the ceiling strips had dried, it was time to stain the wood floor. I just used a Minwax light oak color. It really only needed one coat and came out very evenly. After I had let it dry for several hours, I came back and applied varnish to the ceiling, bedroom wood walls, and floor.


It's finally time to install the interior divider walls. I needed to to give everything a dry fit so I can address any issues at this point.


Before the bathroom walls go in, it's a great time to add the towel racks, mirror, TP holder etc. It's much easier now with the help of gravity to glue on a flat surface and not try to reach into a 5 inch space.


The towel bars were a little too narrow to hold the fluffy towels I have, so I've added a couple beads to extend it. I also wanted to glaze the mirror frame to match the other bathroom fixtures. The glaze takes a while to really dry and lose it's tackiness, so I'll probably start making the bedside lamps in the meantime.


Things should start to get pretty interesting now that finishing touches can be added. Check back soon for more updates!


Friday, July 17, 2015

The Barn Is Taking Shape!

I love when I get to this part of a mini project because you can actually see it taking shape. This week I got to add a lot of little details, so I can actually start to see where the design is going to lead me.


In this photo the doors have been stained, varnished and had the little door hardware added. It was after this step that I glazed the tiny brass nail heads with a aged bronze to match the handles.


In this photo I've added coat hooks to the doors and window pulls to the dormer windows.


It's time to get the windows installed, so that means cutting interior trim and making the little curtains. I thought a little gingham would be apropos. 


For the bathroom window, since it will be blocked by the shower stall on the inside, I've made a non opening curtain. Just a bit of pleating will help the illusion from the outside.


 This is the outside of the window prior to adding the curtain. Since I'm installing it now, I'll have to be careful later on when I paint.


The interior window trim has been glued into place. Now I have to camouflage the terrible dormer openings as best I can with trim.


Here is the entire front wall/ roof piece complete with curtains. It is now ready to be installed onto the barn loft.


Here is a close-up of the bedroom dormer on the left. I still have to decide if I am going to stain or just varnish the wood strips. The right side is going to be the kitchen window dormer. The kitchen is going to have to be a complete custom job because the space is so small and awkward.


Here are the room divider walls complete with wall coverings, doors and trim installed. As soon as I install the front wall/roof piece, these can go in. It's so exciting!