Search My Blog!

Use the Search box below to find keywords that you're looking for quickly and easily!

Search Feature

Friday, July 17, 2015

The Barn Is Taking Shape!

I love when I get to this part of a mini project because you can actually see it taking shape. This week I got to add a lot of little details, so I can actually start to see where the design is going to lead me.


In this photo the doors have been stained, varnished and had the little door hardware added. It was after this step that I glazed the tiny brass nail heads with a aged bronze to match the handles.


In this photo I've added coat hooks to the doors and window pulls to the dormer windows.
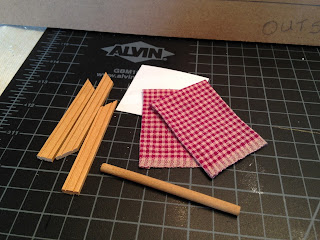


It's time to get the windows installed, so that means cutting interior trim and making the little curtains. I thought a little gingham would be apropos. 


For the bathroom window, since it will be blocked by the shower stall on the inside, I've made a non opening curtain. Just a bit of pleating will help the illusion from the outside.


 This is the outside of the window prior to adding the curtain. Since I'm installing it now, I'll have to be careful later on when I paint.


The interior window trim has been glued into place. Now I have to camouflage the terrible dormer openings as best I can with trim.


Here is the entire front wall/ roof piece complete with curtains. It is now ready to be installed onto the barn loft.


Here is a close-up of the bedroom dormer on the left. I still have to decide if I am going to stain or just varnish the wood strips. The right side is going to be the kitchen window dormer. The kitchen is going to have to be a complete custom job because the space is so small and awkward.


Here are the room divider walls complete with wall coverings, doors and trim installed. As soon as I install the front wall/roof piece, these can go in. It's so exciting!


Saturday, July 11, 2015

Wall Coverings

Today was all about wall coverings...

I started with the bedroom walls by applying a couple coats of honeycomb paint. The wood strips I'm using as the wall treatment are very thin and they tend to curl when I apply the glue. Some glues are worse than others, so I used Grandmother Stover's. I'd apply a few strips and then clamp them for a while before doing the next section.


I could only do half of the french door wall, because I can't cover the tapewire until I attach the front wall/roof and tie into the taperun. I did cut the pieces, tho, so it will be a lot easier when it's time to paste and clamp them in.


I like the contrast in the wood strips. It gives it a nice reclaimed wood look. I'm not sure yet if I'll do any staining, or just a varnish. One of my wall plugs is crooked. Good thing there will be a nightstand in front of it!

You can never have enough clamps!


This is the bedroom side of the wall. The bathroom is on the other side.


The kitchen wallpaper has also been installed on all three walls.


The next step will be to stain all of the windows, doors and trim. It will be a lot easier to trim out the dormers before I attach it to the front. This means I have a major clean up and reorganization project before I can start the stain. My dining room is a mess, and I'll need my entire table to turn into a stain factory.


Friday, July 10, 2015

Fun Little Project...


In between dealing with all of the technical issues this week, I managed to finish up a fun little project!

This is the tub/shower that will go into the retirement barn. I like rustic living, but there's no harm in having a few modern conveniences, too!

This unit measures just 5-3/8" wide x 6-1/2" tall.


The MBS kit was fun, although since I needed to make it a freestanding unit I had to get a little creative. The kit comes with adhesive sheets. You're supposed to stick them to each of the three tile wall panels, then affix them to the dollhouse walls. Since I have no walls ready yet, I had to use clear packaging tape to make all the walls into one unit.


Gluing the tub to the walls was challenging. I made a couple of stacked wood braces for the underside ends of the tub so I'd have a better gluing surface. I did one end at a time and made sure the epoxy was fully set before I moved on.


The shower faucet, tub spigot and mixing valve were included in the kit but were an ugly grey color. I coated them with flat black enamel and then gave them an aged bronze finish coat. It did not come with the drain unit or the soap dish. I made the drain from a jewelry finding.


The shower curtain is made from an old placemat. I've had it for years, and it had a couple of mustard stains on it! The pattern and weave were right, though, so it took one for the team. It was two pieces with batting in the middle, so I used a seam ripper to separate the pieces, then in true OCD mode, pulled all the batting from the fabric.


I was able to find an area without stains for the shower curtain. I cut the piece I needed, then ironed the seams flat. I used fabric glue to affix the seams. I ironed pleats evenly in the fabric, made a small hole with the seam ripper, then inserted a jump ring into the center of each flat area between the pleats. This is so the shower curtain can slide across the shower curtain rod.


The shower curtain rod is a piece of 1/8" dowel cut to size. The parts that hold the curtain rod ends to the tile are just bead caps. I sanded them down then painted them the same as the shower hardware.


It was nice to have a little reprieve from the electronic issues, and now I can move on to the wall treatments in the bedroom and kitchen!