Search My Blog!

Use the Search box below to find keywords that you're looking for quickly and easily!

Search Feature

Showing posts with label Non Mini Ramblings. Show all posts

Monday, May 18, 2020

~Happy Birthday Alexis~!!!

Guess what? I didn't do what I was supposed to do again this week. I'm not surprised that you're not surprised. You all know me so well by now! But let me explain... You see, my son Ande met Alexis  when she was working at her family's bakery and Ande was helping with the bakery's remodel. Apparently, it was SHAZAM at first sight! And after their first date they realized that they "totally got each other". That was in the fall of 2017. Since then, these two crazy kids have gotten engaged. No formal plans for a wedding yet, but they are saying "someday".

Alexis has shown interest in my miniatures and dollhouses. In fact, she said she'd like to have a dollhouse and all of the little treasures that go inside, one day. That's all I needed to hear. She is also a budding young artist. She and Ande painted a couple acrylics together with instruction from YouTube videos. Alexis continued with interest painting several more. I am so proud of her! They are really awesome!

So what to do for her birthday on May 18th this year? How about making all of her paintings into mini ones with a small space to display them? Yup. That's what I did...


 I began with a plywood base measuring 5-1/2" x 5-1/2", then used foam core and 1/4" x 1/4" basswood beams to make the 10" high walls. I used a scrap of Houseworks walnut flooring and stained it in walnut to contrast with the white painted magik brick walls. A blank canvas!


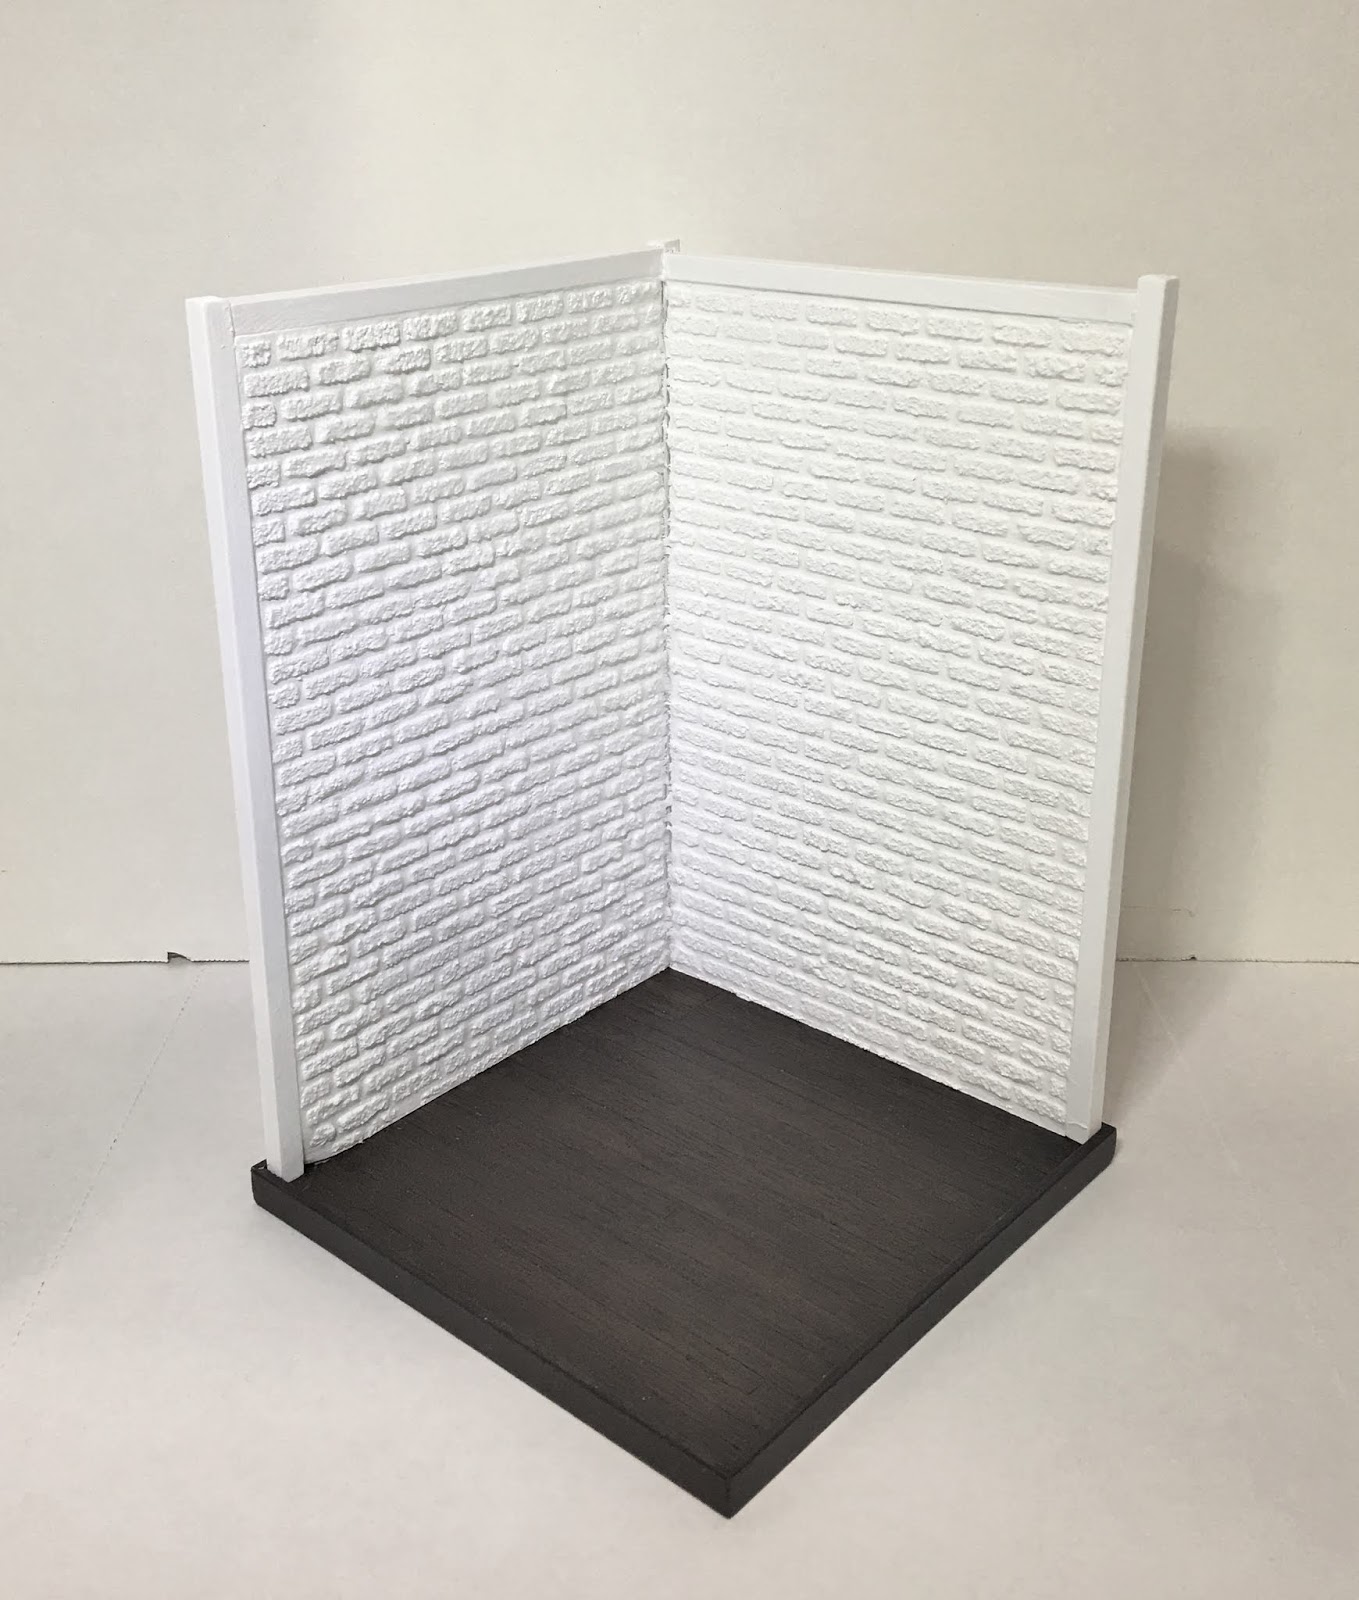
I kept the back side simple with leftover brick wallpaper.


Next, I needed an easel. Since I'd given myself only days to have this project finished, I thought the quickest method was to turn an unfinished Classics ladder into one by adding a wide shelf for a canvas to sit on. Alexis' favorite color is yellow, so I used every shade I had of it in the project. I could not bear to dirty up the apron so I made a dirty paint rag instead.


I had a tray table kit from Jane Harrop so I painted the legs yellow, decoupaged yellow art onto the tray part and then made it look like a flea market treasure.


I made the stool and tool caddy using svg files intended for 1:1 furniture. I simply had to resize them in Cricut's Design Space for 1:12th scale.


I definitely needed art supplies, but wouldn't you know - that was one category of miniatures I hadn't collected things for! So I made 'em!

The little acrylic bottles were made based on Rainbow Tinkle's video:

https://www.youtube.com/watch?v=Zm4nbv0RPpo

She provides the printie in pdf format but I definitely had to resize it significantly for 1/12th scale. It was an otherwise great method, and if I'd had the right foam on hand for the lids, my bottles would have been perfect.


The paint tubes were made by rolling toothpicks in aluminum foil tape. I will make a tutorial soon as well as one with how I used heat shrink tube to make the paintbrushes. I cut the artists palette with the Cricut and then looked at photos to see how to make it look well used. I had the pretty yellow bottle in my stash, and the sketch book with the initial "A" is from a fun kit by Nancy.


I had a yellow teacup and saucer, too, so thought I'd make Alexis a nice cup of tea with a tea bag and cookies. She will even have seven more tiny tea bags in a box when she needs to relax a little. I really need to make a tutorial for the tea bags and boxes, too!


Of course there needed to be flowers, and I just so happened to have yellow roses, a white bunch of something and a yellow watering can. I feel like I cheated, not making the flowers, but I just didn't give myself a whole lot of time!!! I am getting so disorganized in my old age!!! They are still so lovely, though!


And the best part for last... Alexis' amazing art!


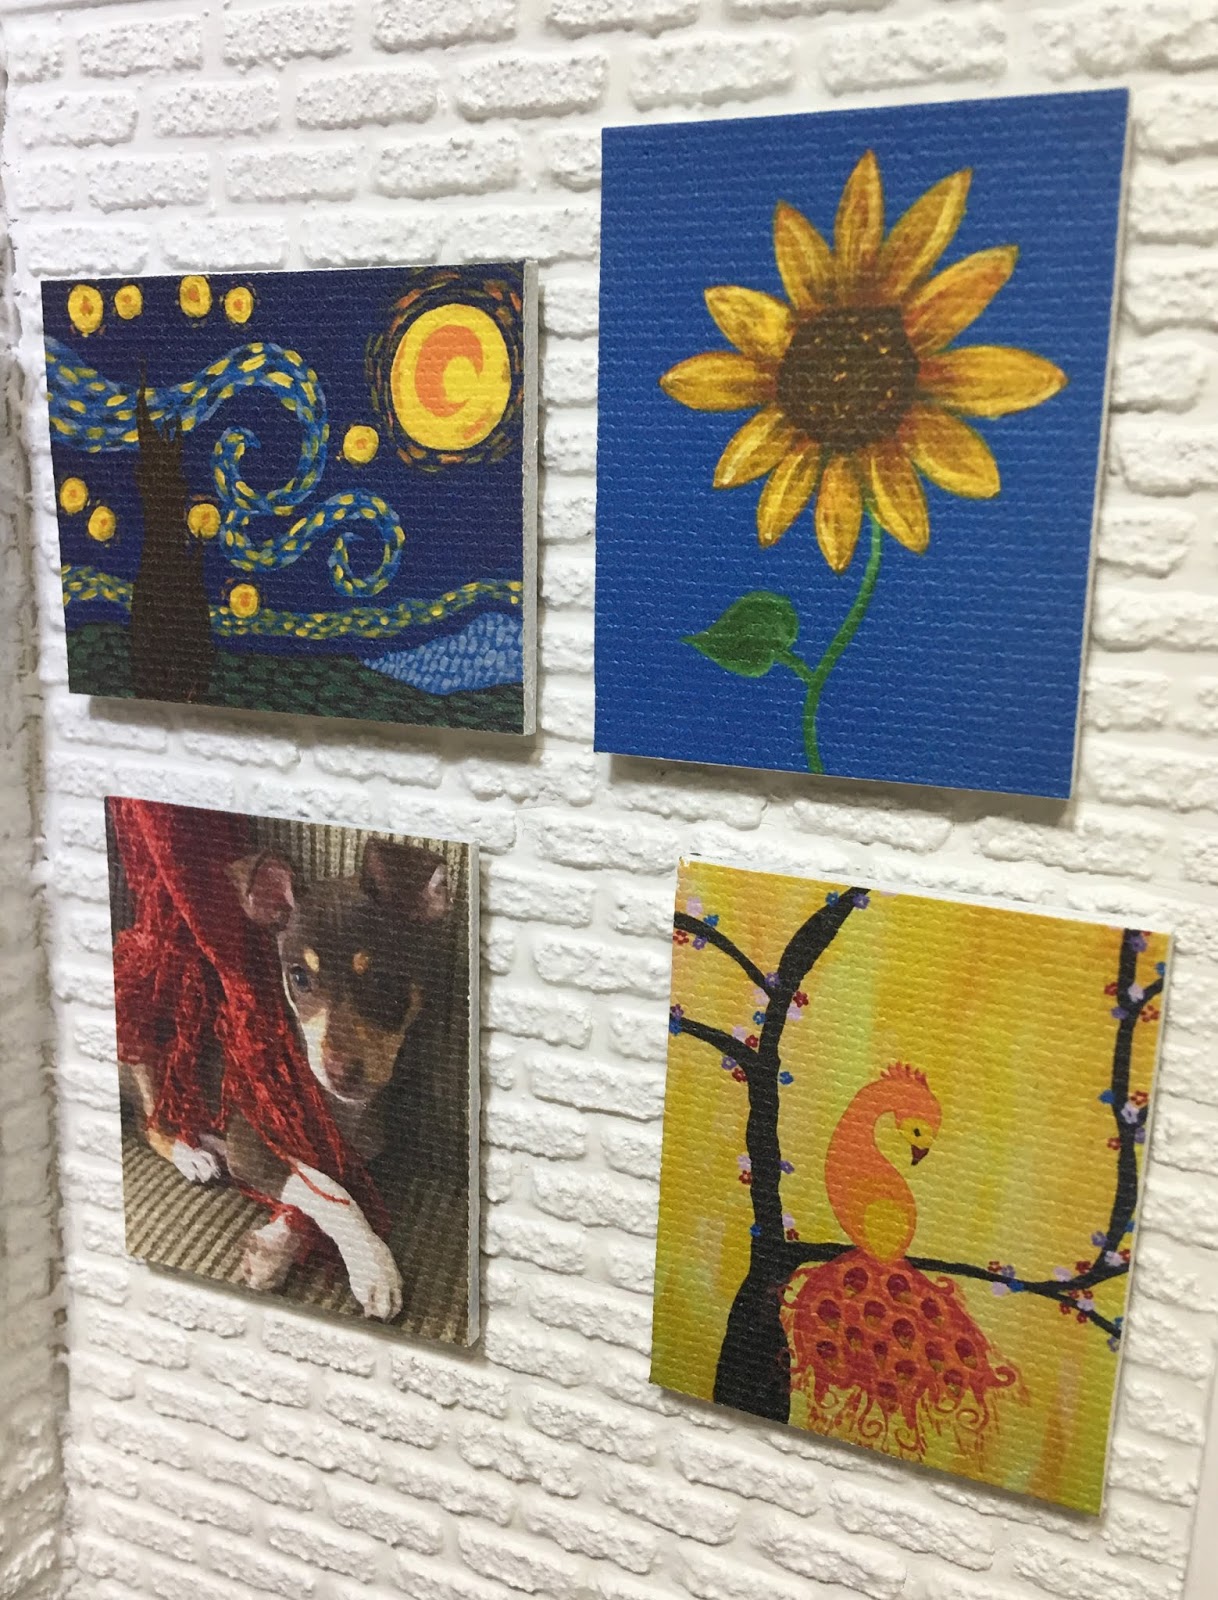
Between Facebook, Instagram and asking Ande to sneakily take straight on photos to text to me, I managed to get seven of her paintings. I know - there are nine in the finished photo at the top of the post but I will explain the other two in a moment...

I resized them in my graphics program and then printed them on this canvas inkjet paper. It's such a nice effect! I cut exactly matching chipboard shapes with the Cricut, sealed the edges with SuperGlue, painted the edges white, then mounted the art on to the chipboard with wallpaper mucilage. Just look at that texture! We won't speak about how I had to uninstall my printer and then download new drivers and software. That was a bummer, but my printer is doing a fantastic job again!


Now for the other two "paintings". I love this picture of Ande and Alexis' puppy Thug Rose (a.k.a. Rosie), my grandpuppy. I have a free program called FotoSketcher that will stylize any photo into pencil, chalk, oil, watercolor, acrylic, pen and ink, impressionist etc... I took Rosie's photo and applied the oil painting effect. I think if I'd had time it would have been fun to experiment with a texture medium to create brush marks on the canvas. An experiment for another day...

Left - Original, middle - FotoSketcher oil, right - oil printed on canvas.
The canvas on the easel was a color selfie photo that Alexis posted. I changed it into a pencil sketch as if it were an in progress self portrait.


And now Alexis has her own mini art studio with her own mini art! Everything is stuck down with FunTack so she can rearrange and play whenever she has the urge. She seemed really excited with her gift and I hope I have created a monster!!!


And now, since I have finished this fun birthday project for Alexis, I can finally and bravely unbox this amazing gift from my daughter Natasha. This may be a rabbit hole that I don't emerge from for a while. Wish me luck!!!


Back soon with more adventures and, maybe, some tiny 3D printed wonders!

xo xo,
Jodi

Tuesday, May 12, 2020

Good Works

Hello dear friends! I hope all of you are well and that those celebrating Mother's Day had a lovely one to remember! Just getting to be the mom of my two amazing kids would have been enough for me, but Natasha (33 in July), and Ande (31 in July), went out of their way to make sure I felt loved and appreciated!

Ande came by for a hug (the first one I've gotten from him since social distancing started) and brought these beautiful roses, gourmet cinnamon bears from Tacoma Brothers (a wonderful local grocery store), and let me keep my grandpuppy Rosie overnight.


My daughter Natasha, who is known to spoil me rotten, got me a 3D printer! The learning curve is going to require a lot of trial and patience, but I am so excited to get started actually printing my own miniature designs in the future! What thoughtful people my incredible kids have become! There is no gift greater than that!


When I last posted about the vanities, I had found a silicone mold making kit in my "someday" stash. I had a lot of fun working with the stuff and got great results with almost everything I tried!


The process is simple enough: Mix equal parts of an "A" and "B" liquid substance, place your model into a container, pour the combined mixture over the piece you want to mold (pot life 50 mins). and wait about 4 hours to demold. I used a couple Unique and Falcon Miniatures pieces that I had to experiment with.


The mold will end up the size and shape of the container you used to hold the model, so it is good to have one close in size to the item you are molding. It is recommended that you fill the silicone about 1/2" above the piece you are molding so that it is strong enough to handle many future casts. I used cheap dollar store plastic storage tubs as my model holder and they were wonderful! I need a little practice on my level filling skills, but it was easy enough to clean up the opening with my Xacto knife after the mold had cured.


I cast many brackets using the leftover colored resin from the tiny product bottles I was making. This is great because one of these brackets alone costs around $5. If you need a lot of them in a build, molding and casting is the way to go! With a coat of gesso and then paint you'll never know there is colored resin beneath. The detail is amazing!


Speaking of product bottles, I made a mold for those, as well. The mold has 5 bottles in three sizes.


I experimented with different mediums to color the resin including alcohol ink, chalk and paint as I have always done. But just to broaden my horizons, I'll be ordering a set of mica powders to try the next time I do resin work. The chalk was pretty good, but the paint and alcohol ink were difficult to get the exact color I was after. In order to achieve lavender I had to mix red and blue inks. If I'd had a purple it would have been easier to achieve, The mottled ones below were a combo of chalk with a little white acrylic paint mixed in. It took a lot longer to cure and not all of the bubbles came out. If you're going for a scrubbing body wash or a bubble bath this can work in your favor!


One mold did not work well at all. In fact, I broke the model piece just trying to remove it from the mold. This type of intricate and thin model may require a mold release agent, which I did not try this time. I think I can still use the mold, however, if it is in a setting where I want the detail to look as though it is old and has seen many layers of paint over the years.


These are what I ended up with the first time through with the bottle mold and colored resin. Not perfect, but not bad. I have some ideas to try out which I believe will perfect the method, and I will keep you posted! I found and ordered better bottle tops from Bindle's, too, so that should help the overall appearance to be more authentic. I need to improve the scale of the labels, too. Maybe use slide decals instead.


While I had the resin out, I took the opportunity to use the excess resin in an Architectural Flourishes mold I picked up from AlphaStamps a while back. These came out beautifully, and it makes me want to do a small project just to use them!


Now let's get to the other accessories for the vanity sets. You remember the candles and pillars (tutorial here)...


I also made baskets based on Casey's Very Easy Basket Tutorial, only adding some 1/16" silk ribbon to the top and bottom and painting in coordinating colors.


And filled them with towels I made up and printed on fabric. Here are the towels and rugs for you to use if you like.


Then I was on to the arrangements for the vases that will sit on the vanity countertops. I made eucalyptus branches from an SDK kit and lavender based on the We Love Miniatures tutorial on YouTube. I had enough left over to make up some heart shaped grapevine wreath hangings, too.


Next I made some framed art with the eucalyptus and lavender theme using free art found on the internet. I used the Cricut to make matting and back covers, then painted 1-3/16" x 1-7/16" frames in coordinating colors. Here's the art if you'd like it, too.


In looking at the vessel sink height, I decided to raise up the faucet unit by adding a booster piece beneath. Now the faucets are at a much better height to function. I finally added the mirror material too!


The sink itself is a bisque bowl painted and then given a gloss coat. For the illusion of the drain, I use a flat washer topped with a round nail head stud. This is supposed to look like the more modern 'push to toggle open and closed' type of drain plug.


Now it's back to work on the product bottles to see if I can make them better. I'll be back soon with the perfected vanity and accessories for the giveaway! In the meantime, I encourage you to see what ways you can help those in your communities. Food banks are great, making masks is great, or even bringing a batch of homemade cookies down to your local fire station. It'll make a difference, I promise! And it'll make you feel so good!

xo xo,
Jodi