Alexis has shown interest in my miniatures and dollhouses. In fact, she said she'd like to have a dollhouse and all of the little treasures that go inside, one day. That's all I needed to hear. She is also a budding young artist. She and Ande painted a couple acrylics together with instruction from YouTube videos. Alexis continued with interest painting several more. I am so proud of her! They are really awesome!
So what to do for her birthday on May 18th this year? How about making all of her paintings into mini ones with a small space to display them? Yup. That's what I did...
I began with a plywood base measuring 5-1/2" x 5-1/2", then used foam core and 1/4" x 1/4" basswood beams to make the 10" high walls. I used a scrap of Houseworks walnut flooring and stained it in walnut to contrast with the white painted magik brick walls. A blank canvas!
I kept the back side simple with leftover brick wallpaper.
Next, I needed an easel. Since I'd given myself only days to have this project finished, I thought the quickest method was to turn an unfinished Classics ladder into one by adding a wide shelf for a canvas to sit on. Alexis' favorite color is yellow, so I used every shade I had of it in the project. I could not bear to dirty up the apron so I made a dirty paint rag instead.
I had a tray table kit from Jane Harrop so I painted the legs yellow, decoupaged yellow art onto the tray part and then made it look like a flea market treasure.
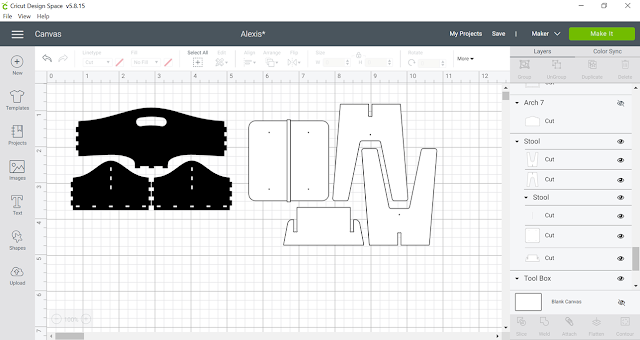
I made the stool and tool caddy using svg files intended for 1:1 furniture. I simply had to resize them in Cricut's Design Space for 1:12th scale.
I definitely needed art supplies, but wouldn't you know - that was one category of miniatures I hadn't collected things for! So I made 'em!
The little acrylic bottles were made based on Rainbow Tinkle's video:
https://www.youtube.com/watch?v=Zm4nbv0RPpo
She provides the printie in pdf format but I definitely had to resize it significantly for 1/12th scale. It was an otherwise great method, and if I'd had the right foam on hand for the lids, my bottles would have been perfect.
The paint tubes were made by rolling toothpicks in aluminum foil tape. I will make a tutorial soon as well as one with how I used heat shrink tube to make the paintbrushes. I cut the artists palette with the Cricut and then looked at photos to see how to make it look well used. I had the pretty yellow bottle in my stash, and the sketch book with the initial "A" is from a fun kit by Nancy.
I had a yellow teacup and saucer, too, so thought I'd make Alexis a nice cup of tea with a tea bag and cookies. She will even have seven more tiny tea bags in a box when she needs to relax a little. I really need to make a tutorial for the tea bags and boxes, too!
Of course there needed to be flowers, and I just so happened to have yellow roses, a white bunch of something and a yellow watering can. I feel like I cheated, not making the flowers, but I just didn't give myself a whole lot of time!!! I am getting so disorganized in my old age!!! They are still so lovely, though!
And the best part for last... Alexis' amazing art!
Between Facebook, Instagram and asking Ande to sneakily take straight on photos to text to me, I managed to get seven of her paintings. I know - there are nine in the finished photo at the top of the post but I will explain the other two in a moment...
I resized them in my graphics program and then printed them on this canvas inkjet paper. It's such a nice effect! I cut exactly matching chipboard shapes with the Cricut, sealed the edges with SuperGlue, painted the edges white, then mounted the art on to the chipboard with wallpaper mucilage. Just look at that texture! We won't speak about how I had to uninstall my printer and then download new drivers and software. That was a bummer, but my printer is doing a fantastic job again!
Now for the other two "paintings". I love this picture of Ande and Alexis' puppy Thug Rose (a.k.a. Rosie), my grandpuppy. I have a free program called FotoSketcher that will stylize any photo into pencil, chalk, oil, watercolor, acrylic, pen and ink, impressionist etc... I took Rosie's photo and applied the oil painting effect. I think if I'd had time it would have been fun to experiment with a texture medium to create brush marks on the canvas. An experiment for another day...
 |
| Left - Original, middle - FotoSketcher oil, right - oil printed on canvas. |
And now Alexis has her own mini art studio with her own mini art! Everything is stuck down with FunTack so she can rearrange and play whenever she has the urge. She seemed really excited with her gift and I hope I have created a monster!!!
And now, since I have finished this fun birthday project for Alexis, I can finally and bravely unbox this amazing gift from my daughter Natasha. This may be a rabbit hole that I don't emerge from for a while. Wish me luck!!!
Back soon with more adventures and, maybe, some tiny 3D printed wonders!
xo xo,
Jodi


