Search My Blog!

Use the Search box below to find keywords that you're looking for quickly and easily!

Search Feature

Showing posts with label Fairytale Treehouse. Show all posts

Wednesday, February 8, 2023

At Last...

Hi Guys! I know it's been a long while, but I'm back to the craft table! I was beginning to worry I might not ever find my motivation again! First, the onset of holidays, then a bout with the nasty RSV bug, then more holidays and finally Russ being home for the majority of the last three months. It was all so counter to creativity! Finally, I just remembered where I'd left off, what the next step in the fairytale treehouse project was supposed to be, and I got busy. Thinking can be the death of creativity for me, so ignoring the "shoulds" is the only path back to my table...

Before the bug struck, I had been working on stairs for the left wall tower. I didn't have much of a plan but that is the plan for this project. I want to allow my imagination to wonder and figure out solutions as problems arise. That seems like the best way to have the most fun with this fantasy genre. So, without much measuring and only using my eyecrometer, I cut up some 3/16" foam core to create a circular staircase. I carved in some stones, added a base coat of paint and applied some glue veining because I thought it might look neat. Then I sponged and pounced on various paint colors until it looked like a staircase that belonged in a forest fairytale treehouse. And that's all for the staircase until I get a better idea of how its going to function in the treehouse...


I cut the opening for the staircase tower... At Last! The scroll saw noise sent Woodson under the bed! Guess we're going to have to work on his tolerance all over again. Poor guy!


And like usually happens when I just stop thinking and get to work, more progress happened! I took the pop out window from the kit that was meant for the left wall (but got nixed in favor of the stair tower), reconfigured it a bit, made an opening for it in the right wall and it will become a sleeping loft upstairs for one of the girls.

Window seat from kit meant for the left wall.

Traced onto the second floor of the right wall.

Another opening to cut - poor Woodson!

Test fit.

Side view to see the protrusion.

Below the bedroom will be a kitchen for the girls. Goldie is working on a porridge cookbook and will need to test recipes! I thought it might be nice to have a little light coming into the room from outside, so I made a pop out window for above the sink. I repurposed the tall foundation pieces that I omitted from the kit. Woodson doesn't like the noise from the mini table saw any better than he does the scroll saw. You should see him take off when I release the steam on the Instant Pot! Poor Wubby!!!

Simple lean-to type pop out design.

Now this wall is much more interesting!

Profile view.

The last wall to get a bit of a pop out feature is the second floor window of the front wall. It didn't need much, just a little elevation change to add some detail and interest. This was a little more complicated than the other two windows because I had to figure out how to remake the arched window into a pop out, how to create an arched roof and how to keep it from interfering with the gable trim to come.

Here is how the original kit it configured...

Opening window.

And here is the wall with the pop out mock up. I used illustration art board for the arched roof, sliced at intervals to make the curve. It protudes only 5/8" - just enough to add a little charm.


Profile view.

So, it looks like I am back on a roll! Hopefully, I'll be able to keep the momentum going! But first...

Some of you receive my posts in email form. I have used MailChimp's free service for my 1,500 email subscribers since Blogger stopped sending them in 2021. After March 10th, it won't be free any longer. I know $13 - $20 per month ($156 - $240 per year) for their service doesn't sound like too much, but for someone who doesn't make money from her hobby, it's a lot of mini supplies I could be buying each year. I'll be looking for other free alternatives and hopefully, I'll find one and be able to continue sending the emails. More info to come...

Also, I wanted to share the wonderful treasures that Birgit (BiWuBären on the Blog) sent for Christmas! In addition to yummy marzipan and chocolates, she sent a 2023 calendar featuring photos she took of her amazing garden. Each photo features her adorable handmade BiWu Bears Flubby and Rosey. It brings such joy each time I look up and see it on my desk! She also included a handy closable storage/lunch box, a kit to make a palm plant (yippee!) and the best gift ever - Bottled Sunshine!!! Boy do I need that!!! These are tiny marvels of the biggest kind!  Thanks to Birgit and all the gang! It is thrilling to receive such love, thoughtfulness and kindness all the way from Germany! 🥰💗🤗


Hope you are all feeling mini motivated and having fun!

xo xo,

Jodi

Wednesday, December 7, 2022

A Treehouse? A Fairy House? A Storybook Fairy Treehouse?

Yes!!! All those things! And any other style or genre that seems to fit the bill. All I know for sure right now is that this will be the home for a couple rebellious and adventurous little girls that seem to find rejection and trouble in their worlds. They need a fun, safe place to call their very own and a real, true friend to adventure with. This will be a home where the porridge, chairs and beds are made just for them and weird tea parties with strange creatures are encouraged. Beheadings definitely are not! Meet Goldie and Alice and their new home, the Linfield Fairy Treehouse...

Goldie Locks and Alice Wonderland


They are very excited to make your acquaintance and would love it if you could recommend a good dressmaker!

Now that we have the inhabitants to build for, let's talk about the structure...

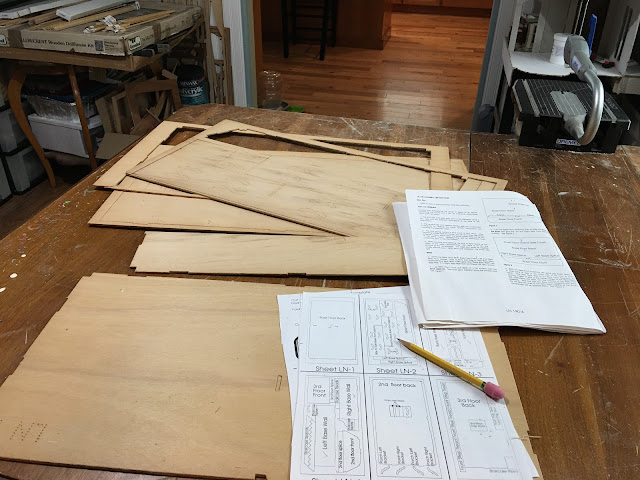
Since I only have a folder full of inspirational photos as a general guide to the features I'd like to include in their home, I thought it best to work on each of the four main walls in the Linfield kit, one at a time. But I kind of do have to sort of follow the instructions, so it might get challenging quickly.

These homes have features I'd like to attempt to incorporate

Going by the instructions, I needed to construct the base floor first. Already, by step 2, I was deviating from them. I guess that makes me a rebel, so I'm the perfect builder for these girls! I want to incorporate a tree trunk type base for the house, so having a 3-1/2" tall foundation was not going to work. I replaced the kit's foundation pieces for 3/4" basswood strip, and will end up with more of a deck floor incorporated into the tree base. I installed the kit's wood flooring strips as haphazardly as I could with a hot glue gun. The messiest techniques could become the best character features for this treehouse!

Punching pieces, picking splinters from my fingers...

Lots of gaps, just like a treehouse should have!

This floor will need supports once I know where the trunk will fit.

Next, I wanted to start on the wall with the staircase. I always knew that I would create a protruding stairwell for this house. It would take up too much room space if I left it in the center of the house. But the new stairwell would have to fit in architecturally with the treehouse feel. I had the perfect little Carlson's kit to help me.


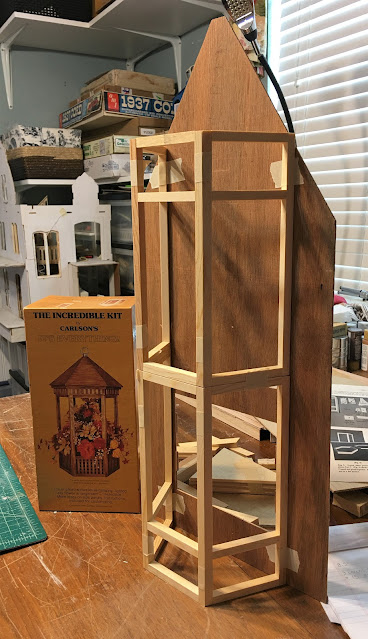
The gazebo kit is designed to be built in two halves, so if I stacked the halves, I'd have an almost instant staircase tower. Using and rearranging some of the kit's trim pieces in dry fit was promising. I just had to cut the short sections off one of the halves to end up at a good height for the Linfield kit's wall. The opening in the left wall is almost the perfect width for the tower - I'll just need to make the opening taller. The pop out window that is supposed to fit the opening can now be relocated to the right side wall. I am hoping that it will become a bed niche for one of the girls. 


I'll need to cut a slightly wider and much taller wall opening.


Just a little too tall...

Now I had to come up with some stairs and see if it was going to work with only half a stair tower. By stacking three 3/16" foam core pieces it created a good step height. I was only able to fit six steps and still have a roomy landing, so the girls will have a custom ladder to climb the last four inches to the second floor. Fun! I'm still considering ideas for a finish on the stairs. 

Fairytale steps!


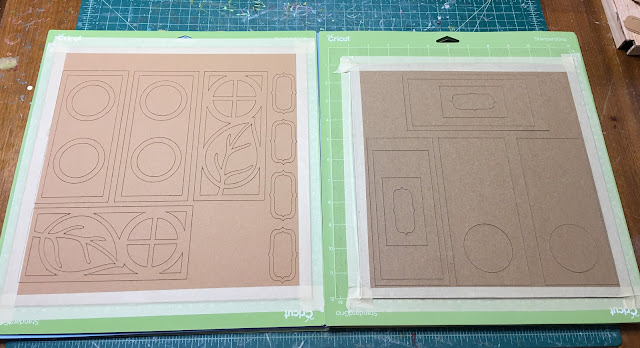
Now that I knew the stair tower was going to work I needed to come up with wall ideas. I turned to my trusty Maker and chipboard/kraft board. I decided to make small porthole windows where the stairs winded up, but then open the second section up with windows common in fairytales. The top section of the tower just needed small windows with a fun shape.


First section tower wall/window panels

Second section tower wall/windows

Third tower wall/windows.

By stacking layers of chipboard and kraft board, I created walls for the inside, walls for the outside, and will sandwich the 1/16" Lexan window panes in between. But first, a dry fit to see if they were going to fit and look the way they looked in my mind. You can see in this dry fit photo how I was able to use some of the gazebo kit's trim pieces to create a raised base for the tower. Now the stairs and first floor will meet perfectly.


I envisioned that the tower would look like a tree trunk and that the panels were carved from it. That would mean a lighter color inner wood was exposed and the detail trim would actually be bark. So I painted the base colors before assembly to see if it looked right.


This is the color board for the project, though the girls have something more colorful in mind for their pop out features. More on that later...


Before going any further, a dry fit with the base colors... I love it!


And with the stairs... I think this is going to work!


Now to create some texture! Using layers of regular wood glue, applied with a needle tipped bottle, I created "bark". It shrinks quite a bit after it is dry, so I applied about three layers. I was really hoping this was going to come out the way it looked in my mind.


And then the tower itself needed "bark"...


And paint...


And dry brushed highlight colors, then finished with dirty water washes on top...


Now it was time to assemble the windows. I only have so many clamps, so this was a patient process...


Once one window panel sandwich was dry I could assemble and clamp the next, then sand and fit the previous one into the tower...


And I just love the whimsical look and texture that was achieved with simple chipboard/kraft board, wood glue and paint!


Finally, the panes were finished and installed! 


This "by the seat of your pants" thing is really very fun and the girls are loving the progress! Hopefully, I'll be back next week with the stair tower finished and attached to the left wall. Maybe the girls can even test out the stairs! 🤞 

xo xo,

Jodi