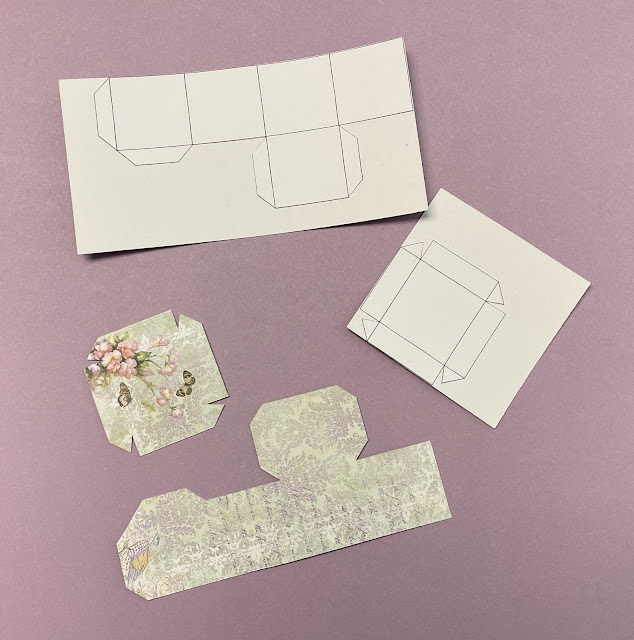
I needed a lidded gift box for Roz's kitchen warming party. Here's how I made it - I hope it works good for you when you need a gift box, too!
Supplies You'll Need:
Lidded Box Pattern (if you're having trouble with the Google Docs link to the .pdf the jpg file is at the bottom of the tutorial)
Lightweight Cardstock (any color)
Scrap Scrapbook Paper - thin works best
Glue Stick
Tacky Glue - Fast Grab preferred
Toothpick
Tools You'll Need:
Metal Ruler
Xacto Knife
Tiny Ball Stylus
Tweezers
Size your pattern in whatever graphics program you like best. I made the pattern for a 1 inch square box. I made the tutorial with a 1-1/4" square box pattern so that my large teapot would fit inside it.
Using your metal ruler and Xacto knife, cut out your box and lid patterns. Cut your scrapbook paper just slightly larger then your pattern
Apply glue to the back side of your box pattern. Not the side with the fold lines. Place it on the back of your scrapbook paper taking into account where you want your pattern. Smooth and let dry.
Cut the excess scrap paper away from the box pattern.
Using your tiny ball stylus and metal ruler, trace the lines of the box pattern to help the box to fold straight.
If you used white cardstock like I did, and the inside of your box will be viewed, you can add some color with paint, markers or in my case, chalk pastels. Scrape some chalk onto waxed paper then apply to the box with a stiff brush. Blow of any excess before continuing with the box assembly.
Glue tabs using Fast Grab Tacky Glue, holding until set. Before gluing your box lid preform a fitting to make sure it will fit. If you need to you can glue the box lid tabs a little looser.
Thanks to Printablee.com for the free box patterns!


Muchísimas gracias por el tutorial!!
ReplyDeleteBesos.
Thanks Pilar!
ReplyDelete