

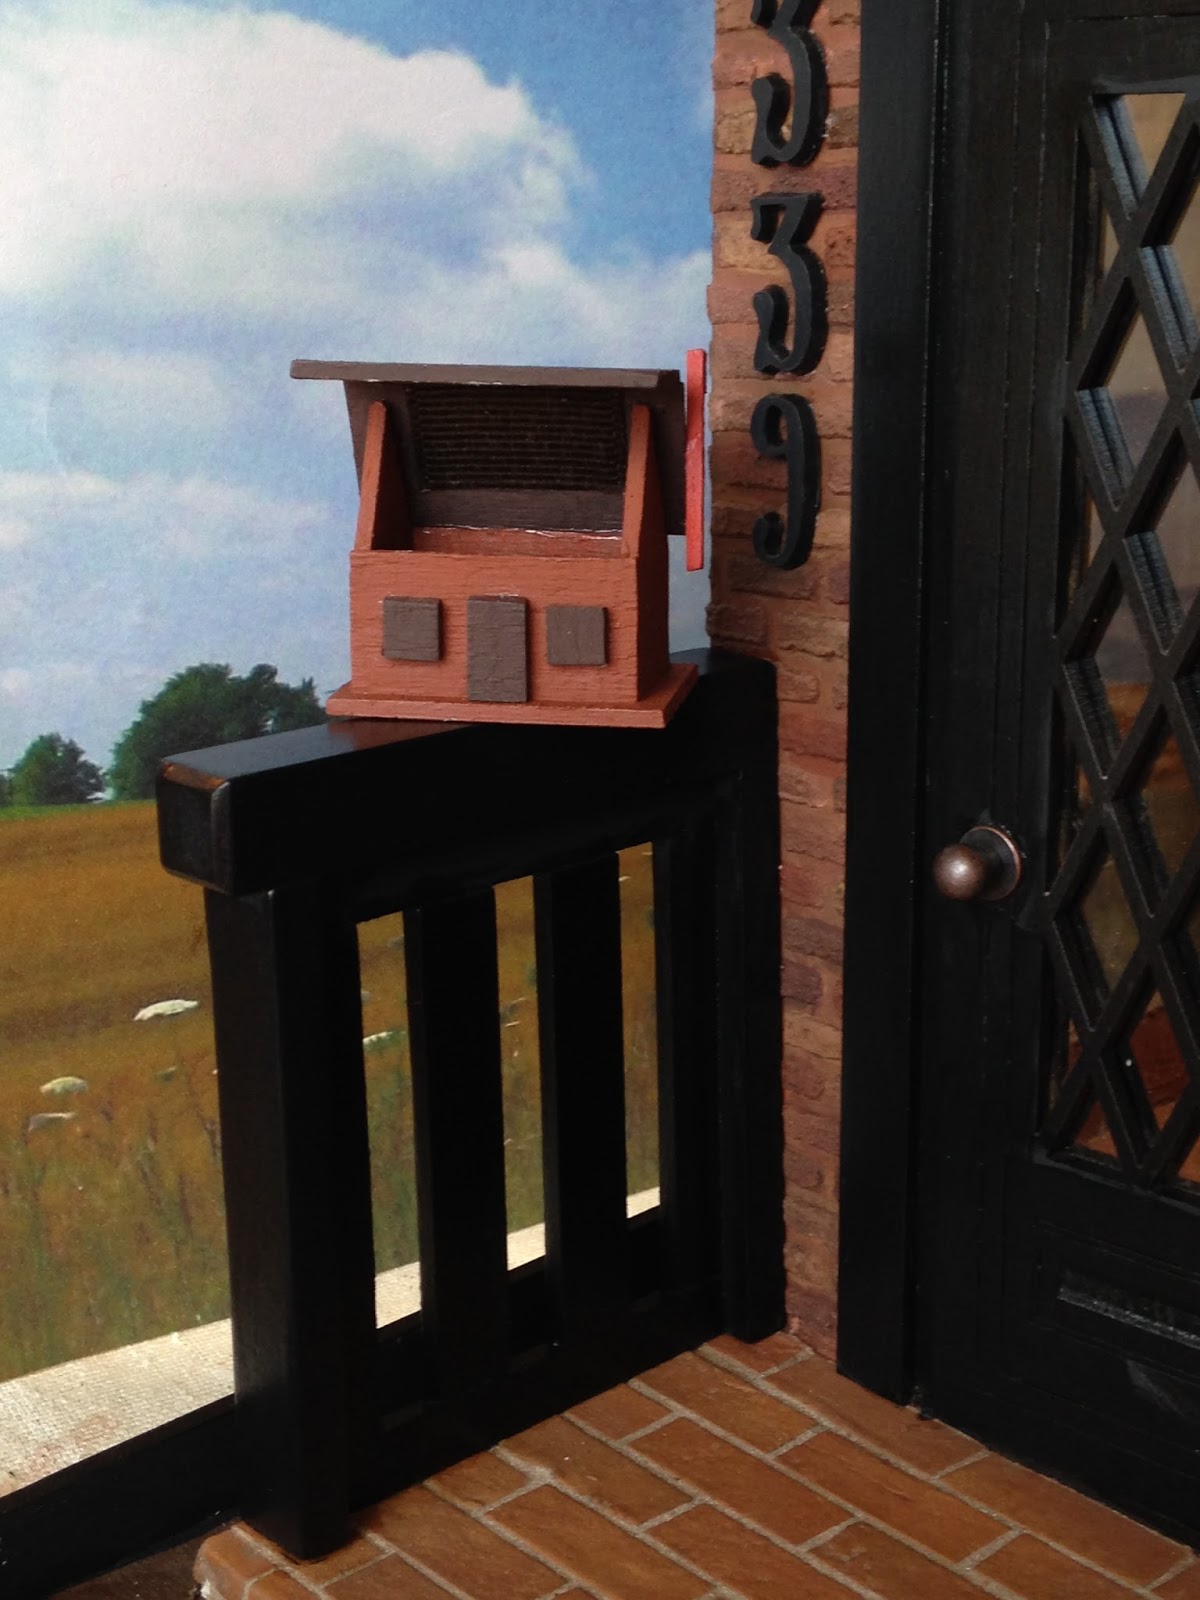
I was working away on the foundation trim, roofing and front porch accessories (for the HBS Creatin' Contest 2016) when I found myself waiting for glue to dry. I know - story of our lives, right?!? Anyway, one of the projects I wanted to make was a cottage mail box to match the house. I started on it and thought "Oh! This might be fun to share!". So, I made a pattern and instruction sheet. Here is the tutorial and a link to the printable .pdf - enjoy!
Make A 1/12th Scale Cottage Mailbox .pdf
https://drive.google.com/file/d/0B-TDO8Yunzncand3d2JwV3JTZUU/view?usp=sharing
YOU’LL NEED:
· 4” X 4” X 1/16” BALSA OR BASSWOOD
· XACTO KNIFE
· TAPE
· GLUE
· PAINT
· 1” PIECE RIBBON
DIRECTIONS
1. PRINT PATTERN AND
MEASURE 1” CHECK SQUARE (ON PRINT SHEET) TO MAKE SURE YOUR
PRINTER OR PAGE SETTINGS DID NOT RESIZE THE PATTERN.

2. PLACE THE PATTERN
OVER BALSA OR BASSWOOD. ADHERE ON 4 SIDES WITH TAPE AND CUT ON OUTLINES USING A
RULER AS A CUTTING GUIDE.

3. LIGHTLY SAND PIECES
MAKING SURE NOT TO RESHAPE THE EDGES.
4. GLUE THE FRONT TO THE
SIDES AND BACK. THE FRONT AND BACK PANELS OVERLAP THE SIDE PANELS. LET DRY,
THEN GLUE YOUR STRUCTURE CENTERED ON THE
BASE.

5. LAY THE ROOF FRONT
AND BACK DOWN, TOP EDGES TOGETHER. GLUE A 1” STRIP RIBBON,
EQUALLY DISTRIBUTED, CONNECTING BOTH ROOFS. THIS WILL BE YOUR HINGE.

6. PAINT THE INTERIOR
AND EXTERIOR OF YOUR PIECES. GET AS DETAILED AS YOU WANT WITH THE ROOF, DOOR
AND WINDOWS AND CHIMNEY (FLAG). CLAPBOARD LINES AND ROOF TILES CAN BE LIGHTLY
GROVED INTO THE WOOD WITH A RULER AND SMALL FLAT BLADE SCREWDRIVER. FOR A MORE
POLISHED LOOK, SAND PIECES AFTER THE FIRST COAT, THEN APPLY A FINAL COAT.


7. GLUE THE BACK ROOF
ONLY TO THE STRUCTURE, LEAVING THE FRONT ROOF TO FREELY OPEN FOR THE MAIL. THE
TOP OF THE FRONT WALL WILL HOLD IT IN PLACE WHEN YOU WANT IT CLOSED.

8. ATTACH THE FLAG TO
EITHER SIDE. YOU CAN GLUE IT IN THE UP POSITION, OR ATTACH TO THE MAILBOX WITH
A SMALL BRAD TO MAKE IT LOWERABLE.
9. APPLY A COAT OF
VARNISH/SEALER.
P.S. #1 To make this a birdhouse instead, just
cut a hole in one side and attach both roof halves with glue. A rope hanger can
be glued between the roof halves, and a perch can be added below the hole.

I had a PS #4, but I've forgotten what it was now. Oh well - next time!
Back again soon,
Jodi
Hi Jodi! I really like your cute little mailbox and the tutorial AND I like what I am able to see of your porch and front door too!
ReplyDeleteand what a great name, "Eyelet Outlet" it just rolls off the tongue. :D
elizabeth
Thanks Elizabeth! I should have another progress post in a couple days! I've been busy!
DeleteAlso - I LOVED your last post! The way you reworked that room was brilliant! I hope you get the trestle table that you want, but even the fill in table looks amazing with your decorators eye! And the concrete is amazeballs, too! And that stairway is going to be gorgeous!!! I'm so looking forward to more progress posts!
Love the mailbox. Have to keep this one for a later project.
ReplyDeleteI noticed HBS change up too... I'm not exactly thrilled with it. It doesn't seem as friendly as before.
~S~H~E~I~L~A~! Your build is looking just awesome! The ageing and staining is turning out so perfect!!! I really liked Elizabeth's ideas about the furniture arrangement, and should probably go post thin in your comments - really outstanding job!!!
DeleteLOL Thanks! I honestly got a lot of advice from the more experienced miniaturists. Keli has been leaving lots of comments which are hugely helpful. My miniature experience is not vast and varied so I'm grateful for all the feedback.
DeleteThat is awesome of Keli and Brae! I just love how our community supports each other! Some day we will both have enough experience under our belts and have the opportunity to help the next new generation of mini addicted!
DeleteMy husband is constantly impressed by how helpful people out in our mini world are. Especially since a lot of us are in the same competition!
DeleteWell you are in it to win it my friend, and I really hope you do!!! NOLA is coming out just awesome!
DeleteThank you for this lovely tutorial. It inspires me for a project in another scale.
ReplyDeletexx Drora
Thanks Drora! Once I'd worked out how simple the pattern was going to be I just had to share! Can't wait to see how you finish yours - it is sure to be adorable!
DeleteSheila, what a great little project this birdhouse is. Thanks for sharing
ReplyDeleteThanks Marion!
DeleteCute! I'm going to pin this to come back to later.
ReplyDeleteI wish I knew you needed eyelets, I've got handfuls of the little suckers in my stash. I've always wanted to make grommet- hole curtains with them, so I am looking forward to seeing you figure it out first. : D
Oh that is so nice - thank you! The hubs had a leather punch that is supposed to make a perfect round hole for the eyelet - we'll see how well it works with my cotton material! I have some sewing grommets from my grandmas sewing basket, but they are only good for LED ceiling light trim and sink drains because they are too heavy duty. These are "quick eyelets" - easier to crimp and a much shorter shaft. I'll post how they work and then you can finally get to make curtains with yours! I am looking forward to a non contest build next!
DeleteHello Jodi,
ReplyDeletethat mailbox is gorgeous and just perfect for the house. Thank you so much for posting the instructions and the patterns!
Big hug
Giac
Hi Giac - It was fun after the tutorial to add more paint, a post and some landscaping to it. It really did ratchet up the cuteness factor! I am enjoying that while I can get away with it on this build! Less serious = more fun for this one!
DeleteWhat a sweet idea for a mailbox. You may have started something here - every miniaturist will want one in real-life =0)
ReplyDeleteThanks Pepper! It is so nice to see you back!
Delete