

At this point in the HBS Creatin' Contest build I could have gone in several directions. The open side roof piece and the roofing needs to be done, then there's the fascia, and I have a long list of little projects that all need doing. It was a toss up, but I decided that some mini vegetable gardening sounded the most rewarding.
Have you ever watched the Food Network show called Semi Homemade? I haven't seen it in years, but I love Sandra Lee's philosophy: Why do it all from scratch when you can save time with a few ready made ingredients? For this post I am going to share how I used ready made minis, kits and good old mini ingenuity to create the vegetable garden for the little piggies...
I started with some carrots, beets and tomatoes from NattyCollection and some vegetable kits from TheMiniatureGarden on Etsy.

Tomato Vines
The tomatoes on the left are from the kit. they are plasticy one hole beads. The ones on the right are like FIMO, but softer and a little pliable, which was really handy for making alterations. I thought it would ne mice to combine the kit and the clay tomatoes.


Next it was time to add the leaves and flowers. I added veins to the leaves then glued them on as a tomato vines leaves naturally grow. Looking at photos really helped! I also attached a wooden stake to each plant.


They were starting to actually look good, but I thought adding some green and unripe tomatoes would really add some nice detail. I looked around for what I could use, and painted styrofoam balls worked out perfectly!


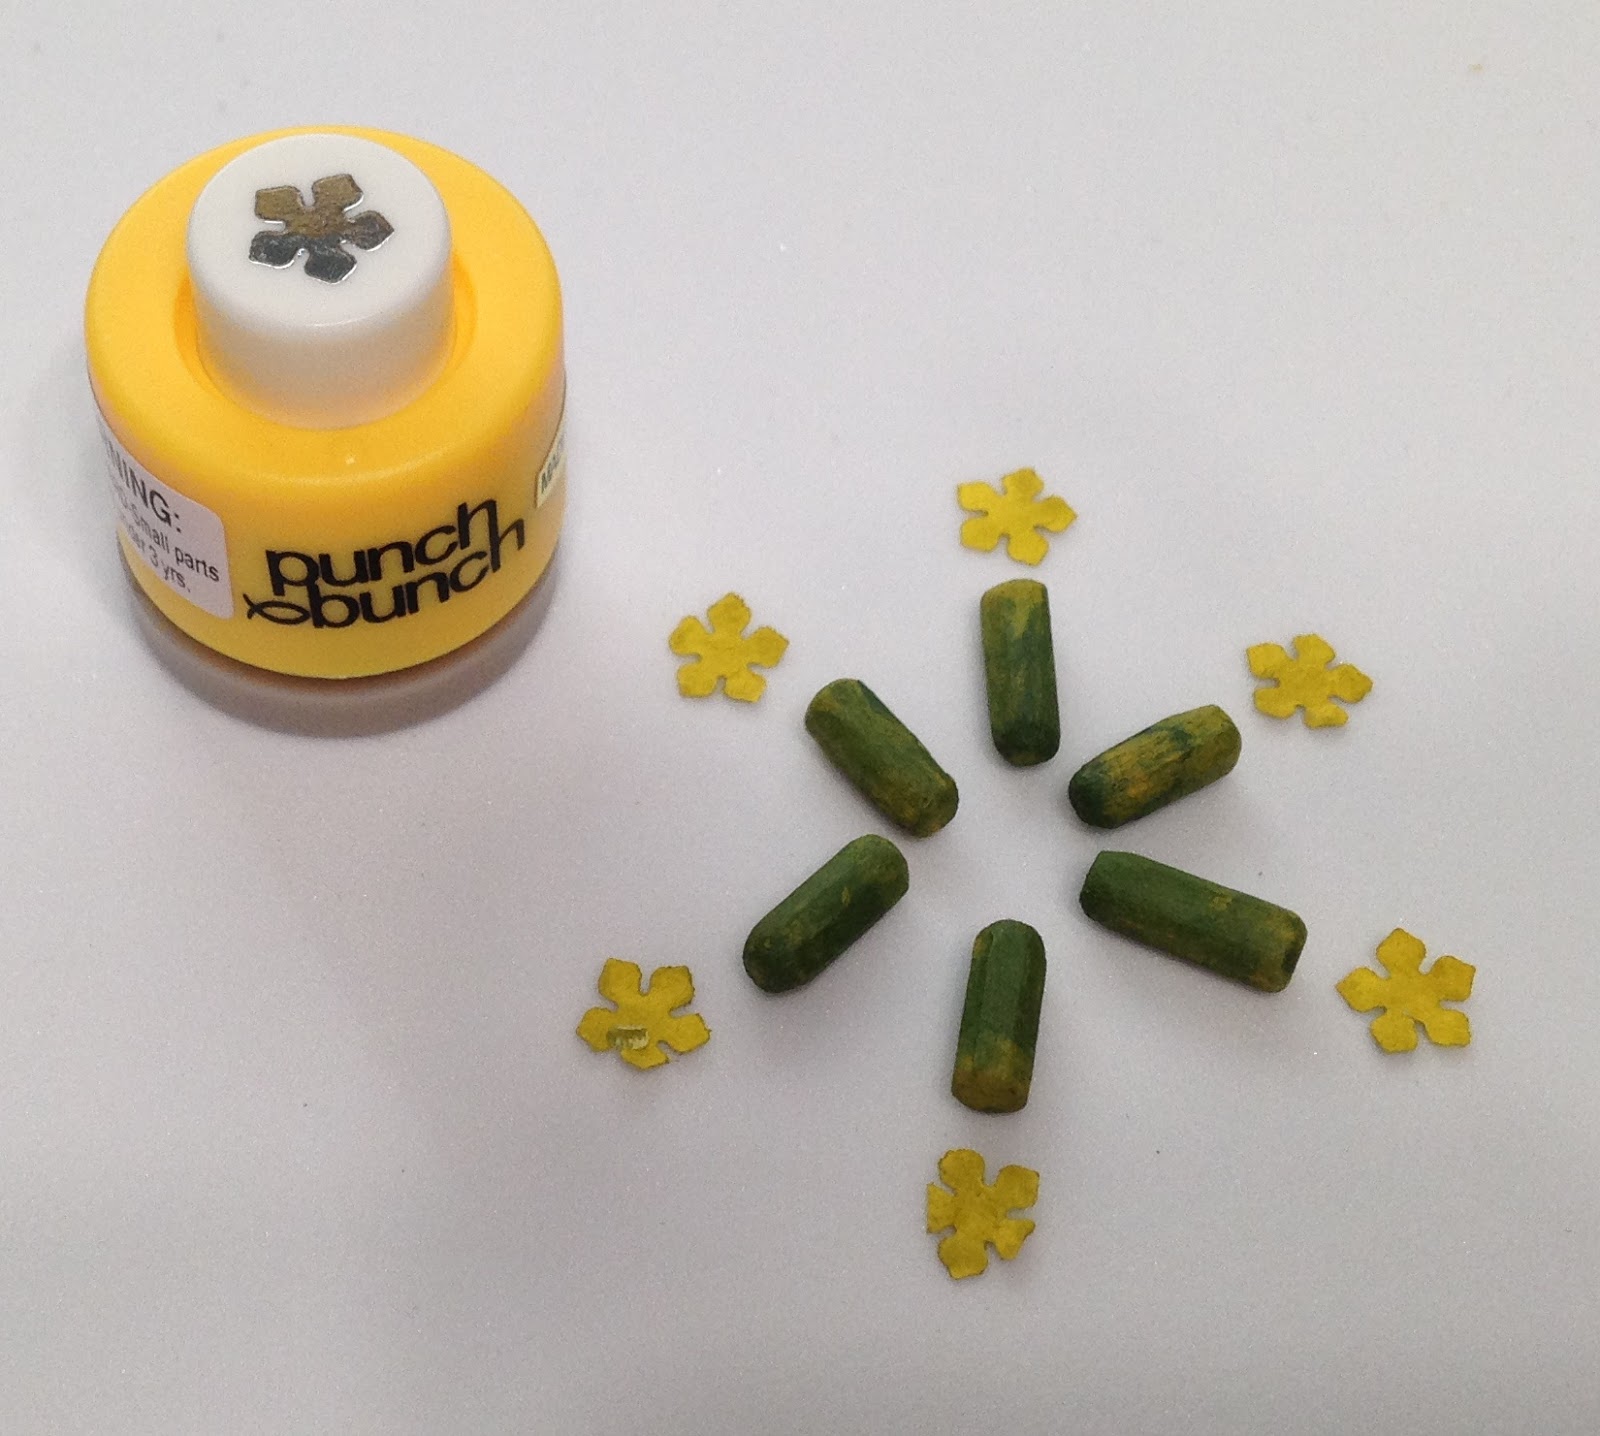
The zucchini plants started out as a kit. The kit does not include actual zucchini - only the leaves and flowers. I decided to make my own to add a bit more visual interest. I just cut off the ends of some take-out chopsticks, sanded them to shape, then painted them. I used my little star-flower paper punch for the little flowery thing on the ends, I am not even going to pretend to know vegetable plant anatomy, and tonight I am just too lazy to Google it!


I was pleasantly surprised to find that I had all of the paper punches I need for future zucchini plants! In fact, I cut out more pieces to beef up the kits!


The lettuce kit came with some strips of thick green crepe paper and some wire. Next time I'm at Joanne's or Michaels, I'm going to buy some! I see lots of lettuce in my future projects! It was probably the most fun of all the vegetables!
After cutting and shaping the paper, I ended up with enough leaves to make 8 heads. Three of them had one extra leaf. The first leaf gets glued about 1/8" onto the wire, then gets rolled up tightly. Each consecutive leaf gets glued a little offset from the previous leaf. Once all of the leaves are glued, you use tweezers to fan out the leaves. For the red leaf, I just watered down some purplish/red paint and dabbed it on. LOVE, love love the lettuce!


Green Onions, Swiss Chard & Leeks (oh my!)
Who knew that so many awesome mini veggies could be made from these simple and everyday supplies:


NattyCollection makes fabulous mini food and other items, but there is a certain style I was after with the garden for this project. I guess more organic looking is what I was after. Like I mentioned earlier in the post, these veggies are soft and pretty pliable which allowed me to make alterations.
For the carrots, I was able to twist out and drill the carrots to add my own tops made from painted Lycopodium. I dabbed some glue on the end of the stock and pushed it into the drilled hole with the aid of a piece of wire. It's not a perfect carrot top, but it has a much more natural look.


I will wait until the last steps to attach the vegetables to the base and create the actual garden. When the roofers come they always make such a mess and kill all of the plants anyway. Better to wait...

I'm not sure what to tackle next, but I hope it will be as fun as the vegetable garden was! It's so nice to be back into the mini swing of things!
Have a safe & happy Labor Day weekend!
Jodi
Great work. Thanks for sharing.
ReplyDeleteThanks Melli!
DeleteFabulous! I really appreciate you sharing every stage like this - I've been wondering about buying some plant kits for a while, and now I will.
ReplyDeleteRosie I an so glad you posted! I love your art work and searched all over to buy prints. No luck. You need to sell prints of them on Etsy. They are absolutely wonderful and I'd have them up all around to encourage me each day! I will be the first in line! Please open a shop for them!
DeleteGlad you survived the work marathon. The veggies look wonderful! Thanks for the details, so helpful.
ReplyDeleteThanks Shelley! I have been wondering how your builds are coming - and in my next build I have places for some of the wonderful things you sent to me!
DeleteHello Jodi,
ReplyDeleteThe realism of your garden is just amazing! You did a fantastic job bashing the kits to look like in-ground vegetables, but I must say the tomato plants are a masterpiece. They look fantastic and the green tomatoes were a stroke of pure genius. Your attention to detail is wonderful and your work enchants me. Bravo! Forget cleaning, just work on minis ;)
Big hug
Giac
Thanks Giac! They really were fun to make!
DeleteNice!!!! :D The lettuce is especially good. Time for salad!
ReplyDeleteI had so much fun making those lettuce that I believe they will be in every one of my projects from now on!
DeleteOh my! Amazing! I love that you show how you accomplished all this. I love how it looks. I agree with Giac, cleaning pheh, more minis.
ReplyDeleteBrae's right. Now I'm hungry for salad.
I may just have to hire a girl to come in every couple weeks so that I can mostly focus on minis! My life is shorter all of the time and there are so many ideas to create!
DeleteCreative thinking at its best...I never would have thought to make veggies from tape. When I saw this, I was like what a great idea.
ReplyDeleteOh I hope you give it a try! It was so much fun!
Deletewow! Speechless and full of admiration!,
ReplyDeleteThanks Marion!
DeleteLOVE LOVE can't wait to see the Piggy Scene when complete Thx for the tut wonderful info E
ReplyDeleteThanks E! I hope the piggies get to be unwrapped and living in their home soon!
DeleteYES! I have a vege garden planned for the English Cottage Kitchen, you've just saved me hours of figuring-out time. Thank you for sharing :). Your garden looks delicious, I'm sure it will make your piggies happy and healthy.
ReplyDeleteYou are so welcome! Thanks for reading! :O)
DeleteLet me know when you get ready to start the cottage garden. I have purchased a roll of Italian crepe paper that is HUGE. I can send you enough to make a ton of lettuce and yet still have enough to supply everyone for years to come!!!!
I will take you up on that!
DeleteThat reminds me - if any of you would like to make lettuce, I have a LOT of crepe paper in pale green for it. Just send me an email: jodihippler at g mail . com
ReplyDeleteWith your address and I will mail you some!
Hi Jodi,
ReplyDeleteI came across your garden tutorial and love it!!
I am the editor for American Miniaturist Magazine and was wondering if you would like to feature your tutorial in a spring issue. I would love to share your work with our readers if you would be interested. It's a great way to reach many people who have a passion for miniatures. Depending on the issues budget and the complexity of the tutorial we can offer you payment or credit towards issues and subscriptions if you chose to participate.
Let me know what you think!
You can email me at auralea@ashdown.co.uk if you are interested.
Thanks and have a lovely day,
~Auralea
Awesome job and thanks for sharing
ReplyDeleteThanks so much! Hope you can find something useful here in your endeavors!
Delete