Search My Blog!

Use the Search box below to find keywords that you're looking for quickly and easily!

Search Feature

Showing posts with label Shabby Chic Soap Shop. Show all posts

Tuesday, February 20, 2018

Sugarplum (aka The Soap Shop) Added To The Purge

In my continuing efforts to clean and organize, I listed another item on eBay. The poor little soap shop (made from a Greenleaf Sugarplum kit) has been sitting up on the shelf collecting dust for nearly two years. I just can't seem to find renewed inspiration for it, so I am hoping someone will get it and do something awesome with it!


I added a dormer with a rounded window to the roof, then added two more on either end of the gables. The gables are clad with 1/2" scale hexagonal shingles to give them some nice detail.


I extended the front porch and roof to make way for lots of display, letting the shoppers have a peek at what they can expect inside the shop. The door is made by Alessio and features arched mullions. I really like it!


The foundation and chimney are done in egg carton "stone".


I kept the interior very whitewashed so that the minis would be the star of the show.


I made all of the displays, shelving, baskets and window seats custom for the space, so they are included, too.


The fireplace is by Jim Coates...


As are the frames on the lover level windows.


I eliminated the second floor to give way to vaulted ceilings. A battery powered chandelier would be awesome in here! There's a built in shelf where the second floor would have been for more display space. The ceilings have a patterned textured ceiling paper by Jackson Miniatures.


Theres lots of display space for bottles of hair care products, shampoos, soaps, candles, jars of bath salts and potpourri and anything else you'd find in a soap shop. There's even a window seat where you could put some adorable pillows for sale.


The displays on either end were designed to hold wrapping paper rolls, ribbon spools and gift cards.


I started the bidding again at $.99 because I have no idea what to value something like this at. I'll let the buyer decide, and I will be happy knowing it is going to someone who feels inspired.

Here's the link to the auction:

Sugarplum Soap Shop Dollhouse


I am still going through boxes, repairing and sprucing up unused furniture and miscellaneous minis, so there may be more stuff to purge soon!

Have a great week!

xo xo
Jodi

Sunday, November 13, 2016

Chalk Paints, Wax and Fun Baskets


Greetings my fellow mini crazed!

There are so many things to love about this time of year! A BIG one is that miniature related blog posts seem to roll out more regularly, so ideas and inspiration are everywhere! It is truly a feast for the eyes and an uplift to the heart! It can also be a very hard time for a lot of us, too. The onset of holiday stress, loss of loved ones, depression, anxiety and even the uncertainty brought on by our ever changing world. To those of you who need a little extra love and support, my heart and prayers are with you. Please reach out to me or anyone you care for - it truly helps so much to share!

I am continuing to work on the soap shop with every minute I can spare. Time for playing is precious few, especially when you're in demand! Rusty is such a little doggie - he gets cold this time of year! He wants to be held and cuddled constantly! And he is so hard to resist! And Woodson always wants to play! That is... when he's not looking for extra treats! In spite of all the wonderful distraction, I managed to get a bit of mini-ing done.

Rusty (1-1/2yrs) left, Woodson (1yr) right.
Both are Miniature Pinscher (even my puppies are miniature!).
I can never capture them when they're still!
The next step for the shop fixtures was to paint them with FolkArt chalk paint. But first, they needed some detail! I ordered some things to add detail to the fixtures like adhesive pearls and braided tapes etc... But they hadn't shipped yet and I was not willing to wait. I had to rummage through drawers and "borrow" things from other project stashes to get started.

To the grocery stand fixture, I cut out a section of embossed decorative border from a sheet I had tucked away for the New Orleans (still waiting for it's turn in the queue, but now that RGT has discontinued production on that kit I am sooooo glad I have it!).  {{{Side Story Interjection - There was a lot of waste around the embossed area of the border sheet, so a little lightbulb went off. I grabbed some paper punches to see if they would work on the thick and velvety material. I found that the EK Tools stamps went right through the material and left clean cuts, but the Punch Bunch mini and small sized punches didn't really have the clearance needed for this material. Oh well, I'll file that info away for a later time... Now back to the regular program}}} I also cut and filed the loops from some nice fleur de lis jewelry findings and stuck them on with Elizabeth's favorite: Quick Grip! Worked great! I also added some dimensional stickers to see how they'd look once they were painted over and sanded.


I added on a couple thick coats of gray chalk paint (I had white and black so I mixed 'em!) to all of the shop fixtures, then sanded them smooth. It's the coat for the under color that will show through in places at the end.


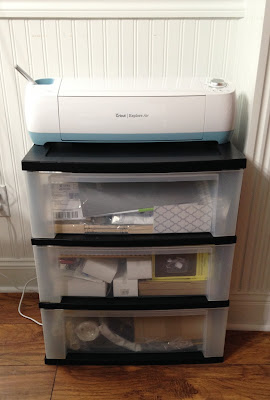
I had to do more rummaging for some of the other pieces. I was okay with using some of my stash of JMG because {{{Side Story Interjection - My New Cricut Explore Air arrived, and now I can cut as many beautiful scrolly accent pieces as I want to! I am still waiting on accessories and supplies, but I will post all about it soon. The hubs and son are working out of town for several weeks right after Thanksgiving (which is being hosted at my house this year and we have LOADS of people coming), so I will be here with only the doggies and LOTS of time for learning new things. Now back to the regular program}}} I stuck on more detailing where it seemed appropriate, on top of the first coat of white chalk paint. Then I added another layer of white chalk paint, let it dry, then sanded it smooth again. Following the easy directions, I sanded random spots a little more to reveal some of the gray paint underneath. Some spots went down to the wood, too, which I really liked.


Even the silver metallic stickers look awesome with a tiny bit sanded off!


The final step to finishing off the fixtures was to add the FolkArt wax, let them dry overnight, then buff... But WAIT!!! I am losing my place here... FIRST, I knew that I needed a little extra detail on the shabby fixtures to add a bit of CHIC! I saw Casey's really easy basket tutorial when I was dreaming about this project a year ago, and ordered the Penelope canvas from The Needlepoint Joint then! Great service! It was a simple matter to measure, cut and sand the Woodsies for each cubby. Since I made 23 of them, it was a real basket party!


I made them all in only a couple of hours! Great tutorial, fun and easy to do and so satisfying to see them done!

But then, in keeping with the spirit of and vision for the project, I decided overnight to paint them all white. Ever painted things with lots of holes in them? Oh yeah! I got more paint on my fingers than anyplace else! And let me tell you, that chalk paint isn't easily removed! I didn't run embroidery floss through them - yet. I may or may not. I am not sure at this point if I want anything to compete with the colorful accessories. I like the idea of having them be the only color - the fixtures should just be the canvas. Here you see some of the baskets drying, along side the fixtures that are waxed and drying. I decided to use the clear wax because I wanted smooth and shiny, but not so used and worn. I did try the white wax, but it has more of a yellowing effect, and that made the piece I tried look a little dirty. No one wants to shop at a dirty soap store!!!


Dizzy? Me too!

{{{Side Story Interjection - I have been collecting some really fun glassware over the past year for this project and couldn't wait to set it up! I know it is waaaaay too early in the project, but I just had to see how they looked! Swoon - I just LOVE pretty, girlie glass! Soon I have to decide how I will fill them up! The seller included some soaps and candles as a Thank You for being a patient buyer, but I'll need to make MORE of EVERYTHING! Now back to the regular program}}}


After the waxed fixtures sat, I was able to begin wiping and buffing them. I actually let them sit two extra days because I was distracted - more on that in a minute. By the time I got to them, the wax had dried. Just a really quick buff with a cotton napkin and they were smooth and felt "finished".


For the next part of the project, I need to have a lot of working space. This won't be my first time making silicone molds and casting with resin, but I'm using more "professional" materials and will be working on more complicated models. In other words, I expect to wreck the joint! I think I should get the Creatin' Contest photos finished and get The Three Little Pigs: Revenge packed away for the library.

In the meantime, I'll be getting better acquainted with the Cricut Explore Air machine and the Cricut Design Space software. I'll post a full report on it next time!


Until next time... Don't squat with your spurs on!

Jodi

Monday, November 7, 2016

Soap Shop Fixtures!


Boy, I wasn't joking around when I said I wanted to get going on the soap shop! The ink from my last post hadn't even dried and I was auditioning kits and planning for fixtures inside the store!


The Left and middle kits are REAL Old (probably about my age - not yet 50 but creeping up on it!) and they smelled like it, too! A test of the vegetable stand told me that I was going to need to make some alterations. As many of you know, the Sugarplum kit is on the small side of 1/12th! No worries! I cut down the legs, added slats (skinny sticks) on the bottom supports for shelving, and now it works perfectly under the front windows!


The fabric stand kit was really just too large for the space. I contemplated ways to modify and shrink it down, but it was just too nice a kit! I decided to hoard hold onto it a while longer and use it in another project...

I had a couple of crate kits that I'd been holding onto for this project, too. I employed the use of the largest one (from another really old kit) to beef up the display counter - it was really short! Adding the crate underneath gave me more display space, too! Win - win!


I used the largest of the three crates to raise up the counter.

Newly configured cash register/POS display.

Still needing a LOT more display space and/or shelving, I decided to make more crates! What could be more Shabby than crates? The stuff to make them Chic will go inside! I made nine more of them, and for a few hours had a crate factory going!


Six of the nine crates flanking the vegetable stand display.

Now I was getting somewhere! 

WAIT! That's only ONE wall!!!

No time to pat myself on the back - I needed to make MORE!

Because of the space constraints I knew that I was going to need to make some custom displays. I had in mind to make a card/ribbon/gift wrap display, but I ended up deciding to make two of them - one on either side of the bay window opening. I took some measurements then drew up a rough sketch using parchment paper over my mat.


This way, I could draw using the measurement marks for scale and figure out just how much space each "section" would take up. This is a great solution if you don't happen to have graph paper on hand, or if like me, you are too lazy to go looking for it! I took those measurements over to my pc, and using shapes in the corresponding measurements, I created a scaled pattern (sorry Mrs. Martin! You were right! I really do use geometry in my life! Oh, and I really did know who TP'd your house that Halloween! Sorry again!)!

Printed pattern and added side diagram with primitive cut list.


I doubled and taped two basswood sheets together so that I was cutting both sides at one time, and each display would match perfectly.


Pattern taped to basswood sheets for cutting.

All pieces cut for one display. Er, maybe not...

Bottom piece? Duh!

Display in it's home. All is well that ends well...
When I get to adding ribbon, cards and wrapping paper rolls to this display, I'll create a How To .pdf with the pattern and pieces you'll need to make one for yourself!

I was getting someplace, but there was still the middle section of the shop to figure out. I had some more kits (boy do I have kits! I can't resist 'em!) to try. I LOVE The Daisy House kits, so I pulled out a few to see if they might work.


After a few modifications, I ended up using the sofa table kit and the jelly cupboard kits. I'll need to add some interesting legs to the jelly cupboard, but I am waiting for them to arrive in the mail! :O/


In the meantime, I have a pretty good idea what's in and what's not...  And there's plenty to keep me busy in the form of textured STICKERS and CHALK paint! I will be thinking of her amazing talent for bringing shabby up a few thousand notches, and keep asking myself "What would Elizabeth do?"!

Fixtures now sanded and shaped, waiting for stickers/appliques and chalk paint!

Have a great week everyone!

Jodi